


The Magic in the Middle

Legend has it that Hogwarts has a little-spoken-about secret wing devoted to the dark paper arts. There, young witches and wizards take classes that allow them to put together scrapbooks, cards and crafty art with nothing but their wits and their wands to help them.
Today, the dark paper arts are a secret no more. In fact, they may be dark no more…depending on the papers you choose.
{Right, if you are already confused and don’t know why it’s Harry Potter day at shimelle.com, check out this post for an explanation.}
As your lecturer today, I’ve been asked to speak about a secret of the dark paper arts alumni that we like to call The Magic in the Middle. It’s a composition trick that will help you create a contemporary look quicker than you can say ‘Hermione’.
We call it the magic in the middle because it’s all about working from the middle of the page. Let’s start simply, with a beginner’s layout.
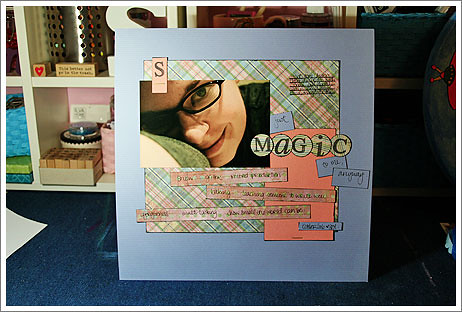
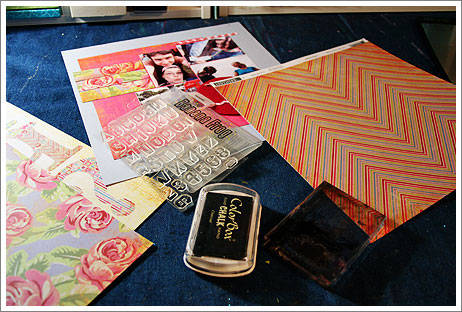
For this trick you will need two colours of cardstock—one for the background and one for everything else, two patterned papers, round letter tiles from Basic Grey (or a circle punch to make them from your own patterned paper), letter stamps or your printer for the title and a black pen. You’ll also need one 4×6 photo.
The trick is to start in the middle of the page and work out, building and sticking accents as you go. So you can start with the 8×8 square of patterned paper – place it in the middle, move it just a smidge in any directin and stick it down. Your photo is the next thing—place it in the middle of the page, move it to one direction and stick it down. Now you’ll want something to balance that photo, so cut a block of cardstock, place it in the middle of the page, move it in the other direction—leaving a little overlap—and stick it down. That’s the hard part done. Now you just build with little things on top of that basic construction…add title letters that start in the middle of the page and work their way right. Add journalling strips to fill the gap left near your photo. Everything works out from the centre of the page, and as long as you follow that rule you should be fine. It’s finished when you like it…add as much or as little as suits you.

Once you’ve studied the basics, you can put your own spin on each page. This page was completed by a student in the second year in our programme. She started with the same concepts but changed the elements to make something a bit more personalised. She added a journaling box printed from a digital kit…although she is not a digital scrapper in the slightest, she loved this set of tools for its usefulness on paper. Current students can find it here if you prefer to spend your pocket money on things useful to your studies rather than Bertie Bott’s silly sweets. To balance her expenditure, this student also put something recycled to use: two magazine clippings add further description to her layout. If you can not manage the Archivally Safe spell just yet, you can spray magazine clippings with Archival Mist, or scan them and print them onto your own paper. She also added a mysterious disappearing title, something taught only to the keenest students in the second year. Can you see it?
Here it is magnified to be seen by even the Muggle eye. This student used stickers that were similar in colour to her background paper for a title that makes you look closely…something that is very useful in keeping the dark paper arts a secret to those outsiders who do not believe in the power of our works.
Now that you’ve seen some work by other students, let’s get to the details of this branch of magic.
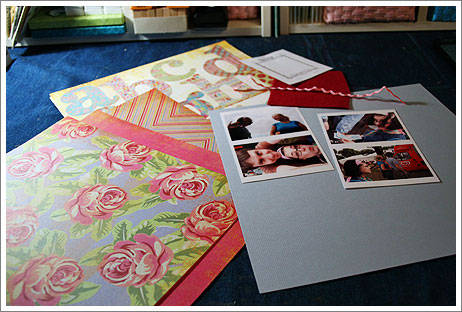
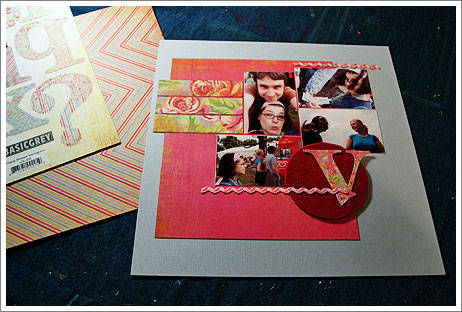
Assemble your supplies. Cardstock, patterned paper, journaling box, letters, trims. And photos! You can use one or several. This project uses 4 wallet sized prints.
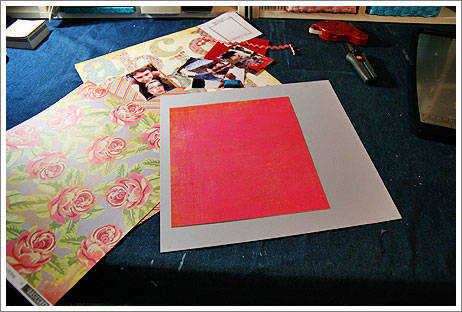
Choose one patterned paper to make up a big piece of the background. Cut to size, place in the middle of the page, then move in one direction and stick down. Students in the upper school may opt for inked edges, but beware this makes this process slower and more messy.
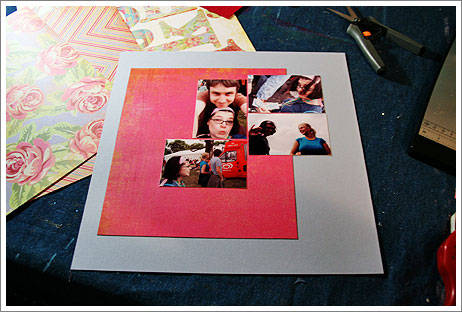
Arrange photo(s) near the middle of the page, overlapping what you placed in the last step.
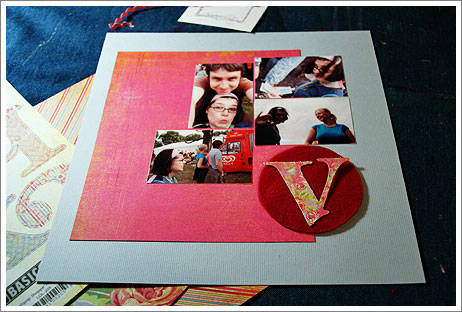
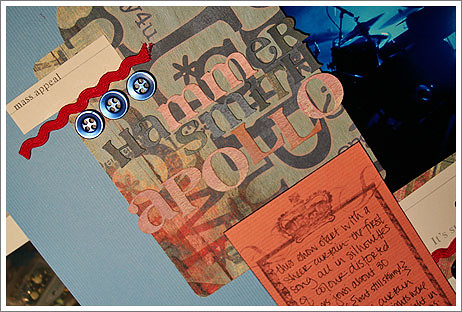
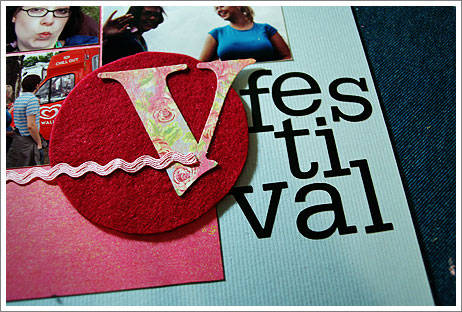
Begin to create a title. Here the felt was cut into a circle by tracing a coffee cup on the reverse. The letter is a monogram by Basic Grey. You can create similar with your printer if your wand does not produce this. But here there is a mistake. See the gap left in the middle of the page? This spell will not work if gaps are left in the middle. We must correct this placement before we stick anything down.
Here the placement is correct, and no gaps mean the spell will be successful.
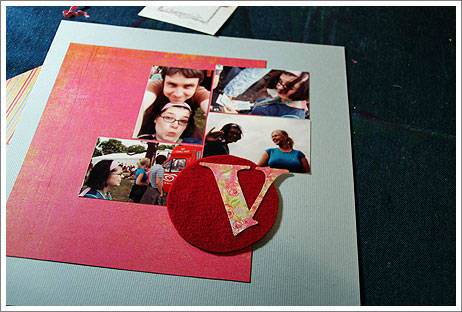
Now we start to fill the spaces that remain. A little magic meant the letter and the patterned paper match, but this is optional.
Texture and dimension from a bit of trim. Some above the centre and some below creates balance.
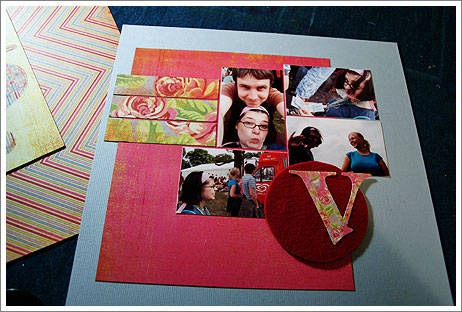
To finish the title, letter stamps and the second patterned paper are enlisted.

A common mistake made by young witches: the stamped word will not fit on the page. Never mind, a quick fix will help.
Letter stickers can be placed with line breaks yet the word can still be read. This shortcut has helped many students in a pinch.
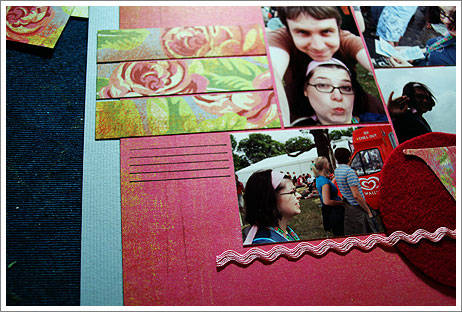
The journaling box was also too big, so the student shrank it to just small lines. Muggles might do this with a stamp or a ruler and pen.
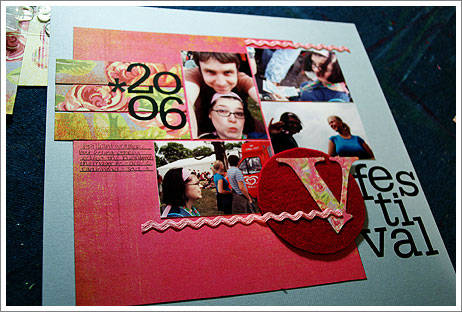
Journaling and the date finish this side of the page. As the sticker sheet did not include two 0 stickers, the lowercase o was magically transformed.
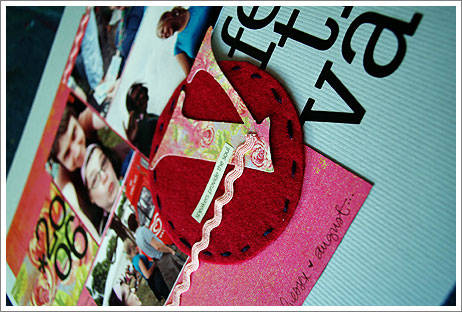
A last sweep of the wand added a clipping from a magazine and some stitches to the felt circle.
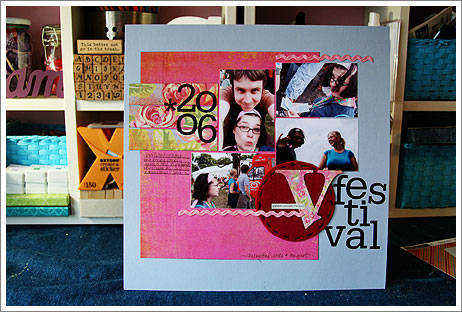
The finished spell.
Students have also used their own supplies to practise in their spare time. You can see some of their techniques here:
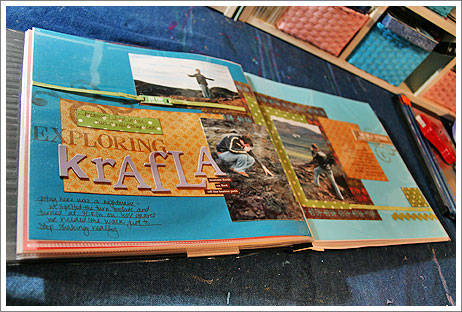
And here, over a two page spread:
Today students will be marked on their effort. All completed projects receive house points and some randomly selected entries will receive prizes sent by owl, including free online classes. To be eligible, you must post your work online and comment here with a link to your work.
Homework is due at 5pm Sunday, and winners will be announced Sunday evening. There will be prizes for students of UKS houses as well as students at other schools of magic throughout the world, so feel free to pass the word.
Questions to the professor may also be posted in the comments, but only those linking to a finished project will be entered.
A short audio message for students with the kit is available for download here.
Now, get on with your work!
xvanishesx
![]() Read more about:
Read more about:
Next post: Is just a choice
Previous post: His own Christmas dinner


