pretty paper. true stories. {and scrapbooking classes with cupcakes.}

lovely to meet you Twitter Facebook Pinterest YouTube

Take a Scrapbooking Class

online scrapbooking classes

Shop Shimelle Products

scrapbook.com simon says stamp shimelle scrapbooking products @ amazon.com shimelle scrapbooking products @ amazon.co.uk

Reading Material

travel

Sketch to Scrapbook Page :: Adapting a page sketch for Project Life

scrapbook page by Shimelle Laine @ shimelle.com
I share enough pages that you can easily put together an idea of my general process. I don’t really reinvent the wheel or worry about replicating a design I’ve used previously. For all the times I start a page by piling a mix of rectangles on top of a subtly patterned background, I like the chance to balance that with a look that’s a little more tidy and inspired by dividing the page into different blocks.

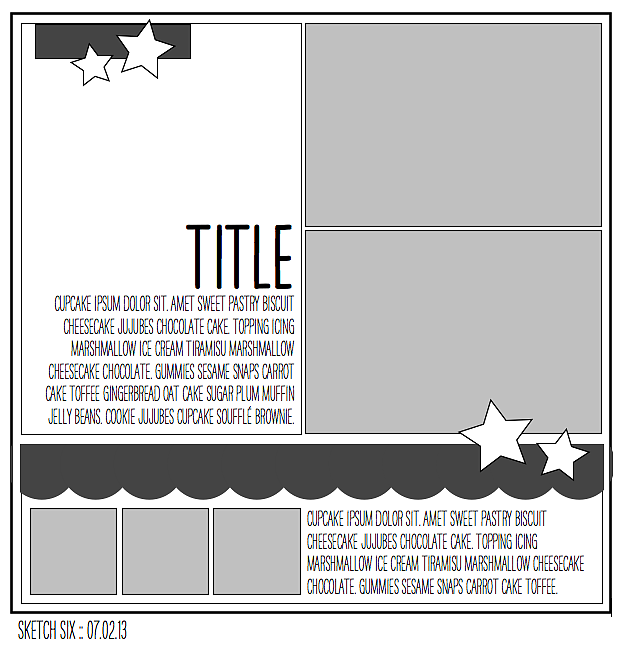
scrapbooking sketch by Shimelle Laine @ shimelle.com
Today’s sketch is not wholly unlike this one in the archives. But this time it’s a bit streamlined and includes more photographs – the same idea of two landscape 4×6 prints but also three small square pictures. This makes it perfect for using with photo photos (Instagram or otherwise) but it’s also handy for cropping into details that might be lost in a larger, less-than-perfect shot. That latter option is what I included on this page.


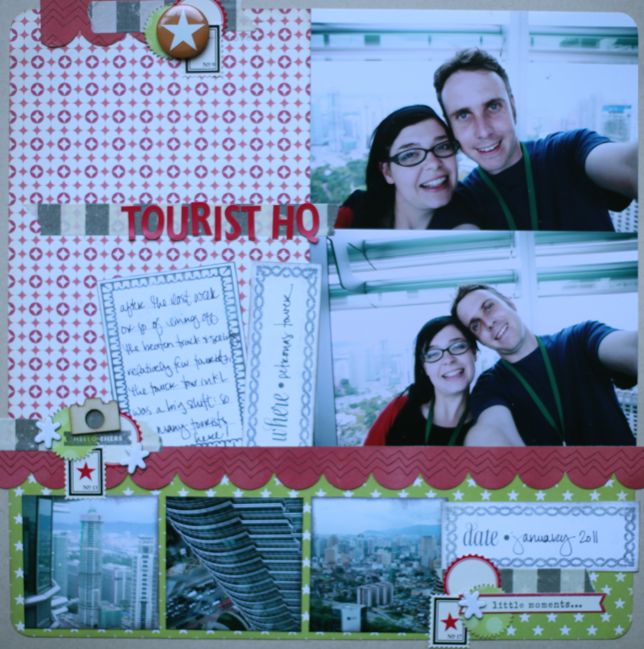
Again, I’m working a bit simply, but not quite as sparsely as the diagonal sketch. And the recent episode of the Paperclipping Roundtable inspired me to get some of our silly self-portraits onto a page. In addition to the difficulty of taking such a picture, these particular photos make me laugh as this marked the point in the trip where my hair started to get really awkward. Because we had no checked luggage, I couldn’t travel with scissors, and I had a lot better luck getting a mani/pedi on the road than a haircut! By Malaysia, I had definitely reached that point where my fringe was so long it was in my eyes, but not long enough to pin back! I did eventually just take matters into my own hands… I bought some scissors in New Zealand and used the wing mirror on the van to cut it back to something more manageable. We’ve all had these moments of frustration, right? I suppose that’s something that needs to go in the Kiwi volume of these scrapbooks! Anyway, back to this page, these photos were taken when we toured the Petronas Towers in Kuala Lumpur, Malaysia. The smaller photos are cropped images of the view from the bridge that connects the two skyscrapers.

scrapbook page by Shimelle Laine @ shimelle.com
This page was made with the February product picks for Best of Both Worlds. If you ordered the same, you’re welcome to put it to use in the same way, but of course you can use any supplies you would like! There are just a couple small pieces not taken from the kit – a sheet of kraft cardstock for the background and the wood veneer camera used in the final bit of embellishment. I used Staz-On ink in black for the stamping, since the surface of the JBS stickers is a bit more glossy and while some other inks work perfectly well with that surface, it is a bit more slippery and I’m just less likely to make a mess of it with Staz-On!

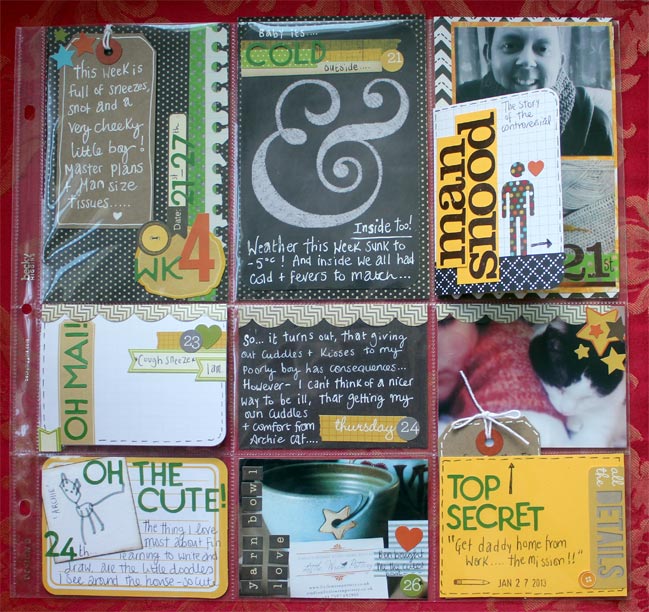
Project Life scrapbook page @ shimelle.com
I had a slightly different challenge in mind for today’s sketch guest, SJ Dowsett, and that involved taking a page sketch and adapting it to a Project Life entry with divided page protectors. I think there’s quite a bit of potential for adapting sketches in this sort of way, and a more blocked page design seemed the best place to start, but I was really enlightened by SJ’s creative process for making it work:

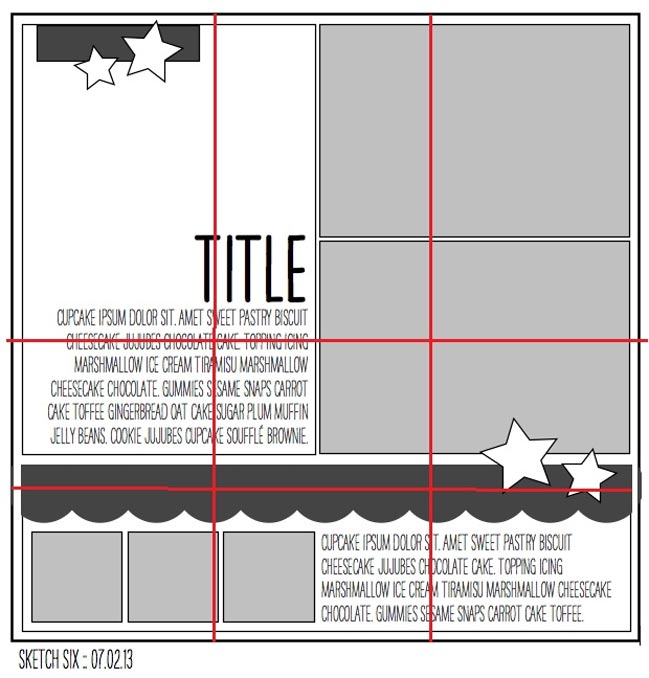
Using a sketch in conjunction with Project Life presented me with a challenge I hoped I could rise too! – breaking the sketch up into segments so it fit into a divided page protector was harder than I initially thought. But instead of panicking, I got a pen and ruler and drew over the sketch so I could see what areas I needed to focus on.

scrapbooking sketch guidelines for Project Life @ shimelle.com
I applied the rules, of being able to flip and turn the sketch and although it may look loosely based, the double photo, stars, scallops and left hand title are all there. I used an Ampersand card as a focal point, which is a digital download from my _Chalk it up kit available from my digital store has made me want to explore the idea of breaking up sketches like this again for Project Life. Sometimes it is a great chance for your brain to take a break of the planning the weekly layout when it’s already laid out in front of you to work from the sketch._

SJ is a stay at home mum and freelance graphic designer. Creating digital stamps and prints, she spends her days within arms reach of pen and paper for doodling all the random thoughts that wander through her mind. She believes in finding cost effective ways to scrapbook, making pretty printables and noting down the tiny things in life that ordinarily she’d forget. Read more about SJ on her blog and find her digital and printable designs at Little Musings.

And now it’s your turn! Create a page in your style with this sketch, post it online, and share it with us. You can upload to your blog or to a scrapbooking gallery like Two Peas or UKScrappers, then just follow the steps to link to your project wherever it can be found online!


Sketch to Scrapbook Page :: Simple Designs for Patterned Papers on the Diagonal

scrapbook page by Paige Evans @ shimelle.com
Wow, this has been quite a day already, but the videos are a-loading and it’s definitely all systems go around here! I have one video and sketch for you now, and then I’ll pick up again in the morning with the rest of this catching up session! I hope you find something useful in the mix.

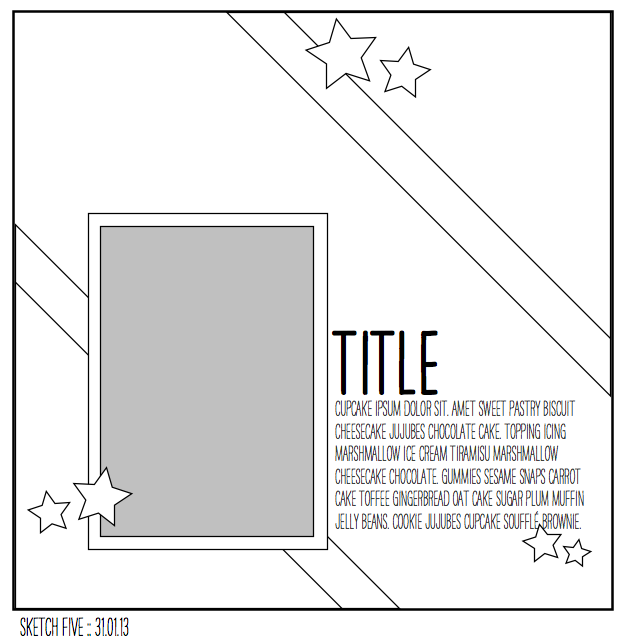
scrapbooking sketch by Shimelle Laine @ shimelle.com
This sketch is meant for a scrapbook page with a single, portrait photo. It’s shown as 4×6 but could easily be bigger – especially if paired with quite simple patterned papers. The smaller strips on the diagonals could be paper, but they could be all sorts of other things – border stickers, washi tape, ribbon, stitches, and so on. This could easily work with additional photos too with a bit of rearranging to the other elements. Feel free to move it around to make it work for you!


I worked very close to the sketch this time around, and the resulting page is quite simple in style. Considering some of the major embellishing I’ve done on some pages in that album, I’ve wanted to add a few simpler pages to give a bit of balance. I love embellishing but I also want the focus of a book to be on the writing and photos, not just ‘wow, you added a lot of stuff there’, so some more stream-lined pages are in order.

For this page, I’m working with the supplies from the February Best of Both Worlds kit. Of course you’re welcome to join in with any supplies you choose.

scrapbook page by Shimelle Laine @ shimelle.com
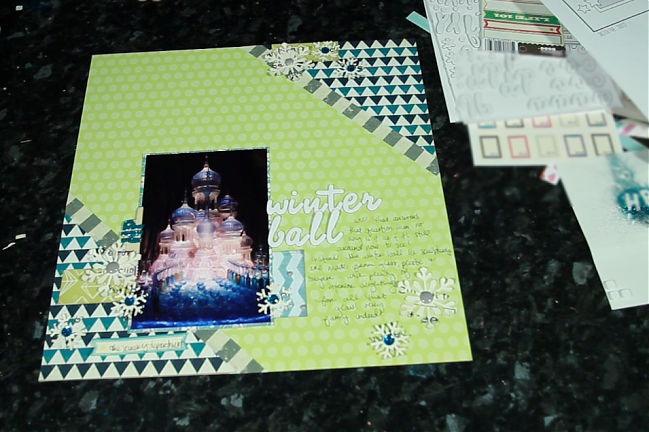
Why yes, that will be much prettier when photographed properly in some daylight tomorrow morning! But in case you don’t have time to watch the video right this second, here’s a still image for now to show the final project.

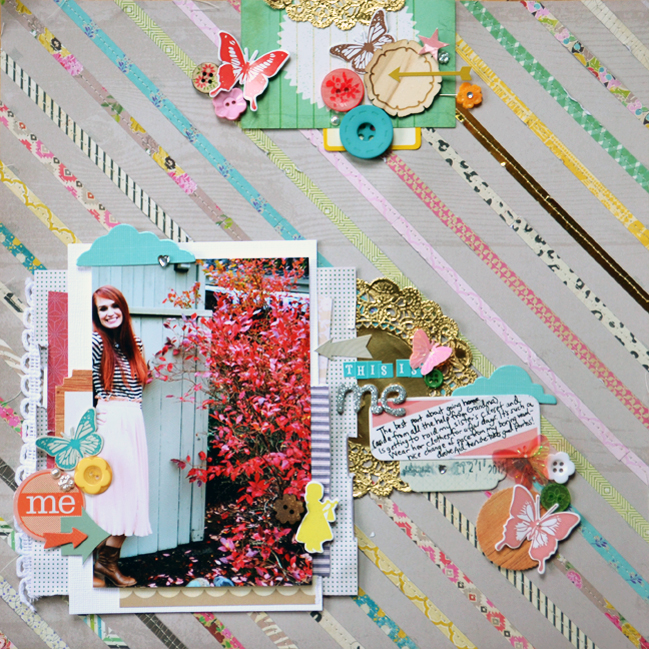
scrapbook page by Paige Evans @ shimelle.com
This page from today’s guest Paige Evans makes me swoon. I love that stitched strip detail she chose to emphasise the diagonal! Paige has a few further notes:

I made this layout while I was at home in Washington state. I didn’t have my scrapbooking supplies with me, but luckily my sister is also an avid scrapper so we rummaged through her stash and found some super fun things to work with! The sketch was such a great start. I liked the two diagonal lines and decided to keep going with that idea and make diagonal lines of patterned paper across the entire layout. I mostly used the On Trend collection by Crate Paper, with some gold accents thrown into the mix. The placement of the photo, title, three embellishment clusters, and journaling are right where they are in the sketch – sketches make things so easy peasy!

You can find more of Paige’s work on her blog. She designs for American Crafts and Two Peas in a Bucket, and also works for Northridge Publishing, the company behind Scrapbook Trends magazine. She loves to create on a daily basis and enjoys dabbling in everything from fine arts (painting, drawing, sculpting, printmaking), to bookbinding, basketweaving, photography, graphic design, and more.

And now it’s your turn! Create a page in your style with this sketch, post it online, and share it with us. You can upload to your blog or to a scrapbooking gallery like Two Peas or UKScrappers, then just follow the steps to link to your project wherever it can be found online!


A weekend of sketches and scrapbooking

scrapbook page detail by shimelle laine @ shimelle.com
I’m back on my feet and in for a major session (or rather several major sessions!) of catching up – with work, with life, with the world it seems! And one of those major sessions was devoted to scrapbook pages and sketches and indeed, the February product picks for Best of Both Worlds, which I’ve now turned from a kit into a stack of pages. And this weekend I’m going to transfer that big catch up session from my desk to the blog, editing and uploading and posting those videos and projects for you!

I’m in class through the middle of today and need to focus, so I wanted to gather the last several sketches here for you if you want to make a start and have missed any of these… then new sketches will start later today once I’m out of class and back and ye olde computer! Sound like a plan? I’ve really enjoyed working with the products this month – I hope you enjoy the process too, whether you’re working with the same supplies or choosing items from your own stash. The 2013 sketches so far then, in review! Each with a link to take you to page examples and videos and assorted other details.

scrapbooking sketch by shimelle laine @ shimelle.com
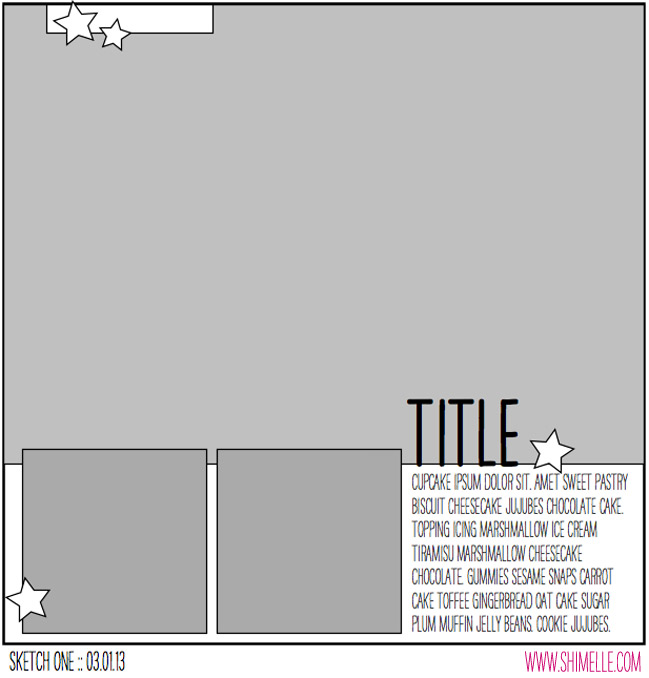
A sketch for a scrapbook page with one large and two small photos

scrapbooking sketch by shimelle laine @ shimelle.com
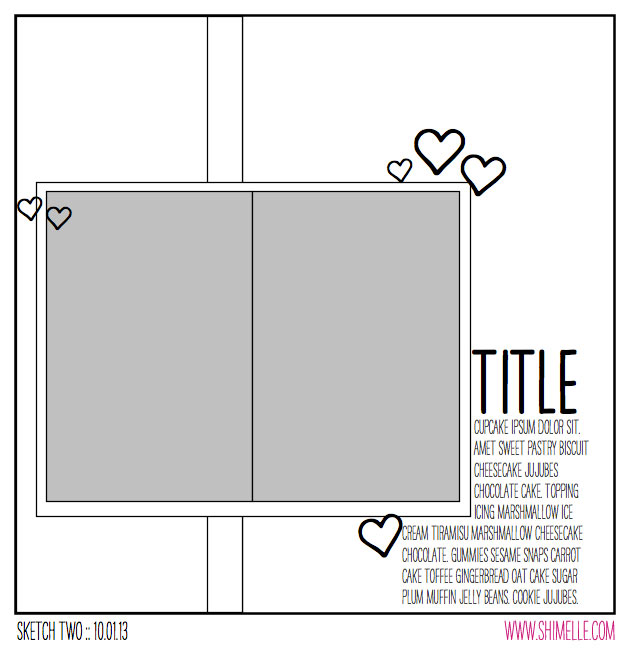
A sketch for a scrapbook page with two portrait 4×6 photos

scrapbooking sketch by shimelle laine @ shimelle.com
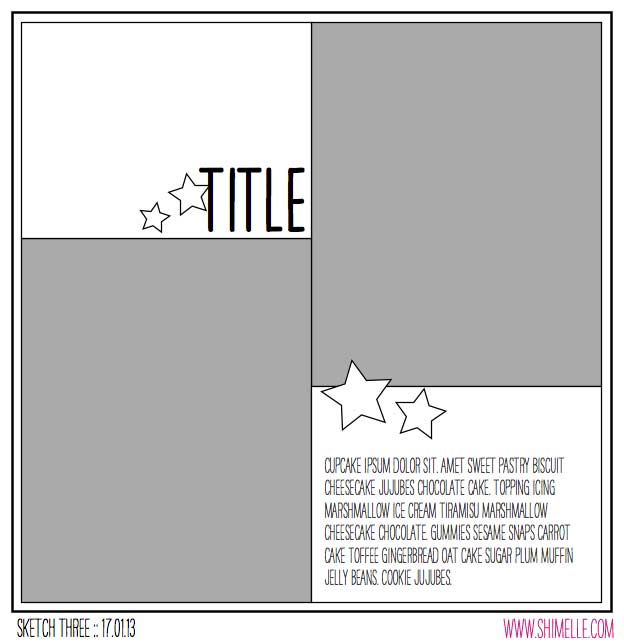
A sketch for two photos and quadrants of patterned paper

scrapbooking sketch by shimelle laine @ shimelle.com
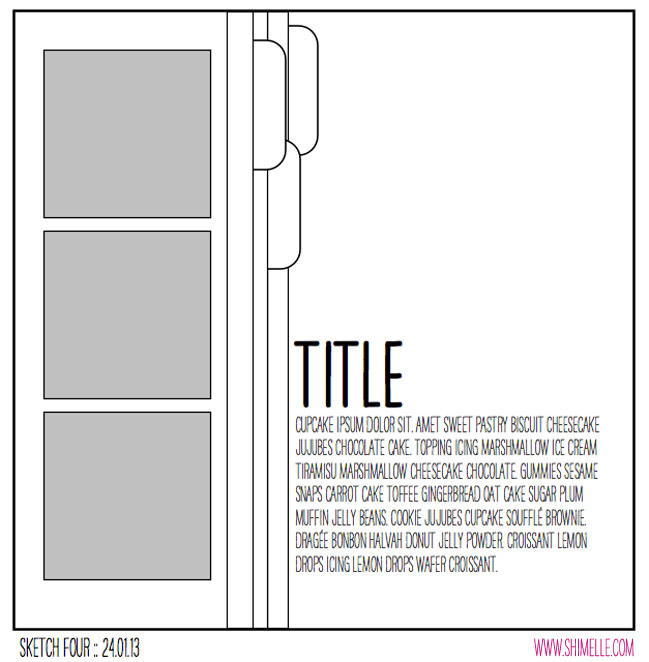
A sketch for square photo prints – perfect for scrapbooking Instagram or other phone photos

Each post has a spot for you to share a link to your project, but I do have to put a closing date on these otherwise they get filled with random spam links to things that are definitely not scrapbooking material! If you ever complete a sketch and want to share but the end date has passed, you can always leave a link in the comments. If these sketches aren’t quite right for your needs, you can always search through the older archive of page sketches – there’s a link at the bottom of the page that takes you to all those posts.

I hope that gives you a little starting place if you’re an earlybird to your crafting desk today, and I’ll be back later with new sketches, videos, and examples from some of my favourite scrapbookers too! Have a fabulous weekend, wherever you may be!

xlovesx

Gardeners' Digest scrapbooking blog hop (February 2013)

scrapbook page by shimelle laine @ shimelle.com
A month has passed and it’s time for a new Gardeners’ Digest to catch up with the Garden Girls, the scrap booking design team at Two Peas in a Bucket.  Since we last hopped through the team, Glitter Girl has gone on adventures through wood veneer embellishments, the design principles of white space, and most recently the world of travel writing for your scrapbook.


For more details on this project and further Glitter Girl Adventures, find her under the video tab at Two Peas more details on this project and further Glitter Girl Adventures, find her under the video tab at Two Peas.


I’m always inspired by Garden Girl Wilna Furstenburg, but this month even more so between her fab In the Mood to Scrap video and the launch of her brand new workshop, Art Class. I’ve signed up and I’m working my way through, rationing each chapter so I make sure I put all these great ideas to work.  The workshop is filled with great tutorials and Wilna’s beautiful examples. More about that in a moment…

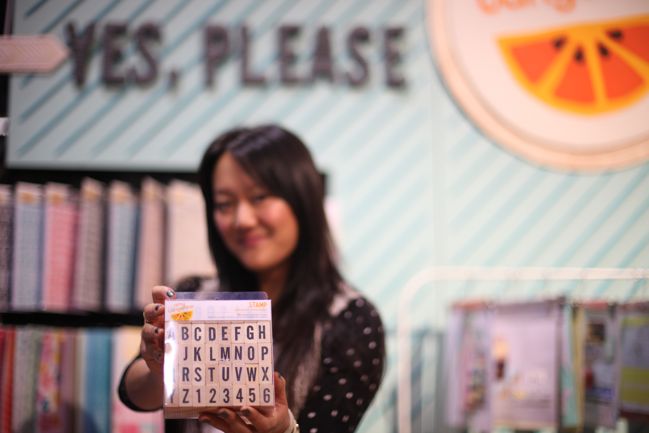
amy tangerine letter stamps
It’s a great time to go shopping at Two Peas, with new products arriving pretty much daily! Including the new lines from Amy Tangerine, Dear Lizzy, American Crafts, Crate Paper, Studio Calico, Glitz, and Echo Park! That’s some major good stuff, and you’ll be seeing lots of these new letter stamps from Amy Tangerine on my upcoming projects!

Speaking of upcoming projects, stop by this weekend for a special two day adventure through sketches and scrapbooking videos, right here at shimelle.com. Perfect if you’re snowed in, but snow is not a requirement.

Your next stop on the hop is brand new Garden Girl Celine Navarro.  Be sure to check our her blog and her beautifully artistic style!

But before you go, I have something for one of you! I have a class pass for Wilna’s Art Class workshop so you can join me and plenty of other scrapbookers for this creative adventure.  To enter, just leave a comment on this blog post.  Entries close at the end of February, London time.  And if there are 500 or more comments by the end of the month, I’ll throw in a prize pack filled with Wilna’s product picks so you will be all set to take part in the class and follow along. So tell a friend, won’t you? if the winner has already signed up, we will refund the workshop – so there is no need to wait and see. Sign up now: and get started straight away!

5 Ways a Paper Scrapper Can Use a Digital Kit by Betsy Sammarco

scrapbooking tutorial by Betsy Sammarco @ shimelle.com
Please welcome Betsy Sammarco to the blog today! She’s an expert at hybrid scrapbooking – that whole idea of taking something a bit computerish and making it into something papery. She has five gorgeous examples to share with you that just might inspire you to look at all things digital in a new way.

I think of my computer as another scrapbooking tool that I can use in many different ways to compliment my paper projects. If you haven’t tried using digital kits along with your paper, don’t be intimidated. The projects I’ll show you here were done using Microsoft Word, a program many are familiar with.
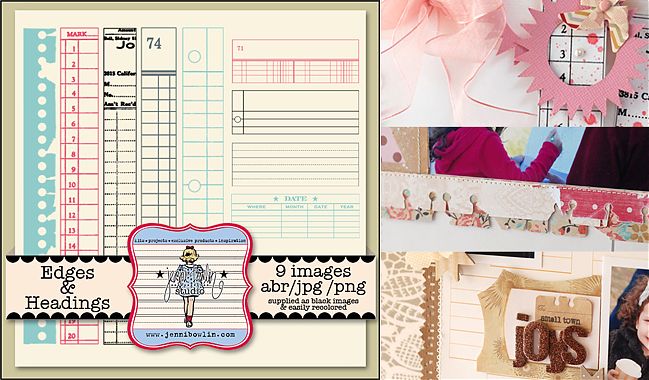
I took one newly released digital kit Edges & Headings from Jenni Bowlin Studio and used it in 5 unique ways. These ideas could translate easily with other digital kits too.

scrapbooking tutorial by Betsy Sammarco @ shimelle.com

scrapbook page by Betsy Sammarco @ shimelle.com
Use jpg files as embellishments
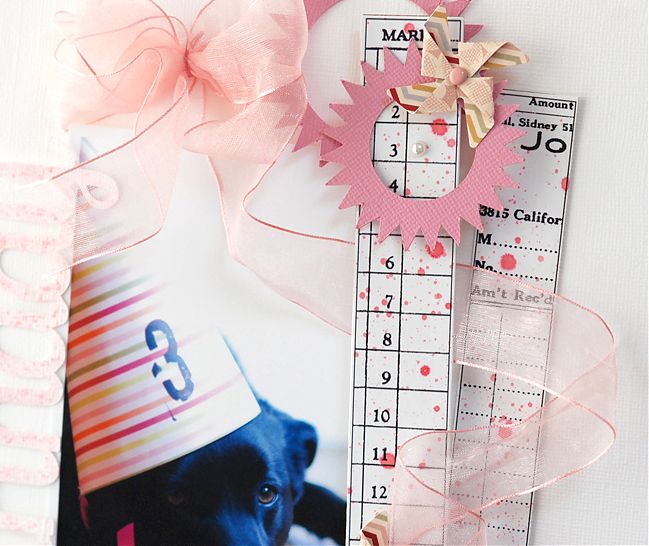
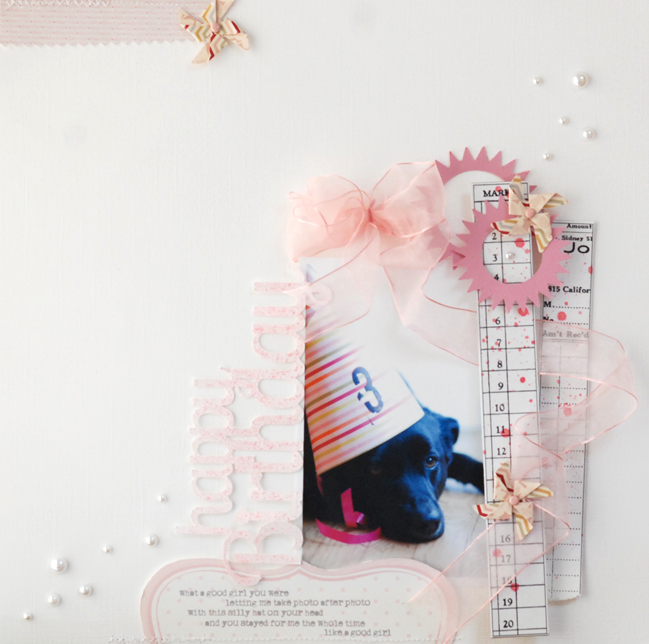
Digital jpg files can opened in any word processing program, printed, cut out, and used as embellishments on page. You can alter the size of the jpg and even change the colors jpg files in Word also. In my example I printed out two of the edge images and splattered them with pink ink. The numbers down the side of one embellishment was perfect for noting the age of my sweet dog. The cute little pinwheels were created using this Jenni Bowlin Studio patterned paper and JBS Pinwheel punch from Fiskars.

scrapbook page by Betsy Sammarco @ shimelle.com

scrapbooking tutorial by Betsy Sammarco @ shimelle.com
Use PNG files with your Silhouette
If you open a PNG file in your Silhouette, you can use the trace function to allow the machine the cut the file shape. This opens up a whole new supply of digital images that can be used with your Silhouette. In my layout, I used the torn paper edge png file, traced it in the Silhouette software and cut the shape out of multiple pieces of patterned paper from Jenni Bowlin Studio, Basic Grey, and Webster’s Pages.

scrapbooking tutorial by Betsy Sammarco @ shimelle.com

scrapbook page by Betsy Sammarco @ shimelle.com
Custom design your own background paper
You can use .png and .jpg files to create your own background paper. You simply open the images in your word processor and arrange them as you’d like for your background.
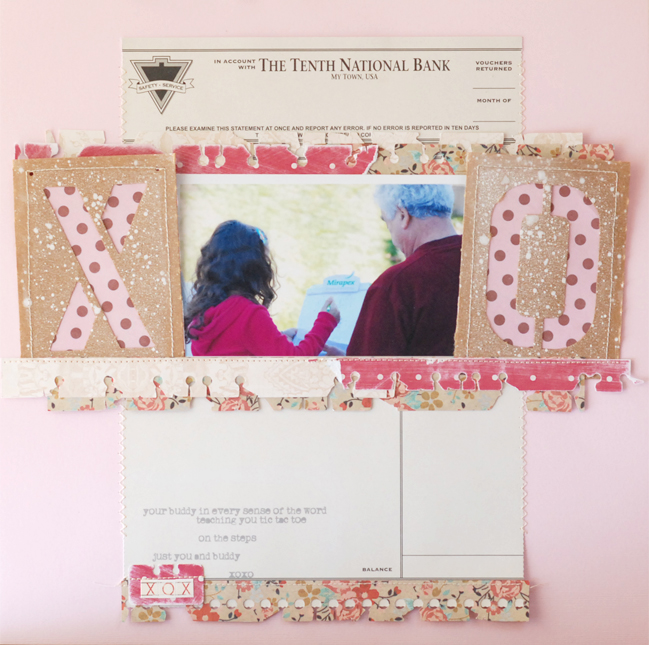
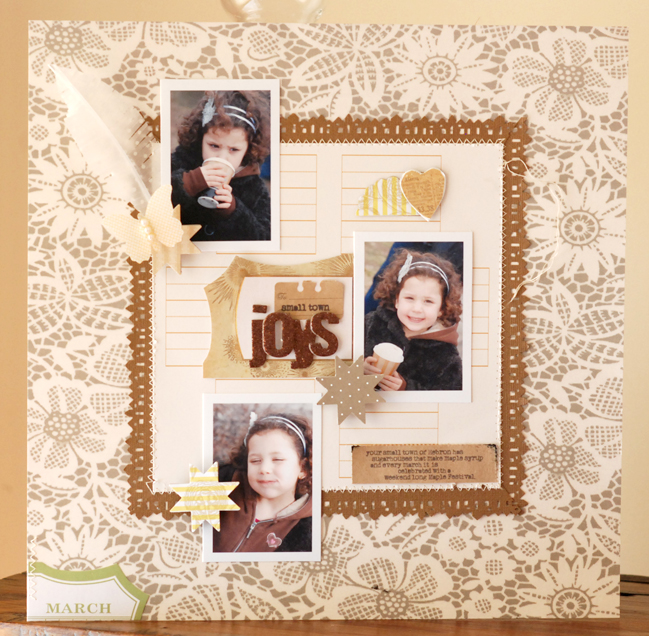
In my example, I used the notebook image from the kit, altered the size in Word, changed its color to light brown, and arranged the images in a grid to aid placement of the photos and embellishments on my page. You don’t need a 12×12 printer to create your own backgrounds. I printed my background on a 8-1/2 × 11 cardstock, cut it square, and sewed it to a punched border I made using the Fiskars/JB Main Street punch and piece of JBS 12×12 bird patterned paper. The result is a custom made 12×12 background!

scrapbooking tutorial by Betsy Sammarco @ shimelle.com
Use digital elements off the page
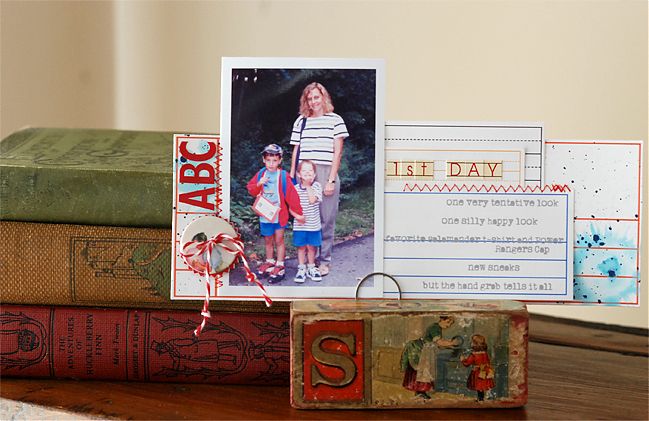
Digital files can be printed, cut out, and used as the base for a 3D project. In my example, the various heading images were printed in different colors and further embellished with paint, stickers, and stitching to serve as the base of this display celebrating the first day of school. The vintage block is from Jenni Bowlin Studio Flea Market.

scrapbooking tutorial by Betsy Sammarco @ shimelle.com
Use digital elements to make divided page protector inserts
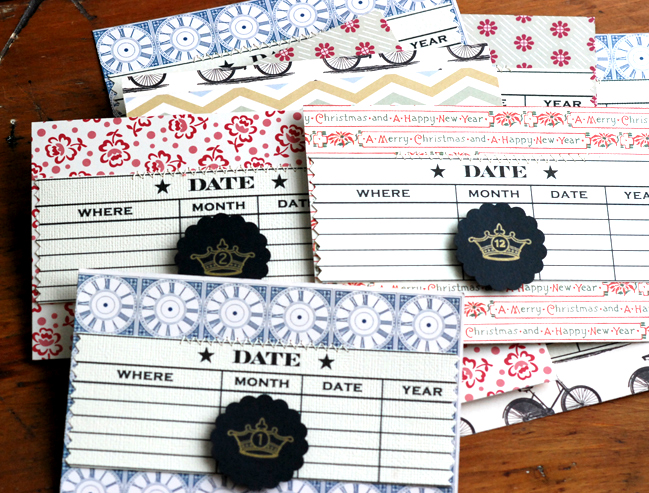
When working with digital elements it is very easy to create in large numbers or batches. This comes in handy if you work in divided page protectors as you can create many journaling cards and inserts at once. I opened the date heading image and sized it to about six inches wide. I fit four of these on my Word document and printed off three sheets to give me twelve headings, one for each month. I stitched them to JBS patterned paper in an assembly line style and embellished them. They are now ready to go in my pocketed photo album.

I hope these ideas inspire you to look at digital kits in a different way. Paper scrappers can indeed use digital kits! I often share ideas for using digital elements in paper projects, and you can find them bookmarked on the Pretty Pixels page on my blog, for easy reference. Please stop by and say hi!


Betsy Sammarco lives in Connecticut with her husband, her two college-aged boys, 2 pet ducks, and her dog. When she’s not working part time as a pharmacist, you’ll find her creating for her favorite company, Jenni Bowlin Studio. She loves sharing with others online. You can find Betsy on her blog Just a Pharm Girl.

Vellum Stamping: a Scrapbooking Tutorial by Jill Cornell

scrapbooking tutorial by Jill Cornell @ shimelle.com
Today, please welcome Jill Cornell, with a tutorial that reminds us all to use those stamps we buy for our scrapbooking! Her stamped embellishments are beautiful. Do share if you give this process a try!

Stamping on projects like scrapbook pages can be intimidating for anyone, but especially for someone who usually creates quick and easy layouts. Like most of you, I have quite the collection of stamps just begging to be used. I am trying to challenge myself to pull out those stamps every time I create even if I only use a couple images or phrases here and there on my layouts.

It can also be intimidating to stamp directly on your projects, especially when there is no guarantee that an image will stamp cleanly and give you the look you desire. Rather than stamp on patterned paper or cardstock, I love the look of stamping on vellum. Vellum provides a beautiful softness to projects. To curb the likeliness of my images smudging from the slick surface, I also like to heat emboss what I have stamped. Today, I’m here to show you how to stamp and heat emboss on vellum!

scrapbooking tutorial by Jill Cornell @ shimelle.com
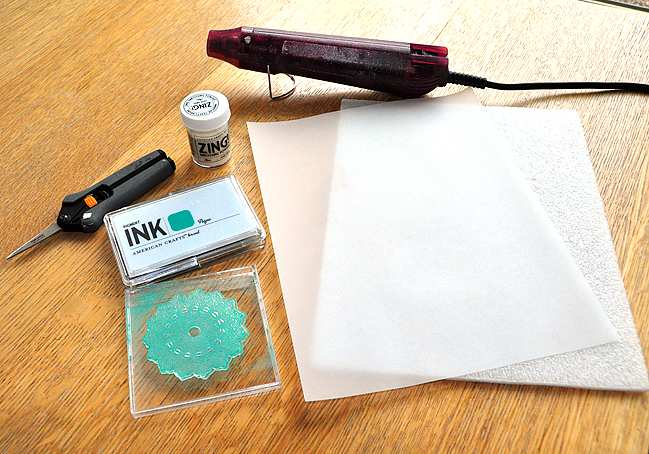
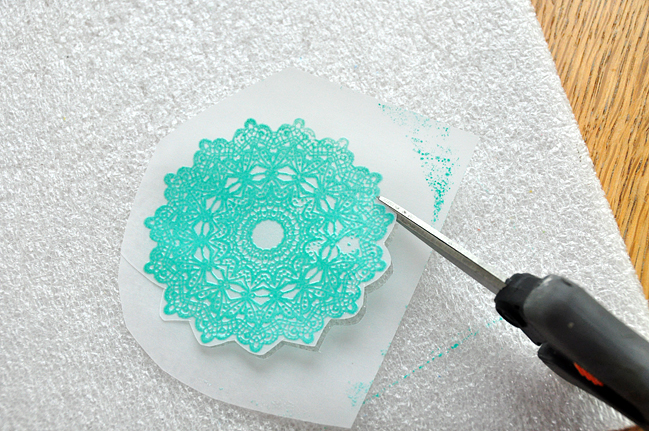
Step 1: Gather supplies.Here I have a foam sheet, vellum, heat gun, American Crafts Pigment Ink in Aqua, ZING clear embossing powder, a doily stamp from My Mind’s Eye, a stamp block, and scissors. I couldn’t find the size I needed so I used a plastic CD-type case instead, which works just fine.

scrapbooking tutorial by Jill Cornell @ shimelle.com
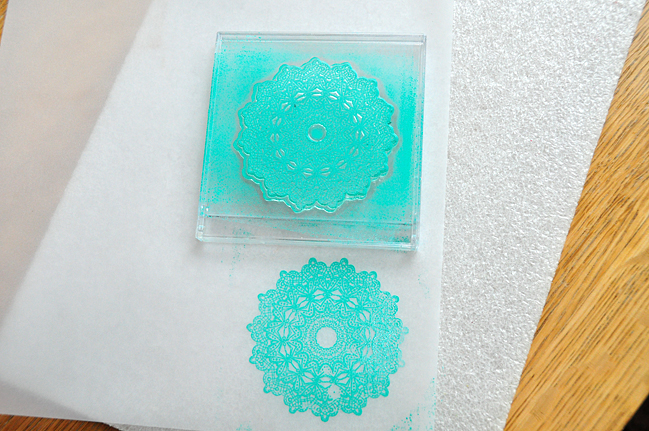
Step 2: Stamp the doily on the vellum. The foam sheet helps the stamp give a little so it stamps cleanly and gives a better impression. Stamp with pigment ink, which stays tacky so you can add your embossing powder. Dye inks traditionally dry almost immediately, so they are not the right choice for embossing.

scrapbooking tutorial by Jill Cornell @ shimelle.com
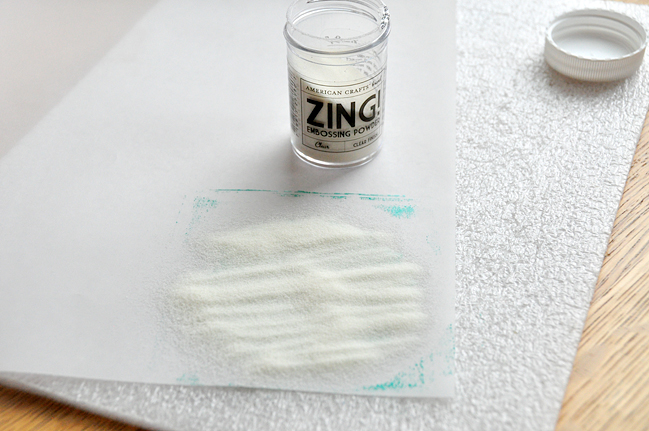
Step 3: Sprinkle the image with clear embossing powder and place the excess back in the jar.

scrapbooking tutorial by Jill Cornell @ shimelle.com
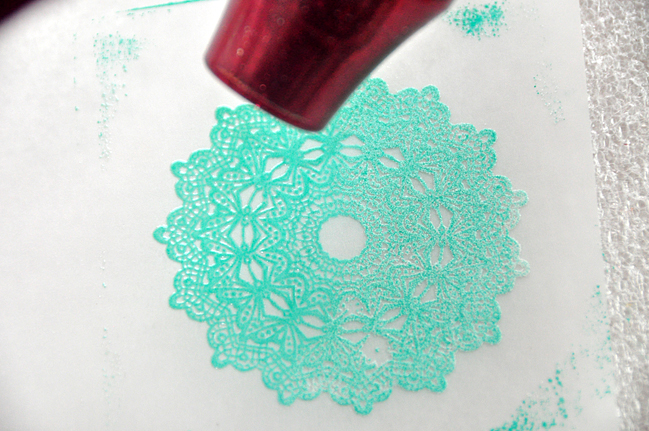
Step 4: Emboss the image with a heat gun. The vellum will melt or scorch if it gets too hot, so move the heat gun quickly and multiple times around the image until the embossing powder sets. It’s better to hold the gun further away from the image and have it take slightly longer to emboss than to zoom in too close with the heat gun and burn your image from trying to go too quickly.

scrapbooking tutorial by Jill Cornell @ shimelle.com
Step 5: Cut around the image and adhere to your project. I placed buttons and stickers in the middle of my doilies so I could hide my adhesive, since vellum is transparent.

scrapbooking tutorial by Jill Cornell @ shimelle.com
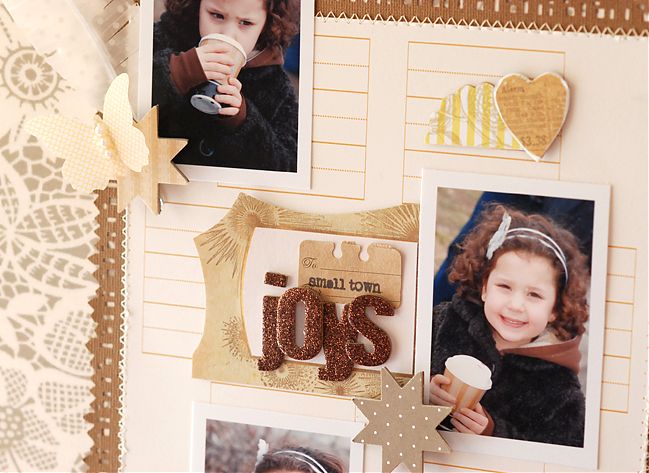
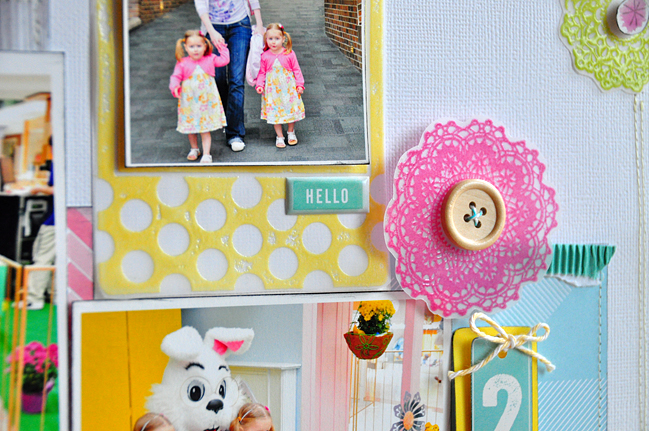
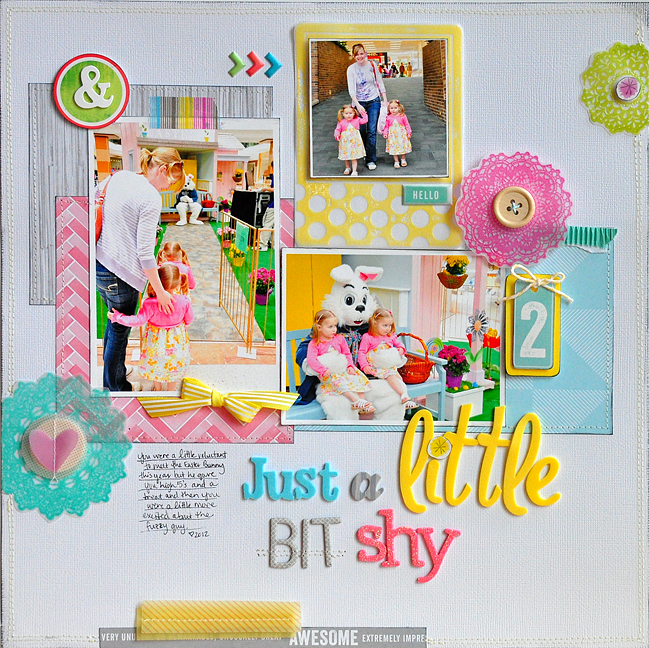
Then put your vellum pieces to use – here is my finished layout! I stamped three different doilies on vellum as well as a Polaroid style frame to hold my square photo.

Try using this technique with phrases and any image you can think of (I’ve tried this technique with leaves for a fall layout). The bright, heat embossed images just add that perfect burst of color!


Jill Cornell lives with her husband of 9 years and 3-1/2 year-old twin daughters in Windsor Heights, Iowa. She has a degree and career experience in public relations and broadcasting but is now a stay-at-home mom. Jill has been scrapbooking and papercrafting for 10 years and has a soft, shabby chic style that incorporates linear design elements. She loves having girls to scrapbook because it gives her an excuse to use pink and feminine details on her work. Jill is currently designing for American Crafts, Simple Stories, Webster’s Pages, Scrapbook Circle, and Emma’s Paperie. Find more of Jill’s work on her blog, Blessed Scrapper.

Five ways to Use Mists on a Scrapbook Layout By Corrie Jones

scrapbooking tutorial by Corrie Jones @ shimelle.com
Today please welcome the very talented Corrie Jones to the blog. I was thrilled when she said she had five different ideas for scrapbooking with mists – because every time she uses them on her layouts, I find myself asking ‘Why didn’t I think of that?’ Her pages are always beautiful, and I hope you feel inspired to get a bit misty with your scrapbooking pages very soon!

I love using mists. I love the colors and the messiness of them. I love that they can take the place of patterned paper. I love that no matter how you use them, even repeating the same technique, the page is always unique. Mists are fun and help me to make my pages look like they are mine. Today I am here to show you five different ways to use mists. Hopefully, you will see how much fun they can really be and how liberating it is to just get messy and play.

scrapbooking tutorial by Corrie Jones @ shimelle.com

scrapbooking tutorial by Corrie Jones @ shimelle.com
Spray
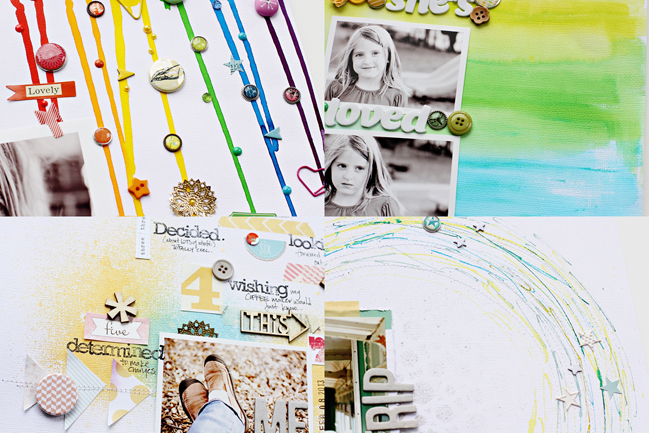
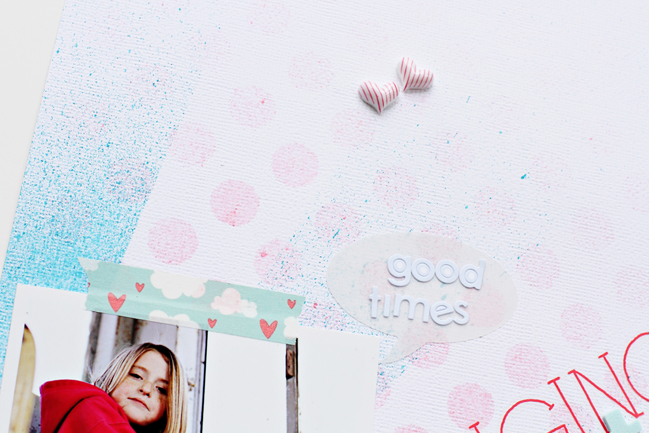
Most likely, everyone has thought to spray mist. The bottles do have a sprayer on them and we all complain from time to time about the bottles getting clogged. So sure, we can spray mists. Honestly, if I just spray them on my page, trying to get that beautiful even color, it doesn’t happen for me, so I spray my mists with a purpose. I use stencils and cut up pieces of paper as masks, so an even spray doesn’t matter quite so much. Plus, I get a fun pattern on my cardstock that I can control (sort of) the intensity of the color. I love to spray at an angle to get a cool fade look.

scrapbooking tutorial by Corrie Jones @ shimelle.com

scrapbooking tutorial by Corrie Jones @ shimelle.com
Soak
Sort of spraying here, but sort of not. There is nothing even about his look. It looks like color is poured onto the page at times, but it is a fun technique that will remind you of preschool. Remember those paintings where you put all the paint on one side of the paper, then folded it in half, pulled it apart, and it looked almost like a butterfly? Well, this is very much the same type of thing. For soaking with mists, I spray unto my craft mat, then use my cardstock to soak up the color. It is much less controlled but the effect is really cool as the colors tend to melt together in places and are small speckles in others. This can also be done after using a stencil. Instead of wiping your stencil clean, use a new sheet of cardstock to soak up the excess mist! Plus then you have a pattern as well!

scrapbooking tutorial by Corrie Jones @ shimelle.com

scrapbooking tutorial by Corrie Jones @ shimelle.com
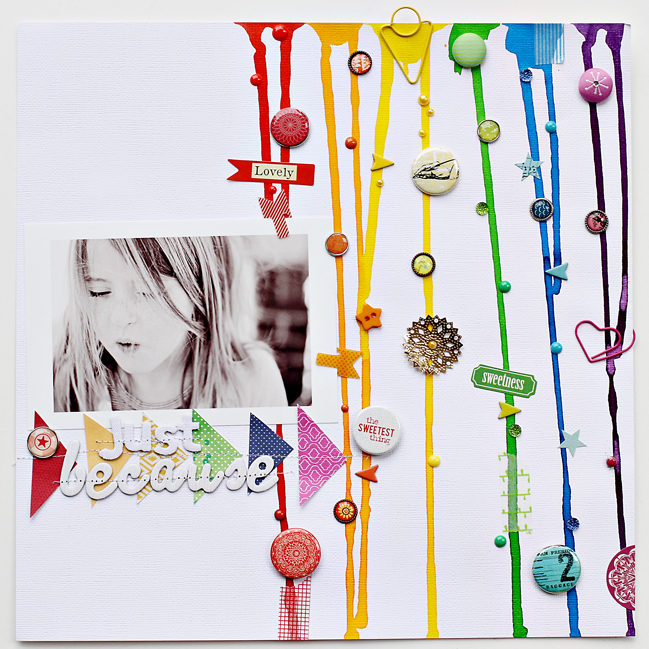
Drip
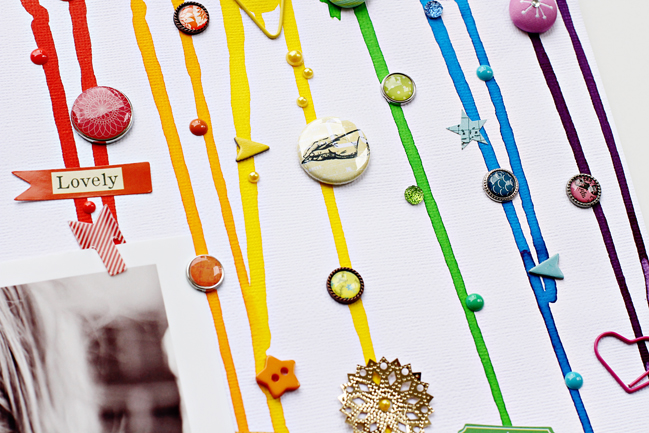
I never thought I would love the look of drips as much as I do, but the more and more I see drips on scrapbook pages, the more inspired I am! I just love the runny color. To make a good runny line, simply saturate a paintbrush with your favorite color mist. Then drag the brush over the top edge of your paper while holding the paper up. The mist will start running right down the page. You can do this from the middle of the page as well by pooling the color in a spot then simply lifting the paper up to make it run. Remember this ink does dry fairly quickly so if you let it sit too long it will not drip, but you will have a beautiful colored spot!

scrapbooking tutorial by Corrie Jones @ shimelle.com

scrapbooking tutorial by Corrie Jones @ shimelle.com
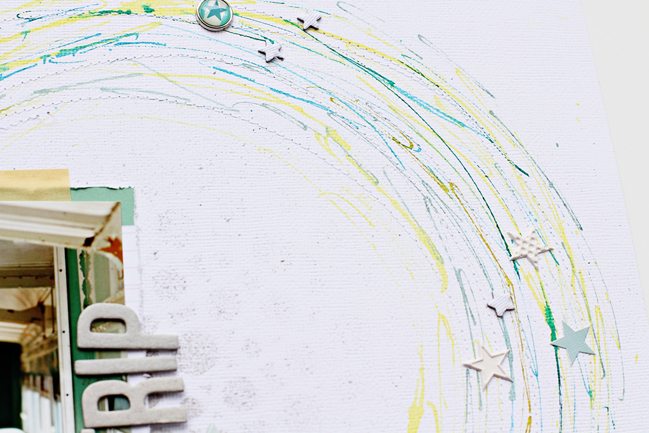
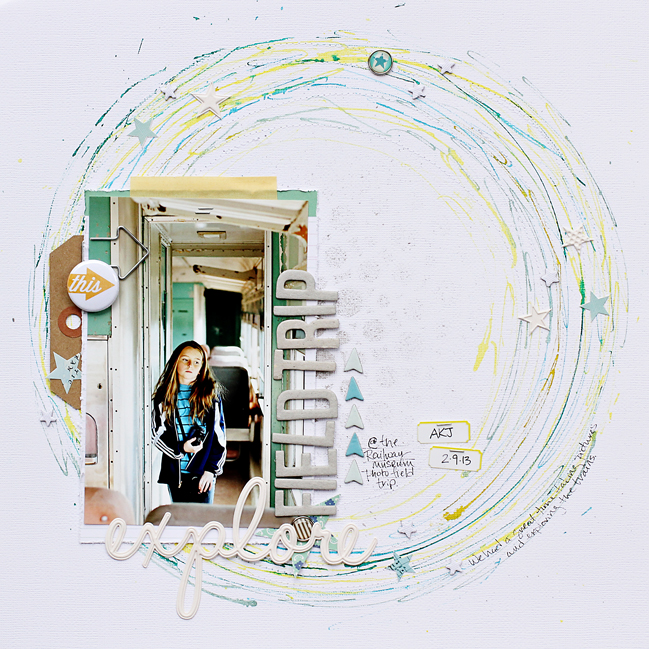
Draw
My favorite way to page with mists is to draw with them. It is the easiest thing to do to. It takes no special tools, just the mist and paper. So, here you go. Unscrew the top of the bottle. Use the sprayer tube as a pen and draw your desired shape on your background. Let it splatter and channel your inner child. Drip into the ink whenever you need more. Change colors from time to time as well! If you need a more detailed explanation, I recently created a video for Two Peas in a Bucket showing this technique. I draw a heart, not a circle like in this layout, but it is the same idea.

For further details and supplies for this project, see 213 in 2013 at Two Peas”.

scrapbooking tutorial by Corrie Jones @ shimelle.com

scrapbooking tutorial by Corrie Jones @ shimelle.com
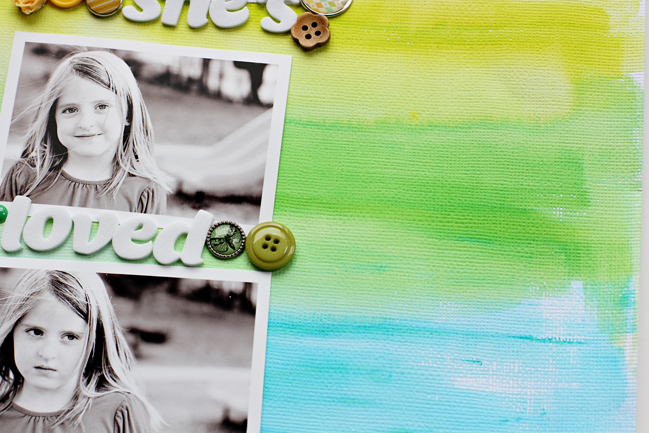
Paint
I am no watercolor expert. Actually, watercolors are hard for me, so I decided to try painting with mists. Hello! This is fun! Once I decided it was just another way to use mists, the “watercolor” look became easy for me. How to do it? Well, have a wet paint brush and dip it into your mist and then just paint it on! Mists like Dylusions and Heidi Swapp Color Shine are both reactive to water, so by adding a little extra water they are easy to blend and even out. This is just another fun way to customize your pages and be really creative.

There are so many ways to use spray mists. I hope you are inspired to try a new way to use this product. Do not be afraid of the mess! Wear an apron and play. Thanks Shimelle for letting me be here today! Bye!


Corrie Jones lives with her husband and three active daughters in the suburbs of Atlanta where she spends a considerable amount of time playing a taxi driver and trying to stay cool in the heat. She has been scrapbooking since 2009 and has found that it forces her to remember how amazing this life and world are, even when things aren’t happy and perfect. Beside scrapbooking, Corrie enjoys photographing her kids, reading on the beach, and eating sushi with friends.
Corrie enjoys being on design teams and can currently be found over at Two Peas in a Bucket as a part of the Garden Girl team or on her blog, You, Me & Crazy.

Sketch to Card Making:: Using Rub Ons by Julie Campbell

scrapbooking tutorial by Julie Campbell @ shimelle.com
This week I am extra grateful for scrapping friends helping me keep the inspiration going while I do a bit of focusing and recovering. That means I haven’t finished my page for this sketch, but I didn’t want to make you wait to see Julie’s Valentine take on it! (I’m hoping to be back with a project for you by Friday night or Saturday morning.) Please welcome Julie Campbell, and a very happy Valentine’s Day to all of you!

scrapbooking sketch by shimelle laine @ shimelle.com
Sketches are a great tool to spark creativity! I love the added challenge of taking a layout sketch & making it work on a card. For this project, I rotated the sketch 180 degrees and simplified it a bit so that it would work better with my scaled-down work surface.

scrapbooking tutorial by Julie Campbell @ shimelle.com
I’ve been itching to work with some of the new rub-ons from Amy Tangerine’s Yes Please collection. They transfer beautifully & make an instant pattern for hand embroidery. (Of course, they’re also adorable in their natural state as well.) It thought this camera would work well as the large shaded rectangle found in the sketch.

scrapbooking tutorial by Julie Campbell @ shimelle.com
One of my favorite colors right now is royal blue. I love the wide stripe found in this patterned paper (Special Delivery collection by GCD Studios) & matched some embroidery thread to it to tie everything together. I added some alpha stickers (Lily Bee Design) to create a custom sentiment.

scrapbooking tutorial by Julie Campbell @ shimelle.com
I added a scalloped border, felt hearts & embroidery floss to mimic the small circles and large border from the sketch. The hearts make this card perfect for Valentine’s Day, but the rest of the card is neutral enough that it could be given year round.


Julie Campbell is from rural Indiana where she lives with her husband and two sons. She is passionate about making things by hand and loves working with fabric & paper. Julie is a contributing editor for Paper Crafts Magazine. She’s also a Garden Girl at Two Peas in a bucket where she recently released her new online workshop Journey Into Card Making & is part of the Creative Team at Studio Calico. You can find more of Julie’s work on her blog Stamped In His Image or follow her on Twitter or Instagram