



pretty paper. true stories. {and scrapbooking classes with cupcakes.}

lovely to meet you Twitter Facebook Pinterest YouTube

Take a Scrapbooking Class

online scrapbooking classes

Shop Shimelle Products

scrapbook.com simon says stamp shimelle scrapbooking products @ amazon.com shimelle scrapbooking products @ amazon.co.uk

Reading Material

travel

Lovehearts don't have to be red: A scrapbooking tutorial in textures and layers
Lovehearts don't have to be red: A scrapbooking tutorial in textures and layers by Kirsty Smith @ shimelle.com

Today, please welcome contributing designer Kirsty Smith, with her delicate and handmade take on a Valentine of a scrapbook page. Thank you, Kirsty!

As Valentine’s Day approaches, it’s nice to be able to scrapbook about the people in our lives that we love. But while pages about loved ones are topical at this time of year, and there’s lots of great inspiration around, we don’t have to document these feelings with giant pink hearts. So today, I’m going to share with you a page that is personal and heartfelt, but takes a look at the theme of love from a different design perspective.
Don’t get me wrong: I love pink as much as the next person and I use a heart icon on almost all my pages as a heart is a universal way to indicate that you like something, or someone. But it’s nice to mix things up sometimes.

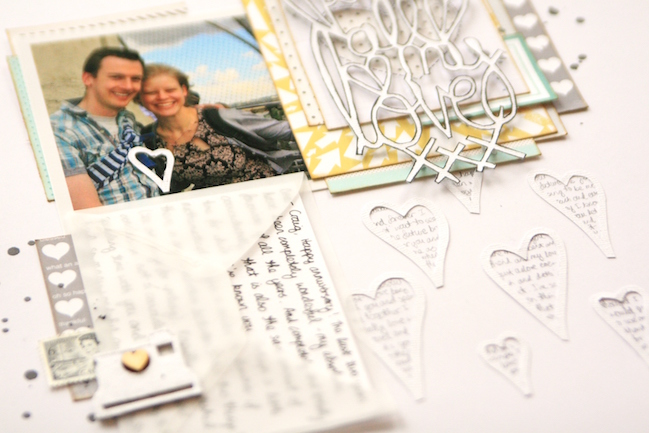
I wanted to make a page about my relationship with my partner, documenting some of the letters I’ve written to him over the last few years. I loved the idea of recording the things that I have written so that I can look back on them at some point.
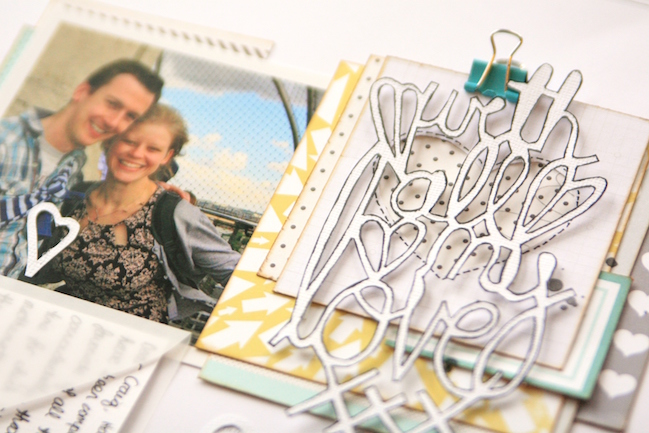
Lovehearts don't have to be red: A scrapbooking tutorial in textures and layers by Kirsty Smith @ shimelle.com

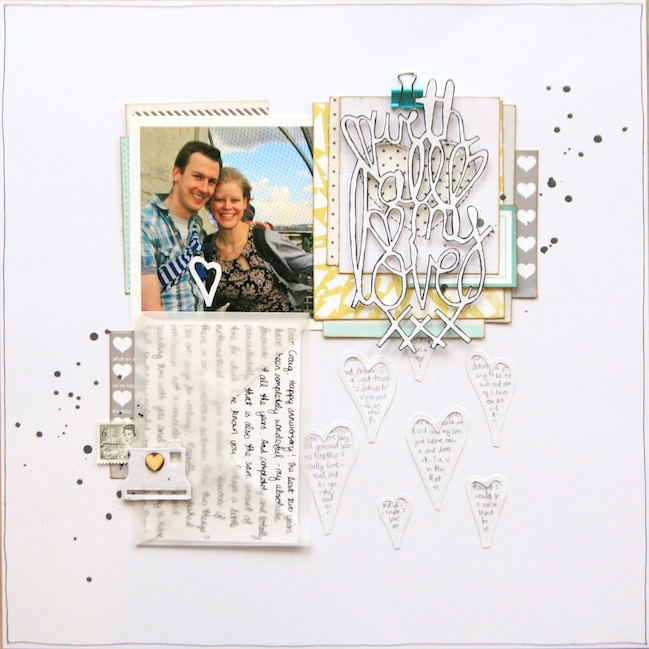
I used a photo as the starting point for this page, and drew the colours of blue, grey, yellow and teal from the picture. I wanted the page to have a soft, romantic feel with plenty of space, but to still have plenty of detail. To me, this means a clean, white background, and lots of detail in layers.
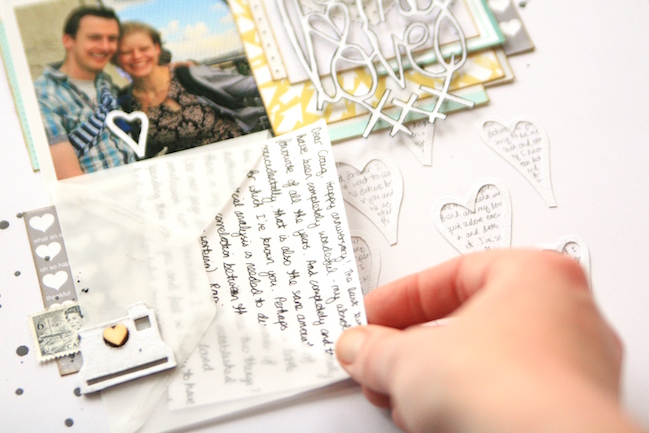
Lovehearts don't have to be red: A scrapbooking tutorial in textures and layers by Kirsty Smith @ shimelle.com

I pulled my supplies together and found I had three key elements to the page. First the picture, which influenced the colour choices. Next came the journaling. I wrote my journaling out onto little sheets of writing paper and folded them to fit into a vellum envelope. I find vellum to be a wonderful material for journaling like this: it’s just dusky enough to hide the details of more private words from casual eyes, but it’s transparent enough to let my handwriting show through. I always aim to include my handwriting on my pages in one way or another; our handwriting is something that is unique to each and every one of us, and it’s a nice way to add your own twist to a design.
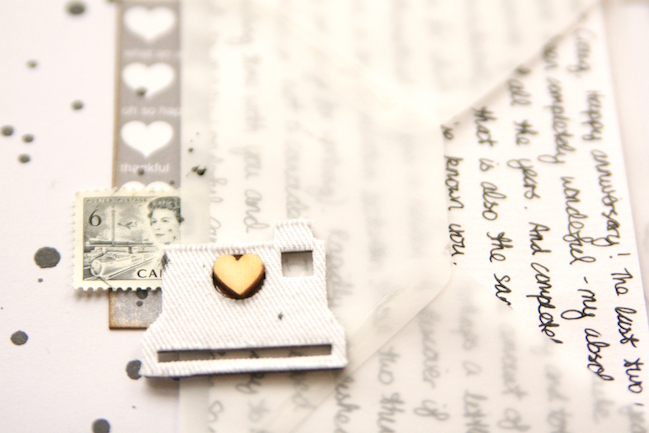
Lovehearts don't have to be red: A scrapbooking tutorial in textures and layers by Kirsty Smith @ shimelle.com

Lovehearts don't have to be red: A scrapbooking tutorial in textures and layers by Kirsty Smith @ shimelle.com

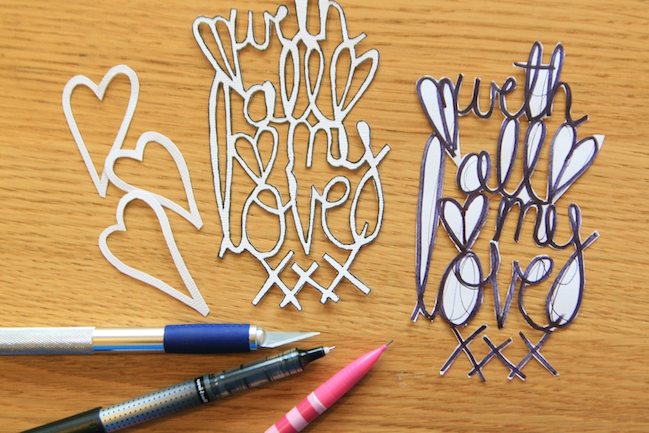
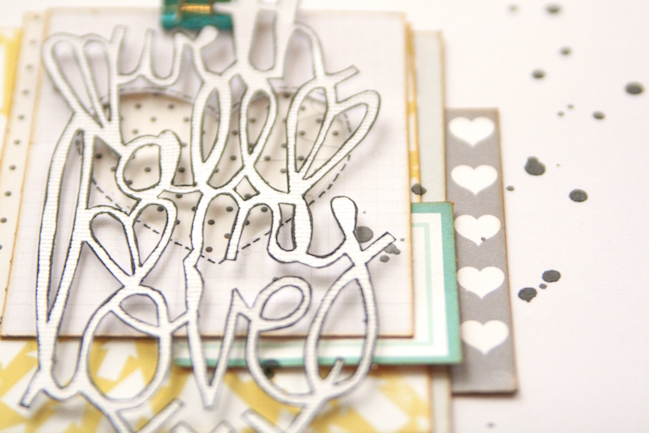
I also created a title that would reflect the letter-writing idea of the page. I wrote out my phrase on scrap paper in a thick, black marker pen, making sure all the words were touching and adding a heart here and there both to tie in with the design and link the phrase together more securely. I cut out the phrase to make a template, and then traced around it onto cardstock. To complete the title, I cut out the cardstock title with a craft knife. I’ve used this technique a lot lately, and if you use a die cutting machine, it’s probably much quicker and you will achieve the same effect. But I enjoy the process, and I have been loving the lacy, delicate look titles like this produce.
Lovehearts don't have to be red: A scrapbooking tutorial in textures and layers by Kirsty Smith @ shimelle.com

My only concern with the title was that it wouldn’t stand out or be legible, so I outlined it in black pen for emphasis, and stacked the title on coordinating scraps of patterned paper. The layers add detail without being overwhelming, and raising the title up on foam squares makes it a real feature of the page.
Lovehearts don't have to be red: A scrapbooking tutorial in textures and layers by Kirsty Smith @ shimelle.com

With the three parts of my page ready – photo, journaling and title – I was ready to put my design together. The three elements together nicely filled three points of a 2×2 grid design. Grids are wonderful starting points for scrapbook pages, but I didn’t want anything too rigid or blocky in style which might clash with the softer feel of this page. So I opted to create a background design on the white cardstock to give the illusion of the fourth square in the grid, and to add additional layers of texture to the page.
Lovehearts don't have to be red: A scrapbooking tutorial in textures and layers by Kirsty Smith @ shimelle.com

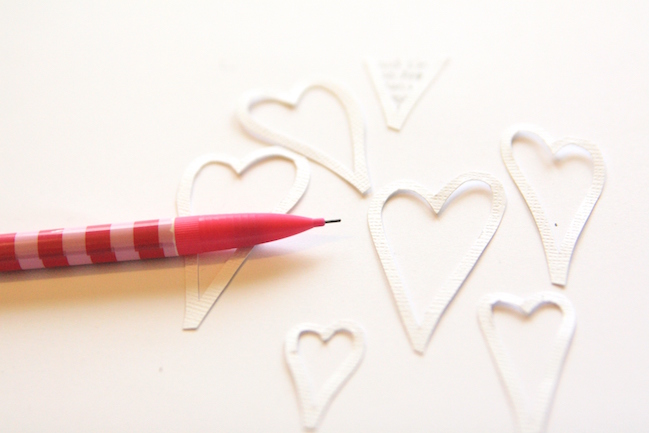
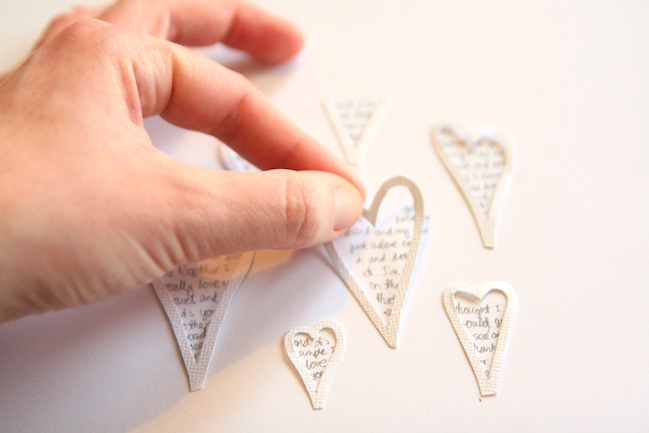
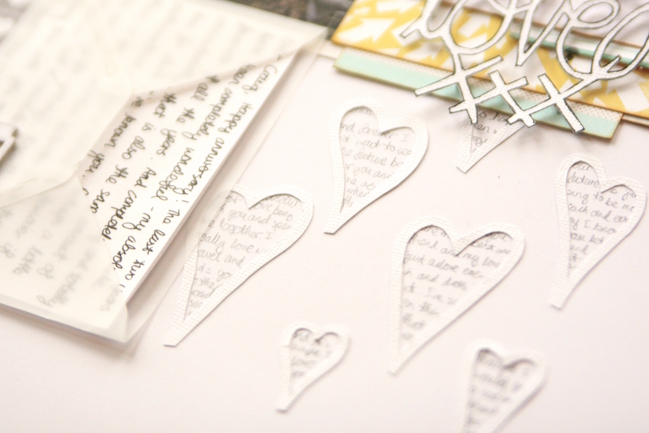
To create a background design, I sketched out a few slightly wonky heart shapes, and cut them out with scissors (although punches or die cuts would work equally well!). I arranged them on the page and in pencil, filled in the middle with a few words drawn from my journaling. The grey of the pencil tied in nicely with colour scheme and meant the contrast with the background was less severe than the black journalling pen.
Lovehearts don't have to be red: A scrapbooking tutorial in textures and layers by Kirsty Smith @ shimelle.com

Then I adhered my hearts to the page with a trusty clear glue, and the background was complete!
Making a background like this is a great way to add detail to a page. It adds layers and texture through the use of text, but because the design is white on white, it won’t draw attention away from the main focus of the page.
Lovehearts don't have to be red: A scrapbooking tutorial in textures and layers by Kirsty Smith @ shimelle.com

This page is a layout of contrasts. It’s a Valentine’s day page without pink; it’s a simple grid design with lots of detailed letters; it has hidden journaling in plain sight and there are four square blocks with only three of them filled. For me, it works and this is a page I hope I can keep adding too, tucking future letters and sentiments away into the envelope to look back on one day.

Of course we’d love to see what you create inspired by Kirsty’s techniques! But which will you pick? Are you going to try the hand lettering or maybe writing in a tiny heart frame? Or the white on white colour scheme? Decisions, decisions!

Scrapbooking with pink and red

scrapbooking with pink AND red @ shimelle.com

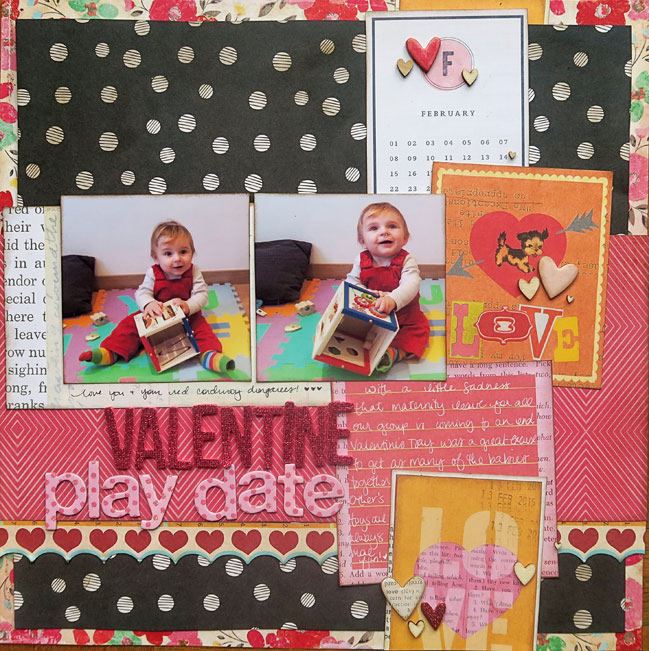
Are you feeling the lovey-dovey vibe with your scrapbooking this week or do you prefer to opt out of all things Valentine? I had to laugh when I looked back at my photo library for what we did for Valentine’s Day 2015 – we set the table properly and ate lunch during nap time. That’s all. And it was awesome and should definitely go in my scrapbook. But in crafty days, I love Valentine’s as an excuse to mix pink and red together. Truly pink is just red with white added, so they certainly go together in a monochromatic sort of way, but it’s not a combination we see everywhere and it feels just a little extra special and maybe even rebellious to me.

scrapbooking with pink AND red @ shimelle.com

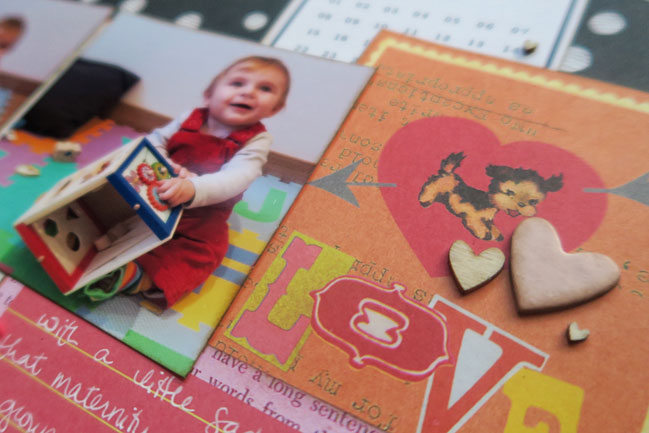
I threw orange into the mix today as well, and I wasn’t really planning that. But that Sassafras Valentine cut-apart sheet included orange and it made sense. In colour wheel terms, red-red/orange-orange all in row makes them analogous colours, so there’s a harmony there. A bit like blue and green feeling like the sky and the grass, red and orange feels like the colours of the horizon at sunset! But I had pulled out so many patterns, with all the hearts and text and that bold floral in the background, and I knew those two square photos would get a bit lost, so I blocked out a big section of the page in black. Solid black would work, but I just prefer more pattern! This dot is more subtle in terms of my pattern selections, and adding brown ink around the edges toned it a bit more in line with that vintage floral background. Or so I’d like to think, anyway!

scrapbooking with pink AND red @ shimelle.com

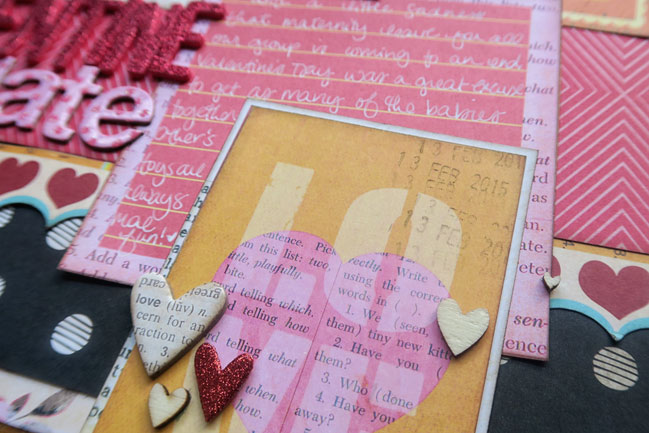
In design terms, I did something a little different – no triangle of things surrounding the pictures! There are still three areas of more embellishment with the chipboard and wood veneer hearts, but they are all in that column on the right. I think their placement brings more attention to the cuter of the two photos (the one on the right) but that photo on the left might be a bit lost. Not enough for me to change anything, but it’s nice to look back and evaluate sometimes. I think the lighter bits of the patterned papers, like the calendar, the text behind the photos and the frame around the orange card at the bottom are really key in this mix of so much stuff. That off-white tone helps it from being too dark and heavy, and those do create a triangle that surrounds the photos, so I’ve not gone full on rebel or anything.

Today I’ve also asked guest artist Karla Yungwirth to take on the pink and red challenge, and she obliged with a Project Life style!

scrapbooking with pink AND red - page by Karla Yungwirth @ shimelle.com

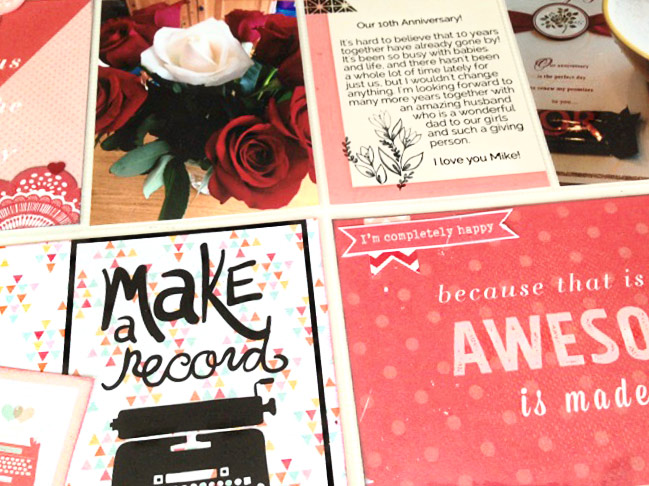
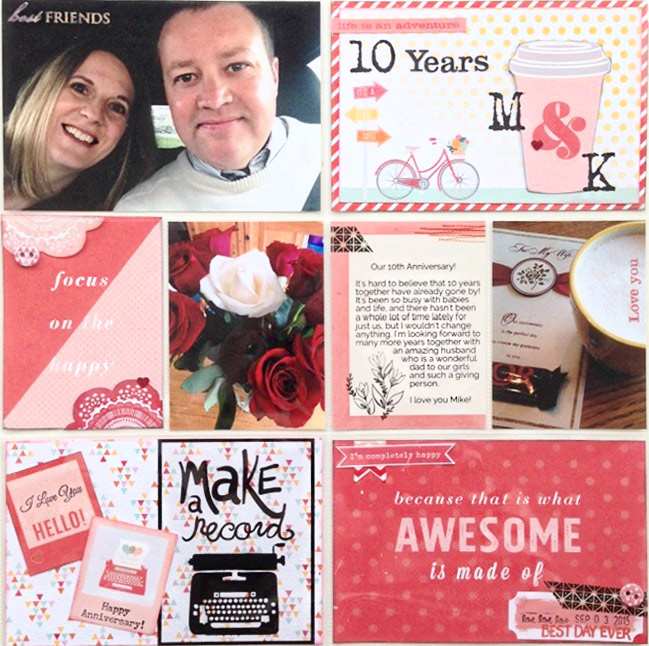
Not too long ago, my husband and I celebrated our tenth wedding anniversary! It was such a special day, and I wanted this page to really focus on our love for each other. I looked for red and pink pieces in my scrapbook supplies and was surprised at how many ‘love’ themed papers and ephemera I actually had!

scrapbooking with pink AND red - page by Karla Yungwirth@ shimelle.com

I pulled papers from Shimelle’s True Stories collection and a Fancy Pants paper pad as well as using stickers, stamps, rub-ons and some My Mind’s Eye accessories to complete my pocket page. With eight pockets but just three photos, I made sure my pictures were the size of the full pockets so they wouldn’t get lost, but I still had plenty of room for my journaling and to play with embellishments in the pink and red colour scheme for a monochromatic look.
-Karla

Karla and I would love to see anything you’ve created with both red and pink, be it a scrapbook page or a Valentine greeting. Share it in the comments if you like! Happy crafting, no matter what subject you’re scrapping today.

Today’s Guest Artist: Karla Yungwirth loves family craft sessions, organizing and, of course, scrapbooking. You can find more from Karla on Instagram, Facebook, and her blog.

Glitter Girl Adventure 128: Old Stash Simplification

Glitter Girl Adventure 128: Old Stash Simplification scrapbooking video @ shimelle.com

This week’s question comes from Val, who asked:
I miss using all my older scrapbooking tools and supplies like mist, paint, and plain chipboard. I know styles change, but I have so much older stuff. It would make me feel better to mix my new and old supplies more frequently. Glitter Girl, can you help?

So this week, Glitter Girl shares her top tips for getting rid of the guilt of scrapbooking supplies you’ve had a long time and getting more of them onto your pages, and of course there’s a new scrapbook page to show those tips in action. Come along for the adventure, won’t you?

Let go of anything giving you guilt
I know what is like to hold onto supplies because you paid good money for them. I’ve been writing about this topic for a while now and I often find myself looking at supplies and asking myself ‘is this the new version of my special expensive paper?’ and sometimes it totally is. I liked it when I bought it but I kept it because I spent money on it… not because I am loving how it would look on my page. So with the exception of that original super ugly paper that made me have the realisation, if I don’t love it, it goes to someone else. It might be brand new or I may have had it for fifteen years.

Plain chipboard is something I don’t really love, and I only had a few little exceptions I had kept because I thought they would be easy to adapt. I’m taking that as a good sign that I didn’t have to choose between twenty-three unopened packages of plain chipboard shapes.

Find a way to let go that makes you feel good instead of rubbish
Years ago, I posted on Freecycle to give away a big box of offcuts and leftover workshop supplies and stuff that was just weighing me down but was still so lovely I didn’t want to just put it in the recycling. Someone answered and it turned out she ran crafting workshops with the patients in a children’s hospital. Perfect. I give her big boxes a few times a year and I feel good about it rather than rubbish! I love that I can help with a cause that hits my heart. You don’t need to find your good connection in some random way like that and you can go direct to a source you know. Call up a children’s hospital, school, scouting group, Sunday school, family shelter – whatever feels right to you. Don’t let not knowing anyone there scare you. You can send an email or make a phone call and find the solution for you, if you are in the position of being overrun with supplies. (If your stash is small and you don’t have the overrun problem, that’s okay too! But it does happen, and it’s good to make a change for the better than to live with guilt every time you look at your supplies.)

Choose up to three older products or tools to use at any time
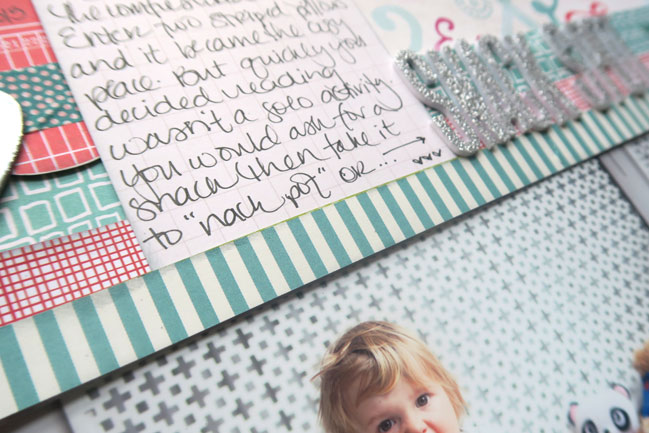
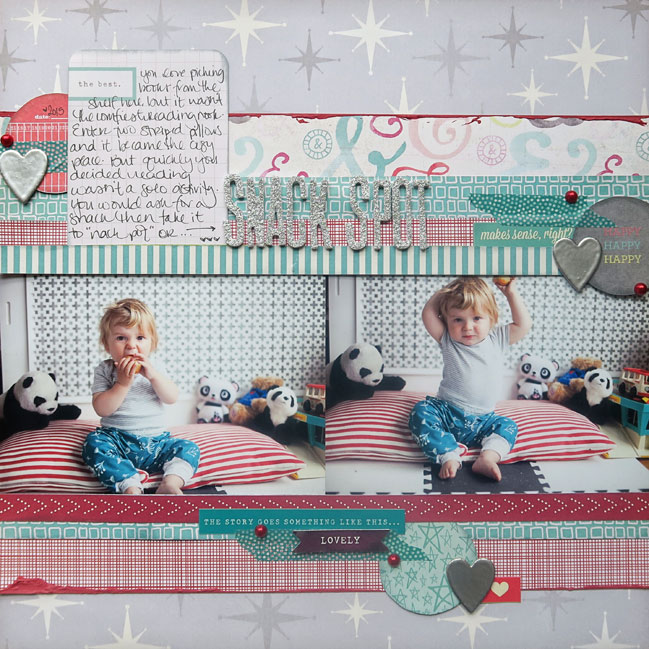
If I set myself a mission to ‘use older stuff’, I would be so overwhelmed. There are too many options, especially after so many years of scrapping and collecting supplies! I work best with a visual reminder I can see and I don’t like to move around much once I start my page (even though I scrap standing up – go figure). A mission that does work for me is something more narrow and specific, so I can challenge myself to ‘use acrylic paint, plain chipboard, and embossing powder’ and I put those things on my desk before I start the page. That way I couldn’t easily forget – they were staring at me! (I’ll admit, this visual aid works best if my desk is relatively tidy when I start so nothing gets lost.) I ended up making a few more silver hearts than were practical for my finished design, so those are currently still on my desk, waiting to go on my next project. They’d be great for a Valentine card, so I’ll use them straight away but I packed them away somewhere, I guarantee I would forget and in three years we’d be having this discussion about challenging myself to use two random silver hearts. Trust me.

Create pages that are still in a style you love
With just those few things picked out as my old supply mission, I don’t feel obligated to time warp my style to how I was scrapbooking when I purchased every colour of acrylic paint or stockpiled plain chipboard (remember the cute lunch tins they came in? They made it hard to resist!) and I can mix those elements with current papers, stickers, and whatever else, as well as photos currently inspiring me. My style stays true to how I make stuff today, which gives me a little game of figuring out how to mix those older things with the new ones! (Short answer: usually less is more and I find I’ll add a little acrylic paint now where ten years ago I would have added a heap of the stuff. On this page, I love the texture it gives to those paint layers without the layout shouting HEY! I USED MY PAINT! IN 2016! This makes me happy. I’m not a fan of shouty pages.)

Glitter Girl Adventure 128: Old Stash Simplification scrapbooking video @ shimelle.com

In terms of supplies, the old stuff is old, okay! Jenni Bowlin chipboard hearts (I also kept quite a few of her chipboard butterflies), Ranger acrylic paint from the days when Jenni was a signature designer there, and American Crafts Zing embossing powder in silver. The papers come from my Starshine line (the grey star), Dear Lizzy Documentary (ampersands and turquoise boxes) and Happy Place (red cross hatch). Plus silver Fitzgerald Thickers for the title, a journaling card from the Polka Dot Party Project Life mini kit, washi tape from an old Studio Calico kit, stickers from True Stories, and some red Pebbles pearl dots. I think that’s everything!

If you want a bit more Glitter Girl in your life, you’re welcome to chat and share what you’re making in the Facebook group Scrapbook like a Superhero. See you next Wednesday for a new adventure!

My take on scrapbooking with hearts

scrapbook page by shimelle laine @ shimelle.com

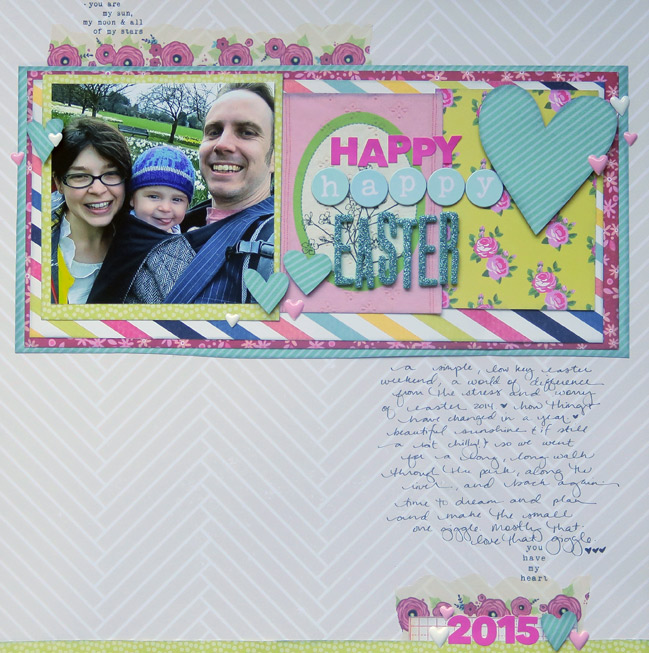
Some days, short and sweet scrapping sessions are just the thing, and that’s the case with my take on this week’s scrapbook with hearts challenge. I had twenty minutes, a photo already printed, and a few papers on my desk. Time to go, go, go!

Cutting boxes is quick, so I cut one square to frame the square photo and three more into horizontal rectangles, each a little bigger than the last. All those papers are from the Starshine collection – the background is from my first collection with AC. The two 3×4 cards were already that size, and easy to find in a box of cards roughly filed by colour. They are both Studio Calico designs – the one of the left from a 12×12 cut apart paper and the one on the right came in a kit from about this time last year.

Using the same paper as one of the boxes for the embellishments is another way to speed things up! Punches and dies are quick and easy enough for cutting shapes, but hearts are something I prefer to cut by hand. I cut one large heart then four small hearts from the scraps around the edges of the big heart.

It was at this point that I really wanted something more floral to pick up on all the daffodils in the background of the photo. (They are out already this year! It’s crazy.) I am currently wasting no opportunities to use that shaped washi tape with the flowers! A little at the top and a little at the bottom of the page made me realise where everything else would go: title between the photo and the big heart, journaling down the page in a column on the right, and a little bit of embellishment below that to connect it all and act a little like a frame so the journaling catches your eye a bit more. I felt like a bit of colour at the bottom would help it not feel so bland, so found another strip of the same paper that frames the square photo to run across the bottom edge.

Simple simple title with Thickers and Studio Calico stickers (from that same Valentine kit), two little rub-ons with sweet sentiments in typewriter text (mostly to make the black journaling pen not feel so stark), and a bunch of little enamel hearts from Amy Tangerine.

Start to finish in twenty-five minutes. Because some days the need for sleep and the need for creativity are in a big, big battle, yes?

Happy scrapping with hearts, whether you have just a few minutes or several hours of blissful creating time this week!

Weekly Challenge :: Scrapbook with Hearts

weekly challenge: scrapbook with hearts @ shimelle.com Full page here in the archives.

So many scrapbooked selfies from last week’s challenge! It really made my week to see new pages pop up there and on Scrapbook like a Superhero every day. But we’re getting very close to Valentine’s Day now, so it’s time for embracing all the pink and red and vintage text and sheet music and other prettiment in paper crafting.

Here’s a new challenge! This week, get ready to get a bit symbolic. I challenge you this week to scrapbook with hearts. Make a new page and include one or more heart shapes in the design. Simple. Everything else is completely up to you, so you can take your inspiration in any direction you like! A few years ago, May shared five ideas for artsy crafting with hearts, and this past summer, I tried using hearts in a relatively masculine design! To get you started on this week’s challenge, take a look at these new examples from contributing designer Heather Leopard and guest artist Chloe Murray.

weekly challenge: scrapbook with hearts @ shimelle.com // layout by Heather Leopard

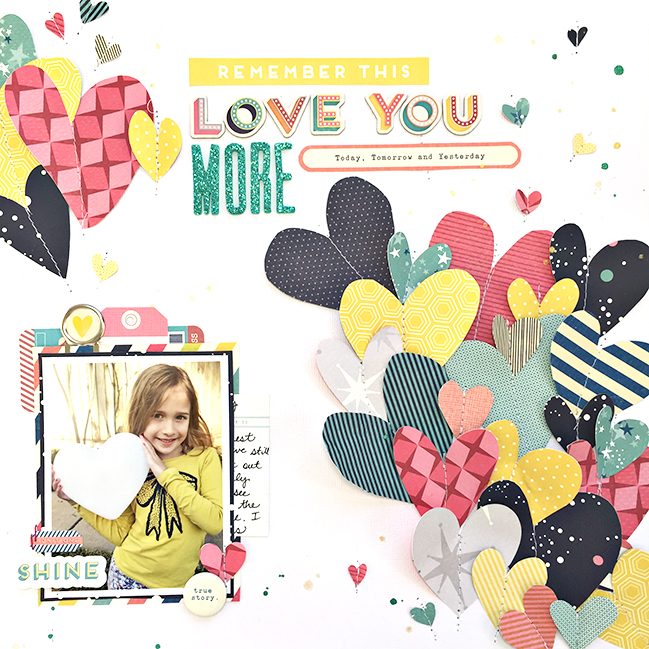
The contest my daughter and I have almost every single day inspired me to create this layout. This is actually becoming a battle and she’s the one who instigates it 99% of the time but that’s okay because the awesome thing is that this competition is a healthy one for us. It’s a battle of who loves whom more. I’ve created pages about this before but I feel it’s important to document this throughout the year since it’s one of those ongoing special things between just us.

weekly challenge: scrapbook with hearts @ shimelle.com // layout by Heather Leopard

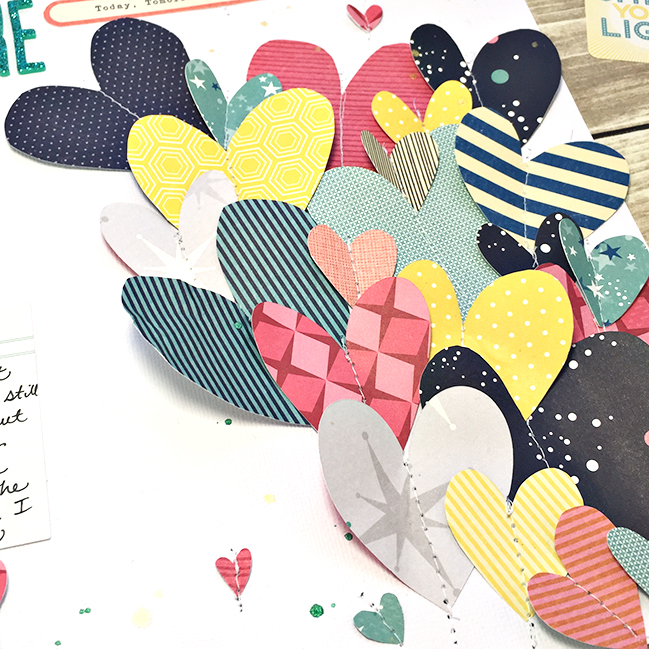
One of the things we talk about is how our hearts are exploding with love for each other so I thought it’d be fun to make it look like hearts were bursting from the bottom of the page. To create this, I started at the bottom and stitched the yellow heart. I then layered another heart on top, stitched it, tucked another heart under and stitched it, etc., etc. until I had all the hearts on the page.

Once the hearts were in place I added layers of paper, die cuts and other embellishments around the photo. I created a pocket under the right side of my photo to insert a journaling tag. I then created my title using a mix of alphas and two sentiments from one of the 12×12 papers.
- Heather

weekly challenge: scrapbook with hearts @ shimelle.com // layout by chloe murray

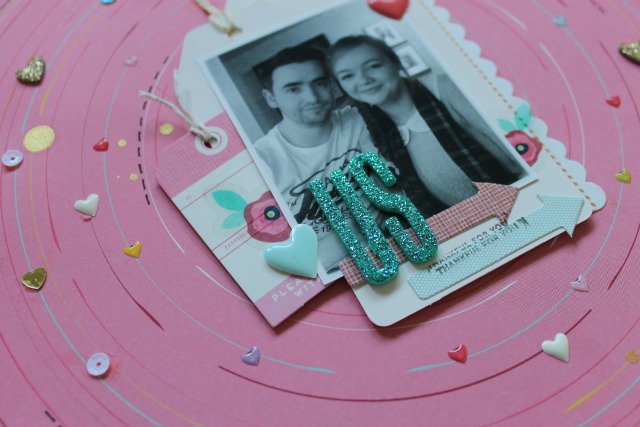
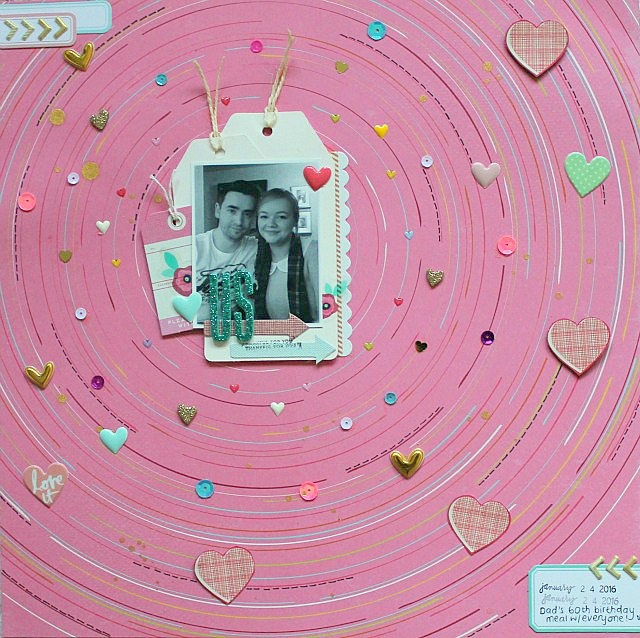
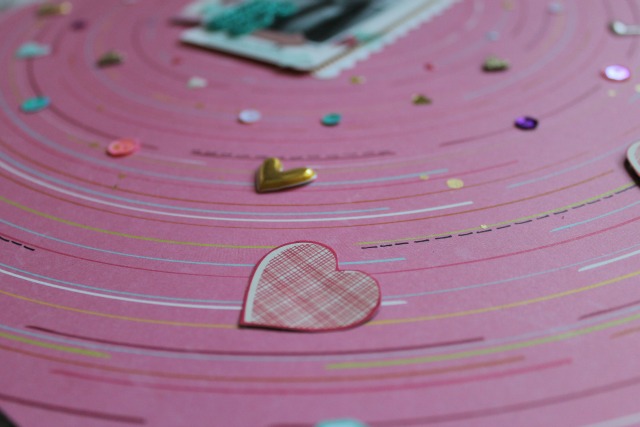
With Valentine’s Day just around the corner, I decided to scrap this recent photo of myself and my boyfriend. I had this wonderful patterned paper from the new Starshine collection just begging to be used as a background, so I decided to keep my photo very small, and really make use of the movement in the paper.

weekly challenge: scrapbook with hearts @ shimelle.com // layout by chloe murray

I layered the photo up on some shipping tags, a few die cuts from the Starshine ephemera pack, and some gorgeous floral stickers from the corresponding sticker sheet. Finally, I cut some hearts from an older Shimelle paper, and combined them with lots of other heart embellishments from my stash; I wanted to create the illusion that the hearts were emanating out from us. I’m really pleased with the overall effect.
- Chloe

weekly challenge: scrapbook with hearts @ shimelle.com // layout by chloe murray


You have a week to complete the challenge and share a link – but of course you’re welcome to set your own time schedule. Whatever keeps you happy and creative!

I’ll see you tomorrow to share how I took on this challenge! Happy heart-filled scrapping!

Today’s Guest Artist: Chloé Murray loves documenting the little things, reading, and her pet bunnies. You can find more from Chloe on Instagram, Twitter, Youtube, and her blog.

We are all made of stardust - scrapbooking with Starshine!

Scrapbook page by Nancy Damiano featuring the Starshine collection @ shimelle.com

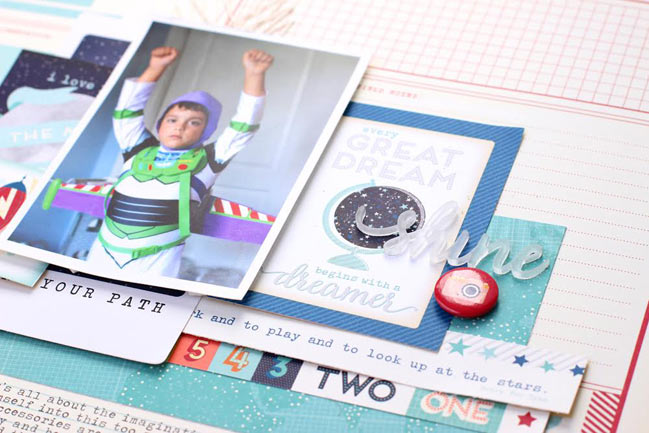
Happy Saturday! With Starshine arriving in stores, now seems the perfect time to round up a few examples to get your design wheels turning. Starshine started appearing on the American Crafts blog too, so we have the AC Design Team on the starry case!

Nancy Damiano (above) is taking Starshine to infinity and beyond. Her pages are always brilliant but she has a special passion for Disney. See the full page on the American Crafts blog.

scrapbook page by Gina Lideros featuring the Starshine collection @ shimelle.com

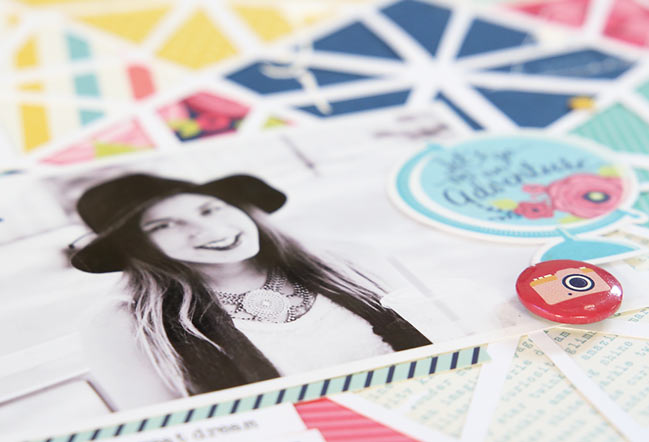
Gina Lideros put Starshine to use with a beautiful full page design cut on the Silhouette. When I see one of those gorgeous full page designs I start to think I should upgrade to the larger size cutter… even though I don’t use my smaller one as much as I should! Anyway: Gina makes me want the bigger Silhouette every time. See the full page over at AC.

scrapbook page by Evelyn Yusuf featuring the Starshine collection @ shimelle.com

Evelyn Yusuf makes that big moon cityscape way easier to use than you might first think. Don’t be scared by it. Just embrace it with one photo you love and it will even work beautifully with a smaller size print. See the finished page here.

I’d love to see what you’re making with the Starshine collection, of course! And I’d love to share it too. If you post your pictures on Instagram, use the hashtag #ACstarshine, and you can always hashtag anything from my product lines or inspired by this blog or the classes with simply #shimelle. I hope to share more beautiful projects with you soon!

Have a beautiful weekend, and if you need a creative nudge, don’t forget about the current weekly challenge.

Scrapbooking with a Woodgrain Embossing Folder

scrapbook page by shimelle laine @ shimelle.com

You may have noticed my sparkly friend seems to be on a bit of quest to use older supplies she loves rather than letting them collect dust. I’ve decided I need to follow her lead with something I am often guilty of ignoring: tools! This week I have used my manual die cutter every single day! There has got to be a merit badge for that. We need more merit badges in scrapbooking, I tell you. Anyway, with the die cutter, I could ease back into fancy tools without needing to dust off every single item I have neglected for a while, so I started with simple shapes and embossing folders. That woodgrain embossing folder! I had so many plans for this folder and then my mind filled up like a fog (a happy fog!) and I’ve probably only used it half a dozen times. For shame! The good news is asked for help and contributing designer Meghann Andrew came to my rescue. Her page inspired mine, and I hope between the two of us, we might encourage you to dust off an embossing folder or two in your own collection.

using the shimelle collection woodgrain embossing folder @ shimelle.com

I don’t know about you, but I own dozens of 4×6 embossing folders, and I rarely pull them out to create something other than the background on a handmade card. Using Shimelle’s woodgrain embossing folder, I’ve come up with an easy way to put those embossing folders to use on my pages, by creating a textured tone-on-tone background for this fun layout about a recent favorite breakfast.

using the shimelle collection woodgrain embossing folder @ shimelle.com

To show you how easy it is to put your embossing folders to use and make this background, I’ve created a video, in which I also finish off the page with embellishments from the True Stories collection.

Thanks for watching! Now I challenged Shimelle to take an idea from my page and put it to work on her own. She had three rules: she had to use the woodgrain embossing folder, she had to include a photo of herself, and she had to do something that she could link to the design of my page!
-Meghann

scrapbook page by shimelle laine @ shimelle.com

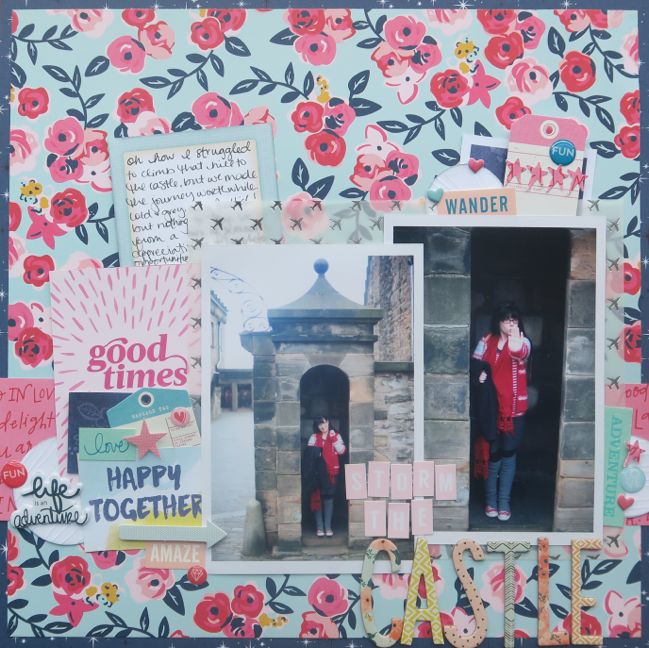
Challenge set. I could do this, right? Found some photos that included me that I needed to scrap (from a weekend in Edinburgh, our last travel as just two before Wonder Boy’s arrival) and dusted off my embossing folder. But I wasn’t ready to go tone-on-tone. I love colour and right now, colour is making me want to scrapbook every day. So whatever I was going to do, it needed to be colourful!

Then I decided to emboss white cardstock. Because that’s colourful. Sure.

But there was method to my madness! I want to take the inspiration from Meghann’s page in the shape – circles!

scrapbook page by shimelle laine @ shimelle.com

I embossed the white cardstock then die cut it into circles to include in some embellishment clusters. There’s a heap of colour happening here – that floral paper is from Jen Hadfield’s new Pebbles collection, and there are cut-aparts from Dear Lizzy and Amy Tangerine too, plus some Starshine tags. Cute puffy stickers by Lora Bailora. So much colour, so much love. But when I stared at all that on my desk, I didn’t want more colour – I wanted more texture. Perfect! The woodgrain embossed circles are a really small detail but it made it one of those pages that people touch when they turn the page in my album. I love that! Plus it’s a gateway drug technique: now that I’ve used a little embossed texture, I want to use more! (In fact I have done a few cards that are due to be delivered to recipients this weekend, so I’ll share those next week I think!) Mission accomplished; challenge met. Thanks Megan!

(One note about visiting Edinburgh when very pregnant: the hills are tall, the hills are steep. We walk a lot here and live at the top of a hill, but this is a whole other class of hill. Walking up to the castle, I was literally passed by an octogenarian with a cane. I was slow-slow-slow. But it was awesome. Of course it was awesome: there are pandas. And if you’re ever there are Christmas, the high tea at the Caledonian is basically twice as cool and a third the price of any London Christmas high tea. But don’t tell London that I just said Edinburgh was better or anything. Even if there are pandas involved. Just wear comfortable shoes, for all that is good in this world. That’s all.)

This weekend only: scrapbooking workshop sale!

scrapbook page with the Starshine collection @ shimelle.com

UPDATE: this sale has now ended. All three class are available at any time, however, at the full price. You can find a link to each sign up page in the text below. If you have any questions, please send me a message so I can help! Thank you for all your support. -S.

Thank you so much for the warm welcome back to more regular posting. I’m so happy to have heard things like ‘I haven’t scrapped in a year but I made a page today and now I’m hooked again’. Seriously, that Made My Day. What you’ve seen so far this week is the sort of thing you’ll see every week here now, with a new challenge every Monday, Glitter Girl always posting a video on a Wednesday, then an assortment of scrapbooking topics on the other days of the week. I hope that balance of a little bit of schedule, a little bit of spontaneity works as well for you as a reader as it does for me at my crafting desk!

Now there’s another post with new pages coming up a little later today, and you still have this weekend to participate in the Scrapbook a Selfie challenge, but I have one little extra for you: a sale! This weekend only you can grab some online scrapbooking workshops at a discount.

The Hitchhiker's Guide to Scrapbooking - an online workshop @ shimelle.com

First, there’s The Hitchhiker’s Guide to Scrapbooking. This is a class I taught at Two Peas and I haven’t had it available to purchase here until today. The Two Peas price was $25 and that’s what it will be here normally, but this weekend you can sign up for $18. The course includes 5 videos, each with a corresponding PDF, with a total of forty-two scrapbook pages found only in that workshop. You can read more about the class in this original post but remember to come back to this post to sign up! While this class will feature supplies that are no longer on the shelf in most shops, it is not a class that relies on you using the exact same products and is designed for you to adapt all the ideas to the stash you already have to hand.

Scrapbook Remix - an online scrapbooking workshop @ shimelle.com

Next up is Scrapbook Remix. Originally taught in 2012, this is a workshop all about mixing product from a variety of manufacturers and collections, with tips on what to look for to find things that will work together. Includes a series of eight videos and twenty PDFs (plus a few little extras), and is normally $25. This weekend, you can sign up for $18. The original post about Remix includes the breakdown of class materials, but make sure you come back to this page to sign up with the discounted price.

Ready Set Scrapbook - an online scrapbooking workshop @ shimelle.com

Then there’s Ready Set Scrapbook. This course came out in the middle of last year and it’s already really affordable – it’s only $8 full price for three videos. This weekend it’s just $5! Ready Set Scrapbook uses the True Stories collection in the examples. You can totally follow the steps with any products and papers you like, but if you have True Stories papers just waiting for you to get cutting and pasting, then watch these videos and have an easy time making pages! You can read the full class details here, then come back to this page to get the sale price.

HOW IT WORKS
All of these classes are in an archived format. When you sign up, you’ll receive a payment receipt through Paypal (you can pay by credit/debit card or from your Paypal account) then your registration will be processed by an actual person (me!) and you’ll receive a second email that welcomes you to class. If you’ve never taken a class at shimelle.com, you’ll receive one more email with your login details for the class side of the website. Once you have the email from me, you can sign in and access all the materials and work through them at your own pace. If you want to chat about anything or ask any questions, I’m just at the end of an email – send me a note or a tweet and I’ll help in any way I can! I aim to make sure you have class access within twenty-four hours of your purchase. If you can’t see an email in that time, let me know so I can get that sorted for you.

Thanks so much for the warm welcome back and I hope your weekend is filled with new happy memories!