


Looking back at Project 365 :: Part One
PART ONE :: Overview and lessons learned
This time last year, I decided I was taking enough pictures throughout the year that it wouldn’t be that much harder to take one every single day. Not of anything in particular, just making sure to snap the camera every day for an entire year. And somehow I made it through. Not perfectly, but well enough to make me pretty happy. In 2008, I took just over 9000 photos on my camera that represent 361 days of the year. Five days missing, but all in all, not a bad record. I’m happy to call that a completed Project 365.
This time last year, I also obsessed by searching the internet for information from others who had taken on similar projects to take photos every day, and I spent hours and hours reading the notes of those who had been there and done that. I learned a lot from those people. So it seems only right to share my experience now for those of you who are considering the project this year. Everything I can think of right now is represented here in three parts: Lessons Learned, Keeping Things Interesting and Projects for a Scrappy 365. I also wrote an overview article for Scrapbook Inspirations Magazine in the January issue, which is on newsstands in the UK now. (Go get it! What are you waiting for?!) You can download the article here. Right then…lessons learned.
When I started this project, my logic was mostly that I was already taking thousands of photos a year, but there would be a few stretches of the year that wouldn’t appear in pictures at all. I used a great many excuses to be lazy about taking pictures…excuses like ‘the lighting is rubbish’ or ‘I’ll see all these people again next week’ or ‘people will think I’m a freak if a take a picture right now’. With that new year resolution energy in my head, I decided 2008 would be a year to get rid of those excuses and take even more pictures. I was pushed along by the wedding concept…it seemed like snapshots leading up to the wedding would be interesting, as would a photo a day for the first year of marriage. With the changes and challenges that the last few months have given to pretty much everyone, we’ve found ourselves going through lots of things that we joke will make good stories to tell grandchildren. The kind of stories that keep you humble and grounded and thankful for what you have. Not quite walking barefoot in the snow to school, uphill, both ways…but things we will remember. Things that people weren’t thinking about so much a few years ago: strategy plans for the ‘what-if’, budgeting more and more carefully, paying more attention to the news and letting it all make some sort of sense. So the lessons learned start there: these are things I couldn’t have predicted at the beginning of 2008, but they are life-changing moments that I now have documented in pictures. I’m sure 2009 will be no different and things we can’t even fathom right now, both good and not so good, will happen to many of us between today and the thirty-first of December. Committing to a picture every day—no excuses—means capturing all those details and remembering more from our own meager meanderings through life. It’s not like the idea of daily photo documentation of one’s life is a hard sell to a scrapbooker anyway, really. This is what we’re all about, isn’t it?

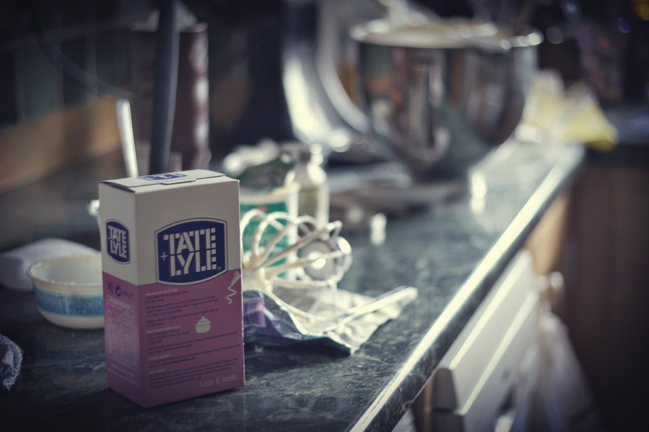
The other lesson is one that makes perfect sense but I still didn’t really see coming: it’s just how much I came to know how my camera works. I’m not saying that those 365 photos made me into some superstar behind a camera. They didn’t. But they changed the way I looked at my camera itself. My first photography instruction came in a part time course through my high school’s journalism program, so we are talking a little bit of instruction and a long time ago! Of course that was film and film had an expense, so the idea was to learn to shoot safely, so no shots on the roll were wasted. It made sense with film, and I learned things that were and still are very important—an understanding of exposure, of ISO, of aperture. But this was well before the days of cameras that do things for you—we shot on all manual then because it was the only option on the camera! (Yes, typing this is making me feel very old.) Somewhere between those days and 2007, I still had a limited understanding of how to use all that on my modern day camera. I wasn’t using the fully automatic mode, but I had a tendency to lean on the modes that gave me partial control and let the camera do the rest. After Cheryl’s masterclass gave me a bit of a kick, I found myself wondering why I was doing that lazy thing at all. I wasn’t happy with the photos that I was getting from that, so why hadn’t I changed earlier? It’s that old adage—if you do what you’ve always done, you’ll get what you’ve always got—my pictures weren’t going to change until I got over the fear of fully manual. And tell me, what exactly was I afraid of? It’s digital—so there’s no expense of shooting extra pictures. With a photo every day, I had plenty that were shots that could easily be recreated, rather than needing the perfect timing of a once-in-a-lifetime moment. So who knows why I was afraid. So 2008 was the year that I started learning the ins and outs of my camera by trial and error. Take a picture, change a setting, take it again and compare. With every dial, every button, every combination I could find. I had read my camera manual before all this but the trial and error approach is what really made me learn what everything would do. Once I got confident with all that, this was (and is) the same approach I’ve applied to learning Photoshop. I could do the basics. I paid for way more than that. For both Photoshop and my camera! So it was time to starting working both for what they really were worth, and this attitude has really paid off. I remember those shots from the first week of January, like this one, and thinking they were great. Now almost make me cringe. And if today’s photo makes me cringe a year from now, that’s good in my book. It’s all about progressing and learning and getting better and better at something you enjoy. It’s the kind of learning that has no pressure, because really there is nothing wrong with that shot from last year. I don’t have to be upset that I ruined a photo opportunity. I’m just happier now, and this entire concept makes Project 365 worth it.

The last lesson was a practical one: I needed a system to make this project work for me. I think the ideal system would be different for all of us, so I’m sharing mine just as an idea. The important thing is to have something that works for you…this is what worked for me. I needed a workflow that kept things from piling up and kept the energy and fun of the project, so I separated it into daily or near daily, weekly and monthly parts.
Daily
Take a photo. Well, obviously.
Near Daily
Transfer photos from camera’s memory card to my computer. I organise my photos in iPhoto, so it automatically sorts, orders and groups the photos by date.
Immediately delete anything that is rubbish or entirely duplicated. (Repeat to self: I do not need thirty-seven photos of that coffee cup today.)
If I took more than one photo for the day, choose the picture that will be the photo for the day and mark it by using the star ratings in iPhoto.
The photo file will automatically have the date attached in the exif data, so you don’t need to do anything to save that. But I also used iPhoto’s description field to add any additional information I would be likely to forget—locations, names of people if I hadn’t met them before, that sort of thing. If you haven’t discovered this field in iPhoto, it can be a lifesaver—click on any picture to select it, then look at the bottom left corner of the screen. That’s where all the info is displayed and you can type straight into it.
Weekly
Do any editing to the seven photos of the week.
Save them in a special folder on my computer so I have them backed up and all in one place.
Monthly
Upload the images from that special folder to an online printing service. I have a photo printer at home that is perfect for how I scrap because usually I like to print the photo and scrap it straight away once I’ve had an idea, but with these photos I knew what I was going to do…it wasn’t an spontaneous layout exercise. And my photo printer is lovely but not economical. Ordering pictures in batches online is far, far cheaper and it’s super easy. I use Photobox, and if your photos are ordered before 3 to 4 in the afternoon, the pictures arrive the very next day by first class post. Can’t fault that in any way! I ordered one copy in 4×6 of these photos, one month at a time. (If you’ve never used photobox, send me an email and I’ll send you an invitation email that earns each of us fifty free prints! Ace!)
Scrap them in a low-stress way. Each month would take me a handful of hours to scrap. I wanted a format that would be easy and not cost me much. (More about the specifics of this in part three.)
And that was (and is) my system. It works for me because things don’t build up to a point where I feel like I have to dig myself out. No part of this process involved hours and hours and hours of catching up. Everything stayed nice and light, which made it all doable.
There is one step that I tried to implement and I didn’t keep—that was uploading to Flickr. I love Flickr and thought I could easily upload a photo a day there, but that part just didn’t make it into the time I wanted to spend on the project. I still uploaded a lot of photos to Flickr in 2008, but my set of images for Project 365 looks like I gave up pretty early on. It is still something I’d like to do and it doesn’t take a lot of time, but it was just enough that I decided I could cut it free from my workflow for the sake of keeping things on my terms. It worked for me.
I’m not saying there weren’t moments where I was close to giving in. I had to do some things to keep things from getting old and boring. So more on that in part two: keeping it interesting.
xlovesx
![]() Read more about:
Read more about:
Next post: Looking back at Project 365 :: Part Three
Previous post: Crafty Christmas :: Tia's Holiday Journal


