paper: Cut, Stick, Stamp :: Card & Scrapbooking Ideas for a Teacup Stamp | pretty paper. true stories. {and scrapbooking classes with cupcakes.}
lovely to meet you Twitter Facebook Pinterest YouTube

Take a Scrapbooking Class

online scrapbooking classes

Shop Shimelle Products

scrapbook.com simon says stamp shimelle scrapbooking products @ amazon.com shimelle scrapbooking products @ amazon.co.uk

Reading Material

travel

Cut, Stick, Stamp :: Card & Scrapbooking Ideas for a Teacup Stamp

Cut, Stick, Stamp :: Card & Scrapbooking Ideas for a Teacup Stamp by Shimelle Laine @ shimelle.com
For so long, I’ve had the mantra that I must use at least as much as I buy – preferably more – in terms of scrapbooking supplies. But somehow I forgot my mantra entirely while taking that break More than once or twice, I convinced myself if I placed an order for new supplies, I’d find a way to scrapbook.

It may have taken me a few hours to open those parcels and find my desk recently. It’s shameful. My immediate plan is to get out of this surplus situation with a new stack of layouts into albums, a file of cards ready for all occasions, and perhaps even catching up on Wonder Boy’s Project Life baby book. And so Cut, Stick, Stamp is born: one of the new series I’ll be sharing here with projects and videos. It’s a pretty simple concept – multiple ideas for one stamp. I’m starting with a Studio Calico stamp I couldn’t ignore: this Alice in Wonderland Tea Party set by Emily McDowell.
Cut, Stick, Stamp :: Card & Scrapbooking Ideas for a Teacup Stamp by Shimelle Laine @ shimelle.com

Cut, Stick, Stamp :: Card & Scrapbooking Ideas for a Teacup Stamp by Shimelle Laine @ shimelle.com
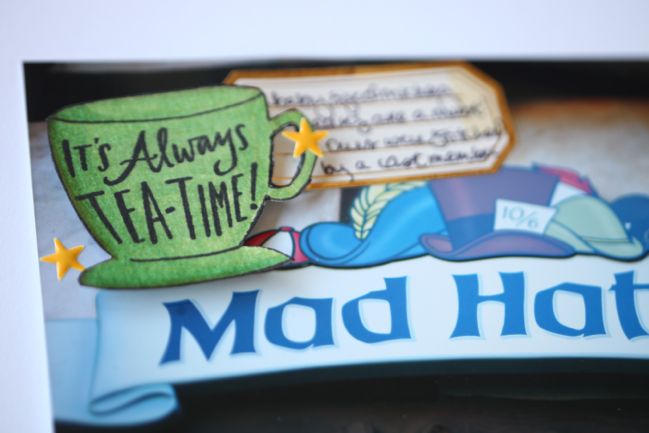
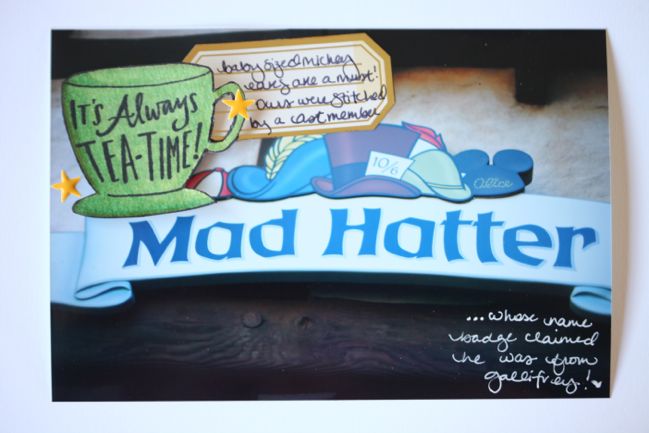
Starting with just the text and teacup outline, I tried a simple photo embellishment shaded with markers. This teacup was coloured with Copic numbers G82, G24, and G99. Simple, quick, and easy to add just a bit of journaling to the empty space of a 4×6 photo to pop it into a divided page protector. But I think this stamp gets a bit better…
Cut, Stick, Stamp :: Card & Scrapbooking Ideas for a Teacup Stamp by Shimelle Laine @ shimelle.com
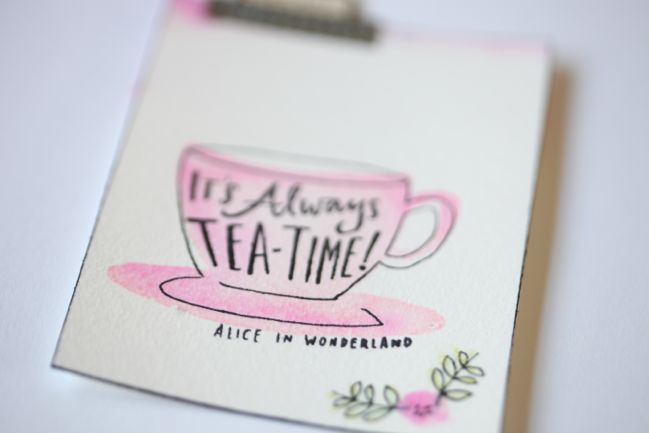
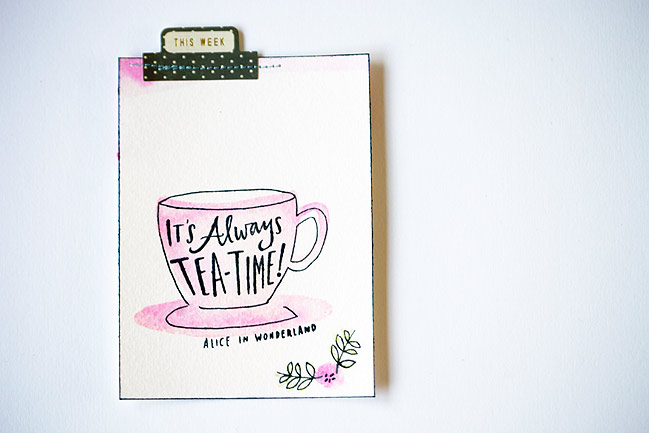
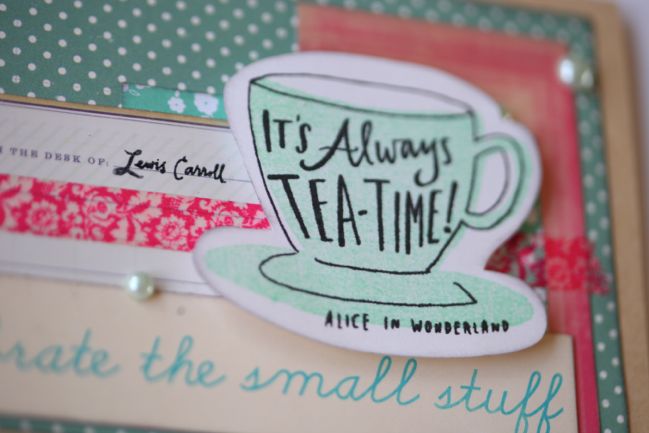
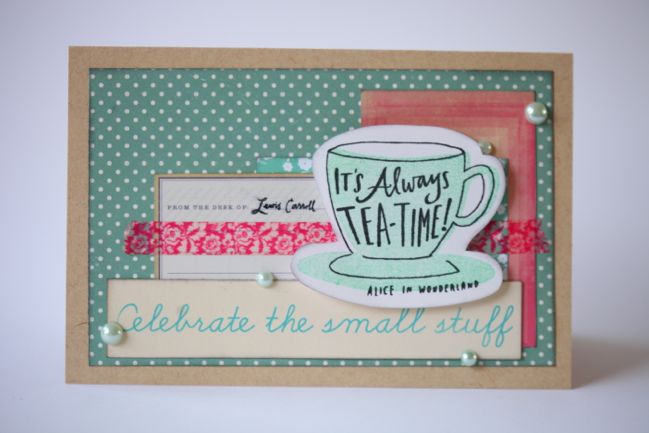
The set also includes a large solid image to create a shadow effect that colours the cup with ink. Sets that include a solid shadow and a coordinating line drawing are always my favourites! This 3×4 card is cut from watercolour paper, with the cup and text outline stamped first (using waterproof black ink) then the shading stamp added with two shades of pink Distress Inks. For this card, I added a bit of the same watercolour shades to the top edge and some of the small flower stamps in this set, plus a label and some stitching, but the video below shows the same stamping technique step by step for use on a 12×12 page.
Cut, Stick, Stamp :: Card & Scrapbooking Ideas for a Teacup Stamp by Shimelle Laine @ shimelle.com

Cut, Stick, Stamp :: Card & Scrapbooking Ideas for a Teacup Stamp by Shimelle Laine @ shimelle.com
Same idea, but quicker and less fuss: stamping the block image with a paler ink rather than adding any water to things. Just an even colour rather than the more delicate shading with the Distress Inks and water. Other supplies on this card include Cosmo Cricket patterned papers, Dear Lizzy washi tape, adhesive pearls, and a Crate Paper label sticker.
Cut, Stick, Stamp :: Card & Scrapbooking Ideas for a Teacup Stamp by Shimelle Laine @ shimelle.com


My first video in a long while – I think it will take me a few to find my pace again! So you may need a hot beverage to make it through the twenty-two minutes or so, but it does include the Distress Ink watercolour technique in detail (and it’s easy, I promise). I realised after filming that my narration assumes you make the leap with me that things that are vaguely Alice in Wonderland themed should include some things that are upside down. I’m not sure if that is something that makes sense to the world or only the scrapbooker inside my head. Moving right along then…
Cut, Stick, Stamp :: Card & Scrapbooking Ideas for a Teacup Stamp by Shimelle Laine @ shimelle.com
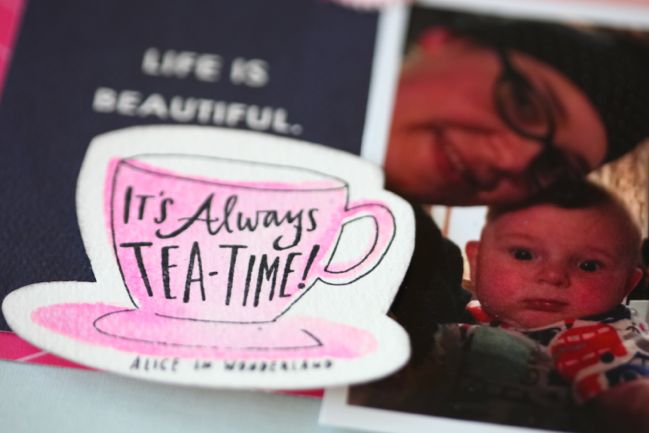
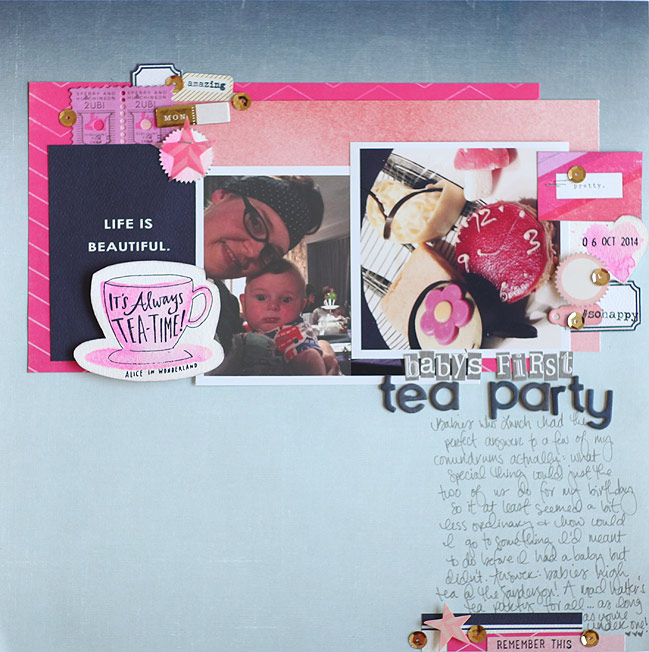
And yes, that is an Alice in Wonderland themed tea party put on entirely for babies. It was mind boggling, and included a tiny drink me vial that changed flavours mid-sip. And Wonder Boy spent most of the party trying to drink my rhubarb and custard flavoured tea. Anyway: back to the crafting.
Cut, Stick, Stamp :: Card & Scrapbooking Ideas for a Teacup Stamp by Shimelle Laine @ shimelle.com

Cut, Stick, Stamp :: Card & Scrapbooking Ideas for a Teacup Stamp by Shimelle Laine @ shimelle.com
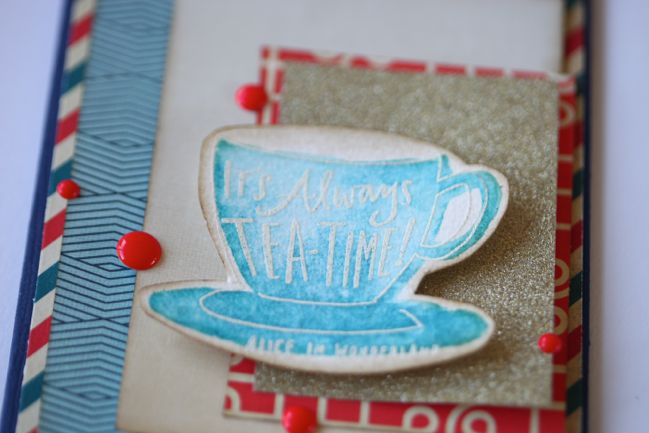
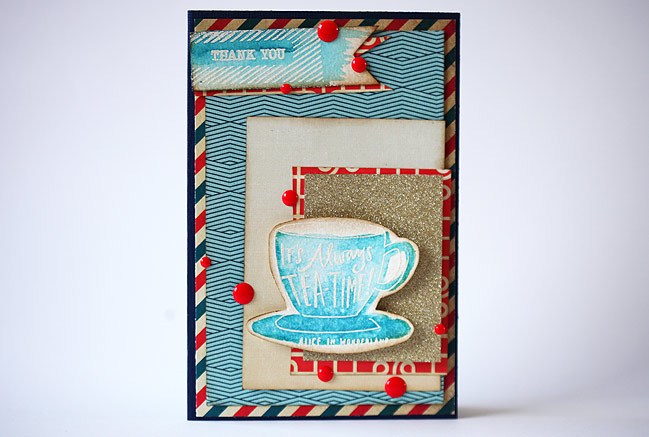
One last card with the same sort of idea, but much bolder in colour and the addition of embossing powder in place of black ink. This was still Distress Ink, just two shades of blue, and the steps are still in the same order – I stamped the outline and text in Versamark then embossed with white powder before adding the blue. The stamp at the top is an older Studio Calico design from a kit with different sentiments, and most of the papers here are from the Pink Paislee Solstice collection.

My aim is to try this with a different stamp set most weeks, so if there is a particular stamp set or technique you want me to try, do let me know! Likewise, if you’ve shared anything with this stamp set or similar techniques and different stamps, I’d love to see. I am definitely in that soak-up-the-inspiration phase of diving back into something you love, so links and tags are even more welcome than usual! Share away, and have a lovely day!

10 March 2015


Related Posts with Thumbnails

28 Comments for Cut, Stick, Stamp :: Card & Scrapbooking Ideas for a Teacup Stamp

  1. Barbara Says:

    It’s so good to watch your videos again.

  2. Crystal Says:

    Shimelle, I think you definitely made great use of this stamp set. I love the different ways you have used it and you layout is stunning. Lovely colors and design.

  3. Lynz Says:

    Welcome back, Shimelle! I have SO missed your videos – I have been cheating on my Scrapbooking with those minxes Quilting and Knitting the last few years. Your wee bits of film always (without fail!) make me want to get out the paper and embellies. Thank you!! x

  4. Nancy Jo Says:

    Great idea for a series. I’m looking forward to lots of inspiration from your wonderful projects. Very fun video.

  5. Martha Says:

    Hello Shimelle! So happy to visit with you again. You are an inspiration to so many people. I think I need to adopt your mantra about using supplies.

  6. Maureen Says:

    absolutely beautiful

  7. Therese Says:

    Great video and techniques. Would love to see you use Tim Holtz’z “Crazy birds” set. they are so much fun but I could use some additional inspiration.

  8. Leslie Says:

    Welcome back! I always looked forward to seeing what you ordered. Can you do a video on your current stash?!!! I would do a lot of shopping from those videos

  9. maria s Says:

    It’s so great to have you back! Your video was fun to watch as always. Thanks for showing us how you used the inks to watercolor your stamp. I’m not much of a stamper, but you make it look possible for even me! Thanks Shimelle. Maria

  10. Daisy Says:

    Hi Shimelle,

    So happy that your back! realy mist your video’s. You really inspire me with your layouts! Thank you for that :)

    Greets Daisy
    xxx

  11. MiaScraps Says:

    So glad to see you back! Love the distress ink painting technique. Lovely.

  12. Kim Jackson Says:

    Welcome back!!

  13. KateT Says:

    It’s great to see a new Shimelle video. Watching you create your pages always makes me want to scrap!

  14. Carly Says:

    Thanks for the video. I bought that stamp set a few months ago and just made a little card with it a few weeks ago. So it’s great to see your ideas for the stamp.

  15. Carol West Says:

    Thank you for the ideas, and the fun video visit with you!

  16. Patricia Says:

    I got excited when I saw that you had a new video. Welcome back! Your 4×6 photo love series is a staple in my crafting.

  17. Andrea Says:

    Shimelle, I’m so happy that you are back! Thanks for the inspiration, now I need to go and see where I put this stamp set…

  18. Anne-Liesse Says:

    Oh my goodness!! A second day, a second post, and a video?!?! I am savoring them with a cup of tea as instructed. Thanks!
    Anne-Liesse

  19. berta Says:

    Love that stamp set! And your great inspiration on how to use it. Cant wait to see more of this series. I love to stamp, make may cards, but seldom other than phrases or words, use stamps on my LO’s. So glad to see another video!

  20. Lisa M. Zepponi Says:

    you make me want to go by this stamp! Can not wait to watch your video! I just tried to use distress markers and the flower did NOT turn out as well as your teacup!

  21. Charity Says:

    I can’t tell you what a treat it was to see a new video from you Shimelle! I’m so glad to see layouts including wonderboy and to watch your lovely scrapping process agian. I am THRILLED to see you using stamps like this… I don’t think I’ve ever used stamps like this all at one time but I think it’d be GREAT to give it a try and have things ready to go with images I love using rather than trying to stop and make an embellishment as I’m scrapping each time… if I use my own coloring medium then I can just have colored embellies ready to go! Also I LOVE the way you partially diecut that heart.

  22. Meghan Says:

    So glad you’re back! Great layout!

  23. Becky Says:

    So very thrilled that you are back! Great video and great layout!

  24. Jeanna Cata Says:

    Welcome back! I didn’t know how much I missed you on the blogger scene until I practically devoured your last 3 posts. ;) I’m excited for this new series. Im pretty sure I have my own stamp sets which have been neglected, so this is inspiring. Enjoy your week! ~Jeanna

  25. Jennifer Grace Says:

    Ooh, lots of fabulous projects with one stamp! I love the watercolour-effect. I posted a layout with lots of stamped embellishments, including stamping on linen, last Friday, HERE.

    P.S. a tea party for babies = awesome!

  26. Kimberly Kett Says:

    Another fantastic layout!

  27. Tracy Says:

    Yes, the curse of the mommy scrapper. No time to scrap but shopping counts, right? Then I will be so ready to go when I get a moment. But reality is I will be drowning in supplies. Nice to have you back. Great series idea. Didn’t realize I could do that with my distress inks.

  28. Natalie (QSOgirl) Says:

    Ahh! It is so good to see new videos from you again. I just love watching your process. I’ve been away from my normal scrapbooking for so long, and watching you somehow makes me feel like I can do it. It’s like a warmup, or practice. I have a few other projects on my list first, but I will be making a layout soon! I will be trying to channel you (in a not-weird way, of course) ;-)

Have Your Say


A name and email address are required for commenting. Textile can be used in comments. There are Textile formatting buttons and a help link above the comment area. Please play nicely and hold hands when crossing the street.

You must click to preview your comment first. Be sure it appears as you wish, then click the submit button.
Spammers please just go away.


Textile helpTextile Help