Origami Arrows:: A Scrapbook Tutorial by Marcy Penner
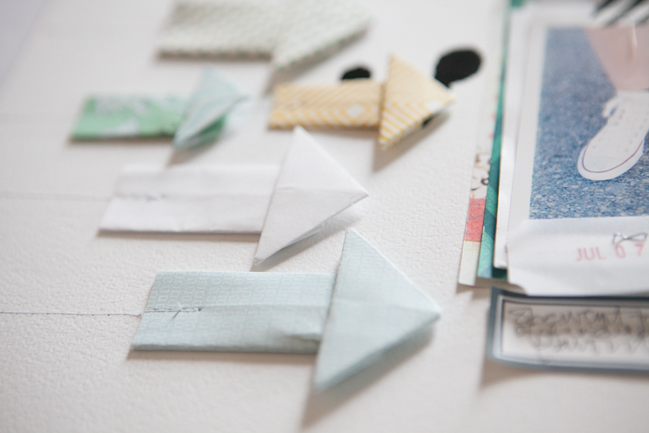
I love using arrows on my projects. There’s nothing like an arrow to highlight something on your page and add emphasis. They’re even perfect as a subtle accent. They work for any theme and are super versatile. They’re truly a workhorse.
I wanted to put a spin on the everyday arrow for this tutorial. Origami arrows, with their added dimension, are the perfect little twist to this favorite embellishment.
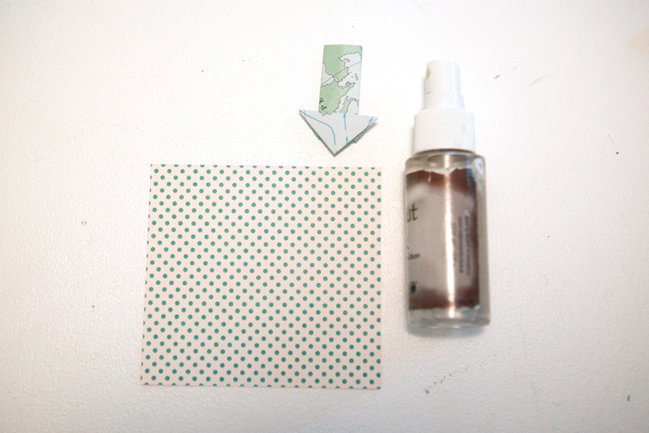
Trim your paper into 3×3 or 4×4 squares. I used both on this layout.
Note: If you’re using origami paper or copy paper you can skip this step.
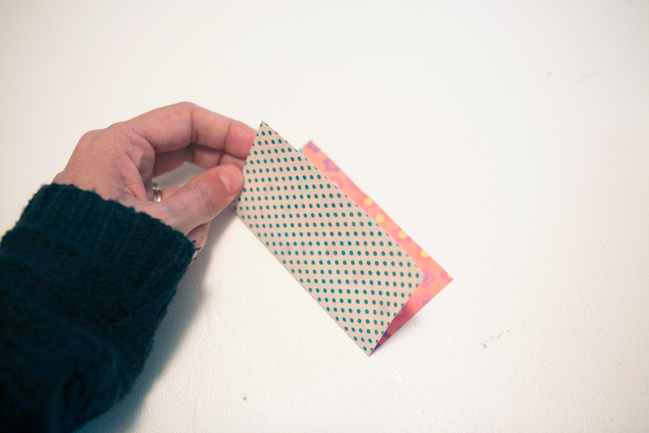
Lightly mist your patterned paper with water. This will make it easier to fold. I misted both the front and back with three spritzes each. Start by folding your square in half. This fold will make a folded line going through the center of your finished arrow. If you do not want this line in your finished product then just fold a tiny bit in the center.
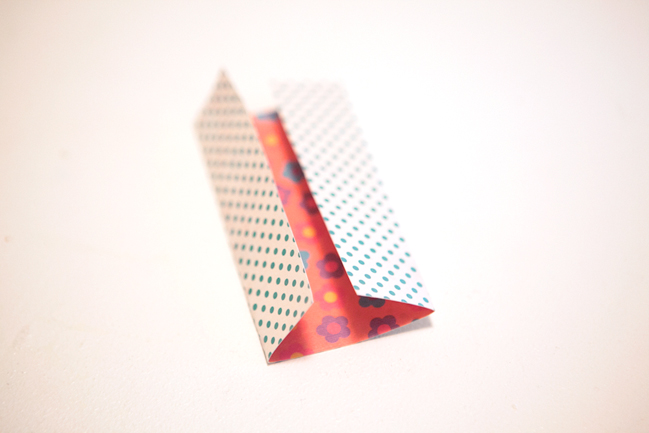
Open your paper back up. Fold the outside edges in so they meet on the folded line you just made.
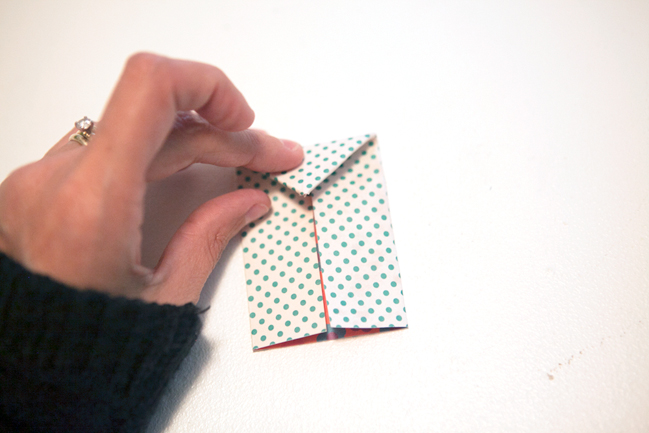
Now take the outside corners and fold them in to the center to make a tip.
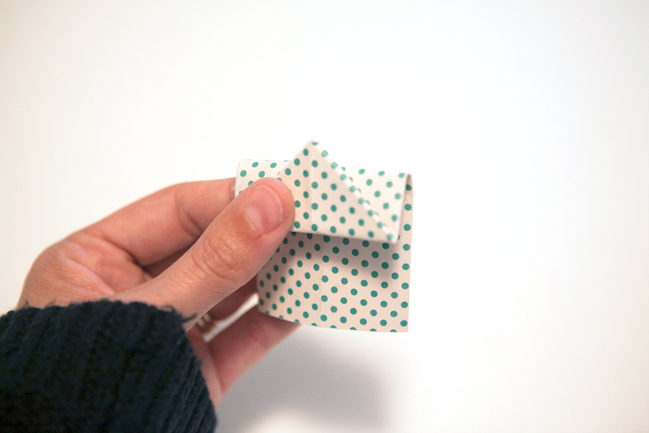
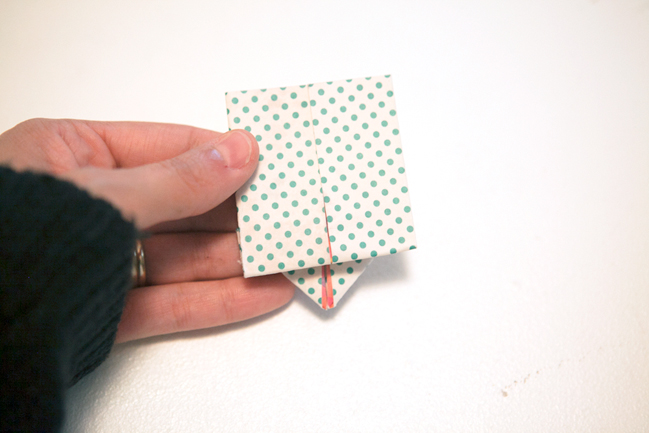
Fold over this entire triangle you just made.
Flip your paper over and fold the large rectangular portion of your paper over so that it reveals about half of your little triangle. Here’s a view from the front and the back.
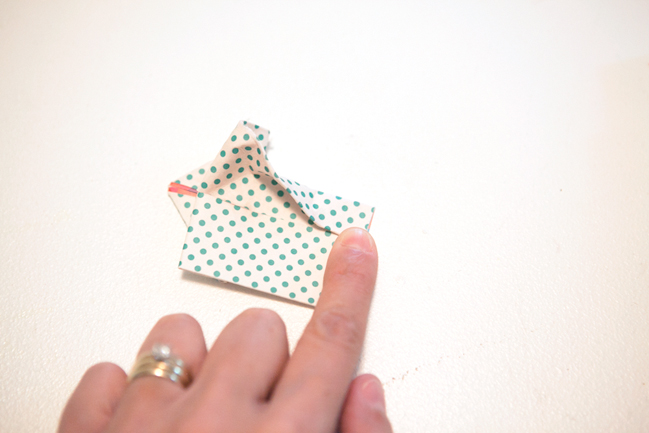
Now turn your shape over so that you’re looking at the back side… the side that shown in the last image. Take the bottom corners and start folding them inward to the center.
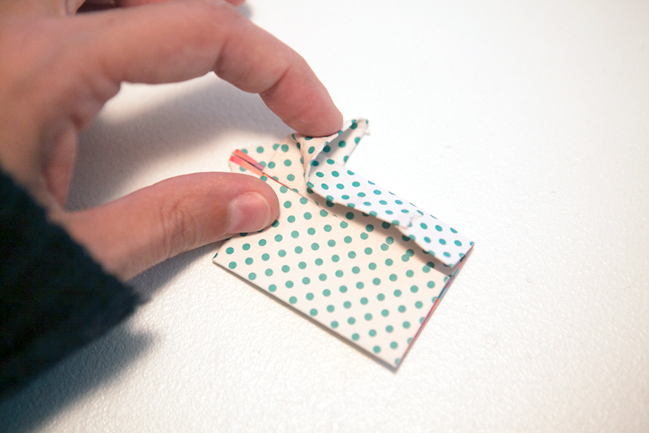
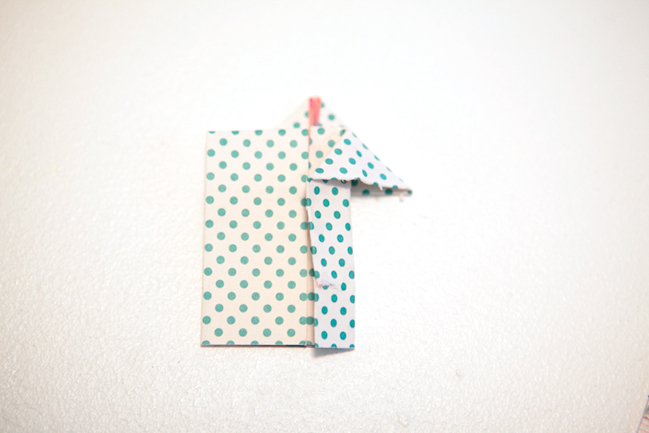
As you do this, find the opening in the sides of the flaps and use your fingers to spread it flat as you fold. Do this on both sides. Flip your arrow over. It’s done!
Feel free to use a glue dot to keep the arrow closed, especially if you’re doing this with patterned paper.
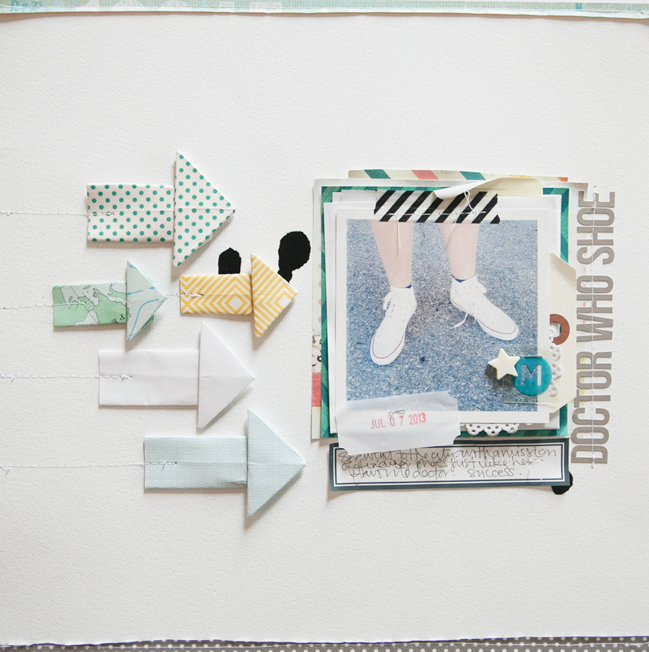
I love the extra dimension they add to my page. Sure, I’ll continue to use my punched paper arrows and my stash of arrow stickers, but it was fun to learn something new and incorporate it on my projects.
Now I’m wondering what an arrow folded with vellum would look like! Or maybe one made with watercolored paper. Guess I’ve got some folding to do.
| Marcy is a self-proclaimed simple girl. She is married to her high school sweetheart and they have three kids. For the last 12 years they’ve been living on the family farm, homeschooling two of their three kids and renovating a 120 year old farmhouse in Canada. Yes. Still renovating! She’s a major homebody so country life is a great fit for her! Back in the day she earned her Bachelor of Education degree, but an artistic life has always been calling her name. She’s always busy doing something creative, photography (sometimes shooting others, but enjoying shooting her own family the most), scrapbooking, decorating… you name it! She loves that scrapbooking combines so many of her hobbies into one! It’s the perfect fit. You can find Marcy at her blog, Hello Forever , and hanging out on Twitter and Instagram. She also design for Studio Calico and is a Garden Girl over at Two Peas in a Bucket. |  |
![]() Read more about:
Read more about:
Next post: Five Ways to use a Grid Design by Jennifer Hufford
Previous post: What You've Been Making!


