Two Sides to Every Story: a Scrapbook Tutorial by Kirsty Smith
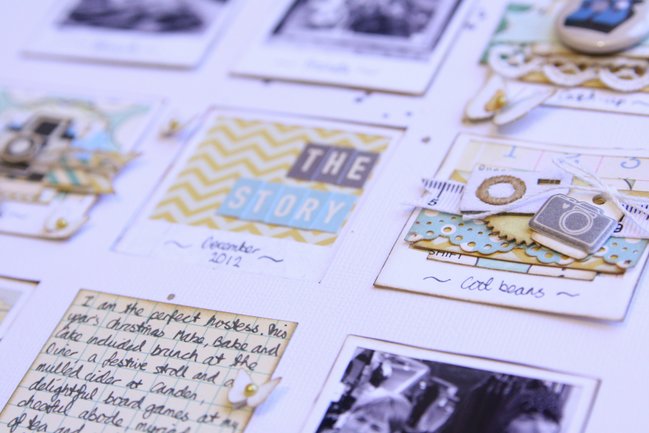
Today I am delighted to welcome a local scrapbooker to the blog! (Bonus points if you just heard the words ‘a local blog for local people’ in your head, by the way. And sorry.) Kirsty Smith is immensely talented and I pretty much love everything she makes. Or writes. Or says on a podcast. She is awesome. But she’s also very British, so I somehow doubt she would go around saying ‘awesome’. So I just did that part for her. I hope you enjoy her story-telling scrapbooking tutorial, and do be sure to check out the great workshop she is offering.
It’s often said that there are two sides to any story. For example, there’s the story of a recent weekend I spent with my friends, when I took them out in London for the day, cooked them all dinner and was generally the hostess with the mostess, right down to freshly-baked cinnamon rolls for breakfast. As a story, it’s technically true, but it lacks, shall we say, the whole truth. The other side to the story is missing. For instance, that story doesn’t explain that I served dessert before the main course, lost ungraciously at board games (and I do NOT lose at Articulate) and accidentally made alcoholic cinnamon rolls.
This tutorial shows you how to put together an interactive page that allows you to share more than one perspective on a memory. The top layer shows the ‘nice’ version of the story of the perfect hostess. It’s lighter and more delicate with pretty little details. There are holes cut into the top layer which show aspects of the page underneath including the photos and the title ‘The Story’.
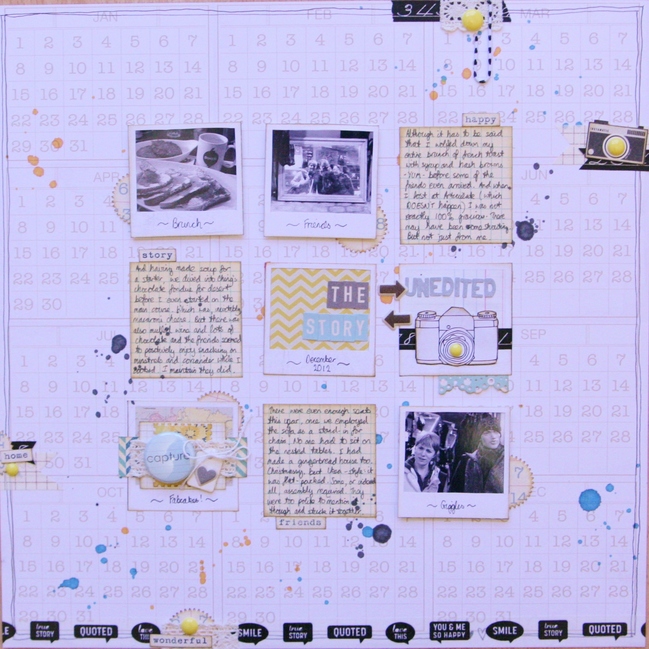
However remove the top page and beneath, on the base page, we find the complete title ‘The Unedited Story’ and different journaling that gives a different interpretation of the same pictures. The basic design is the unaltered but it’‘s a little darker with a touch of grunginess to create a different impression; it’s a little more rough around the edges.
One page unlocks to become two pages with two different angles.
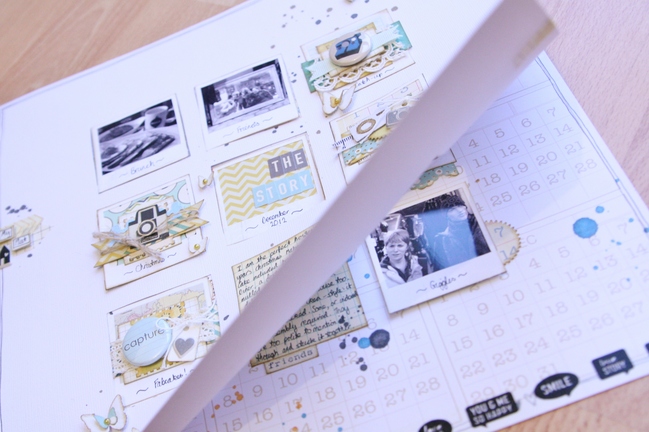
The plan for the two pages is as follows:
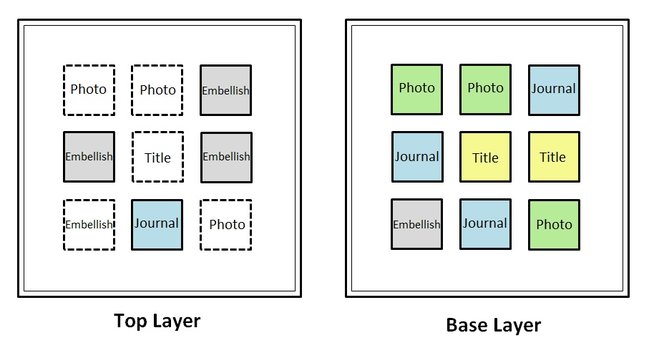
To follow the grid design above, you’ll need three photos, although you can obviously take this idea and vary it to suit your needs! Most important however, is having two different tales to tell drawn from the same pictures. It may be that you have two perspectives of your own, or you may want to ask someone to write down their thoughts when they look at your pictures. You could get the family involved, or ask a friend what your pictures remind them of. You’ll also need two full 12×12 sheets and some assorted patterned papers – a great chance to use up the scraps.
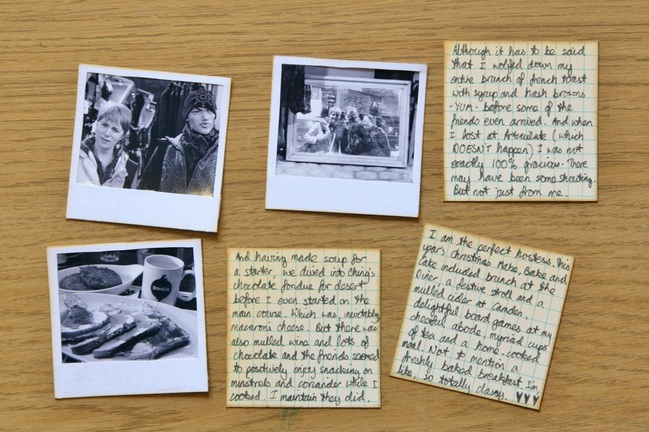
I printed my photos in black and white to ensure that they all matched and mounted them in little polaroid-style frames cut from a sheet of patterned paper.
Then, I used grid-patterned paper to write my journaling: one block for the top layer with the ‘nice’ version of events, and three blocks for the ‘real’ version of the story on the base layer.
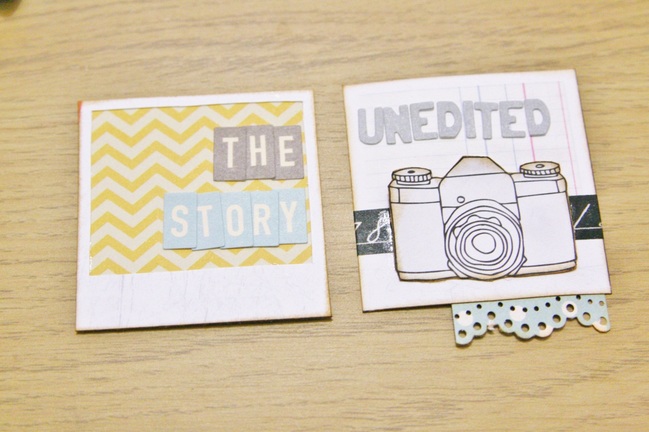
To match the photos, I constructed all the other elements of the page on little polaroid-style squares too. However, any patterned paper squares would work! The title is made up of two blocks: the one that shows through to the top layer which reads simply ‘The Story’. The other is hidden until the top layer is removed to reveal the full page title: “The Unedited Story”.
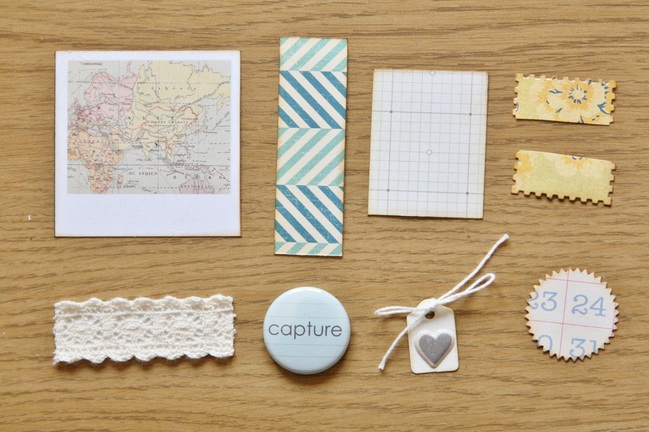
To construct the layered embellishment blocks, I used little bits and pieces left over from other projects. Apart from the backgrounds, I only used scraps to make this page, and punches can be a great way to help you make the most of those little bits you can’t bear to throw away! Mixing the paper with scraps of ribbon and material, and topping with little tags, stickers and buttons creates dimension and texture. It also makes the grid design seem a little less blocky and more fluid.
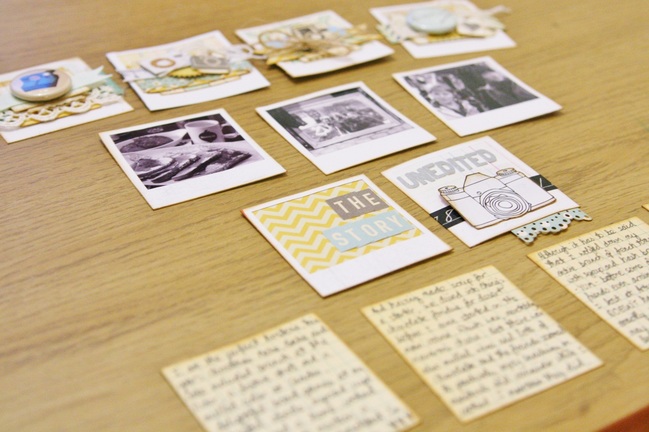
If you’re following the sketch above, when all the blocks are complete, you should have four embellishment blocks, three photos, two title blocks and four journaling blocks. It’s worth remembering that blocks that are on the base layer and won’t show through to the top should be as flat as possible. Then the two pages will fit together and not have lots of bulky lumps and bumps.
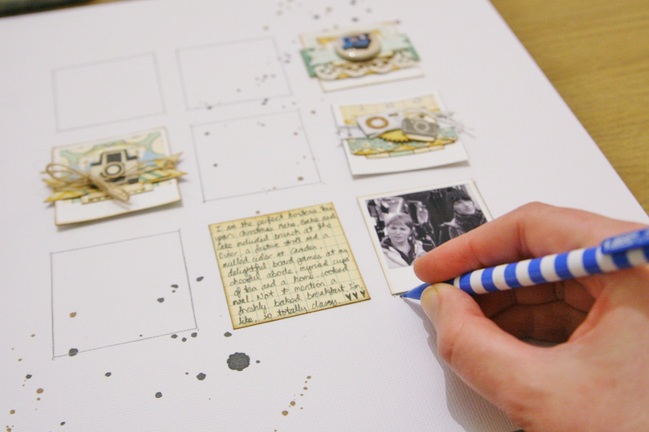
Begin assembling the page by starting with the top layer, and place the relevant blocks in place, including the ones which will show through from the bottom layer. (These are marked with dotted lines on the sketch) If you’re happy with the arrangement, note where everything goes and draw around the ones that will eventually be on the base layer.

If you’re handy with a craft knife, you now need to cut out the five holes where the base layer will show through onto the top layer. If, like me, you aren’t handy with a craft knife, a pair of scissors will work perfectly well.
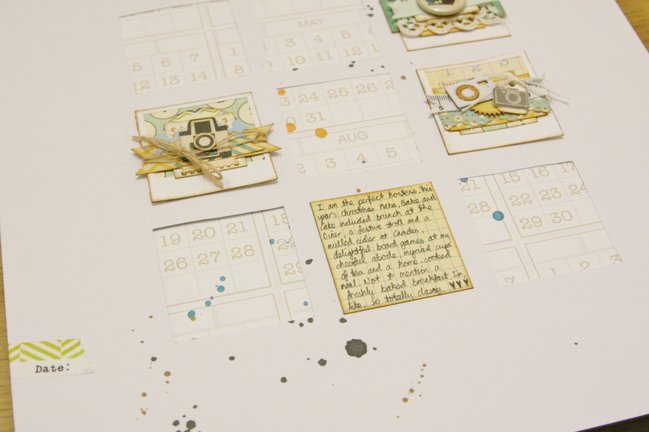
Once your holes are made, attach the relevant blocks to the top page – that’s three embellishments and one block of journaling if you’re following the sketch.
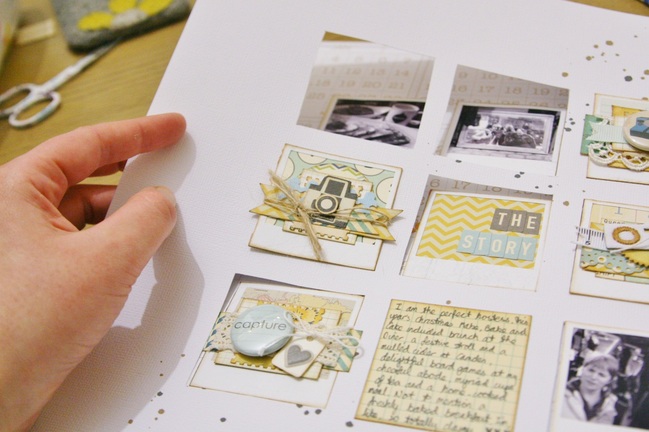
To ensure the two pages will slot together well, make sure that the blocks on the base layer will fit through the holes in the top layer. If you’re happy, position the top layer over the base and attached the blocks through the holes in the top to the base. (That’s three photos, the title and an embellishment). This will enable you to correctly position these blocks on the base layer. You may also wish to pop up the photos on foam squares – they then appear to be part of the top layer rather than seeming to be below the level of the page. Attaching the two layers with something like washi tape first will mean that they stay in place, and you can simply peel off the tape once you’re done.
Remove the top layer and you can complete the base. Adhere the remaining blocks and check one last time that you can combine the two pages into one.
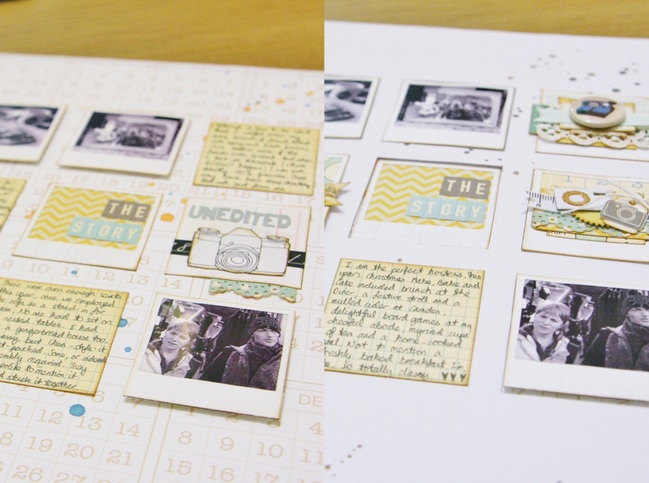
All that remains is to add finishing touches to both pages. For example, I used the same colour scheme on each page, both feature cameras and polaroid frames, and the same grid design. But the top layer has a clean, white background, mist splattered in dark brown and black, and butterflies popped up on foam and embellished with pearls. The soft yellow and blue are emphasized. The base layer has a patterned background, ink splattered in blue, yellow and black, punched shapes and washi-tape. There’s more emphasis on the black and bright yellow in the colour scheme.
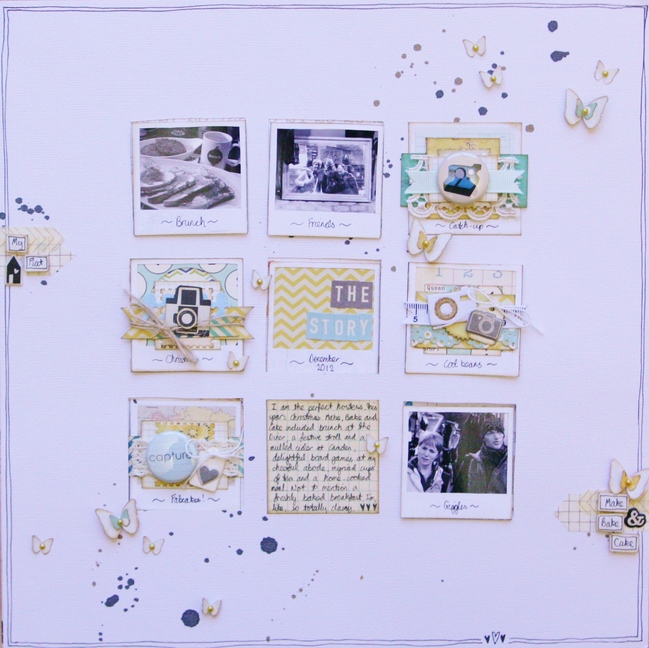
And now get creative! There’s no need to stick to a grid design and there are myriad combinations of stories and pages to tell. All you need is a bit of perspective: remember there are two sides to any story.
| Kirsty is a maths teacher living in North London and she loves to scrapbook and drink tea. If you enjoyed this tutorial, you’d also like her new Scrapbooking class Telling Tales, which is all about sharing memories and getting stories into our scrapbooks. Every penny raised will go towards fundraising for Girlguiding UK and you can find full details here on her blog. You can see more of Kirsty’s projects on her blog journalofcuriousthings.co.uk and she also hosts a scrapbooking podcast, Journal of Curious Things, which can be downloaded from iTunes. And if you’re so inclined, send her an email to journalofcuriousthings@gmail.com. Who doesn’t love getting mail? |  |
![]() Read more about:
Read more about:
Next post: Using Handmade Frames on your Scrapbook Layouts by Mandy Koeppen
Previous post: Best of Both Worlds :: My scrapbooking product picks for March 2013


