Vellum Stamping: a Scrapbooking Tutorial by Jill Cornell
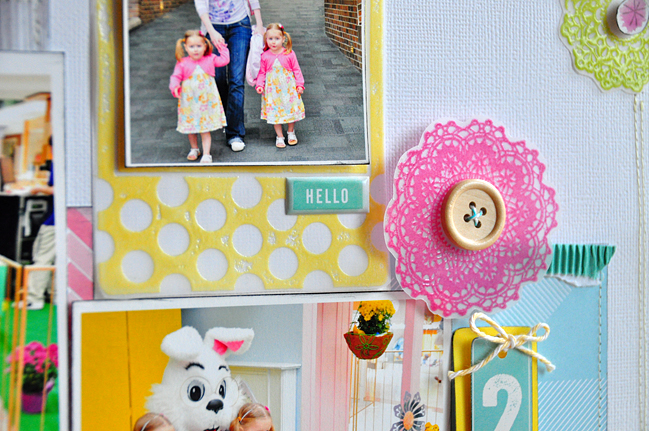
Today, please welcome Jill Cornell, with a tutorial that reminds us all to use those stamps we buy for our scrapbooking! Her stamped embellishments are beautiful. Do share if you give this process a try!
Stamping on projects like scrapbook pages can be intimidating for anyone, but especially for someone who usually creates quick and easy layouts. Like most of you, I have quite the collection of stamps just begging to be used. I am trying to challenge myself to pull out those stamps every time I create even if I only use a couple images or phrases here and there on my layouts.
It can also be intimidating to stamp directly on your projects, especially when there is no guarantee that an image will stamp cleanly and give you the look you desire. Rather than stamp on patterned paper or cardstock, I love the look of stamping on vellum. Vellum provides a beautiful softness to projects. To curb the likeliness of my images smudging from the slick surface, I also like to heat emboss what I have stamped. Today, I’m here to show you how to stamp and heat emboss on vellum!
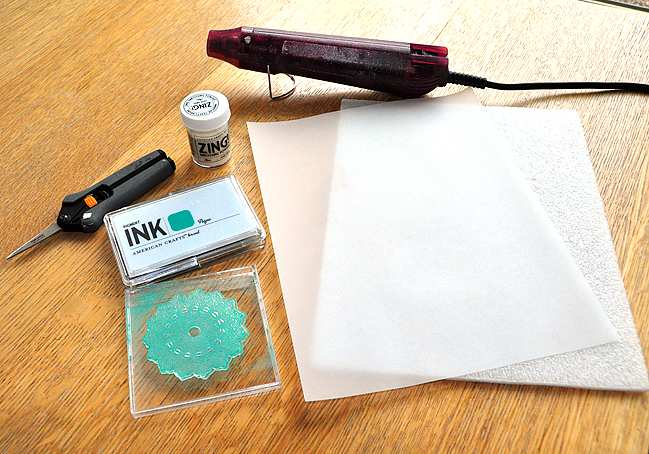
Step 1: Gather supplies.Here I have a foam sheet, vellum, heat gun, American Crafts Pigment Ink in Aqua, ZING clear embossing powder, a doily stamp from My Mind’s Eye, a stamp block, and scissors. I couldn’t find the size I needed so I used a plastic CD-type case instead, which works just fine.
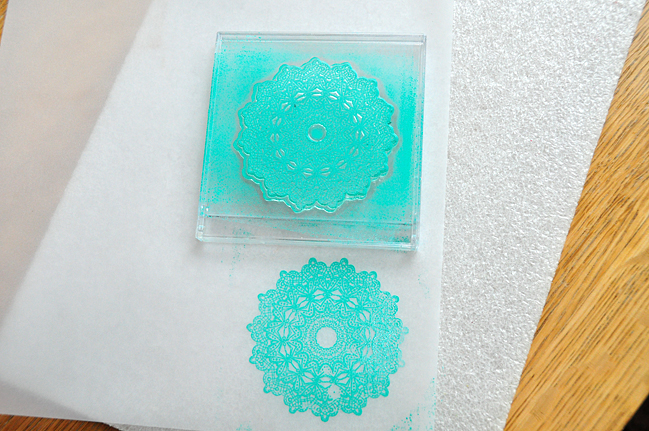
Step 2: Stamp the doily on the vellum. The foam sheet helps the stamp give a little so it stamps cleanly and gives a better impression. Stamp with pigment ink, which stays tacky so you can add your embossing powder. Dye inks traditionally dry almost immediately, so they are not the right choice for embossing.
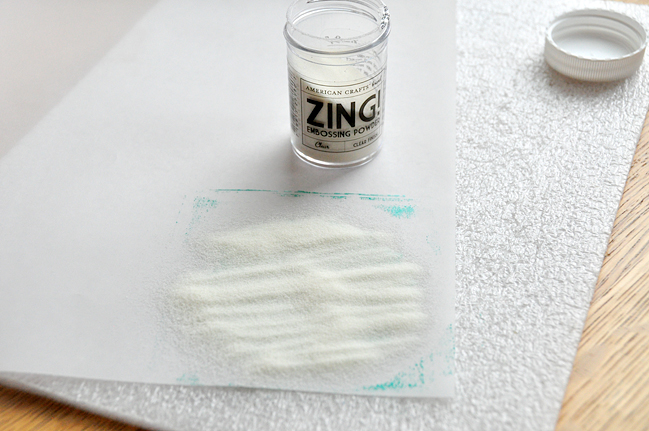
Step 3: Sprinkle the image with clear embossing powder and place the excess back in the jar.
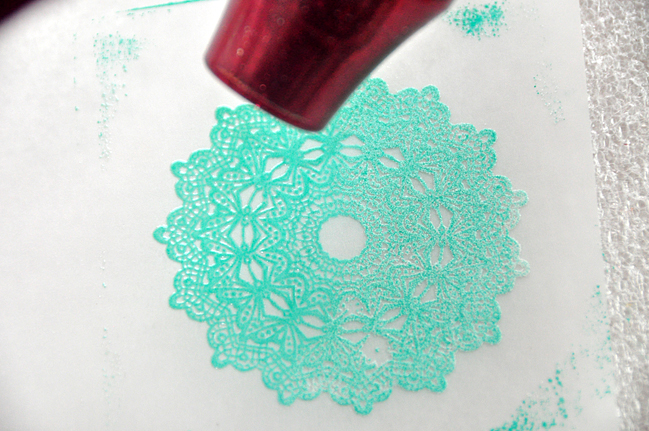
Step 4: Emboss the image with a heat gun. The vellum will melt or scorch if it gets too hot, so move the heat gun quickly and multiple times around the image until the embossing powder sets. It’s better to hold the gun further away from the image and have it take slightly longer to emboss than to zoom in too close with the heat gun and burn your image from trying to go too quickly.
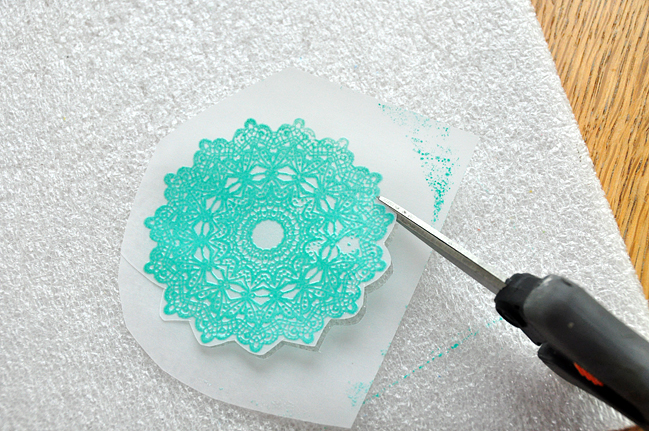
Step 5: Cut around the image and adhere to your project. I placed buttons and stickers in the middle of my doilies so I could hide my adhesive, since vellum is transparent.
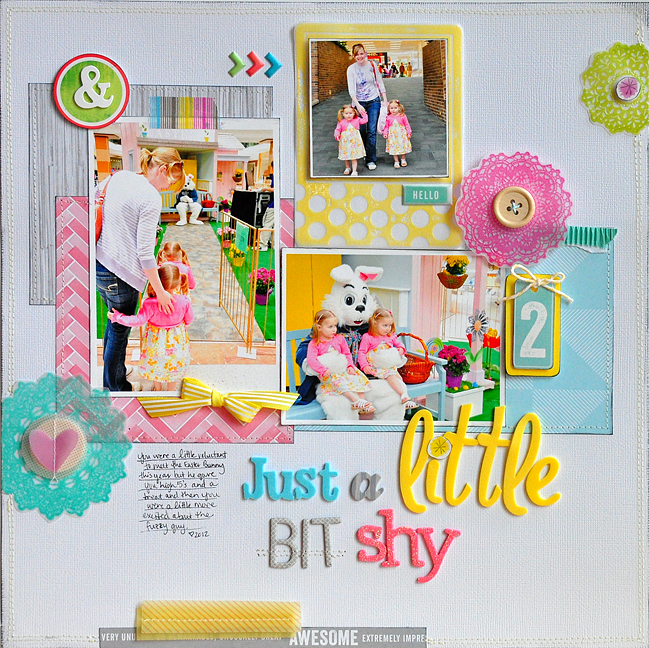
Then put your vellum pieces to use – here is my finished layout! I stamped three different doilies on vellum as well as a Polaroid style frame to hold my square photo.
Try using this technique with phrases and any image you can think of (I’ve tried this technique with leaves for a fall layout). The bright, heat embossed images just add that perfect burst of color!
| Jill Cornell lives with her husband of 9 years and 3-1/2 year-old twin daughters in Windsor Heights, Iowa. She has a degree and career experience in public relations and broadcasting but is now a stay-at-home mom. Jill has been scrapbooking and papercrafting for 10 years and has a soft, shabby chic style that incorporates linear design elements. She loves having girls to scrapbook because it gives her an excuse to use pink and feminine details on her work. Jill is currently designing for American Crafts, Simple Stories, Webster’s Pages, Scrapbook Circle, and Emma’s Paperie. Find more of Jill’s work on her blog, Blessed Scrapper. |
 |
![]() Read more about:
Read more about:
Next post: Gardeners' Digest scrapbooking blog hop (February 2013)
Previous post: Sketch to Card Making:: Using Rub Ons by Julie Campbell


