cupcakes: pretty paper. true stories. {and scrapbooking classes with cupcakes.}

lovely to meet you Twitter Facebook Pinterest YouTube

Take a Scrapbooking Class

online scrapbooking classes

Shop Shimelle Products

scrapbook.com simon says stamp shimelle scrapbooking products @ amazon.com shimelle scrapbooking products @ amazon.co.uk

Reading Material

travel

Gluten-free Peanut Butter & Chocolate Biscotti - inspired by the Bake Off!
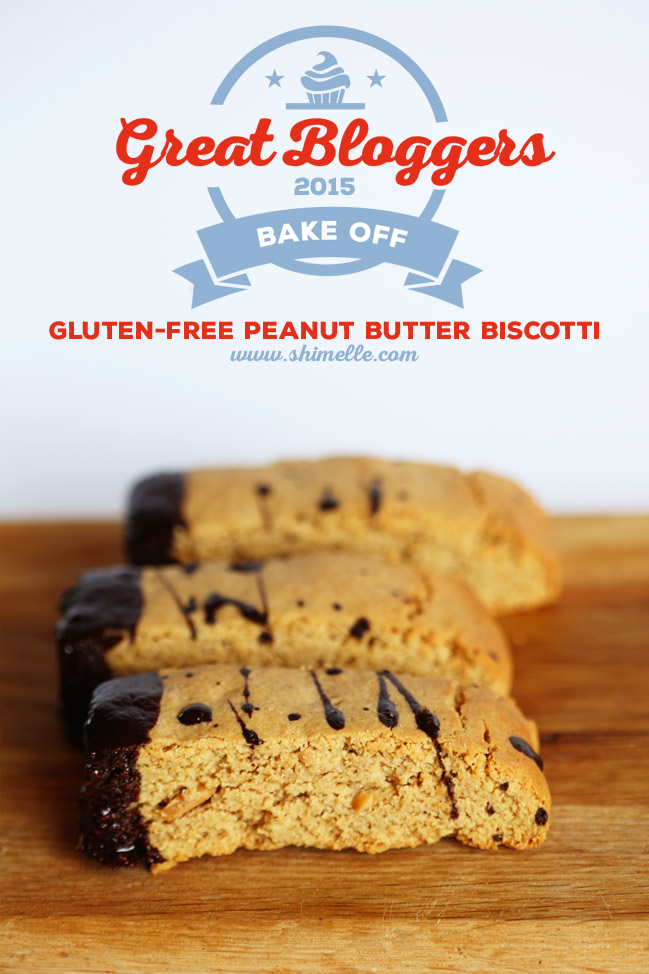
Gluten-free Peanut Butter & Chocolate Biscotti - inspired by the Bake Off! @ shimelle.com

It’s biscuit week for the second round of the Great British Bake Off, a term that is always destined to confuse all the different varieties of the English language. In the UK, a biscuit is what Americans call a cookie. Except when it is also what Americans call a cracker. Indeed. Suffice to say, it is never something served with gravy. Just to make it less confusing all round, I chose the first challenge from the show for my baking this week – biscotti. It’s Italian so we can all agree! Twice baked and found in coffee shops!

Peanut butter and chocolate is a combination I rarely saw in the UK when I first moved here, but it seems to have really gained in popularity over the last few years, and you can even buy an assortment of Reese’s products in our corner shop. There is a still a divide though, and it doesn’t have the classic flavour combination status that it does in the states, so I’m not sure I would have the nerve to bake these in the actual bake off tent in case Paul and Mary were not fans from the start! But I am a fan, so peanut butter and chocolate are always a good thing in my world.
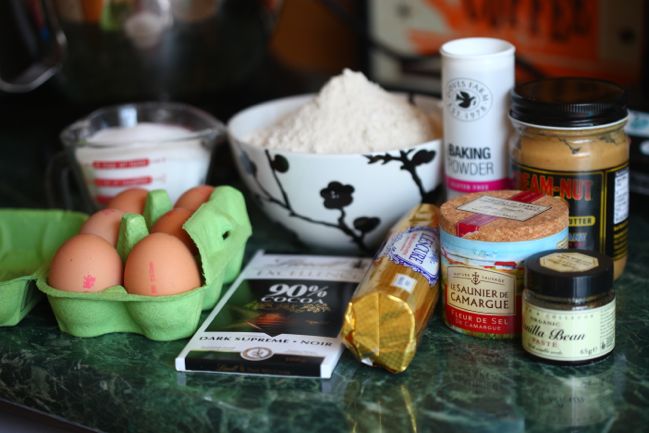
Gluten-free Peanut Butter & Chocolate Biscotti - inspired by the Bake Off! @ shimelle.com

For 24 small biscotti, you will need:
350g oat flour
2 teaspoons baking powder
generous pinch of salt (adjust if your peanut butter contains lots or little salt)
100g unsalted butter
225g peanut butter
215g sugar
1 teaspoon vanilla paste (or 2 teaspoons vanilla extract or one vanilla pod scraped)
3 large eggs
100g chocolate

Preheat the oven to 180C.

Combine oat flour, baking powder, and salt in a bowl and set aside. (Same caveat for the oat flour still goes – check the labels and be aware of your specific sensitivities! I’ve been using Bob’s Red Mill oat flour and getting good results, but your needs may differ of course.)
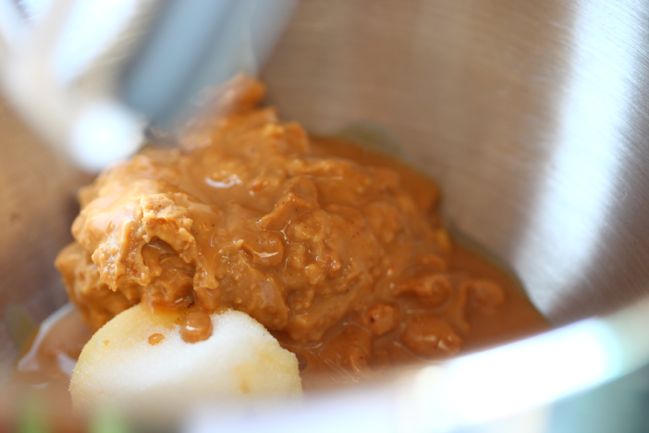
Gluten-free Peanut Butter & Chocolate Biscotti - inspired by the Bake Off! @ shimelle.com

Combine butter, peanut butter, sugar, and vanilla in the mixing bowl. I ended up using half crunchy and half smooth peanut butter because the crunchy we had was a bit extreme, but I reckon the Bake Off judges would probably have liked it better that way actually! Cream these together with the mixer.
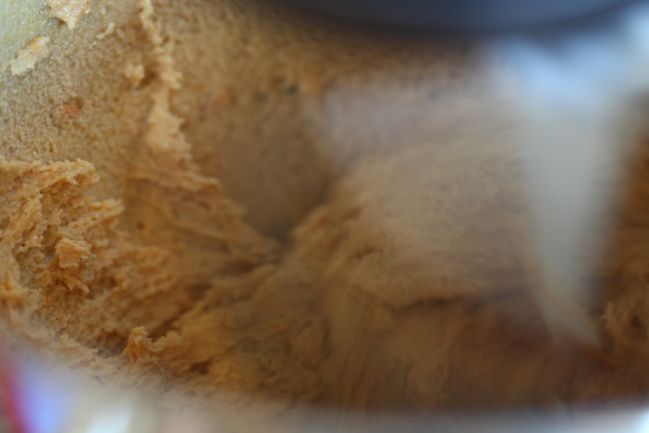
Gluten-free Peanut Butter & Chocolate Biscotti - inspired by the Bake Off! @ shimelle.com

Huzzah for mixing. Mix, mix, mix so it gets fluffy and lighter in colour. Lots of air will open the texture and keep the peanut butter from creating a heavy, stodgy biscuit.
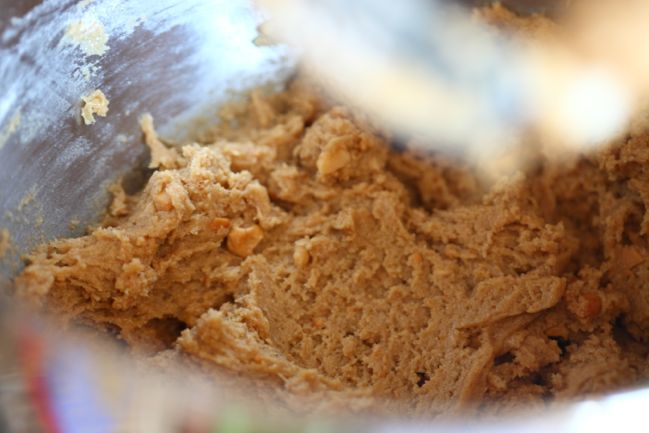
Gluten-free Peanut Butter & Chocolate Biscotti - inspired by the Bake Off! @ shimelle.com

When you’re done mixing that into lovely peanut butter fluff (which smells pretty awesome to a peanut butter fan), stir in each of the three eggs by hand, then add the dry ingredients from your bowl and combine until it’s all lovely and even. It will be a pretty thick and dense dough and should not be wet or drippy.
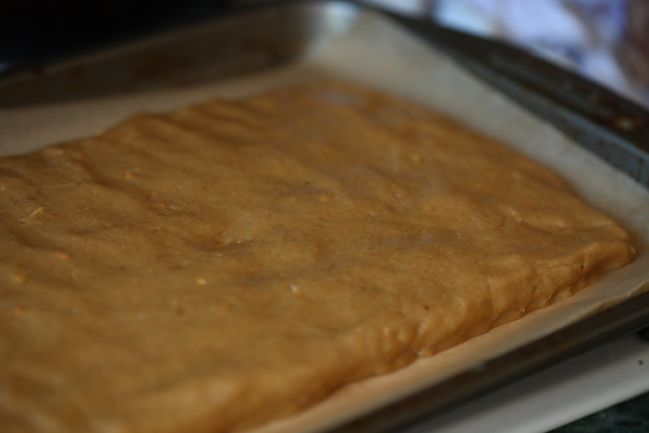
Gluten-free Peanut Butter & Chocolate Biscotti - inspired by the Bake Off! @ shimelle.com

Line a baking tray with parchment or a baking mat and turn out the dough. Form it into as even a rectangle as possible!
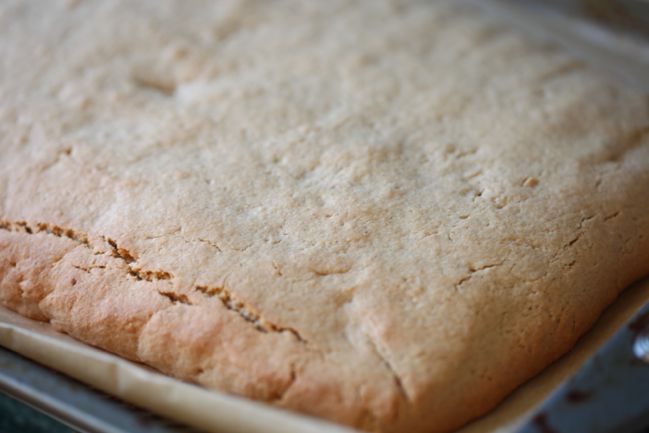
Gluten-free Peanut Butter & Chocolate Biscotti - inspired by the Bake Off! @ shimelle.com

Bake at 180C for 25 minutes, then remove and turn the oven down to 140C. Give the big rectangle a few minutes to cool, then cut into twenty-four smaller rectangles – one big slice on the horizontal then twelve on the vertical, removing the teeny edges on the far sides. Because it is clearly important to taste-test at this point, I’m sure. Transfer to a wire rack if you’re stuck for time and need it to cool quickly or you live in a land of humidity and leaving them on the pan would let them soak up too much moisture. But leave them on the pan and just cool for longer if you are likely to drop them all on the floor in the process. Not that I have done that. No, of course not.
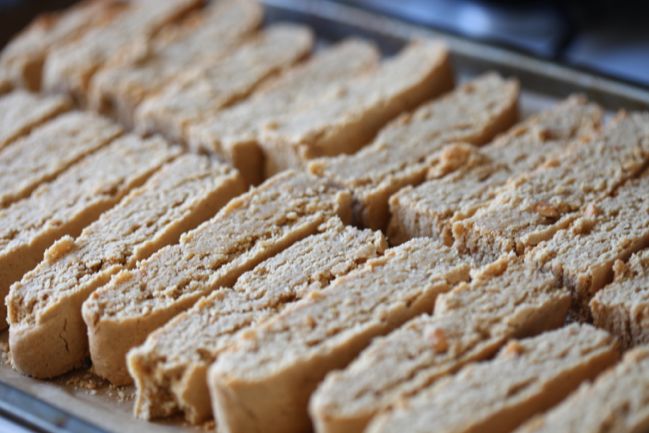
Gluten-free Peanut Butter & Chocolate Biscotti - inspired by the Bake Off! @ shimelle.com

Once cooled, it’s time for the second bake. I do this in three sets of eight minutes – eight minutes flat, eight minutes flipped on one side, then eight minutes on the other side. I have no idea how much this actually helps and how much is just a mental need for balance. Judge appropriately.
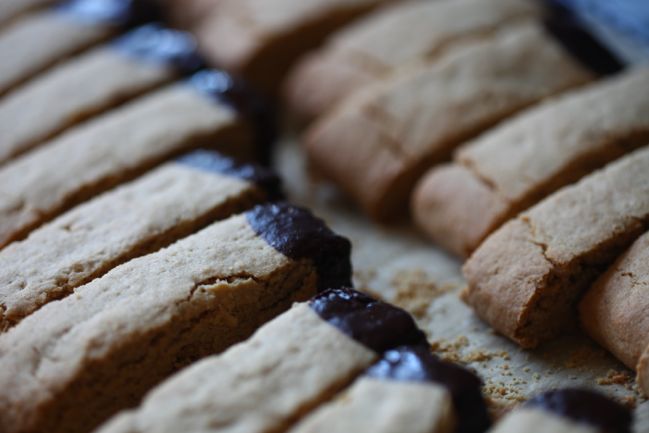
Gluten-free Peanut Butter & Chocolate Biscotti - inspired by the Bake Off! @ shimelle.com

Let them cool again (for good this time) and melt the chocolate. We like ridiculously dark chocolate in this house, so I used 90%, but I have to say it is a bit of a shock if you’re used to dark chocolate being more like chocolate chips, which tend to be somewhere between 65% and 75%. Whatever chocolate you choose, melt in a glass bowl then dunk one end of each biscotti and return to the wire rack.
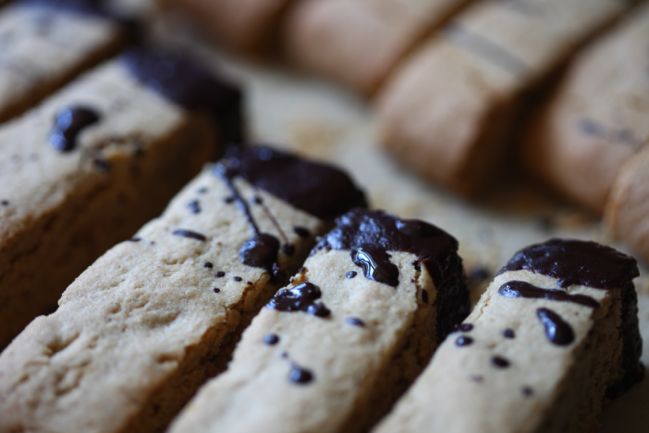
Gluten-free Peanut Butter & Chocolate Biscotti - inspired by the Bake Off! @ shimelle.com

And finally, the step that is most like scrapbooking – use the remaining chocolate on a spoon to dot and drizzle, a process that is much like flicking Mr Huey’s mist over a finished page and hoping it goes well and also coating your crafting table in the process. There may or may not be chocolate dots all over the cooker at the moment.

Best served with a hot beverage, but these aren’t so crunchy they’ll break your teeth on their own, so you’re safe if you prefer them with a lemonade this time of year.


Great Bloggers Bake Off is organised by Jenny at Mummy Mishaps. See more bloggers’ biscuits this week at participating blog, All you Need is Love and Cake.
Please no spoilers from the actual show in the comments, for those who watch later than the original broadcast! Thanks.

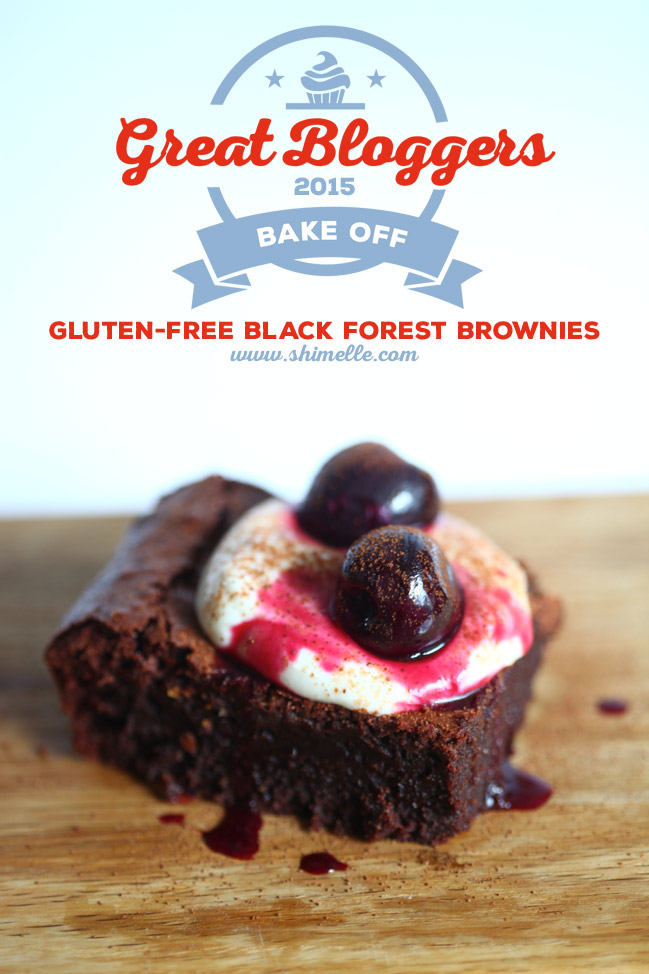
It's Bake-Off Season! Gluten-Free Black Forest Brownies

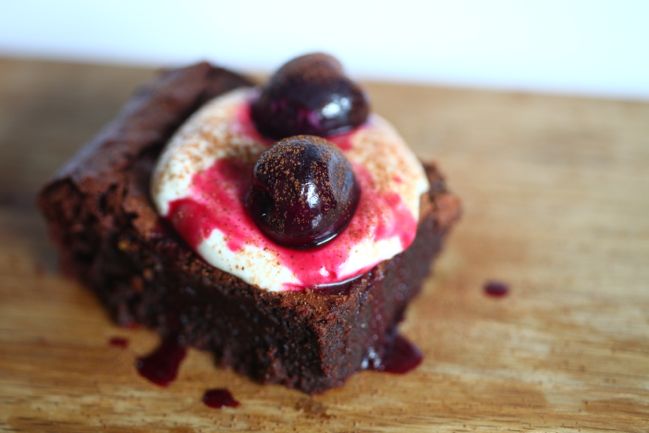
Gluten-Free Black Forest Brownies inspired by the Great British Bake Off @ shimelle.com

It’s August, there is a tent filled with Kitchenaids in a field somewhere, and I find myself saying ‘who cares that the flat is already 28 degrees C? Let’s preheat the oven!’ This can only mean one thing: Great British Bake Off is back! Last summer, my challenge in the blogging version of the Bake Off was just to figure out how to bake something, anything as I found a new rhythm. This year, my challenge is to bake things I can actually eat! Gone are those glory days when I was fine with flours of all varieties and tomatoes that still smelled like a garden were my number one summer craving. I mentioned it briefly in just one post earlier this year, I think, but for whatever reason I’ve developed some new issues with food, and quite a few things I love now give me hives. Hives! Hives are not fun and give me a sad face. But not eating cake for possibly the rest of my life also gives me a sad face. After a few months of making progress by following a ridiculously strict diet that had no allergens at all, I tried various things again one at a time, to see what was causing the dreaded hives and it turns out that my biggest offenders are gluten and nightshades, so that’s most cake and bread right out the window, as well as tomatoes, peppers, chilies, aubergine, and white potato. (Random trivia: sweet potato is an entirely different family of plant and causes me no trouble! Huzzah.) This combination is a little bit extra annoying because most items you find in those lovely gluten-free sections of a store do so by replacing the wheat flour with potato flour. Still a sad face.

All that means I am baking again. That gives me a happy face indeed.

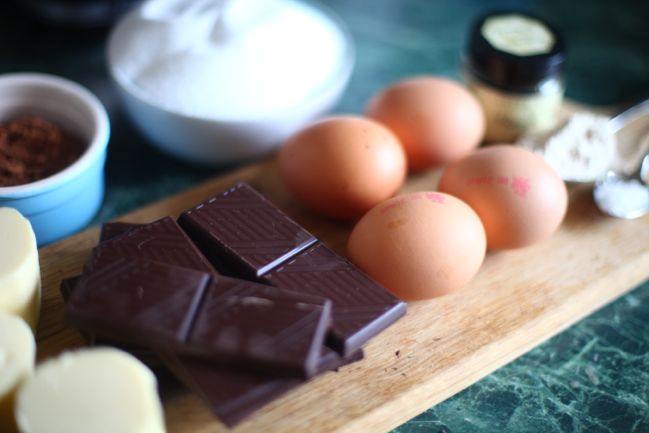
Gluten-Free Black Forest Brownies inspired by the Great British Bake Off @ shimelle.com

For the blogging version of the Bake Off, we choose something inspired by the baking in that week’s episode to make in our own kitchen. Cake was the first theme, with the three rounds including a madeira, a frosted walnut layer cake, and black forest gateau. I have never made a madeira and had never really heard of one before living in England, so I was quite tempted to go in that direction, but I’m afraid the pull of chocolate, whipped cream, and cherries was too much for me. I’ve been wanting to pin down a reliable gluten-free brownie recipe, and a black forest topping is simple enough to dress it up. Gluten-free Black Forest Brownies then!

For the brownies:
180 grams unsalted butter
225 grams dark chocolate (I used 72% cocoa solids)
340 grams sugar
4 large eggs
2 teaspoons vanilla extract
3 tablespoons cocoa powder
2 tablespoons oat flour (please see note below)
half teaspoon salt

For the black forest topping:
300 ml whipping cream
1 or 2 tablespoons sugar
1 teaspoon vanilla extract
fresh cherries

Gluten-Free Black Forest Brownies inspired by the Great British Bake Off @ shimelle.com

Preheat the oven to 180 C.

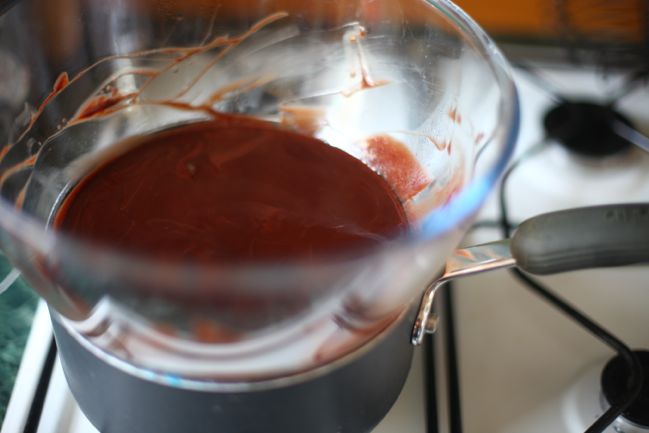
Simmer some water in a saucepan and top with a mixing bowl (if you have a stand mixer, it can be handy to use that bowl but mine doesn’t sit well in any of my saucepans, so I use a glass bowl and the hand mixer for this type of recipe). Melt the butter and chocolate. Years ago someone told me to not stir much while you melt chocolate because it can disturb the flavour and make the cocoa go gritty. I have no idea if it’s actually true, but I try to follow that, and just scrape down the sides with a spatula.

Once that is melted, reduce the heat and gently stir in the sugar. Adding the sugar while there is still heat allows all the granules to dissolve so you have a smooth texture rather than the grit of sugar. The grit of sugar bothers me enough that I use caster sugar for any recipe that calls for normal white sugar. It dissolves easier and has a better texture. I store it in a canister with my spent vanilla pods, so it’s like those fancy expensive vanilla sugars at the store but much simpler and cheaper.

Gluten-Free Black Forest Brownies inspired by the Great British Bake Off @ shimelle.com

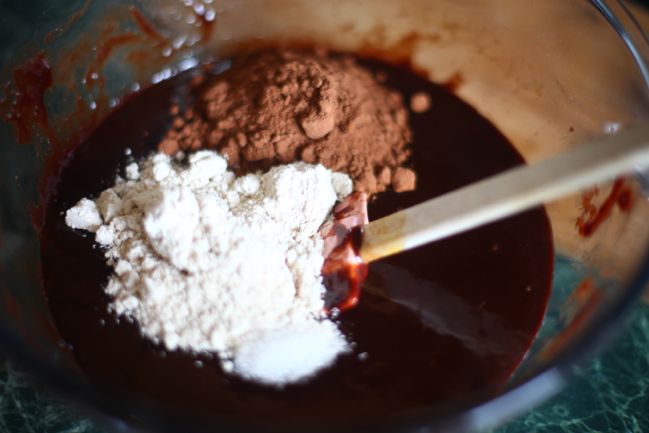
When it hits that smooth texture, remove from heat entirely and leave to cool just a moment so the batter isn’t so hot it will cook the next ingredients. Stir in the eggs, one at a time. (Again that’s a texture thing. You can put them all in at once and it’s not the end of the world. It will still bake. But the texture is smoother if you add them one by one.) Then add the vanilla, cocoa, oat flour, and salt. I’ve been using a vanilla bean paste lately that is easier than scraping out a vanilla pod for every recipe but has a richer flavour than just extract. The oat flour could be swapped for other kinds of starch, I’m sure – so you could use normal flour if you aren’t worried about wheat, or you could use a gluten-free blend if that’s what you have in your kitchen, or even corn flour should work. I’ve been having good luck with the oat flour from Bob’s Red Mill. Salt is another thing that has variations. I wouldn’t have believed you until a friend studying cookery in Paris brought us a little tub of Fleur de Sel as a gift and it really did make a difference between salt being a flavour and salt bringing out the flavours you’re putting into the dish. M&S food hall does a nice and affordable one in the international highlights section now. Yes, I probably will buy into any food hype. Admitting it is the first step, right? Onward.

ETA In response to one of the comments below, I just wanted to address the oat flour and basically say if you’re baking with food sensitivities, be sure to read the packaging and be aware of your specific requirements. I’m not a coeliac and am in no position to give any advice like that. The gluten-free products I’ve been using have more information on their labels that would be useful, and this quick summary about gluten (which doesn’t occur in oats but is often added to products like porridge oats and oatmeal) and avenin (which does occur in oats). Know what works for you is probably good advice on all fronts!

Gluten-Free Black Forest Brownies inspired by the Great British Bake Off @ shimelle.com

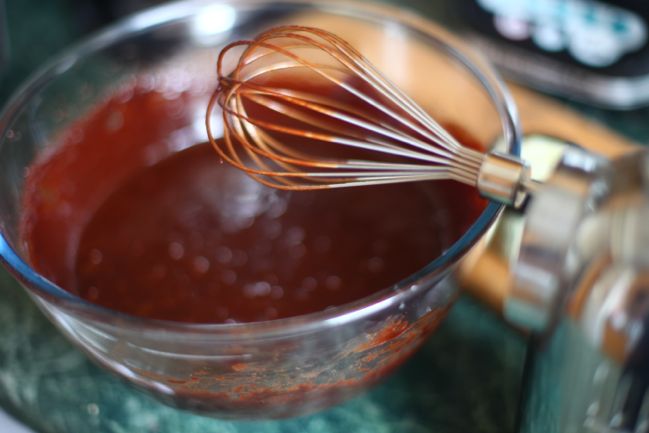
Give that a stir so it’s incorporated and not going to send cocoa flying around your kitchen, then go electric and spin it up with a whisk for a few minutes. There is no raising agent, so you want to get some air in there, and you should notice a point where the texture of the batter thickens and starts to fall away from the edge of the bowl a bit. That leads to rich brownie goodness!

Gluten-Free Black Forest Brownies inspired by the Great British Bake Off @ shimelle.com

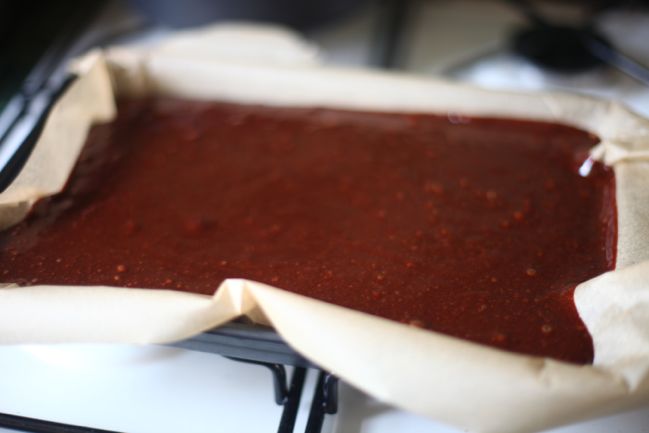
Pour into your tin, either greased or lined with parchment. My brownie tin is about 9×13 inches. Bake at 180C for about 30 minutes, though I start checking it at 25. Don’t leave it until a toothpick comes out clean, as that will be a dry and crumbly brownie.

Gluten-Free Black Forest Brownies inspired by the Great British Bake Off @ shimelle.com

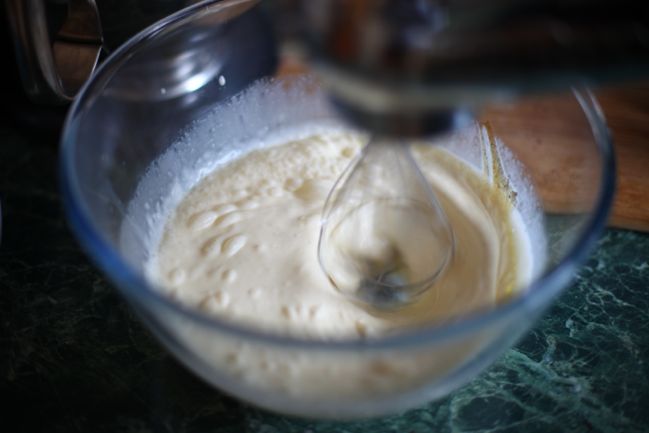
While that’s in the oven, mix up some fresh whipped cream. You’ll need that electric whisk again! I recommend this run down if you need a detailed look at making your own whipped cream.

And cook up the cherries! Wash and remove stems and stones, then simmer in a saucepan. If they are very sweet, they won’t need sugar. If they are past their prime, add a bit of sugar as needed. For years, I’ve always added amaretto when cooking up cherries, but I’m yet to find a toddler cooking guide that suggest amaretto as a suitable flavour enhancer, so this time I just did added a bit of water and vanilla extract. Cherry vanilla is the new cherry amaretto for the foreseeable future, I think!

Gluten-Free Black Forest Brownies inspired by the Great British Bake Off @ shimelle.com

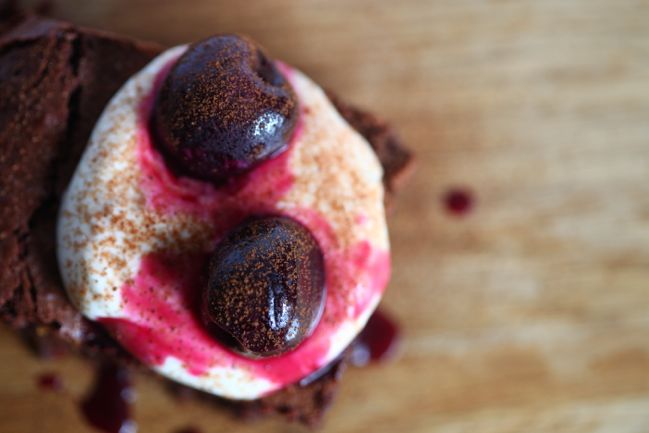
Top brownies with whipped cream and cherries, obviously. And eat.

Gluten-Free Black Forest Brownies inspired by the Great British Bake Off @ shimelle.com


Great Bloggers Bake Off is organised by Jenny at Mummy Mishaps. See more bloggers’ cakes in on her blog.
Please no spoilers from the actual show in the comments, for those who watch later than the original broadcast! Thanks.

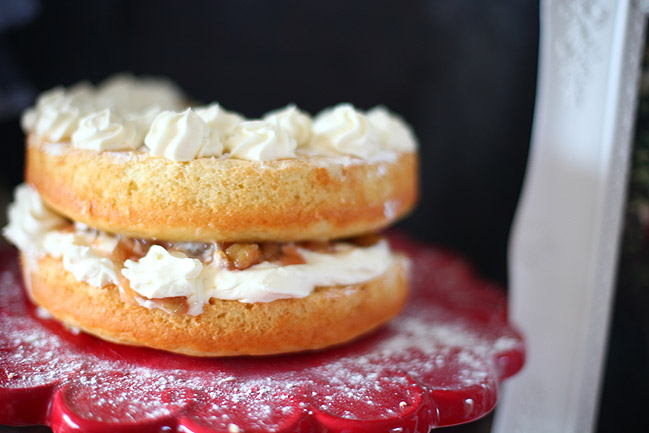
Embracing messy baking

rhubarb amaretto layer cake with recipe @ shimelle.com

For those outside this lovely country, I’m not sure I can entirely explain the phenomenon that happens here right now, known as the Great British Bake Off. It’s simple enough: a weekly television programme where they pitch a tent in the countryside, fill it with pastel Kitchenaid mixers, ovens, and a selection of the nation’s baking enthusiasts, and whittle them down to a winner week by week. That part is easy to explain, but the social impact is more difficult. This show becomes such the topic of discussion that it takes serious effort to avoid spoilers if you’re not watching on a Wednesday night and want to keep it a surprise. Plus it makes everyone want to bake.

It might just seem like ‘everyone’ to me, because I haven’t been baking much for the last few months and along with the rest of the things I’m not doing at the moment, there is a part of me that wants to do those things. Not all the time, not anything near as much as I was, but just a little. That makes sense, right? It’s like a create a dream to-do list in my head for all the things I’m going to do during nap time and then I’m lucky if nap time lasts more than twenty minutes. When nap time is over, the list disappears from my mind and I’m completely happy for it to do so. But there are quite a few things on that list of dreams, and they include baking.

Aside from learning I can’t pack everything into one nap, I’ve also learned to let go of my perfectionism a little bit for things that don’t matter. Like how I would normally spend more time on the icing than on the cake itself, just because I enjoy the process of getting to that perfectly covered final result. That just isn’t going to happen right now. So I’ve decided to embrace messy baking: baking that would get a severe scolding from the experts on the Great British Bake Off, but still tastes fabulous enough to make it worth that little window of time that could go to anything else on the list.

To help me along on this little quest, I’ve been inspired by my friend Leanne who participated in the Great Bloggers’ Bake Off last year, baking along with the challenges from the programme. She’s participating again this year and I’m going to try to keep up, though of course I have completed the first challenge a day two days late. Right now, a day two days feels like a big victory!

The first week’s theme was cake – right up my street! My messy contribution is a Rhubarb Amaretto layer cake.

Cake ingredients:
225g unsalted butter
375g sugar (I use caster sugar and through spent vanilla pods in the canister, but I promise regular granulated sugar works too)
4 eggs
325g plain flour
1.5 tsp baking powder
200ml milk
2 tablespoons sour cream (if you don’t have any in the fridge, don’t go get it specially. Up the milk a little bit – say 225ml in total – and all will be fine.)
1 tsp vanilla extract
1 tablespoon amaretto (use almond extract if you don’t cook with alcohol)

Preheat oven to 180c and grease and/or line three 8” rounds or the equivalent.

Beat butter and sugar together with a mixer for absolutely ages. This is something that really bothers me about a lot of cakes sold in London: not mixing the butter and sugar for at least a few minutes really chafes the texture of a cake. It is worth the five minutes, I promise.
After that, it’s just a case of adding the ingredients and mixing together. Past that initial five minutes, you don’t need to over mix but you do want the consistency to be even.

Pour batter into the pans and bake for 25 minutes. If a toothpick comes out clean, they are done. Add a bit of time if needed, but don’t wait for it to brown as it’s quite a light-coloured cake and will dry out before it browns much. Turn out onto a wire rack.

Filling ingredients:
Two or three lengths of rhubarb
Sugar
Amaretto
Whipping cream (double cream will also work fine)

I realise none of those have measurements and that’s because it’s all down to taste. I promise it’s easy.

Wash the rhubarb and remove any tough skin or ends. Chop into small pieces. Place in a saucepan.
Add a bit of water to the saucepan – about half the depth of the rhubarb – and sugar. I start with a tablespoon of sugar and once the rhubarb starts to break down, I taste it to see if it needs more. I find it really varies with the rhubarb. And possibly the extent of my sweet tooth on the day. Add amaretto (or almond extract) to taste as well. Simmer until the rhubarb starts to fall apart and the liquid has reduced to form a texture a bit runnier than preserves. Remove from heat and allow to cool.

Meanwhile whisk the whipping cream with sugar and amaretto until you have your freshly whipped cream. If all that amaretto is sounding too much, make the whipped cream with vanilla extract instead. Both work. I may have tried. Or if the amaretto isn’t sounding like nearly enough at all, cut a layer of marzipan for each cake to boost the almond factor.

Once both cake and rhubarb are cooled, assemble by spooning cream and rhubarb between the layers and on top of the cake, and dust with icing sugar. I find the recipe makes enough for a three layer cake but that’s far too much for us to have here without guests, so I either give away or freeze the third cake so it’s not a waste.

And then because I managed to put it together while still holding a baby, I embrace the messy look of it all and try to decide which is more exciting right now: making it or eating it. It’s possibly a draw.


Great Bloggers Bake Off is organised by Jenny at Mummy Mishaps. See more bloggers’ cakes in on her blog.
Please no spoilers from the actual show in the comments, for those who watch later than the original broadcast! Thanks.

Sunday Sweets :: New York Cupcakes

chocolate at crumbsred velvet at crumbscrumbs cupcake case
devil's food at crumbs
magnolia cupcake case
two from magnolia

Not so much with the baking this week, but that doesn’t mean I’m steering clear of the cupcakes! We’ve been splitting them so we don’t have to just choose one flavour. So far, red velvet and cookie dough from Crumbs and snickerdoodle and devil’s food from Magnolia.

Yum.

Now to try out the cupcakeries in Kansas City! May your weekend include something delicious!

xlovesx

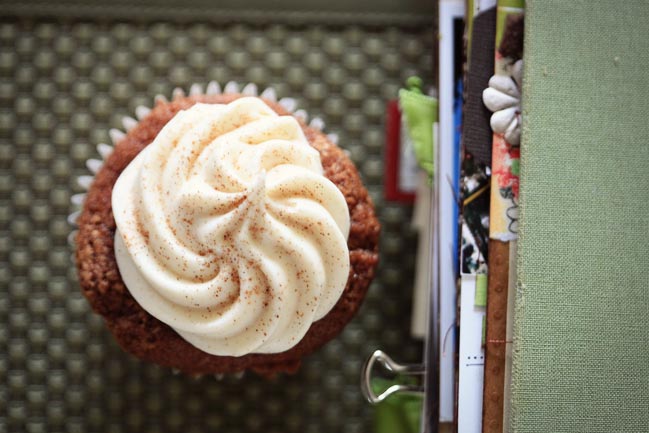
Sunday sweets :: pumpkin cupcakes

pumpkin cupcake with scrapbook

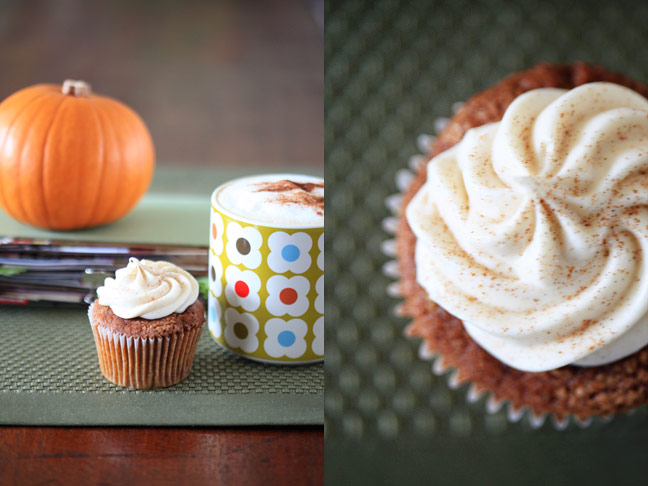
It is autumn and there are pumpkins and in short, this means I could quite happily just stay in my kitchen and bake and bake and occasionally move to the dining table to eat. Somehow I have managed to prevent that level of obsession, but I have already made these twice this season and I am sure there will be a few more times when they seem highly appropriate.

Here’s the recipe so you can share my pumpkin obsession.

pumpkin cupcakes with scrapbook

Pumpkin Cupcakes
(makes apx 24 standard sized cakes)

115g / 1 US stick unsalted butter, at room temperature
200g / 1 cup dark brown sugar
60g / 1/3 cup caster sugar
2 large eggs
1.5 teaspoons vanilla extract
200g / 2 cups plain (all-purpose) flour
2 teaspoons baking powder
1/2 teaspoon bicarbonate (baking) soda
2 teaspoons ground cinnamon
1 teaspoon ground ginger
1/2 teaspoon ground nutmeg
1/4 teaspoon ground cloves
pinch of salt
120mL / 1/2 cup milk
270g / 1.5 cups pumpkin puree (fresh or tinned)

To make fresh pumpkin puree, start with a small pumpkin. Cut a few vents into the top and place on a foil-lined roasting tray. Roast the entire pumpkin for an hour or two (depending on the size of the pumpkin) at a low to medium heat — no more than 120C/250F. Let cool until it is easy to touch. Cut a hole in the top to make a lid, like a jack-o-lantern. Remove the guts and seeds. With those insides gone, you are left with the wall or flesh of the pumpkin — you want the wall but no skin. Many recipes will tell you to shred the flesh, but roasting it first makes shredding unnecessary — just make sure the skin is gone then puree in a blender, food processor, mixer or with a potato ricer.

Preheat the oven to 180C/360F. Line a cupcake tray with paper liners.

In a mixing bowl, mix the butter at a high speed until creamy and without any lumps. Add sugars and beat until fluffy.

Add eggs and vanilla and mix at a slower speed until the consistency is even.

Add the dry ingredients and the milk in alternation until all incorporated. Add pumpkin and mix until even and relatively light.

Fill cupcake cases halfway for flat-topped cupcakes, two-thirds full for domed cupcakes. Bake for 18 – 22 minutes, or until a toothpick comes out clean.

Remove immediately from the pan and cool on a wire rack for best results.

When cool, ice with cinnamon cream cheese icing and finish with more cinnamon on top.

Because it’s autumn, and that means there is rarely such a thing as too much cinnamon.

xlovesx

PS: If you share my disdain that there is no such thing as a pumpkin spice latte from the UK coffee chains, know that this is the stuff you need to make them at home. It may be habit-forming. I may be evidence of this. Just so you know.

Sunday with Scrapbook Inspirations

pound cake

Hopped over to Olympia on Sunday afternoon to check out the Stitch and Craft show and say hello to Rosie who runs things in Scrapbook Inspirations land.

But more importantly, to take pound cake to Rosie and the other lovelies on the Future stand at the show. Because this recipe on Smitten Kitchen was too intriguing to pass up.

It is rather yum indeed. Do try it. It’ll give your mixer a workout!

xlovesx

Rum Cake, Remixed

Rum Coconut Cupcakes

At least a year ago, people started asking me if ‘The Boy’ would no longer be called ‘The Boy’ after the wedding. It seemed quite a popular theory that after the wedding, he should become ‘The Man’ but for a number of reasons, this is just wrong.

Mostly because the reason he is called ‘The Boy’ is because he is younger than I am.

From October to February, he gets to claim that he is four whole years younger than me. Which clearly isn’t quite the case, since from February to October, he is merely three and a half years younger than me. Suffice to say: if his name changes to one that seems old, then I would by definition be older. Ahem.

He will always be The Boy. At all costs.

Since I was actually home for his birthday, I had a master plan to take dozens of cupcakes to his office without him knowing in advance. Note to those who may have similar ideas: if his office has a tradition of the birthday person providing cake on their own birthday, the surprise factor has to go, unless you are quite happy for him to also buy a cake at the shop around the corner from the office. Perhaps the surprise factor is overrated anyway. Or so I tell myself.

The Boy remembers a rum-soaked cake from his childhood, but apparently he was quite the boozy child since he said it was absolutely soaked. No way that was going to work in a cupcake paper then. I asked for more description and he said there was coconut involved. And apricot jam. Which sounded like a very odd combination but turns out, it’s not at all. I know I sent two dozen of these and two dozen chocolate to his office and he returned only with empty boxes, so it seems they were approved.

Rum Coconut Cupcakes with Coconut-Rum Cream
makes about 24 medium sized cupcakes
Cake Ingredients:
6 large eggs
1 1/2 cups sugar (I use vanilla caster sugar in pretty much every cake)
190g unsalted butter (in US sticks, that’s one and a half. in UK blocks, it’s 3/4 of one.)
1 1/2 teaspoons vanilla extract
1/2 cup coconut milk
1/2 cup dark rum
2 cups plain flour
1 1/2 teaspoons baking powder
dash of salt

Preheat the oven to 180C/350F.

Soften the butter and mix on high until fluffy.
Add eggs, sugar and vanilla and continue to mix.
Stir in all remaining ingredients and mix on medium until the batter is even.
Fill cupcake cases 2/3 full and bake for 16-20 minutes, or when a chopstick comes out clean.
Remove from pan immediately and cool on a rack.

Rum Soak: Combine equal parts dark rum and honey. Use a knife to cut an X in the top of each cake, and add a teaspoon of the rum and honey to each cake, so it soaks into the cake through the X.

When cakes are cool, glaze the top with apricot jam or conserve.

Cream Ingredients:
1 cup whipping cream
1/2 cup caster sugar (more or less to taste)
2 tablespoons coconut milk
1 tablespoon dark rum

Place in a mixing bowl and whisk at the highest speed until the cream thickens to form soft peaks.

Spoon on top of cooled, glazed cupcakes and sprinkle with coconut pieces.

And my own childhood preference for rum-flavoured sweets (Butter Rum Lifesaves were my favourite for years!) tells me you could certainly replace the real rum with flavouring in the cream, but the flavouring is most certainly more concentrated, so go easy.

For birthday dinner? I, the vegetarian wife, took The Boy to an Argentinian steak house. Let it not be said that I am always a pain in the neck when it comes to food.

xlovesx

Letters

cupcakes

Dear Shimelle’s Blog,

We have so much catching up to do! We must sit down and do this properly! Let’s do that Monday. Shall we make it a date?

Love and glitter,
Shimelle

PS: I baked you cupcakes as a bribe before I realised that blogs don’t really eat them. I’m not quite sure I understand that, but I hope you appreciate the thought anyway. I tried.

Dear Everyone Else,

I’m hopping in the car for the drive to Shropshire for National Scrapbooking Day with Skrapz. Classes and cupcakes, oh my!

Wishing you a fabulous weekend!

Love and glitter,
Shimelle

PS: Please feel free to nick a cupcake since I baked them for the blog and blog isn’t interested. Sigh.