pretty paper. true stories. {and scrapbooking classes with cupcakes.}

lovely to meet you Twitter Facebook Pinterest YouTube

Take a Scrapbooking Class

online scrapbooking classes

Shop Shimelle Products

scrapbook.com simon says stamp shimelle scrapbooking products @ amazon.com shimelle scrapbooking products @ amazon.co.uk

Reading Material

travel

Five Ways of Getting Stitchy on your Scrapbook Pages by Mandy Koeppen

scrapbooking tutorial by Mandy Koeppen @ shimelle.com
Today I’m thrilled to welcome Mandy Koeppen to the blog to share five beautiful ideas for sewing on your scrapbook pages. I love the looks Mandy has created to share with us, and hope you find some inspiration for a project of your own! -Shimelle

I love to stitch on my projects: it gives that added personal touch. I hope one day when my great-grandchildren rub their hands over the page, they’ll feel the love and time that went into documenting our memories. I know hand-stitching time consuming and it might be easier for you to run your project through the sewing machine, but after you see what I’m going to share with you I think you might change your mind and give the old needle and thread another look. I’m going to share five different ways to create beautiful hand stitched details on your projects. Let’s get started.

scrapbooking tutorial by Mandy Koeppen @ shimelle.com
Making Your Title Pop
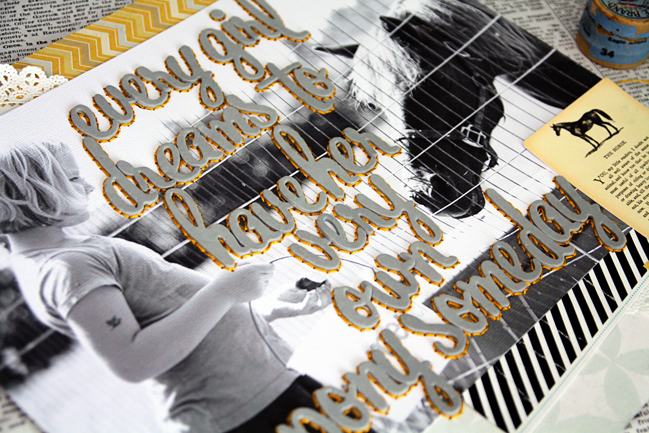
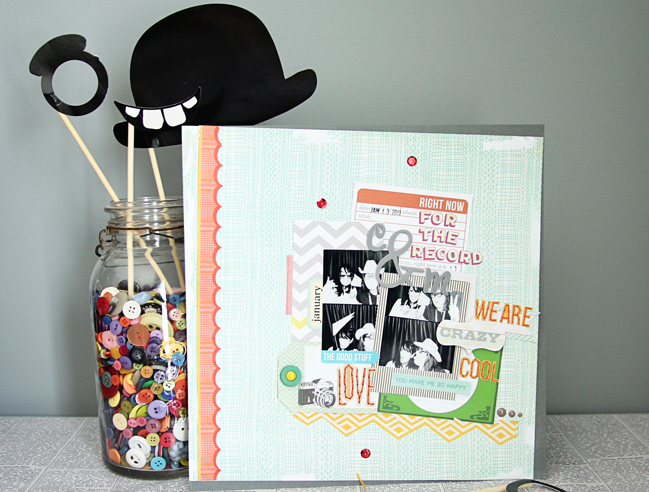
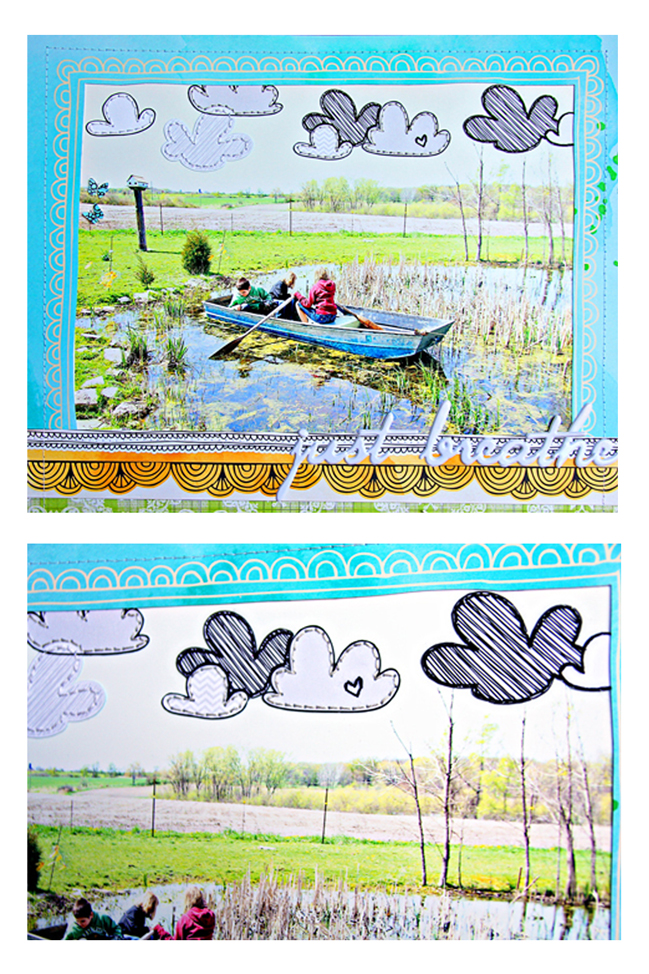
If you know my style, you’ll know that I am into enlarged photos and long titles. I think they make a big statement and are eye-catching in galleries. Sometimes the color of the letters used on my projects look like they need a little something more, so one day while creating it hit me: stitch around the Thickers in another color to make them pop. For those who don’t have patience, this might not be a good one for you to try unless it’s a one word title. This technique admittedly takes a long time, but it’s truly beautiful when finished.

scrapbooking tutorial by Mandy Koeppen @ shimelle.com

scrapbooking tutorial by Mandy Koeppen @ shimelle.com
Borders
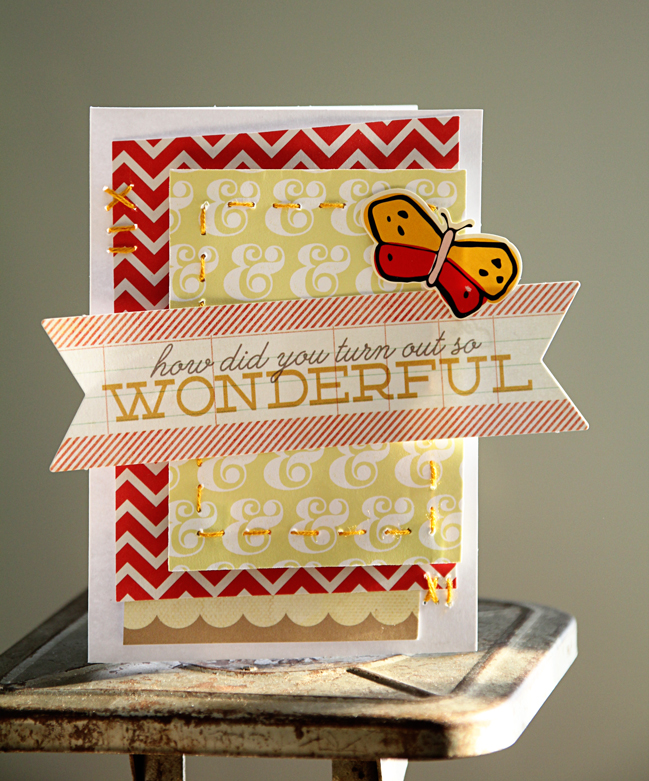
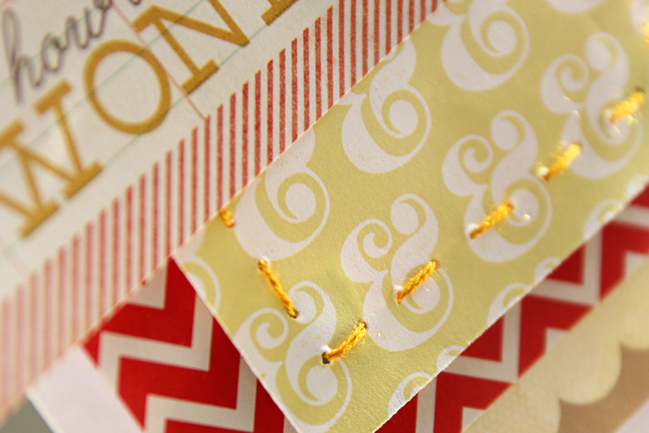
This is an easy and fun way to mix up your stitching. Yes, it’s faster through the sewing machine, but I love that chunkier look the hand-stitching gives and the different stitches you can use without changing settings because you’re using your hands. For example, this card has a straight stitch that you only see every other stitch but I could have added the cross stitch, swirly stitches, and more to the border. You could mix colors and stitches for another look too.

scrapbooking tutorial by Mandy Koeppen @ shimelle.com

scrapbooking tutorial by mandy Koeppen @ shimelle.com
Holding Those Pesky Letters Down
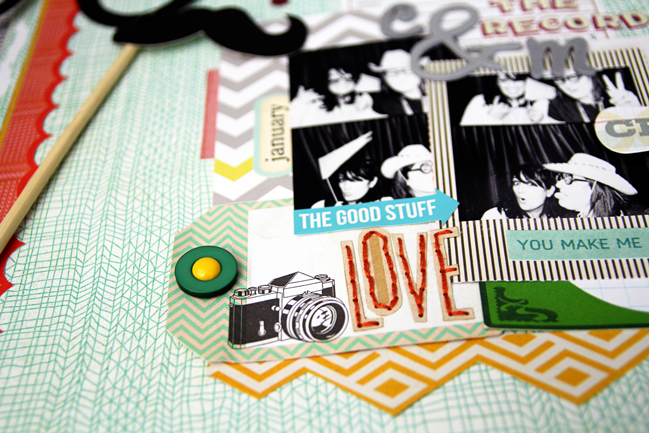
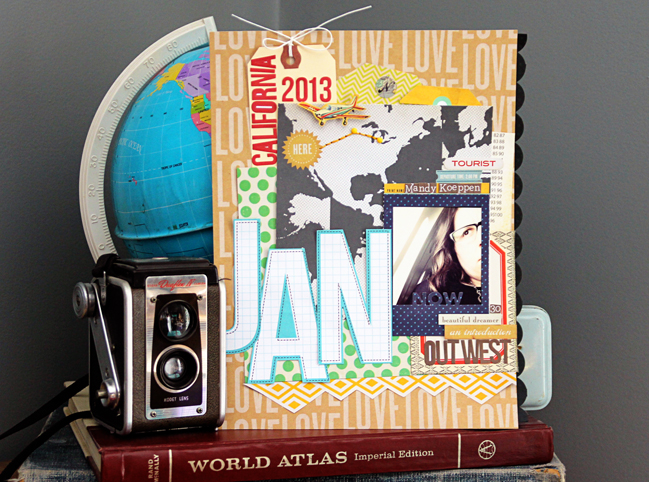
I know we have all had this sort of problem: you open a package of letter stickers or Thickers and they don’t stick or you have moved them around on your page so much they loose their stick. Guess what I do when that happens? You got it: I stitch across the letters to keep them in place on my projects. This doesn’t have to be just for stickers either. The ‘LOVE’ on this layout was cut from patterned paper, so to hold it down and give it a pop of color I stitched the letters to the page.

scrapbooking tutorial by Mandy Koeppen @ shimelle.com
Shapes
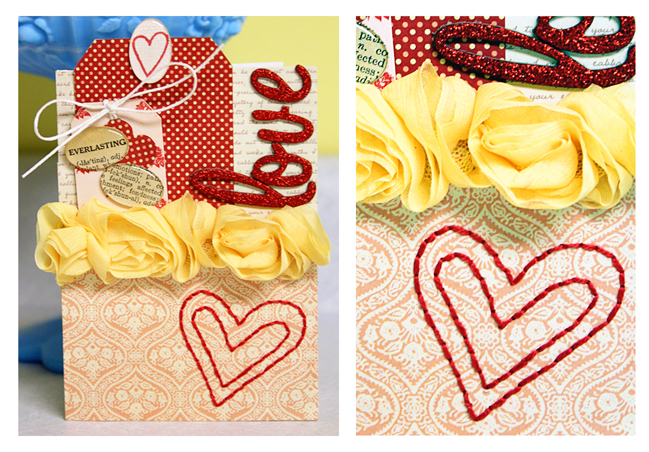
With hand-stitching, the sky’s the limit to the shapes you can stitch. You can make your own templates or Miss Amy Tan has released a fab new set of templates to make it easier (I saw these at CHA and they will be in stores soon). Stitching around cut shapes gives your project added dimension, and following the design of the patterned paper makes all sorts of shapes easy to stitch.

scrapbooking tutorial by Mandy Koeppen @ shimelle.com
TIP using your own template: before you start putting holes in you project, print, draw, or cut out your shape on cardstock, then punch your stitching holes with a paper piercer into the cardstock. Once you have the look you want, place your template on your project and re-pierce the holes through the template onto your project. That way you can make a rough draft before punching any holes in your almost-finished project.

scrapbooking tutorial by Mandy Koeppen @ shimelle.com

scrapbooking tutorial by Mandy Koeppen @ shimelle.com
Stitch Anywhere on Your Projects
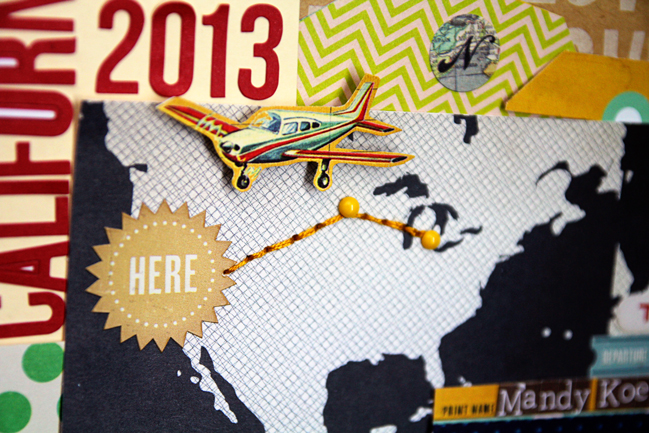
Hand-stitching gives the option to stitch and create anywhere on your projects, unlike your traditional sewing machine that you have a set amount of space you can get to with the needle. On this layout I was able to hand-stitch the flight pattern on the map. With my sewing machine, I wouldn’t have been able to do this (some of you could – I just haven’t mastered the machine so this is easier for me). This little detail only takes a few minutes!
I love how hand-stitching has so many options: colors of threads, thickness of stitches, patterns, tools, where you want to create on your project. You can do a little or a lot! Hand-stitching shows the love and hard work that went into creating the project.

scrapbooking tutorial by Mandy Koeppen @ shimelle.com
A few tips before I say goodbye:
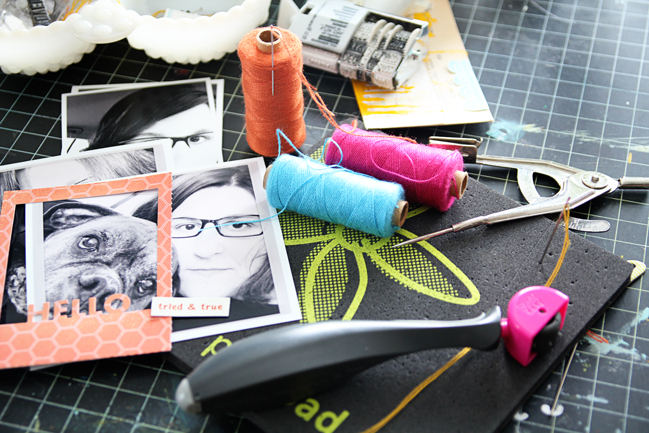
…A paper piercer is a great tool but you can substitute a push pin if needed.
…Pushpads are awesome – they make piercing your holes much easier, especially on lots of layers. A mouse pad will work too.
…There are so many sizes of needles. Try different ones and see which you like best.
…Threads? Oh my goodness! There are so many varieties and colors that again you will try different ones and find your faves. I have a enamel pan full of threads that my grandma gave me from her punch needle & crocheting days.
…Templates are so easy you don’t have to buy them. Make your own or just stitch freehand on your project. It’s easy and fun!

Good luck with your all your stitching projects!


Mandy Koeppen is a 30 something mom of 3 who juggles many job titles in her everyday life from chauffeuring family accountant to zoo-keeping therapist. She lives a small town, country girl life in Michigan with her Mr. K, raising their three children Teagan, Mavrick, and Avery. When she has time, Mandy loves to get creative with paper, browse her local antique shops, raise autism awareness for sweet Mav, and have fun with family & friends. Mandy’s work has been published in Creating Keepsakes, Scrapbook Trends, Scrapbooks Etc, and Somerset Memories. Mandy currently designs for Cocoa Daisy Kits. To see more of Mandy’s work or to get to know her better you can visit her blog or follow her on Twitter or Instagram.

Glitter Girl and her tips for scrapbook journaling

Glitter Girl and her tips for scrapbook journaling class content ©twopeasinabucket.com.
Inspired by this conversation on the General Scrapbooking message board at Two Peas, Glitter Girl brings you thirty minutes of scrapbook talk this week, all about journaling. She shares her tips for product choices that will make journaling easy, designs that allow you to incorporate your writing without losing other page elements, and other tips for seeing your writing as an integral part of any page. I hope you enjoy!


See this post for all the supplies for this project, plus further details including Glitter Girl’s challenge to you this week.

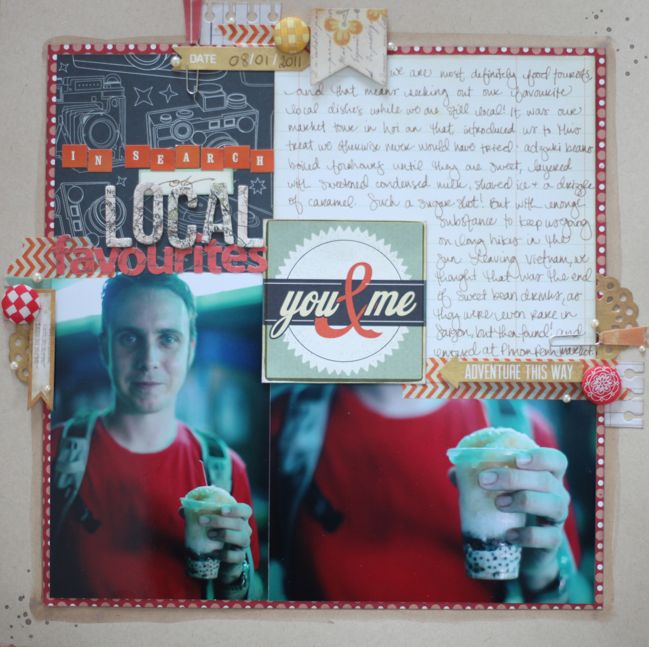
scrapbook page by shimelle laine @ shimelle.com
Those photos were taken in Phnom Penh, Cambodia, inside a market hall. I know the colouring looks a little blue, and I toyed with ‘correcting’ it, but the light truly looked like this inside and in the end I decided I wanted to stay true to the look and feel of the memory rather than changing the colour to look like it could be anywhere. But the story is about our adventures in drinking beans, which sounds strange, but I assure you is actually pretty fabulous. We were introduced to this idea in Vietnam when part of a cooking workshop took us through the local market to sample different local ingredients. There we met someone who was introduced only as ‘The Bean Lady’, and she sat outside the market with half a dozen pots of different slow cooked beans. This summer concoction is made with azuki beans that have been slow cooked with sugar until they are very sweet, then layered with sweetened condensed milk, shaved ice, and caramel. (In the winter, there is a warm version with similar ingredients.) Different regions have different ways of making and eating this and indeed different pots of different things from all the local bean ladies! As we went further south in Vietnam, bean ladies became harder and harder to find, so when we stumbled upon one in Cambodia, we were excited to try her version, which happened to be the sweetest we ever tasted. So for my journaling on this page, I didn’t just want to focus on the moment at hand, but also include some of that backstory – the context of other memories that makes you see why I felt these photos were worth taking and why they are something I want to preserve in my scrapbooks.

For more inspiration on journaling at Two Peas, follow this Pinterest board, where I’ll continue to add my favourites as I spot them in the gallery and other resources there.


If you’re looking to take your writing further in your scrapbooking, True Stories is a resource you might find useful. It’s my journaling class and I’m joined by guest artists and a guest teacher (Relly Annett-Baker, who is a writing expert outside of her scrapbooking side, and contributed a second point of view to each prompt, which provides a great balance and extension of ideas). The pages I made for True Stories are probably my favourites I’ve ever made for any class, because the chance to focus on the writing (but still have fun with photos, patterns, and embellishment) made these pages dear to my heart. I worked on them when we were at an interesting cross-roads in life, as well, and I am grateful that I took the time to document things like decision making processes and conversations between old friends. This class is available any time as a self-paced project, with fifteen prompts for £10 or $15, and you can sign up here.

Onward, covered in glitter, my dear scrapbookers!

adventures of glitter girl

The Adventures of Glitter Girl is a weekly series on Two Peas in a Bucket, and goes live every Wednesday. I’ll share each adventure here shortly after that. I hope you enjoy her quests for crafting happiness, and if you ever have a scrapbooking dilemma yourself, you can always call her to action on the message board.

Gardeners' Digest scrapbooking blog hop (January 2013)

gardeners' digest scrapbooking blog hop
amy tangerine embroidery kit
It’s time for the gardeners’ digest – a monthly blog hop through the Two Peas in a Bucket designers, the Garden Girls.

Since last time, it’s been my sparkly friend contributing to the garden, of course. Last week Glitter Girl got the chance to give the brand new Amy Tangerine stitching templates a whirl, even though they don’t hit stores for a couple more weeks. You can see that new item plus Glitter Girl’s tips on unlikely colours in her adventure on Colour Coordination.

inspired by

The new year has brought a huge change to how the garden works at Two Peas – and now there are six new videos every week. Each day has a theme, and Mondays belong to 213 in 2013, which is a new take on the old weekly challenge idea. Each video includes three or four different creativity prompts so the full year adds up to 213 different ideas, from design to photography to product to colour choice and so on.

This video is from new Garden Girl Corrie Jones and I know how nerve-wracking it is just getting started with videos… even at this point I feel like every video is a new learning curve! I love Corrie’s page and I’m really excited to try some of the ideas she presented, so I thought this might inspire you too. See her full project here.

5 products I love
For my product picks this month, I’m really drawn to stamps! You’ve seen my last few projects including this set by Kelly Purkey, which is exclusive to Two Peas. I’ve also ordered this set by Mama Elephant, this camera background by Hero Arts, the interlocking backgrounds by Lawn Fawn, and these BasicGrey arrows. I guess I’m on a bit of a stamp kick!

scrapbooking giveaway
This month, I’m delighted to giveaway a class pass to Julie Campbell’s new workshop, Journey into Cardmaking. Whether you’re a seasoned card maker or have yet to make your first card, this workshop will take you on a journey to create handmade cards that your friends & loved ones will cherish.

Julie will start out by teaching you card making basics; you will create a card organizer to file away all the new cards you’ll be designing! You’ll then travel on to gain greater design skills. You’ll dive into design principles and learn how to create an eye pleasing design. You’ll learn all about composition & balance in a way that will take your cards from good to great! Become adventurous and explore some of the hottest trends in paper crafting! In this workshop, you’ll also learn how to incorporate colors in your projects & how to create cards in several unique styles. Included in this workshop are over 30 brand-new card samples from Julie and her contributors. The three chapters contain a printable PDF for a total of over 40 pages, and 80 minutes of coordinating video tutorials.

To enter, leave a comment on this post! Entries close at 11:59pm GMT on the 31st of January 2013, and the winner will be contacted and posted here shortly thereafter. But you don’t have to wait to sign up if you’re interested: if the winner has already purchased the workshop, the purchase price will be fully refunded (or you can choose to gift it to a friend, of course).

Once you leave that comment to enter, your next stop is Julie herself! So do go there next!

Jaime Warren shares her chaotic scrapbooking process

scrapbooking tutorial by jaime warren @ shimelle.com
Today I’m delighted to welcome Jaime Warren to share the creative process behind her beautifully delicate scrapbooking style.

I have something to confess. I am, quite literally, all over the place when I scrapbook. Everything is scattered and chaotic. I have never been able to sit down at my desk and pound out a layout based on a plan. Never. Typically this is how it goes down:

1. Print photos
2. Stare at photos.
3. Pick out patterned paper.
4. Stare at patterned paper.
5. Walk away from desk, fold laundry, come back to desk.
6. Stare some more.

See? Chaotic scrapper. I am also not a technique based scrapper. The most I do technique wise is fussy cutting (which I love) and splattering some mist haphazardly on my page. I look at those who can scrapbook with the latest techniques and I wish that I could…but, I am a very basic scrapper. I have major love for patterns, pop dots and stamping. Take me outside of my little box and I scramble right back in! For those who are also chaotic scrappers, you totally get it. So, while I won’t be sharing a trend setting technique, I hope that you will enjoy a glimpse into how I create. No, it’s nothing special really, but it’s my crazy (and I hope fun!) way of putting my memories, thoughts and photos onto paper.

scrapbooking tutorial by jaime warren @ shimelle.com
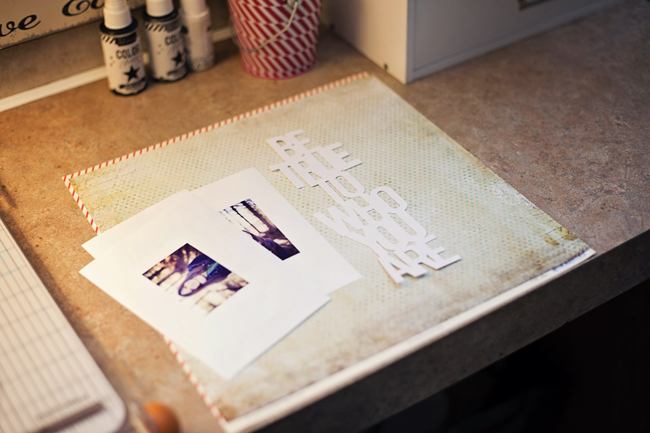
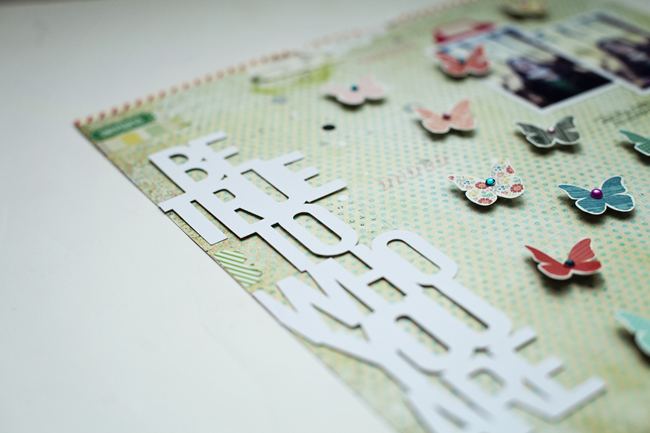
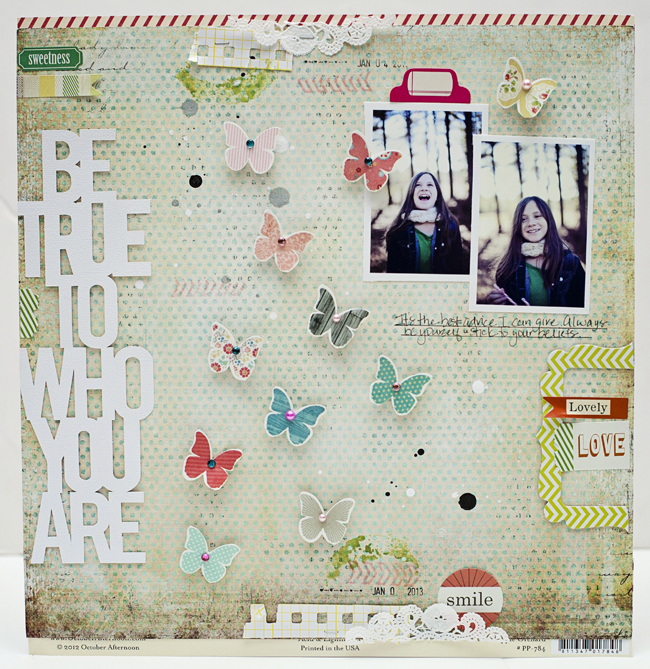
I recently started using my Silhouette Cameo – honestly I was intimidated by it for a while. Now it is part of my scrapping routine, I can’t live without it! I have always struggled with title work, but, the Cameo makes it super easy. I love cutting out large pieces and using them for my titles. With this layout in particular I knew that the photos I had picked out and the cut out phrase were perfect together. As you can see, I have my patterned paper, my phrase and my photos all picked out. Commence staring.

scrapbooking tutorial by jaime warren @ shimelle.com
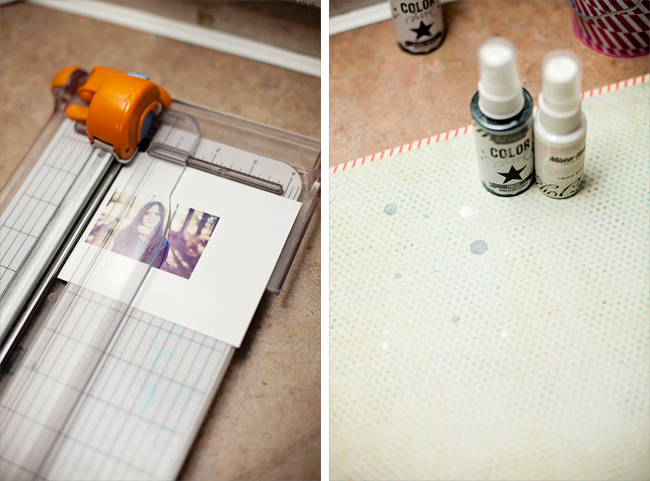
I print my photos, at home, on 4×6 semi-glossy photo paper. Typically I print 2×3, it works best for my style of scrapbooking. I trim them so that I leave a small border of white around the edges. I love how it creates a natural border around my photos and helps the photos pop off of colored and patterned backgrounds. After trimming the photos, I drop a few splatters of mist on my page. There is no real rhyme or reason to how I do it…sometimes it gets covered up and I have to add more. It’s not a perfect system by any means, but it gets the job done!

scrapbooking tutorial by jaime warren <code> shimelle.com)! !http://www.shimelle.com/images/3633.jpg (scrapbooking tutorial by jaime warren </code> shimelle.com
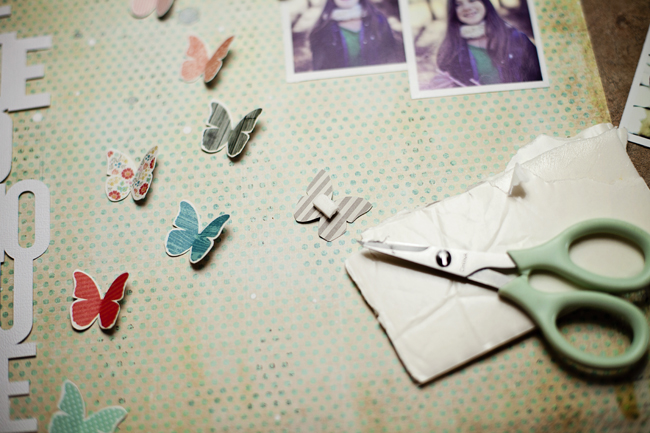
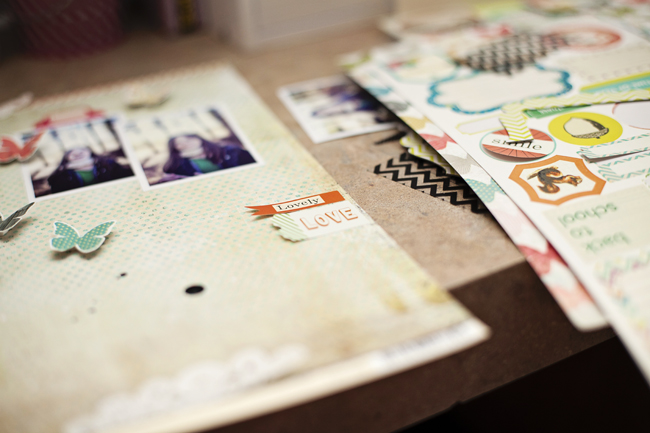
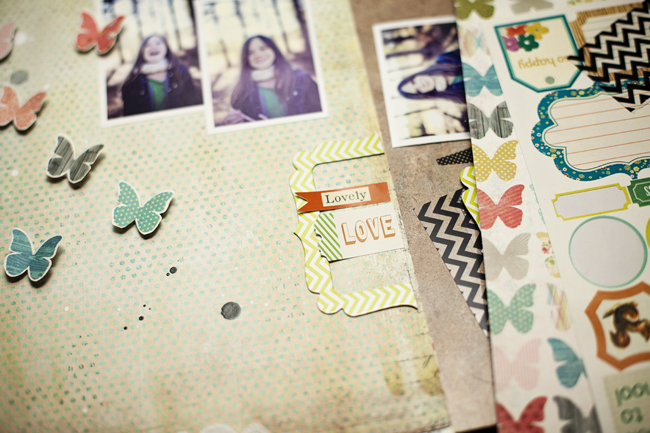
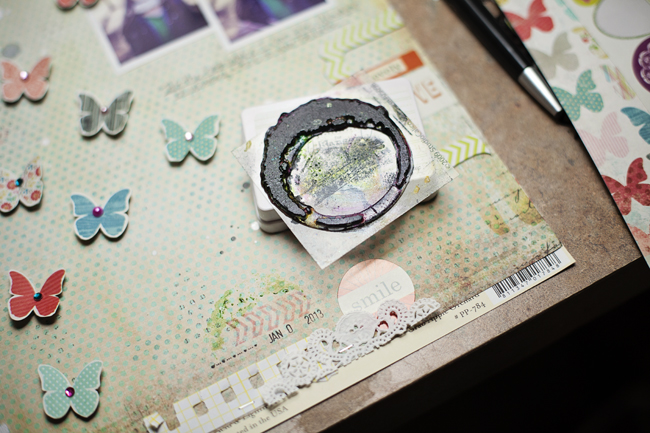
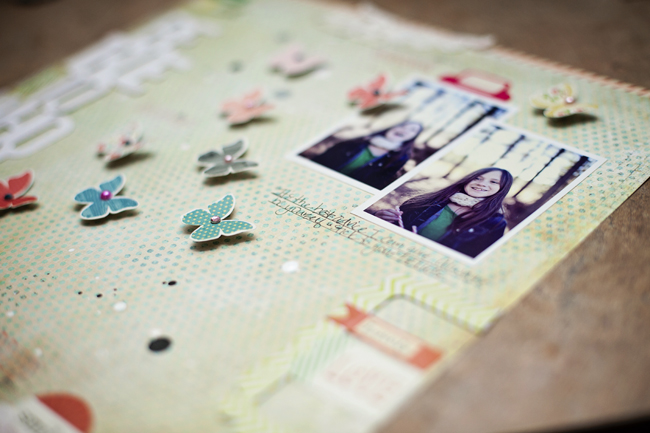
I struggled with what I wanted to put on this layout. After pulling out every embellishment in my stash I couldn’t find anything that seemed to fit. I happened to come across this sheet of patterned paper with the butterflies on it that were screaming to be cut out and used as my embellishments. Yay! It took a while of moving them around on my page, but finally I found a flow that I liked. I attached them with foam adhesive (my favorite is the kind you cut out yourself) for lots of dimension.

scrapbooking tutorial by jaime warren @ shimelle.com
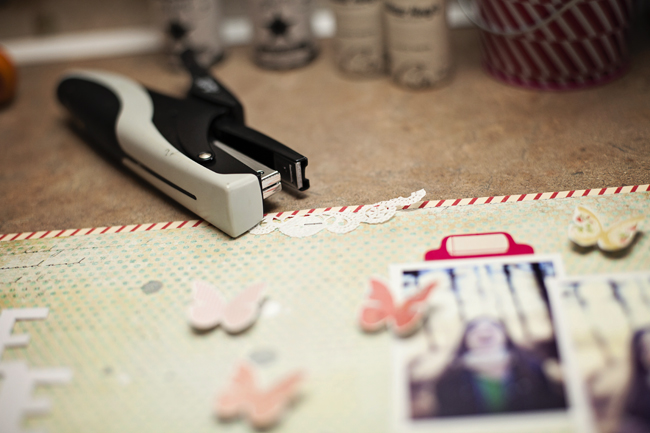
I love using bits and pieces of things on my layouts, especially around the edges. I will often cut things up and use a teeny tiny piece of it as my embellishment. Strange, right? For this layout I trimmed the edge of a doily and attached it with my Tim Holtz stapler (that thing is so awesome for attaching small embellishments). I tend to layer as I go. I might staple something one minute and then come back five minutes later and add something else. Now you see why I consider myself a chaotic scrapper! I can be finished with a layout and then decide, oh: it needs this tiny scrap of paper, right here!

scrapbooking tutorial by jaime warren @ shimelle.com
I ended up trimming the doily twice and using one piece at the top of the layout and one at the bottom. From there I started adding to right side of my layout, just below my photos.

scrapbooking tutorial by jaime warren @ shimelle.com
I started out with two stickers and then ended up cutting a frame in half and layering it around the stickers. I told you I loved cutting things up!

scrapbooking tutorial by jaime warren @ shimelle.com
I loved the little butterflies but felt they needed something more to liven them up. Aha! Gems! Sparkly stuff always does the trick, right?

scrapbooking tutorial by jaime warren @ shimelle.com

Remember when I mentioned that I tend to come back five minutes later and add something to a section that I thought I was finished with? Well, this is a perfect example of that. I attached the doily and then came back and started layering on more bits and pieces. A sticker and some trimmed graph paper. Go ahead, shake your head at me, I don’t blame you!

scrapbooking tutorial by jaime warren @ shimelle.com
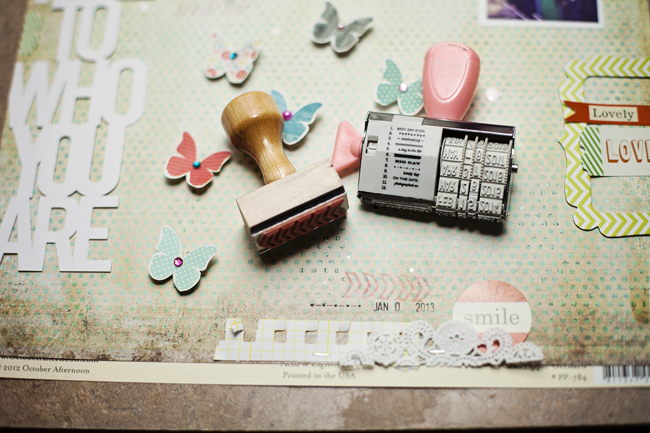
I love stamping in random areas on my layout. I love date stamps, graphic stamps, border stamps..all of them! For this layout I used two of my favorite stamps and a date stamp. I used three different colors of ink – green, pink and black, changing up the colors for each stamp. I stamped along the bottom edge and top edge, using all three stamps on both sections. I also love embossing stamped images, it really makes them pop off of a page!

scrapbooking tutorial by jaime warren @ shimelle.com

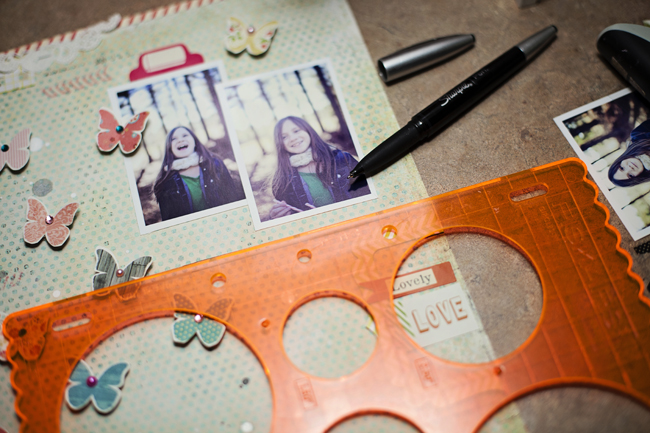
I tend to handwrite my journaling, although I will sometimes type it out…it totally depends on the layout and the “feel” of it. I can’t draw a straight line to save my life, so I used my stencil to draw my journaling lines.

scrapbooking tutorial by jaime warren @ shimelle.com
I love the journaling aspect of scrapbooking. If I have a lot to say, I will write it on a journaling card or tag and slip it into a glassine envelope, tucked behind a photo. Sometimes I journal on the back of my layouts. I want my girls to look back and know my heart.

scrapbooking tutorial by jaime warren @ shimelle.com
The finished product took me two days to complete (sad, yes?) a lot of rearranging, a lot of last minute additions and a lot of love. I hope you enjoyed this little tour of scrapbooking chaos. If you are a totally random, chaotic scrapper like me, well, know that you aren’t alone. I know that there are plenty of us out there. Regardless of the latest trends, techniques or product out there, the most important thing is to just love what you do…no matter how you do it.

If you’ve been reading a while, you might remember this post where I channelled my inner Jaime and challenged you to do the same. Having this additional insight into her process of creating those scrapbook pages, I’m inspired all over again – and I hope you might be too. Thanks so much for sharing this with us, Jaime!


Jaime Warren is a scrapbooker and photographer who lives in a tiny little town in Georgia. She has three girls, ranging in age from 12 to 5 who keep her on her toes and keep her scrapbooking. She is married to her best friend who happens to be the only one who could put up with her chaos. She has been blessed to design for several manufacturers over the years including Crate Paper, October Afternoon, Prima, Chic Tags, Technique Tuesday, Pink Paislee and more. She was a 2009 Memory Makers Master and has been published in Creating Keepsakes, Cards and several scrapbooking books. You can find Jaime at her blog, 3*2*5, or bookmark her scrapbook pages through her gallery.

Scrapbook Starting Points :: Four Small Photos

scrapbook page by shimelle laine @ shimelle.com
This morning I had every intention of being on the train into the city nice and early so I could do one of those very rare things in my world and work with people actually in person instead of through email inboxes. Except it has snowed and snowed and snowed some more this past weekend, and the trains in our corner of London are not running. So instead, I am scrapbooking. I think I can cope with that idea, provided we can reschedule our day of working in person for sometime soon.

scrapbooking starting points @ shimelle.com
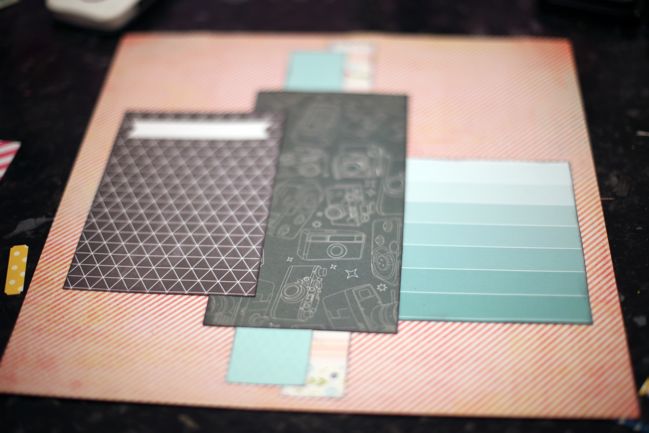
As a result of that, here’s a starting point! It started with a full sheet of patterned paper for the background, two narrow strips (they were the two off-cuts from that large square on the last sketch layout), and two 4×6 cut-apart cards, plus an off-cut of what was left of the camera print in the middle. Everything here is still from my January kit of supplies – this is the fourth page to come from that stack of goodies so far.

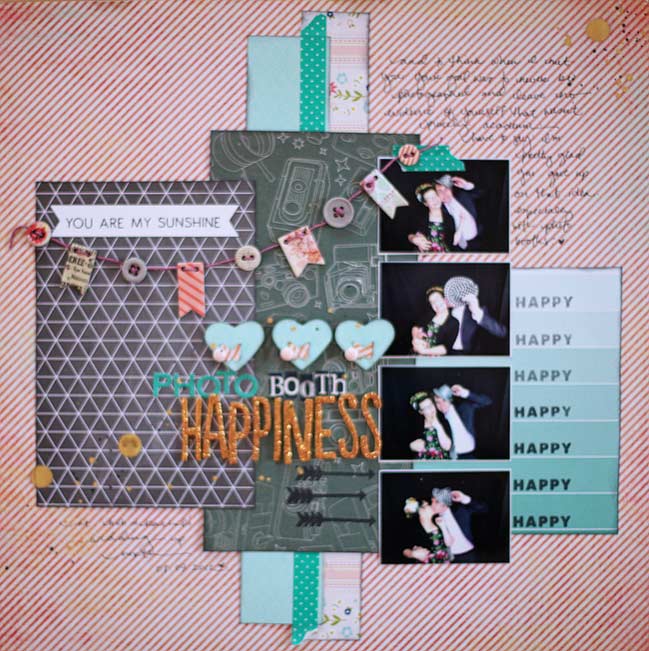
scrapbook page by shimelle laine @ shimelle.com Oh snow, you have taken away all the natural light. Perhaps I can rephotograph this soon.
Almost everything on the completed page is still from those supplies – including lots of the button card used to create the bunting. I added the thread to finish that detail plus gold and black mists and three pink enamel dots for that little row of embellishments in the middle. The stamped ‘Happy’ words at the right are just stamped with regular black ink, but faded to match the ombre pattern of the striped paper by simply adding more pressure or stamping off some of the ink.

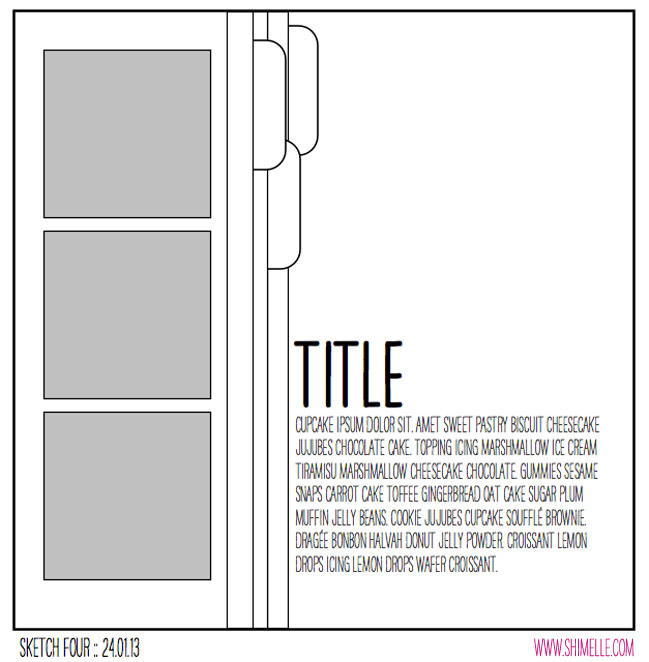
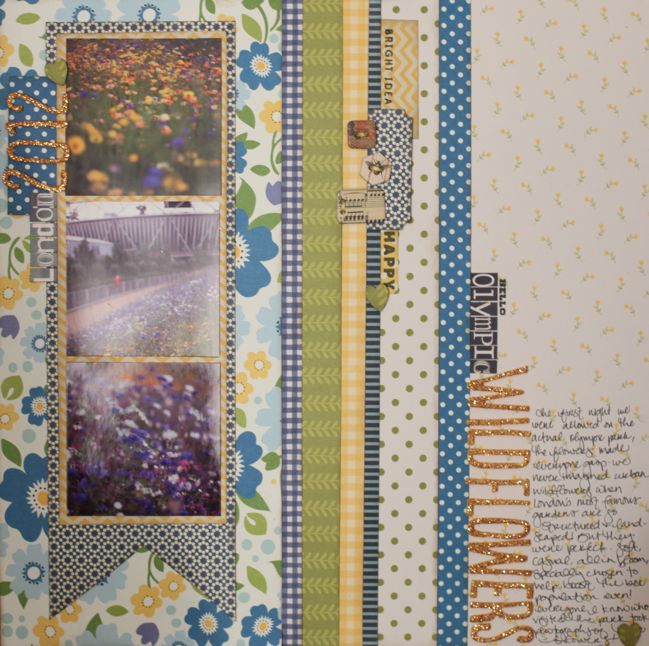
Once this was finished, the combination of the tall narrow strips and the small photos reminded me of this sketch, though there are certainly a few differences. Worth a comparison if you have more narrow strips left than larger boxes.

If you want to give this starting point a try, choose any papers you want and arrange them in a similar fashion to the second image in this post. Then ignore my finished layout and complete your page to suit your style and photographs. When you’re done, share your project with us so we can see all the different ways that same starting point can continue to a completed design.

Have a great week – and if you get snowed in, at least you can always scrapbook!


Sketch to Scrapbook Page :: Scrapbooking with two photos in quadrants

scrapbook page by shimelle laine @ shimelle.com
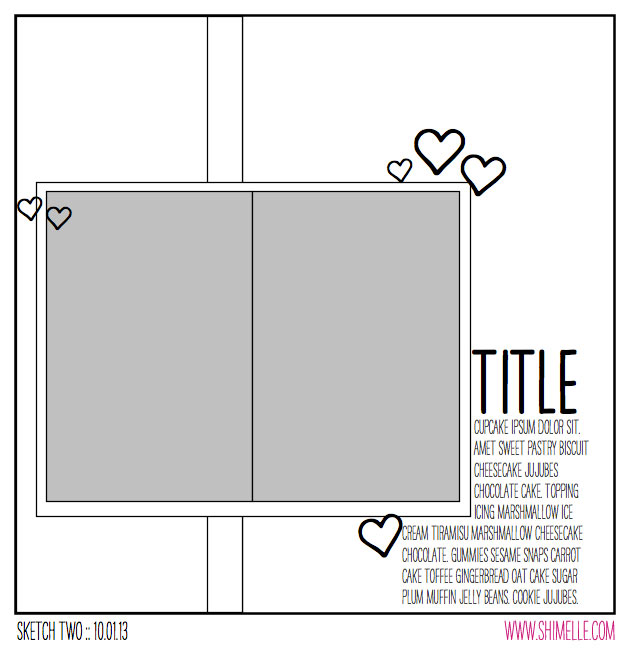
In sketching out a whole collection of page outlines to get things planned for 2013, I realised just how much I like a very simplistic sketch to get scrapping. Yes, it can be lovely to have so many little extras built in, but it can also be so helpful to have just a few basic things in place and then have the freedom to add and subtract without feeling like it’s an abandonment of the original idea. So don’t be surprised at just how simple some of these sketches may be: that way they are yours to dress up or keep simple as the mood hits!

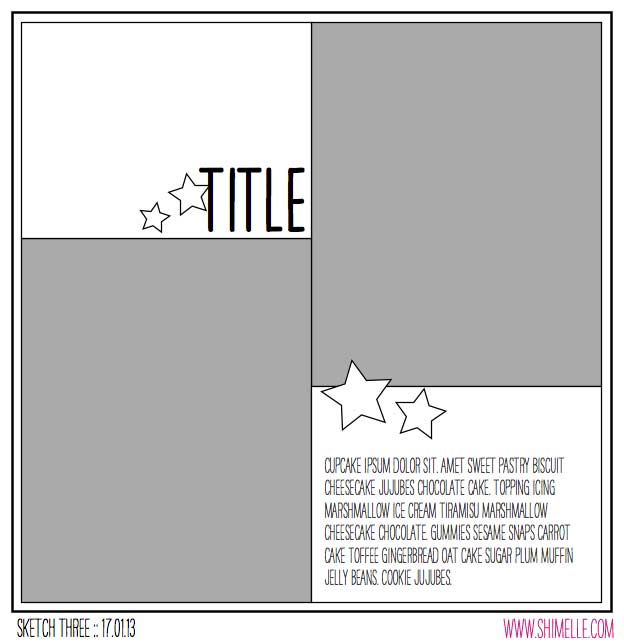
scrapbook sketch by shimelle laine @ shimelle.com
I imagined this sketch with two photos printed slightly larger than my usual, and in fact I printed mine at 5×6 inches. If two photos is too few for you, never fear, as today’s guest has made it work with four images instead. And if you fancy making this into a two page layout, look at the middle line of this sketch and pretend that is the centre of the two pages. Then just extend the design outward, possibly with two portrait 4×6 pictures side by side instead of the single 5×6 pictures. Does that help?


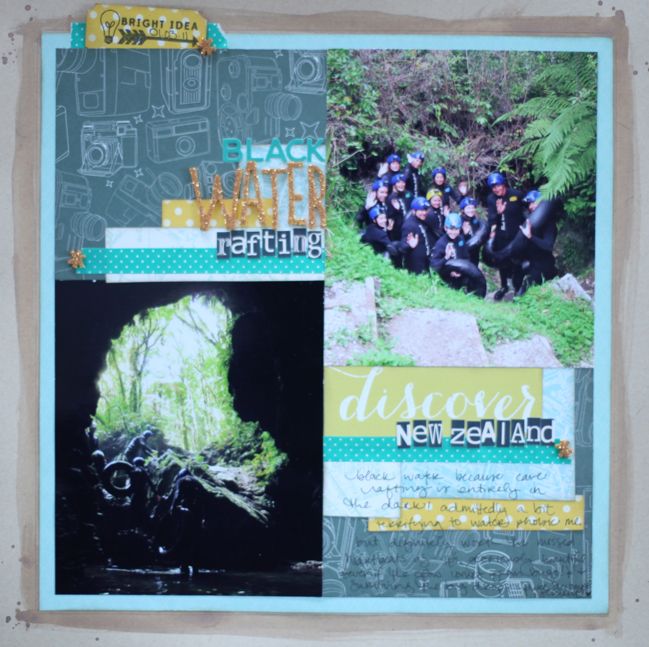
This marks my third full project with the January kit, which is now starting to look well-used but there are still some full sheets untouched that I want to use as backgrounds. Because this page will go in my Round the World album, I added a sheet of kraft cardstock so it matches all the other pages in those books, plus some glimmer mist to paint on that frame around the edge, but everything else is from that same set of supplies.

scrapbook page by shimelle laine @ shimelle.com
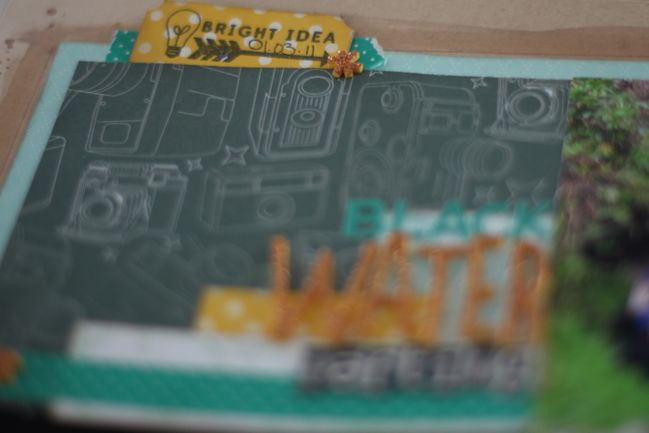
If you check out the Black Water Rafting website, you’ll see just how alike all the photos are, but if you ever find yourself touring New Zealand, it is certainly an interesting item for your itinerary. It’s called ‘black water’ rafting because you’re in a cave and entirely in the dark. Well, maybe not entirely, as there are glow worms on the ceiling that make it a bit like looking up at the stars, except once you find out what a glow worm really is, it’s not nearly as romantic as it sounds, but it is still pretty cool. It’s very cold (even in a wet suit) and very touristy, but New Zealand was our stop of ‘let’s do all the things they show in leaflets’, so indeed we went rafting, paragliding, and scuba diving to ship wrecks. (I say ‘we’. When it comes to the scuba diving, I mean ‘he’. But still.) And at the end of the rafting adventure, they give you hot chocolate and a DVD of pictures from your day, perfect for a scrapbooker.

scrapbook page by ashli oliver @ shimelle.com
Today I’m thrilled to welcome Ashli Oliver (also known as SoapHouseMama in the world of scrapbooking message boards) with her beautifully layered and detailed style. She had no trouble converting this sketch into one with additional photos, so I know you’ll find her ideas inspiring, no matter what your style may be.

scrapbook page by ashli oliver @ shimelle.com
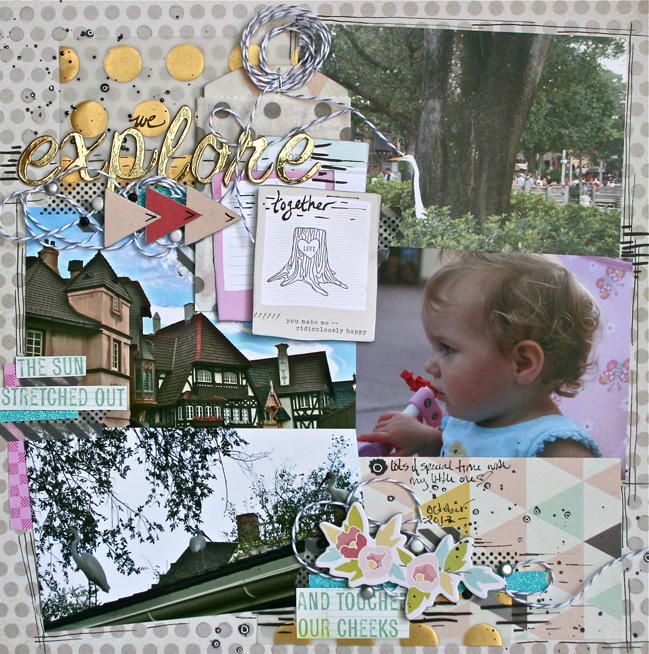
When I saw this fun way to incorporate four photos onto one page, I knew I would be heading straight to my stack of Disney pictures. After all, I took loads of fun pictures and I need to maximize my page real-estate! As you can imagine, this album of our vacation is chocked full of fun and whimsy, so I just overlapped and tilted my photos a bit to maintain this consistency. Not to mention that I just couldn’t bring my self to cover up that fabulous polka dot print from Dear Lizzy 5th & Frolic. The choice of the gold dot vellum also allows for the pattern to peek through a bit, while adding a nice touch of sparkle. In addition to the who, what, when, and where journaling, these photos have a bit of a longer story that I wanted to tell. So, I added a little pocket from Whiskers Graphics to include more journaling. A touch of gold in the title work helps pull in the gold sparkle from the vellum and some doodles finish it off. Plenty of room for pictures with still enough space left for embellishments… This is a sketch that I will be returning to again and again, I just know it!

It is such an honor have joined you this week. Thanks you for having me, Shimelle! I hope to see you all over at purplemailbox.com. You can also find me on Pinterest, Instagram, and Twitter. I look forward to “seeing” you soon!

And now it’s your turn! Create a page in your style with this sketch, post it online, and share it with us. You can upload to your blog or to a scrapbooking gallery like Two Peas or UKScrappers, then just follow the steps to link to your project wherever it can be found online!


Sketch to Scrapbook Page :: Scrapbooking two 4x6 portrait photos

scrapbook page by shimelle laine @ shimelle.com
I have my work cut out with me creating posts for all the remaining CHA booths and I’ll be on that straight away now that I’m back home in snowy London! (To be fair, Southern California wasn’t that much warmer, though there was a great deal more sunshine.) And to make up for a bit of lost time while I was off staring lovingly at all the new paper for 2013, this weekend I have two scrapbooking sketches for you – both with videos and guests, of course.

scrapbooking sketch by shimelle laine @ shimelle.com
This second sketch of the year uses my favourite photo combination: two 4×6 prints in the same direction (portrait, in this case). It stays pretty simple from there too: a title, writing space, and three areas of embellishment. Of course, what you choose for those embellishments is totally up to you!


This is my second page to come from my January kit, though you might have noticed Glitter Girl sneaking a title from my kit lettering options last week. I added some thread and a tiny bit of gold mist (it sells out fast but it is restocked often – click the ‘request & notify me’ button if you’re still searching for some and that way you have a good chance of catching it as soon as it arrives), but everything else is from the kit.

scrapbook page by shimelle laine @ shimelle.com
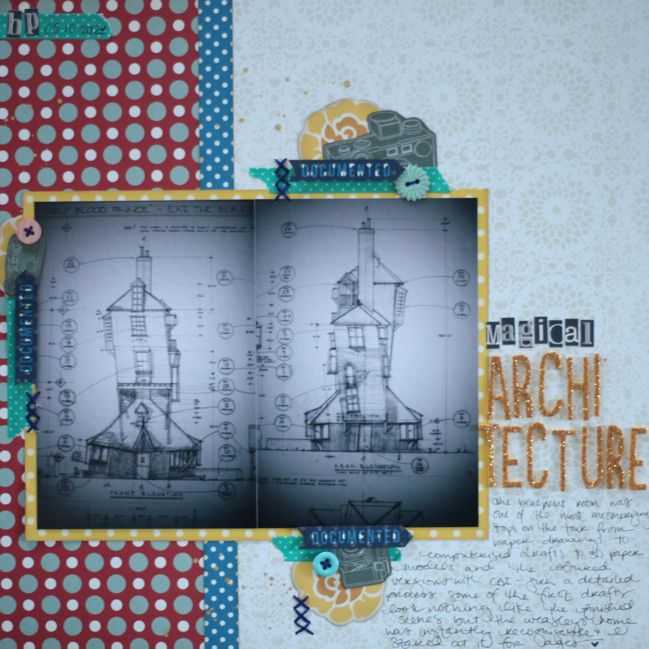
I did add one tiny bit of additional embellishment not on the sketch – two initials and the date at the top left corner. I like having just a few things that repeat on every page in a specially themed album, and in the Harry Potter album, it’s the initials ‘HP’ somewhere on each page. It just seemed a bit more balanced to place them in the top corner rather than add them into one of the existing areas of embellishment since those three were so similar and the initials would make one grouping so different.

scrapbook page by melissa mann @ shimelle.com
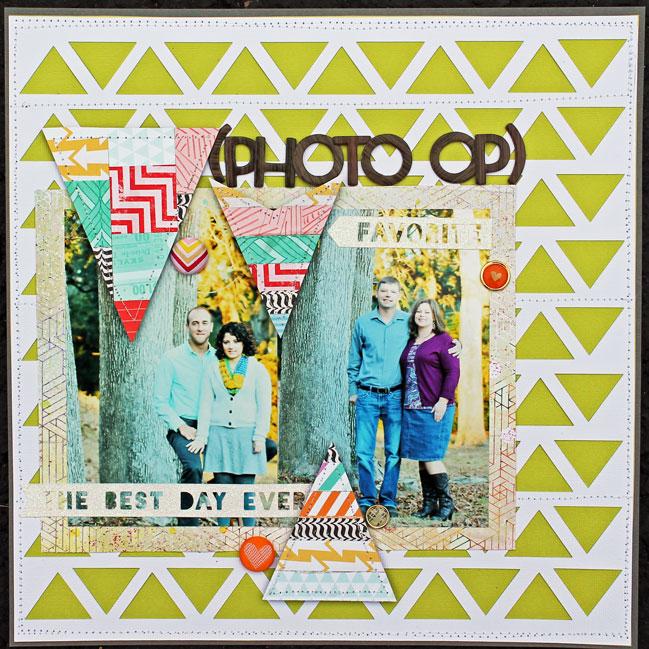
The scrapper behind this gorgeous page is this week’s guest, Melissa Mann. I love how she repeated one motif in two unique ways through the die-cut background and the patchworked embellishments.

I loved that this sketch included two 4×6 photos. I usually stick to one photo scrapbook pages or multiple smaller photos. I stuck pretty close with the sketch but changed the place I put my title. It didn’t seem to flow as well with the title in the lower right hand side. That is the one thing I love about sketches! You can duplicate the sketch in its entirety or use it as a jumping off point. I really wanted to use the lime green card stock on this layout, but it was too bright in my opinion to use as the base. I layered it on top of some dark gray card stock and stitched it down with my sewing machine. I then layered a piece of white card stock that I ran through my Silhouette Cameo and cut a triangle design on and stitched it down on top of the lime green card stock. I matted my two 4×6 photos with a piece of patterned paper that had more geometrical designs on it. I created my own custom arrow embellishments by cutting the arrows out of cardstock. On two of the arrows I layered strips of paper across and trimmed off the excess. On the biggest arrow, I punched out squares of patterned paper and laid it down on top of the cardstock and again cut off the excess. All three arrows were stitched around the border with my sewing machine. A couple of stickers and brads were placed around the photo and the title was placed above the photo mat. The supplies I used are by American Crafts, Studio Calico, Basic Grey, Ki Memories, Tim and Beck, and October Afternoon. The cut files used were by Studio Calico and Silhouette.

You can find more of Melissa’s work on her blog or her galleries at Two Peas and Studio Calico.

And now it’s your turn! Create a page in your style with this sketch, post it online, and share it with us. You can upload to your blog or to a scrapbooking gallery like Two Peas or UKScrappers, then just follow the steps to link to your project wherever it can be found online!


CHA Winter 2013 :: BasicGrey

CHA Winter 2013 :: BasicGrey scrapbooking supplies
Lots of work done and some decent internet found, so on we go to a few more booths at the winter CHA trade show. Next up is BasicGrey. (You can find their current collections here, and almost everything is at least 25% off while it lasts.)

CHA Winter 2013 :: BasicGrey scrapbooking supplies
BasicGrey have four new collections, and the first two are companions: Knee Highs and Bow Ties. Though interestingly enough, there are neither socks nor dapper neck accessories included in the motifs. Go figure. (Also, if it’s not already, I’m sure Knee Highs and Bow Ties should be the name of some adorable tap dancing boys and girls somewhere, yes?) Knee Highs is the girly collection and Bow Ties is BG’s boy option this spring.

CHA Winter 2013 :: BasicGrey scrapbooking supplies
Pretty chipboard pieces. Glitter Girl is rather fond of all the hot pink + turquoise going on in the Knee Highs collection.

CHA Winter 2013 :: BasicGrey scrapbooking supplies
Three Knee Highs stamps – two clear on the left and one red rubber background stamp on the right, which looks promising as I’m not sure how on earth I’ve never seen a background stamp in something so lovely as a heartified polka dot. (Polka heart? Again, it sounds like a dance troupe.)

CHA Winter 2013 :: BasicGrey scrapbooking supplies
Brads and some fancy bottle cap-inspired embellishments. (Sorry I didn’t get a better photo of those as the booth is always quite crowded!)

CHA Winter 2013 :: BasicGrey scrapbooking supplies
Um, why, yes: those are lyrics from One Direction. I am somewhat speechless, but every girl under the age of about twenty probably just jumped for joy. Or nodded ironically.

CHA Winter 2013 :: BasicGrey scrapbooking supplies
These little embellishments are always my favourite part of the BG booth. It makes me want to start crafting instead of keep working though!

CHA Winter 2013 :: BasicGrey scrapbooking supplies
Both Knee Highs and Bow Ties have alphabets I like a lot, and this 12×12 sticker sheet looks really useful. It’s only the owl that will take some creative thinking, but owls work great on cards if they don’t fit your scrapbook look. I have a friend who seems to be collecting quite a stack of notebooks with owl motifs so perhaps that’s a project I need to remember!

CHA Winter 2013 :: BasicGrey scrapbooking supplies
Knee Highs papers – lush colours.

CHA Winter 2013 :: BasicGrey scrapbooking supplies
Exemplar pages and a few cross-over embellishments that link the two collections – wood veneer banners, a printed notepad, and metal tabs in the style of bookmarks.

CHA Winter 2013 :: BasicGrey scrapbooking supplies
This is something new at BasicGrey – the 6×8 minibook with a ring binder and woodgrain-embossed chipboard cover. The spine is patterned (there’s another pattern option in another collection coming up) and there are a variety of tabbed dividers and pocketed page protectors to fit.

CHA Winter 2013 :: BasicGrey scrapbooking supplies
Which leads us to the Bow Ties collection!

CHA Winter 2013 :: BasicGrey scrapbooking supplies
The paper flags in this collection are very sweet and I think they would work for any age really, depending on the other page elements you chose.

CHA Winter 2013 :: BasicGrey scrapbooking supplies
Two stamp sets with this collection – a background of old cars or a clear set of rocket ships and comic book POW!s.

CHA Winter 2013 :: BasicGrey scrapbooking supplies
If you never scrap boys there is one thing you still need from this collection – the letter stickers. They are notebook paper with a stitched detail at the edge (printed stitches rather than actual stitching). My picture doesn’t make them look nearly as cool as they are, I’m afraid. They are on my must-have list.

CHA Winter 2013 :: BasicGrey scrapbooking supplies
And the papers to round off the collection.

CHA Winter 2013 :: BasicGrey scrapbooking supplies
Hipster is the darkest colour palette for BG this show, and it’s not too dark – and will easily mix with brighter colours, I think. That sounds good to me.

CHA Winter 2013 :: BasicGrey scrapbooking supplies
I’m pretty sure there are no One Direction lyrics in a line called Hipster, by the way.

CHA Winter 2013 :: BasicGrey scrapbooking supplies
…though there may be plenty of moustaches. (But I know some of you are not fans of this motif and I can safely say there is plenty in this collection without carefully curated facial hair so don’t skip it completely!)

CHA Winter 2013 :: BasicGrey scrapbooking supplies
This last board even shows how Hipster can look quite feminine.

CHA Winter 2013 :: BasicGrey scrapbooking supplies
File folders and chipboard buttons…

CHA Winter 2013 :: BasicGrey scrapbooking supplies
Brads and a die-cut acetate alphabet…

CHA Winter 2013 :: BasicGrey scrapbooking supplies
and printed chipboard pieces.

CHA Winter 2013 :: BasicGrey scrapbooking supplies
But the stamps are my absolute favourite! I always wanted an excuse to stamp ‘rad’ on every third layout! I look forward to this new phase of my scrapping. (No, really: in real life I say ‘rad’ far too often, so I’m not even being sarcastic.) I like the distressed touch to that Polaroid frame stamp too.

CHA Winter 2013 :: BasicGrey scrapbooking supplies
And three more – five sets of stamps in total for Hipster! The two backgrounds are red rubber, the other three sets are clear.

CHA Winter 2013 :: BasicGrey scrapbooking supplies
Hipster has the ransom-style alphabet with the two smaller fonts at the bottom, and the 12×12 sticker sheet includes things like mix tapes and vinyl, which could be just what you need for those no-photo pages telling stories from the days before digital cameras. (Because you know if there had been camera phones in 1985, we all would have been Instagramming every mix tape we ever made, received, or tore piece by piece from the failing car stereo.)

CHA Winter 2013 :: BasicGrey scrapbooking supplies
And the papers… I like that last one with the boxes especially. BasicGrey don’t really do cut-apart sheets but this one could definitely work that way as a less expensive form of embellishment.

CHA Winter 2013 :: BasicGrey scrapbooking supplies
I also look forward to the day when researchers wonder why circa 2013, there were so many people in the world suddenly named Awesome. (The name badge trend is still going strong!)

CHA Winter 2013 :: BasicGrey scrapbooking supplies
And here’s the final collection from BasicGrey at this show: Mint Julep. Light and sweet and delicate… and there are deer.

CHA Winter 2013 :: BasicGrey scrapbooking supplies
Told you. (Also: check the bottom right badge. Love it.)

CHA Winter 2013 :: BasicGrey scrapbooking supplies
Interesting die-cut patchwork pieces, plus two kinds of brad embellishments.

CHA Winter 2013 :: BasicGrey scrapbooking supplies
All sorts of prettiness, actually!

CHA Winter 2013 :: BasicGrey scrapbooking supplies
Five stamps in this collection too – three backgrounds and two clear sets. All the deer are in one set so you can be pro-deer or anti-deer with ease. (I say embrace the deer! But if we have deer with moustaches and name badges next season, that is GOING TOO FAR. Anything other than that is acceptable.)

CHA Winter 2013 :: BasicGrey scrapbooking supplies
The stickers are surprisingly primary coloured, but they do look very lovely with the papers, I promise.

CHA Winter 2013 :: BasicGrey scrapbooking supplies
And there are the papers, by the way!

CHA Winter 2013 :: BasicGrey scrapbooking supplies
Card inspiration!

CHA Winter 2013 :: BasicGrey scrapbooking supplies
And ahem: enamel dots in every colour needed to match all these lines. Perfect for stocking up.

CHA Winter 2013 :: BasicGrey scrapbooking supplies
And one last look at the BG binder – so you can see both paper options: one for Hipster and one for Bow Ties.

Now… when will all this actually be available to buy? Soon:
Knee Highs and Bow Ties will arrive in stores in mid February.
Hipster and Mint Julep is available in April. Enjoy!

Click here to shop for BasicGrey products and here for the inspiring BasicGrey blog.