pretty paper. true stories. {and scrapbooking classes with cupcakes.}

lovely to meet you Twitter Facebook Pinterest YouTube

Take a Scrapbooking Class

online scrapbooking classes

Shop Shimelle Products

scrapbook.com simon says stamp shimelle scrapbooking products @ amazon.com shimelle scrapbooking products @ amazon.co.uk

Reading Material

travel

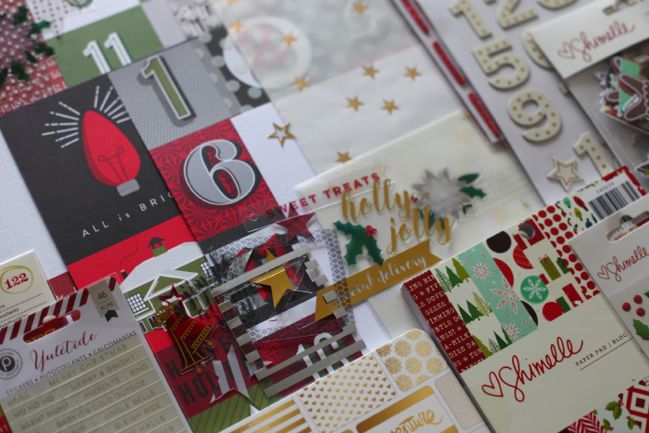
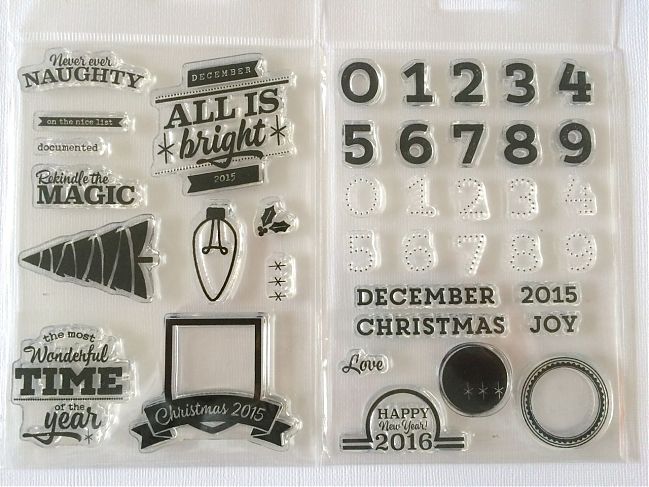
Christmas in a Box 2015 and limited edition Christmas stamps available now

Christmas in a Box 2015 scrapbooking kit @ shimelle.com

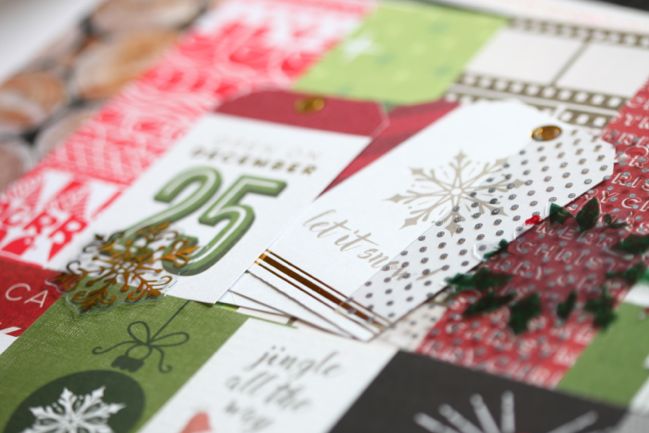
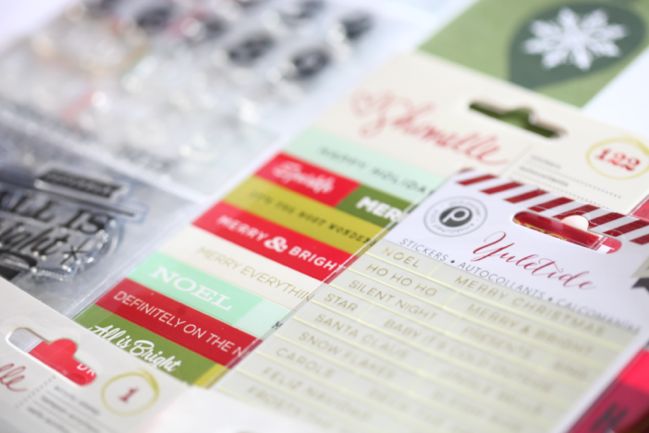
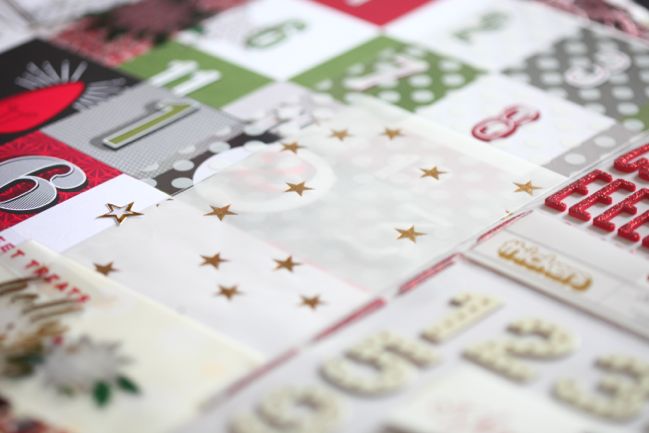
It’s a flurry of Christmas preparation around here and I’m surrounded by these kits at the moment! I’d love to share with you the scrapbooking supplies I’m using for Journal your Christmas in 2015. I’m just finishing up pre-ordered kits at the moment, so will be ready to put the remaining kits for sale at midday tomorrow (that’s Sunday, and GMT/UK time). The kits are available for UK and European shipping, or the stamps only can ship worldwide.

Christmas in a Box 2015 scrapbooking kit @ shimelle.com

Christmas in a Box 2015 scrapbooking kit @ shimelle.com

Christmas in a Box 2015 scrapbooking kit @ shimelle.com

JYC2015 clear stamps @ shimelle.com

There’s a quick look, and payment buttons and the video with full commentary of the kit will be live here at noon tomorrow! See you then!

Rhubarb and Custard layer cakes: my 2015 bake off finale

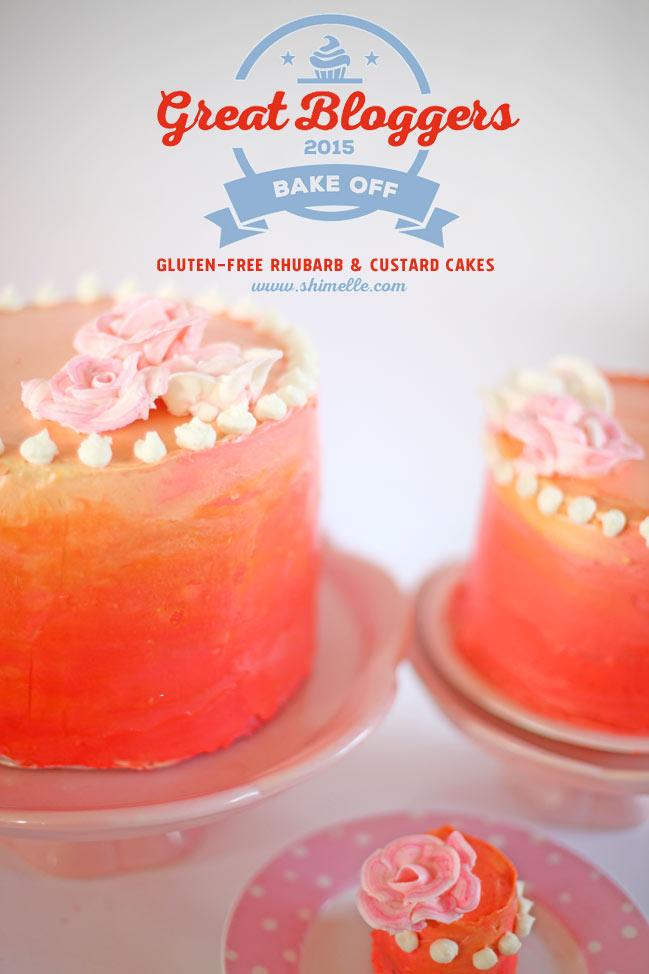
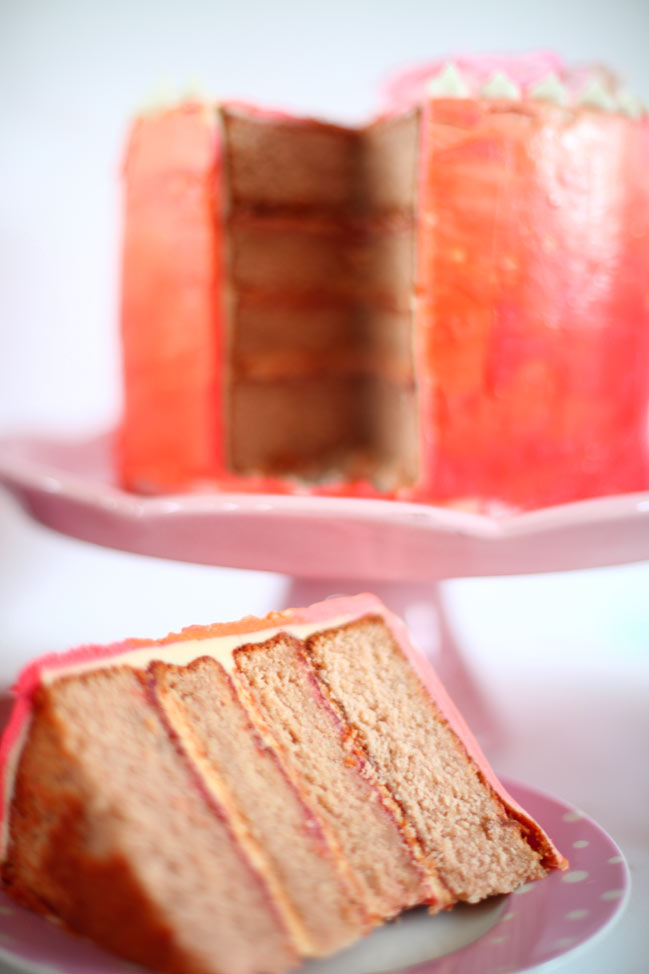
gluten free rhubarb and custard layer cake - inspired by the great british bake off #gbbo @ shimelle.com

Alas, the latest series of the Great British Bake Off has come to a close, and without spoiling the results for those of you watching at a big delay abroad (some of you have reported you’re watching the 2013 season at the moment!), this year my three favourites from the start were the three favourites in the final so it was a real joy to watch because I really just wanted to see them make amazing things and I didn’t mind who won! There was some amazing baking in that final episode, even though the descriptions of the challenges seemed too simple for the final at first – things like iced buns and classic British cakes just seemed like day one of pastry school when earlier weeks had challenged the bakers to such complicated tasks! But seeing how it all came together, it was indeed inspiring to see personal twists on things that home bakers could make rather than just fancy patisserie, and I’m sure that’s really what’s at the heart of a bake off.

I desperately wanted to do all three challenges for this final edition, but there was no such luxury in my schedule. Instead I have barely made the deadline with my one completed bake: the classic British cake challenge, but taken to the rules as much as possible, with plenty of layers and three separate cakes. I’ll save my plans for pumpkin iced buns and making the raspberry millefeuille technical gluten free for another day!

When the 2014 bake off started, I joined in this same blogging challenge and managed one measly post: a very messy rhubarb cake. Rhubarb is such a classic British flavour to me, rhubarb and custard even more so, and having rhubarb cake for the very first time is a delightful memory of my earliest days living in England, so it seemed perfectly framed for my take on the ‘classic British cake’ to be a rhubarb and custard layer cake.

gluten free rhubarb and custard layer cake - inspired by the great british bake off #gbbo @ shimelle.com

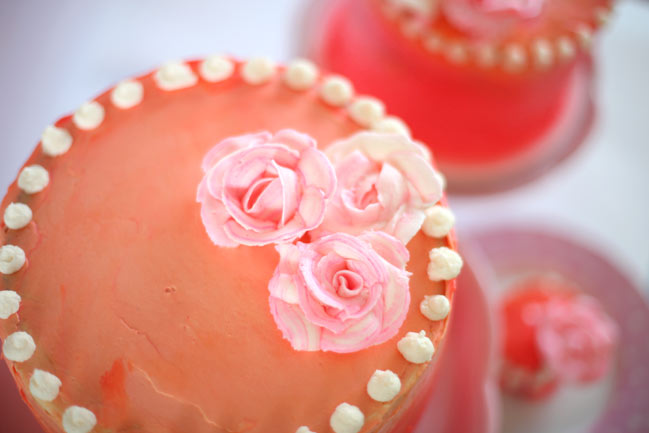
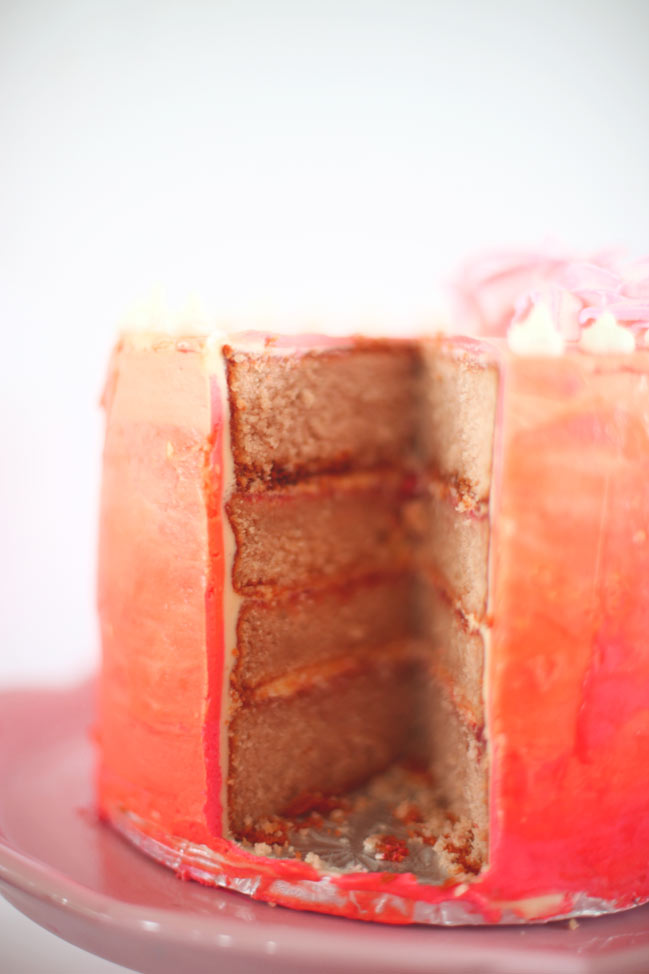
I set myself two more challenges just for good measure: use at least one new skill I have learnt while baking along with the 2015 bake off and add at least one new skill for this specific project I’m happy to report I met both of those, and they both came in the frosting process. All three cakes are covered in French buttercream, something I had never made before the mokatine challenge, but now I am in love with it. It takes more time, more ingredients, and more washing up than plain old butter, icing sugar, and vanilla, but it also tastes like a dream and has the most beautiful texture. I am sold on French buttercream in a very big way. As for new skills: I tried two things I’ve never done before in icing this cake and they’ve both been on my ‘meaning to do’ list for literally years, so I am giddy to have given them a crack. First was the ombre colour styling with the bottom of each cake attempting to capture that rich red stripe you get in a beautiful stalk of rhubarb, fading up to a pale peachy pink at the top, more like the shade you get after you’ve stewed all the rhubarb in a saucepan until it falls apart. Second was something that came from another happy memory: buttercream roses. My grandmother could make beautiful buttercream roses in her sleep and I think I may have made them with her tutelage when I was a little girl but I’ve never tried them in my own kitchen. A little trial and error and substituting a coffee tamper because I have two of those but I don’t own a rose nail, and eventually I ended up with six passable roses to grace the trio of cakes and a little excitement that I could indeed make a flowery cake should the need ever arise.

Is it too much that one set of layer cakes could be some sort of emotional tribute to childhood afternoons in Grandma’s kitchen and a very British summer tea on the Brighton seaside? Forget emotional eating: this entire process was emotional baking for me, in the very best way.

(Also, I’m really happy that I stuck to blogging something for the whole of the challenge! I managed every week of the bake off this year, even if we were all allowed a little more time for the final and I’m still right down to the wire.)

gluten free rhubarb and custard layer cake - inspired by the great british bake off #gbbo @ shimelle.com

The two larger cakes (one eight-inch and one six-inch) were both four layers of rhubarb cake, with as close as I could get to that original rhubarb cake of my memory within the confines of gluten free flours. But between each layer of cake there was also a rhubarb and vanilla jam and a custard-flavoured fresh cream. (Even this made sent me back to that childhood memory, where I was always a little in awe of how ‘torte-ing’ a cake was a verb, slicing cakes into layers and adding the beautiful contrast of filling. Rhubarb cake and rhubarb jam doesn’t have quite the same colour contrast, so I clearly didn’t think that memory through entirely!) The smallest cake was the size of a jumbo muffin but with straight sides, and had just two layers.

gluten free rhubarb and custard layer cake - inspired by the great british bake off #gbbo @ shimelle.com

For the rhubarb cake, I made two batches to get all three cakes (plus a little left over for less formal sharing and snacking), so these amounts would make one reasonable but still big cake of about three eight-inch layers rather than enough cake to feed the entire neighbourhood. Preheat the oven to 180C. Grease and paper three eight-inch cake tins or the equivalent in another size or shape. Stew two stalks of rhubarb with 50g sugar and enough water to cover the bottom of the pan, simmering until the rhubarb is soft but not entirely falling to pieces. Set aside. Start the actual cake with 225g unsalted butter and 350g sugar and beat in the mixer until really light and fluffy. Stir in four eggs, one at a time, then add the flours: 150g oat flour, 100g sorghum flour, 50g rice flour, 25g tapioca flour, plus two teaspoons of baking powder, 200ml milk, 2 tablespoons plain yoghurt, 1.5 teaspoons vanilla extract, and 1 teaspoon almond extract. Mix all that until it’s nice and even then fold in the cooked rhubarb. Distribute the batter into the pans and bake at 180C until golden (with a hint of pink!) and a toothpick comes out clean – this was just shy of thirty minutes in my oven.

For the rhubarb vanilla jam, I stewed two stalks of rhubarb, chopped into small pieces, in a saucepan with 200g sugar, the seeds of one vanilla pod, and enough water to cover the bottom of the pan. Just heat it until it simmers then leave it for what seems like ages, bubbling away on a low heat. The longer it simmers, the thicker it gets, so if they had to make it on the actual Bake Off, it would probably be a twenty minute job, but I let it go for about an hour and it was gloriously thick like a proper jam rather than a sauce. The other thing I’m not sure how they do on the show: cool it enough in time! The next time I make this, I will double the jam recipe so we can have it on mundane things like crumpets because there just needs to be more rhubarb jam in my life and basically anything that involves scraping a vanilla pod into the recipe is going to get a double thumbs up from me.

For the custard-flavoured whipped cream, I could have made actual custard. In fact, I want to try this another time in a tea cake and bake in a layer of classic custard made with a million egg yolks. But I couldn’t make it work with the weight of a layer cake, so instead I looked to that other classic way of making custard in Britain: Bird’s custard powder! Using the kind that comes in the bigger jar that you have to add sugar to (not the instant one in the sachet), I started with two tablespoons of custard powder, two tablespoons of sugar, and two tablespoons of whipping cream and mixed those three into a paste, then added the remainder of the whipping cream – a 250ml pot in total – and blitzed it with the electric whisk until it was thick and gorgeously fluffy. I might also double this recipe next time, because all three residents of this house declared we could eat this from a spoon. On second thought, maybe double this one isn’t really a safe move.

For the French buttercream, I followed this recipe, then divided the results into three bowls to get the gradient of pink to rhubarb red with gel food colouring. I actually did a crumb coat with just ‘normal’ buttercream because it suited the contents of my refrigerator, but I can’t see any reason why it wouldn’t be possible to crumb coat with the French buttercream, as long as you made plenty. I must admit I often skip the crumb coat step if I’m doing something with a texture like ruffles or stars on cake, but I think I will put my hand on my heart now and say I will always crumb coat a cake I want to have smooth sides. It made a huge difference. As this was my very first attempt at ombre, my cake looks nothing like the expert example, but this post was my starting point for tips. Maybe one day mine will look that pretty!

With the Quidditch cake and the Mokatines both convincing me it’s not possible to actual complete a bake off challenge in the time given to the bakers in the tent, I’m convinced this one was more effort (if possibly slightly less washing up) but it was an effort of the loveliest kind. Baking to a memory is something I’m really starting to enjoy, tweaking a recipe until it’s as close as possible to what I remember – which may or may not be accurate, of course. I found all sorts of things came back to me while making this cake, and I could sit here and discuss the weather on the day I ate that rhubarb cake and indeed the dress the waitress was wearing in the cafe (it was amazing and featured a flamingo, of all things). It brought back the magic of my gran making buttercream roses on the tip of my fingers for me to eat, a bit like Amelie eats raspberries. Scraping vanilla pods with the back of a spoon seems to flood my mind with more sensory memory than measuring out teaspoons from a bottle of extract, so perhaps this is the way forward with connecting a love of baking with all the memory keeping I ordinarily share in this space. However it all came together, this epic amount of rhubarb-infused everything is just the right place for this year’s bake off to come to an end in my kitchen. Until next year, then!


Great Bloggers Bake Off is organised by Jenny at Mummy Mishaps. See more bloggers’ final bakes at participating blog, The Boy who Cooked.
Please no spoilers from the actual show in the comments, for those who watch later than the original broadcast! Thanks.

A Design Team Call, of sorts.

scrapbook page by shimelle laine @ shimelle.com

I started scrapbooking by accident, making a gift that was a group present in stolen moments hidden away so the recipient wouldn’t see. By the end of that first album, I was already in love with the idea of this craft. The idea that you could put photos and notes and memorabilia and just cute stuff together with some paste and ink and have a truly unique handmade time capsule of memories filled my heart with excitement and my head with ideas. That was a very long time ago, in 1998. Very much has changed since then. But not that excitement and not those ideas.

The funny thing for me is I could start about ten sentences with ‘The most amazing thing about scrapbooking is…’. At least ten. Which is terrible, because clearly I should know how to use a superlative and if it truly is ‘the most’ then it can only be one. I just don’t know how I would choose. I’m amazed that I have all these albums that track all those changes in life since 1998. I’m amazed that this format of memory keeping makes it easy for me to go back and document things that happened before I was a scrapbooker (not so easy with Facebook or Instagram or whatever other online capture of everyday life). I’m amazed that teaching in this craft became my actual job. I’m amazed that I’ve met such wonderful people with amazing stories. I’m amazed that some of them became my closest friends in life. I’m often amazed that my husband doesn’t stress about me taking up an entire room of our home with albums and craft supplies! And over this last year and a half, I’ve been more and more amazed at how much it fills me with happiness to see people creating their own projects with products I’ve helped to make. I can have the most rotten of days when everything just seems to be going wrong and I’ll take a peek at a project on Instagram and the entire bad day is gone. I really didn’t predict when I had that first discussion with American Crafts that I would ever be that emotional about product! But I truly am.

scrapbook page by shimelle laine @ shimelle.com

It’s that emotion that has made me put something off for a bit. I love seeing everything that is shared and I hope those who don’t post their projects online are enjoying the products as well. But one other thing that hasn’t changed is that I’m just a one scrapbooker show over here. After a year and a half of products with American Crafts, it’s time I branched out a little bit and put together a team of crafters to help me share the ways these products can be used in styles that are not my own. I need someone who is confident with cards, someone who has a passion for pocket pages, maybe even someone who plans with panache or dazzling with decor. I’d also appreciate some help from a few fellow 12×12 fans too, since there is such a wide range of styles in the scrapping world.

From this, yes, it’s time for a design team call. Rather than just say there are x number of spots and each person will have to make x number of projects per month or similar, there are a range of opportunities available. Some will be perfect for someone who works well in a tight time frame, like making projects for display at the CHA trade show. Some will be perfect for someone who has wanted to try out the idea of being on a design team but didn’t love the idea of the commitment, with just a one or two project remit. My hope is this will be a great way to share the love: of paper craft in all forms, of sharing ideas, of meeting new faces in this industry, and yes, of my products too.

scrapbook page by shimelle laine @ shimelle.com

To apply, please send an email to shimelle+dt@gmail.com and include the following in your message:

…Your name and location

…Links to pages where you share your work with others. This might include: Twitter, Facebook, Instagram, YouTube, Pinterest, your own blog, the blog of a brand you currently design with, the gallery of an online store or community. Please don’t feel you have to include any platform you use just to share non-crafty things. I totally respect that many people use Facebook to connect with real life friends rather than scrapbookers, and so forth.

…A summary of what kind of crafting you do, how you got started with it, and why you love it.

…Images of three to five projects you have made and love. I hope you’re applying because you love the products in the American Crafts Shimelle collections, so it would be awesome to see at least one of those projects including Shimelle products. However, if that just isn’t possible, then that’s fine. You do not need to purchase anything new or make anything from scratch just for this call.

…For at least one of those projects, please include a short write-up to go with the project. Think along the lines of if you were posting this on your blog, Instagram, or elsewhere, what would you want to communicate to your readers?

…Answers to these questions:
1. What are your favourite colours for crafting?
2. How long do you like to take on your projects from start to finish?
3. If I asked you to make something new next week, no rules at all, what’s your first impulse for what you would make?
4. I’m ordering for us at my favourite coffee shop. What would you like?
5. What are your favourite tools for crafting? (Think die-cutter, stamps, punches, etc, rather than individual elements like paper and stickers for this question please.)

That’s everything. And it’s due by the 21st of October, 2015.

scrapbook page by shimelle laine @ shimelle.com

Like I mentioned earlier, this isn’t a case of everyone on the team having the same exact remit. Instead, I’ll be contacting applicants by email with the specifics, and I won’t be announcing anything in a public format until all those conversations have been had and all the details are agreed. But like all the guest posts on this blog and the guest contributors to my online classes, all the work will be compensated with pay. Paypal usually works easiest, but if that doesn’t work for you, there are other options we can discuss.

I’d love to hear from you. In fact, I would find it amazing.
Thanks for considering it!

Inspired to Scrapbook with Mists by Sian Fair

Inspired to Scrapbook with Mists by Sian Fair @ shimelle.com

Today we’re staying on this side of the Atlantic with our guest! Please welcome Sian Fair, who inspires me with her love of writing in her scrapbooks (pages with storytelling make my heart flutter!) and her design style with a lovely lightness and freedom to the look. I hope Sian helps you get more from your mists today!

I’m Sian and I love to scrapbook. But, you know, sometimes I look at all the amazing, talented scrapbookers out there, all posting beautiful pages, and I feel a little..well, unworthy. Especially on a day when I’ve tried something which hasn’t quite worked, or when I think I’m right out of ideas. And it’s on a day like that I’m especially grateful for the generosity of everyone who shares projects for us all to enjoy, for the treasure trove of inspiration, right here, with Shimelle. Be inspired by anyone you like! she said. Pick a post! So I looked, I browsed, I was spoilt for choice; but eventually I settled on Five ways to Use Mists on a Scrapbook Layout by Corrie Jones

Inspired to Scrapbook with Mists by Sian Fair @ shimelle.com

I own a collection of mists. Sometimes I even use them: a little, not a lot, just a few drips here and there. And I’m guessing I’m not the only one. It’s easy to think mists: out of control, spoilt pages, carpets which never look the same again. But Corrie gets such beautiful results..well, it’s worth a try, isn’t it?

Inspired to Scrapbook with Mists by Sian Fair @ shimelle.com

So what I decided to do was to use my mists, but to keep them away from my layout. No splats on carefully placed embellishments here, please. I decided to use my mists “off the page” to create some of the brightly patterned alphas we’re seeing at the minute.

Inspired to Scrapbook with Mists by Sian Fair @ shimelle.com

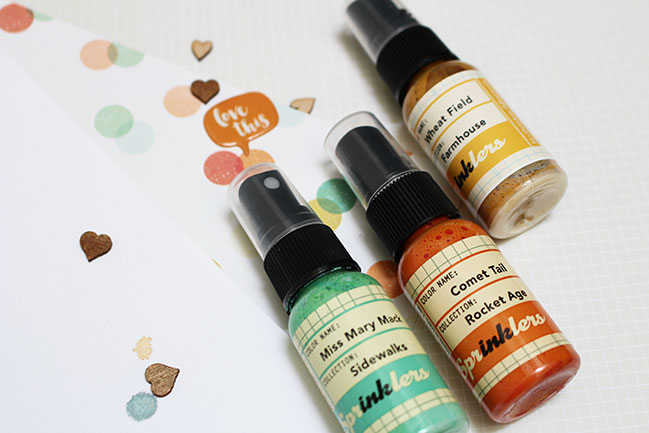
First I had to choose which of my mists to use together and because this sheet of patterned paper was on my desk I used it as a colour combination inspiration.

Inspired to Scrapbook with Mists by Sian Fair@ shimelle.com

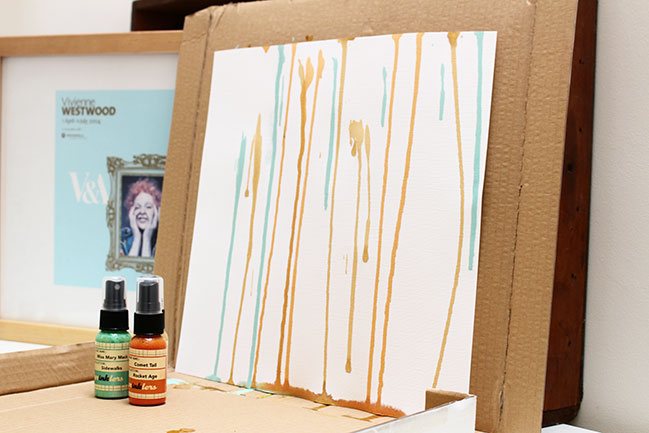
Now it gets messy. I opened up a pizza box to use as a carpet saving tray, propped it against my shelves and, yes, took the lids right off the bottles so that I could dribble the ink down the page. The only tricky part came when I realised that if my alphas were to be small I would need the ink runs to be close together, so that each of the letters would pick up some of the stripe. I told myself that if it all went wrong I could start again with a fresh sheet of cardstock, and still no layout would have been harmed in the making of this project.

Inspired to Scrapbook with Mists by Sian Fair @ shimelle.com

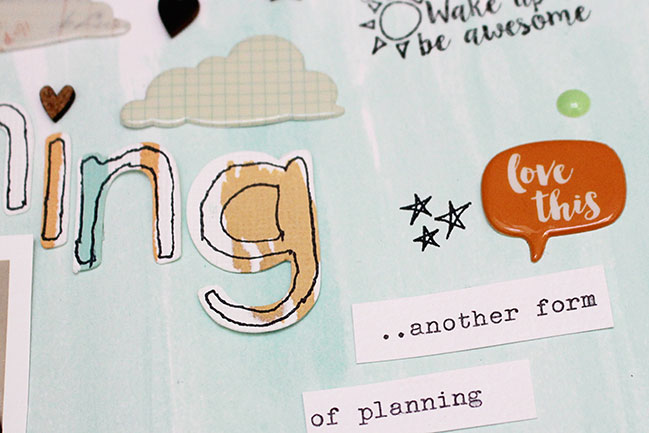
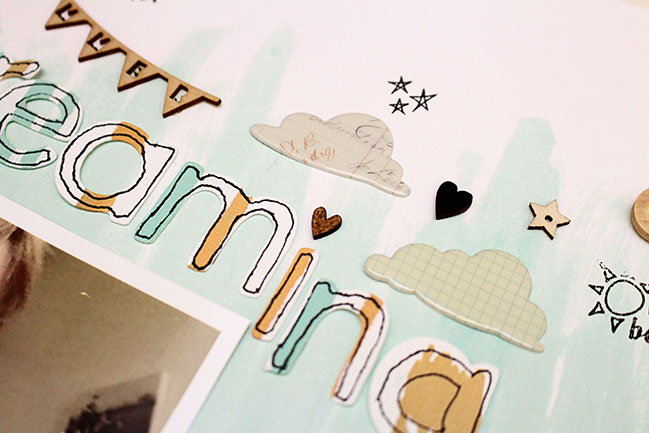
Once my cardstock was dry I used my Slice machine to cut alphas for a title. And because I had a whole sheet to cut from, I wasn’t afraid to experiment. I wasn’t sure if I wanted to outline my letters here, for example, but I had enough ink dribbled paper to quickly cut again if I didn’t like the hand drawn outlines.

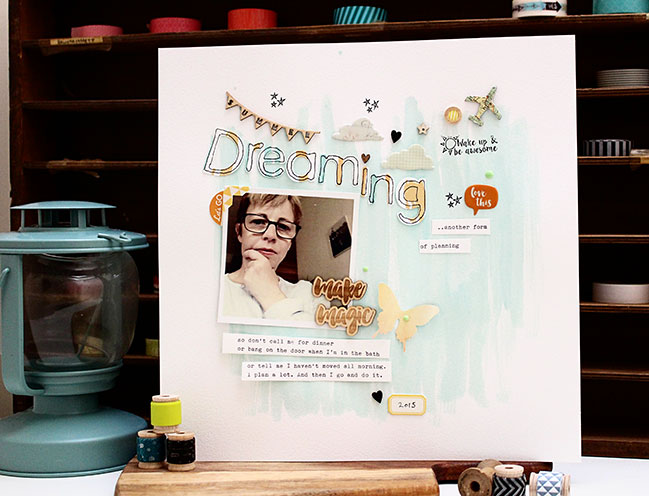
Now, with some mist usage safely achieved I was encouraged to try another lovely Corrie trick and use a paintbrush to paint ink straight out of the bottle onto white cardstock to create a background for a layout which finished up looking like this.

Inspired to Scrapbook with Mists by Sian Fair @ shimelle.com

I’m a dreamer: but it’s when I let my mind wander that I get an idea, or maybe two. When I’m taking a bath, when I look like I’m reading, but especially when I’m staring into space, leave me be, please. I’m planning, not dreaming.


Sian Fair lives with her family in the UK and takes her daily exercise by climbing the four flights of stairs to her desk at the top of the house. She loves to scrapbook the life and times of her friends and family and she has been known to follow them round, as she carries a notebook and waits for something scrapworthy to occur. She is currently designing for scrapbook kit club Gossamer Blue and for Get It Scrapped. She has also written for scrapbook magazines and contributed projects to classes at Craft With May and Masterful Scrapbook Design. You can find Sian on her blog at From High in the Sky Facebook, Instagram and Pinterest.

Gluten-Free Chocolate Peppermint Tart - Inspired by the Bake Off

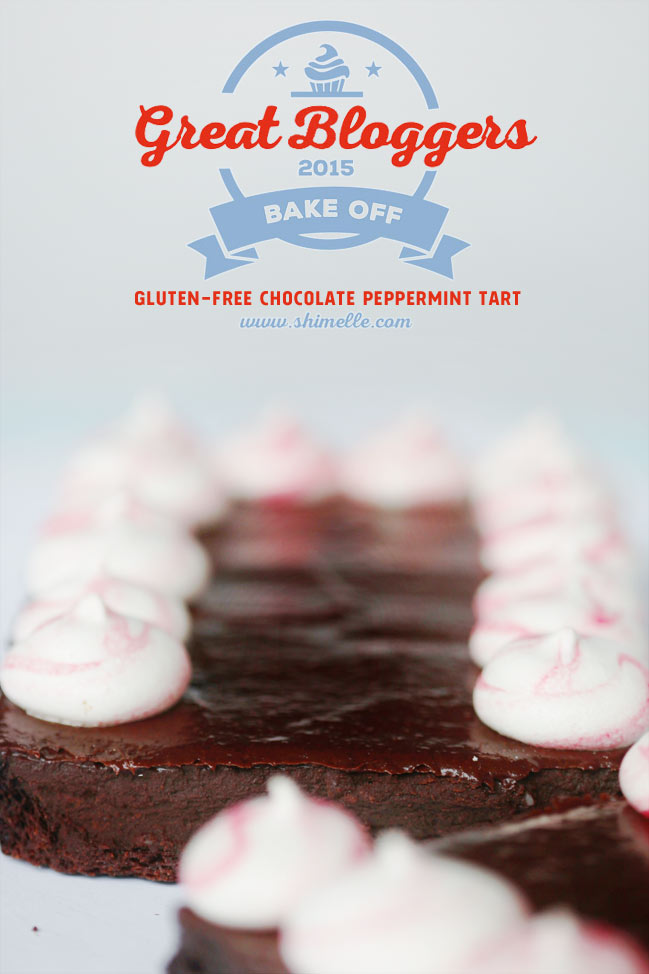
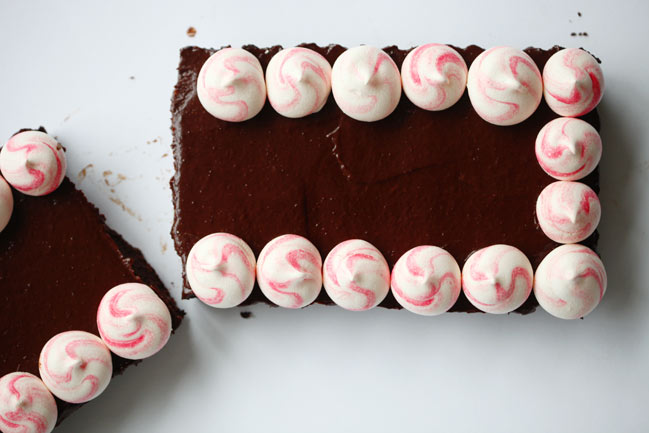
Gluten-Free Chocolate Peppermint Tart - Inspired by the Bake Off #gbbo @ shimelle.com

The semi-finals of the Great British Bake-Off have been and gone and taken at least a metric tonne of chocolate in their wake, along with one more baker. Three whole rounds of chocolate, chocolate, and more chocolate this week: a signature chocolate tart, a giant chocolate soufflé for the technical, and a chocolate sculpture showstopper that went a bit mad really! Flying high in my tiny kitchen thanks to patisserie success with a star baker nod, I desperately wanted a go at that chocolate showstopper, but alas my last two bakes have taken so much time that I really couldn’t bring myself to spend an entire beautiful sunshine-filled family weekend shoved in the kitchen, so the chocolate tart for me this week. But not without a little bit of extra something, because I am apparently incapable of leaving well enough alone. Consider it my tribute to the baker on the show who seems to have the same problem!

Gluten-Free Chocolate Peppermint Tart - Inspired by the Bake Off #gbbo @ shimelle.com

Maybe it is the early Christmas paper crafting this year that has me thinking peppermint already or maybe it’s because someone asked me last week what I missed from America and I replied ‘Other than family and friends, probably Girl Scout cookies’. Anyway, chocolate and mint and an attempt to remember the finer nuances of the Girl Scout Thin Mint were on the agenda. Side note: I was definitely respectable at selling Girl Scout cookies as a small child, and once had someone order thirty-two boxes of Thin Mints all in one go. I have no idea if that was a year supply or her Christmas shopping for everyone else or something else creative. I just said thank you a lot and left with a big smile on my face. Second side note: Girl Scout cookies have come up in conversation a great many times since I moved to the UK. It is a surprisingly high number of people who assume the cookies are actually made by the Girl Scouts, leading many to confusion over why something would be so universally lauded when it would be like any bake sale, and completely a cookie roulette as to whether your local scouts were talented bakers or far from it. Alas, they are made in a factory and the scouting part is the selling and delivering. I know your life is richer for knowing that, yes?

Gluten-Free Chocolate Peppermint Tart - Inspired by the Bake Off #gbbo @ shimelle.com

For the chocolate pastry crust, I actually started with the same cookie base I used last week, but halved in size, and added extra butter, cocoa powder, and icing sugar to make it more a buttery and crumbly chocolate pastry rather than a cookie. Have to say this is a spot where I can see they are just cutting corners to make drama on the show – I have never met a chocolate pastry that wasn’t improved by a few hours chilling in the fridge. Taking that extra time away, the bakers end up with a sticky and unpredictable mess.

For the chocolate pastry, combine half of this cookie dough recipe with an extra 50g butter, 20g cocoa, 50g icing sugar, and 1/2 teaspoon peppermint extract.

Butter a tart tin and line the bottom with parchment. Roll out the pastry and press into the tin. Pierce several times with a fork. Bake for 10 minutes at 180C. When out of the oven, press into the pan with the back of a spoon or a pastry tamper.

Gluten-Free Chocolate Peppermint Tart - Inspired by the Bake Off #gbbo @ shimelle.com

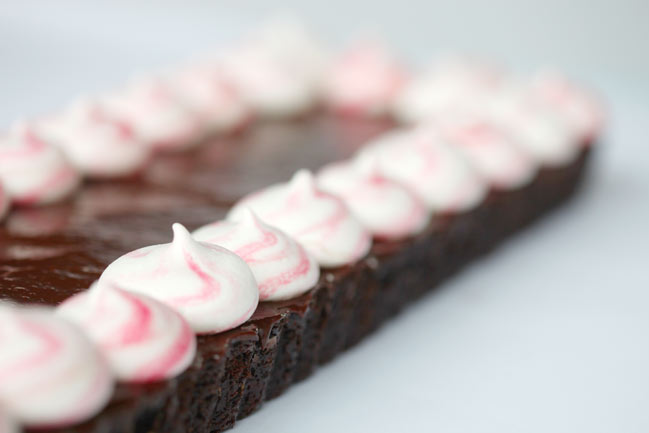
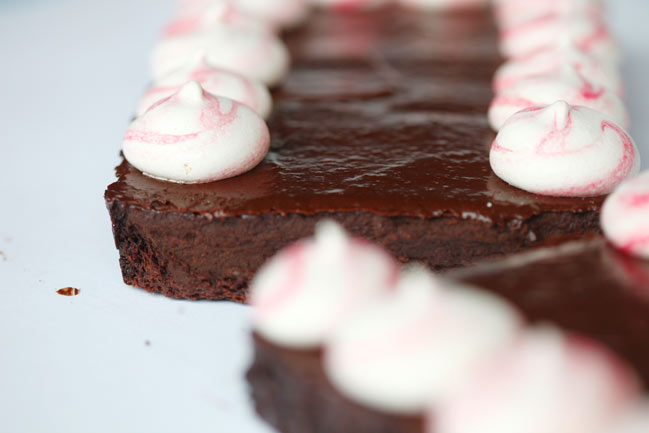
Then there are two chocolate fillings: a rich, set chocolate mint ganache and a shiny, lighter chocolate mirror glaze. The mint ganache definitely puts this into Thin Mint territory for me. To make it look the part for a Christmas party, I tried making peppermint meringues to mimic peppermint candies, which were easy enough if you have a pretty liberal definition of ‘mimic’!

For the chocolate mint ganache, heat 350ml double cream in a saucepan until it just starts to bubble. Remove from heat and add 450g dark chocolate, broken into pieces. Let it just sit in the pan for about two minutes, then stir slowly to mix. Stir in 70g unsalted butter and 1 teaspoon of peppermint extract. Pour into the pastry crust and chill in the fridge.

For the chocolate glaze, I followed this tutorial, with 4 sheets plain gelatine, 125 ml water, 225g sugar, 150g dark chocolate, 30g sifted cocoa, and 65ml double cream. I would suggest going as dark with the chocolate as you can – I made it with 60% chocolate and it is very, very sweet. There isn’t a great deal of it in a single serving, so that might be okay as a contrast to the richness of the ganache, but I think if I was using these steps again, I’d be tempted to go for the 85% chocolate instead. Pour over the cold tart once the ganache has set, and put it back in the fridge to set again.

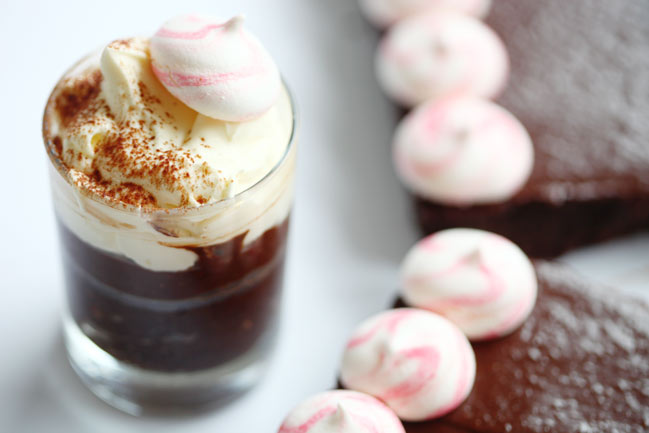
For the meringues, I tried dried egg white powder for the first time. I used four sachets, which is equivalent to four egg whites, and mixed to the instructions on the packet, which is basically six teaspoons of warm water per sachet, gradually mixed. Then whisked with the mixer with 1/4 teaspoon cream of tartar and a pinch of salt until soft peaks formed, then gradually added 300g sugar while it continued to whisk away, eventually turning into pillows of white meringue. Meringue takes on flavour extracts to an extreme so it only took the tiniest few drops of peppermint to make a very minty meringue. The red is a gel food colouring drawn inside the piping bag in a few lines, then fill the piping bag with the meringue and pipe circles onto baking parchment and dry them out in the oven on low heat. These small meringues took about 45 minutes at 100C, and kept their white colour. Too high a heat will turn it yellow!

Gluten-Free Chocolate Peppermint Tart - Inspired by the Bake Off #gbbo @ shimelle.com

These amounts actually made a bit too much ganache and glaze and a heap too much meringue, so we also had enough for three little layered chocolate pots, with the remaining double cream mixed up for a vanilla whipped cream to balance all that chocolate and peppermint!


Great Bloggers Bake Off is organised by Jenny at Mummy Mishaps. See more bloggers’ bakes this week at participating blog, Baking Queen 74.
Please no spoilers from the actual show in the comments, for those who watch later than the original broadcast! Thanks.

From Inked Hearts to Painted Wood Veneer :: Scrapbooking with guest Nancy Damiano

From Inked Hearts to Painted Wood Veneer :: Scrapbooking with guest Nancy Damiano @ shimelle.com

I think you will love today’s guest project – I really do! I’m not sure I’ve ever seen a page made by Nancy Damiano that I didn’t love. Her style is so clean and crisp but detailed and nuanced. It’s just always a breath of fresh air to me. I miss working with this lady all the time – she was also a Garden Girl back in our Two Peas days – and I’m so happy she is able to join us here today. Please welcome Nancy! -Shimelle

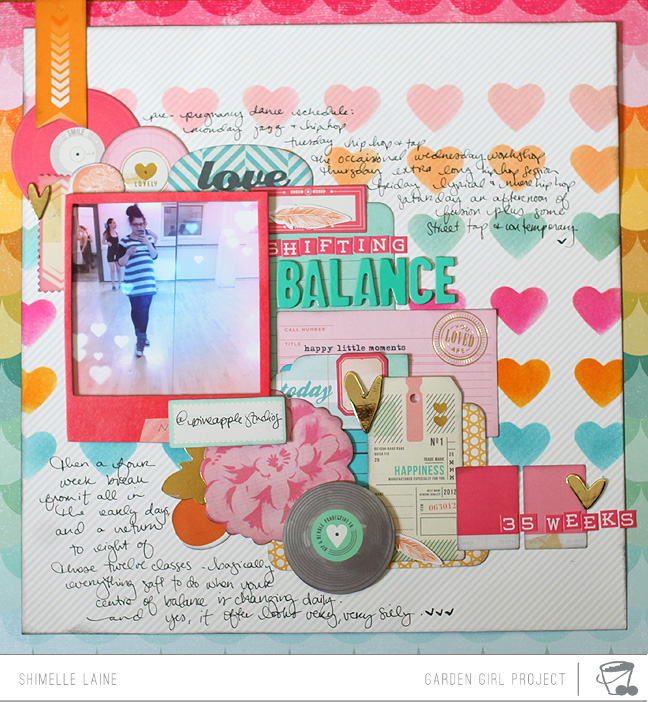
For my layout I was really inspired by Shimelle’s Scrapbooking Colour Schemes with Pink layout. The first thing that caught my eye was the beautiful colour scheme. I love bold pops of colour and this layout delivers. I also like linear designs that feature repetition of a shape or element. The repeated hearts on Shimelle’s layout inspired the band of painted wood veneer featured on my page.

From Inked Hearts to Painted Wood Veneer :: Scrapbooking with guest Nancy Damiano @ shimelle.com

Let’s take a look at this tutorial on how to dress up plain wood veneer and create a bold band of repeated shapes:

It’s a lot easier than it looks isn’t it? Using supplies on hand like a stash of veneer shapes and acrylic paint can add dimension, style and a splash of colour to your layouts. Individually, the painted veneer may not look like much but take a look at how repetition adds a punch of wow to a plain background.

From Inked Hearts to Painted Wood Veneer :: Scrapbooking with guest Nancy Damiano @ shimelle.com

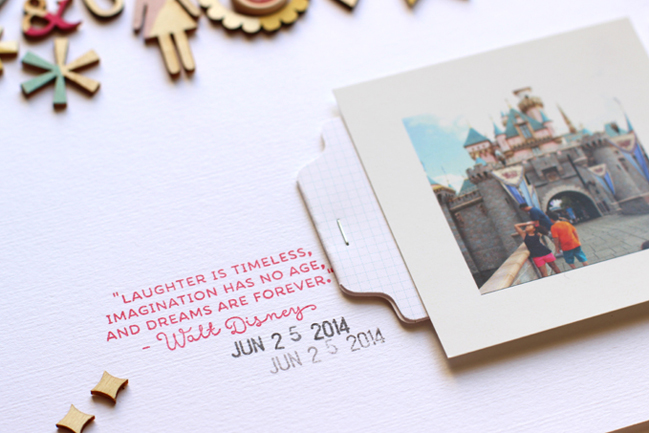
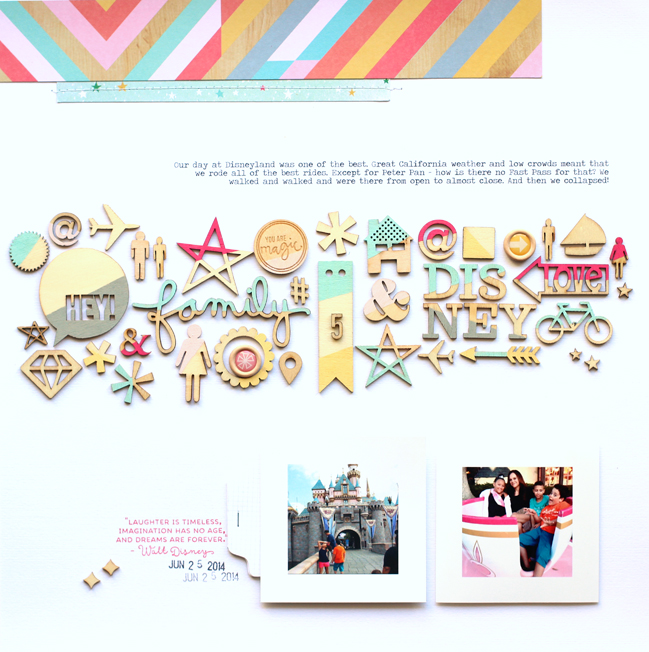
Adding a small stamped sentiment to a layout lends a nice handmade touch. The fuchsia ink provides a nice contrast to the white card stock.

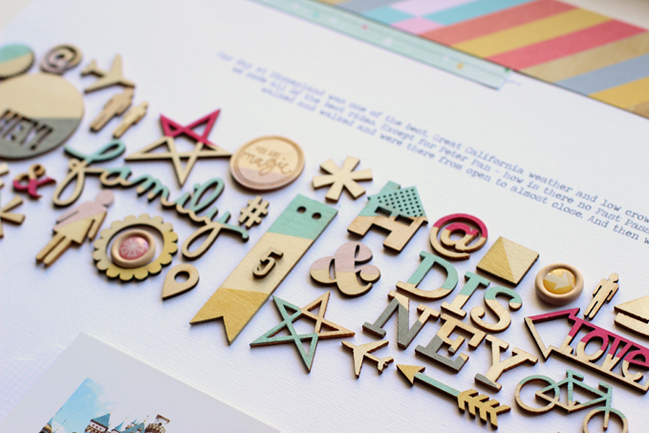
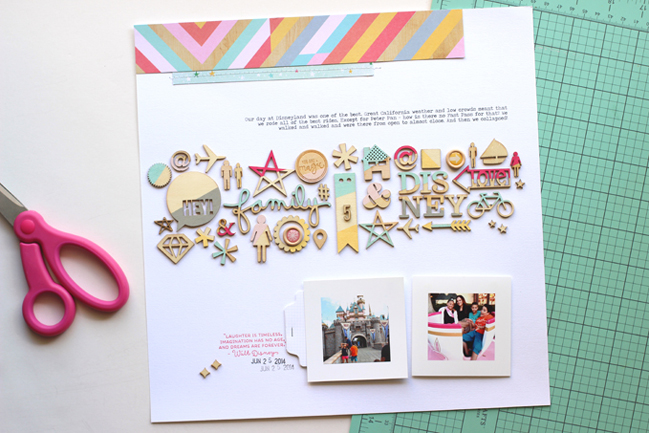
The fun painted accents and colourful patterned paper are the perfect background for these photos from Disneyland. They tell the story of a whimsical, happy place from the start. This layout is the opener for my Disneyland album and showcases the ‘where’ and ‘who’ went. The heavily embellished page is a delightful way to begin this story.

From Inked Hearts to Painted Wood Veneer :: Scrapbooking with guest Nancy Damiano @ shimelle.com

From Inked Hearts to Painted Wood Veneer :: Scrapbooking with guest Nancy Damiano @ shimelle.com

If inked hearts inspired painted wood veneer, what’s your next step in this bit of creative Chinese Whispers? We’d love to see what you’re inspired to make today.


Nancy Damiano lives in New Jersey with her husband, son and a gaggle of nieces and nephews she adores. She has a passion for the color aqua, Disney, and anything paper + craft. She currently designs for Simple Stories, Scraptastic Kit Club and Scrapbook & Cards Today Magazine. You can find more of her work and life at her blog, Instagram and Pinterest. You can also find a lovely collection of process videos on her YouTube channel.

Gluten-Free Cookies and Cream Mokatines, or The Day I Used Every Single Bowl I Own on One Recipe

Gluten-Free Oreo Mokatines inspired by the Great British Bake Off @ shimelle.com

After last week’s Quidditch Cake, this week’s bake off brings such excitement! The Quidditch Cake won the honour of Star Baker and Tesco sent me a £20 gift card toward this week’s bake: patisserie week! I’ve often heard it mentioned in terms of hunting or farming or something that if you want to eat meat, you should be comfortable killing your dinner. I don’t eat meat so that entire concept just makes me queasy really. But I’m all about adopting this idea as a new motto when it comes to patisserie. I will make patisserie bakes once a year just to go through the magnitude of the entire dish to then have full respect every time I go into a diabetic coma while looking at a glass cabinet of fancy pastries. (Maison Bertaux, I am looking at you.) This bake required more dishes than I actually own, to the point that I had to wash my mixing bowl three times in the middle of all this, but I’m getting ahead of myself.

Patisserie week was the quarter final and filled with three time-consuming challenges in the tent: a signature challenge of two kinds of cream horns, a technical challenge called mokatines, and a showstopper that involved eclairs stood on their ends and layered until they resembled either a nun or a dalek. Seriously. I nearly went for the nun/dalek option, because every year I watch patisserie week and note scornfully that I have never actually made ‘creme pat’ as they are so fond of saying, and surely I should learn to do this. But I couldn’t get over the fact that the nun that remained standing was coating in so much molten-sugar-glue that it just didn’t seem like it would be fun to actually eat. And that technical challenge was mocha flavoured. Coffee and chocolate and cake IN THE SAME BITE. I should never have doubted that this was the way forward. After trying to follow Mary Berry’s recipe for the technical last week and deciding she was a bit out of her tree with the estimation of preparation, I thought I’d take her recipe as more of a starting point and make it my own this week. Well, my own, with a big helping of inspiration from Flavourtown. London has a lot of cupcake bakeries and I have tried pretty much all of them. The only one I love without question is Flavourtown. Giving up my nigh-on weekly treat of a Flavourtown cupcake has been very sad and I have stood there on multiple occasions asking myself if maybe I wouldn’t mind a few days of hives for the glory of that cupcake. (Oh how I hope this is a temporary sensitivity I can grow out of, because I think I might need to just wear long sleeves and a ski mask if it’s going to go on forever. My will power is wearing thin.) They have flavours I dream about, and one of my absolute favourites was a cupcake that combined an Oreo cake with a chocolate ganache centre, and a coffee buttercream. Completely over the top. Completely amazing. Surely I could take that idea and apply it to those dainty little Mary Berry Mokatines? This was the plan, at any rate.
Gluten-Free Oreo Mokatines inspired by the Great British Bake Off @ shimelle.com

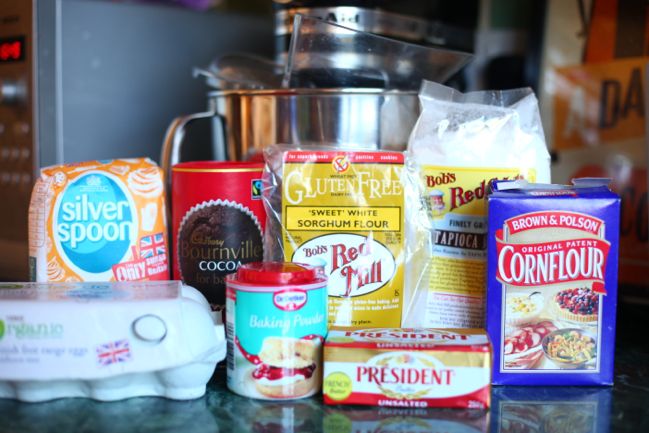
This is a complicated plan when it requires gluten-free Oreos, basically, which is not a thing we have here. Google tells me they exist in some part of the world, but not here. I read a few recipes and most of them depended on that lovely replacement potato starch, which I can’t eat either. I guessed at some flours I had and came up with a rough draft of my own Oreo recipe. It just seemed to take a million ingredients, and I hadn’t really started with the actual mokatines yet. Oh well.
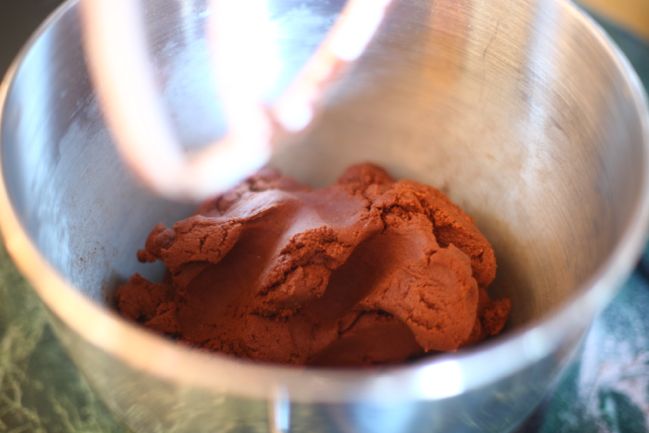
Gluten-Free Oreo Mokatines inspired by the Great British Bake Off @ shimelle.com

These were made with 75g sorghum flour, 95g tapioca flour, 45g corn flour, 50g cocoa powder, 1/2 teaspoon baking powder, 190g sugar, and a pinch of salt stirred in the mixing bowl, then 115g butter, 1 egg, and 2 tablespoons of cream added and mixed until it came together like a pastry dough, then wrapped in cling film and chilled for a few hours.
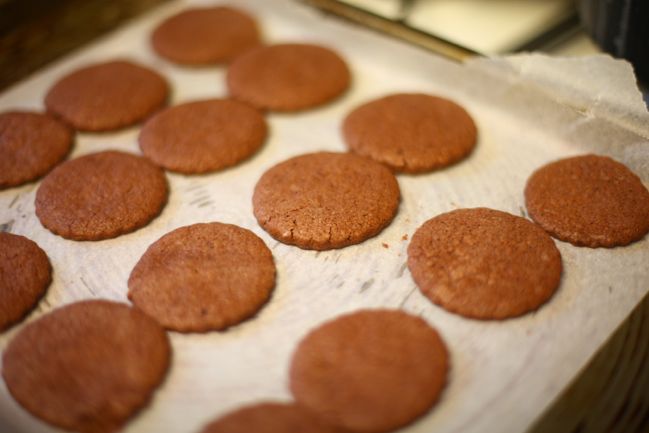
Gluten-Free Oreo Mokatines inspired by the Great British Bake Off @ shimelle.com

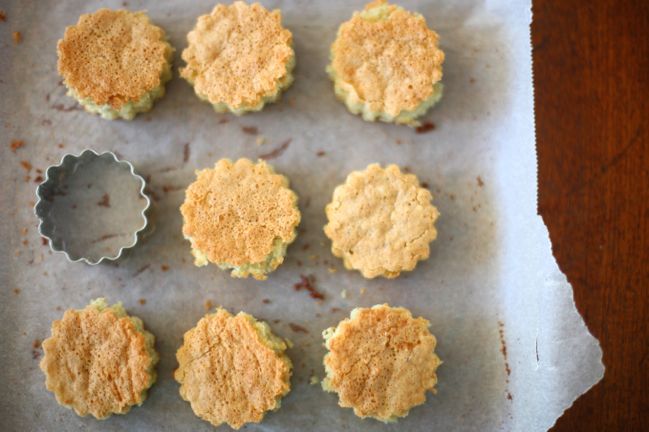
Then rolled out and chopped with a cookie cutter and baked for ten minutes at 180C, and moved to a wire rack to cool.

I think I may tweak this recipe over time. Straight out of the oven, they taste a little too much of the tapioca and I’d like the cocoa flavour to be more overwhelming like a real Oreo. The next day, they were a bit softer than an Oreo too, rather than crispy. But they aren’t greasy like a real Oreo, which I presume is because these are made with butter and Oreos are made with shortening… and I think I’m okay with having just the flavour and not the grease! I’m liking these, but I think they can be made perfect with a few tiny changes.
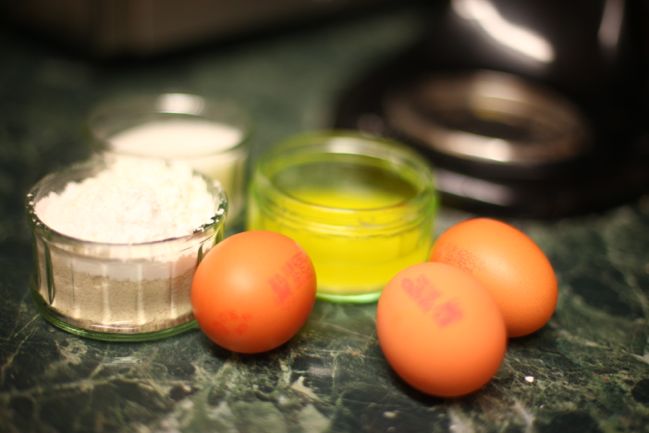
Gluten-Free Oreo Mokatines inspired by the Great British Bake Off @ shimelle.com

Then time for the genoise sponge to get the actual mokatines started. This takes far fewer ingredients than the chocolate cookies! I liked that this week’s episode let us know a bit about how their technical instructions are written, and apparently it just said ‘make a genoise sponge’. I think I might have given up right then. I wish they would publish the recipe as they give it to the bakers and then also post the full version. It seems they do neither really, as the whole point of a genoise sponge (as they told us several times in the narration of the episode) is that there is no chemical raising agent – no baking powder or the like – it all has to come from the whipping of the eggs. Then I pull up the recipe on the BBC website and it lists self-raising flour as an ingredient. Well, that’s not exactly right then, is it?

I used 40g butter, 3 eggs, 75g sugar, 35g sorghum flour, 20g tapioca flour, and a tablespoon of cornflour, basically following the Mary Berry recipe but no self-raising flours involved. Much egg whipping involved. Many bowls involved. And following my belief that YouTube can provide instructions for pretty much anything, I followed this video for tips…
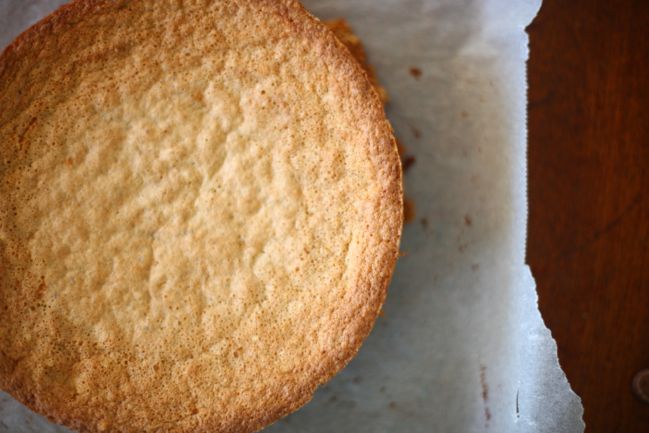
Gluten-Free Oreo Mokatines inspired by the Great British Bake Off @ shimelle.com

And it worked!

Gluten-Free Oreo Mokatines inspired by the Great British Bake Off @ shimelle.com

What I didn’t have was the specified seven inch square tin, so I used an eight inch round tin, and a pastry cutter to make round cakes. I considered buying a new tin, but the cupboard with the baking tins is already one where you have to kind of push it all into place and let go at the very last second as you latch the door closed. I really shouldn’t buy a new tin for my once-a-year dip into patisserie, I suppose.
Gluten-Free Oreo Mokatines inspired by the Great British Bake Off @ shimelle.com

Time to make the first of three frostings that make this all come together. I suppose I have only myself to blame, because Mary Berry doesn’t use chocolate ganache. She uses a combination of apricot jam and fondant. The woman is obsessed with apricot jam, from what I can tell. It’s her version of edible glue, and it is in so many recipes. But I don’t actually like the taste of apricot jam. Nor the taste of fondant really. But you know what looks great on the top of a cake AND has the adhesive qualities of apricot jam? Chocolate ganache. There is no room in my life for apricot jam where there could be chocolate ganache.

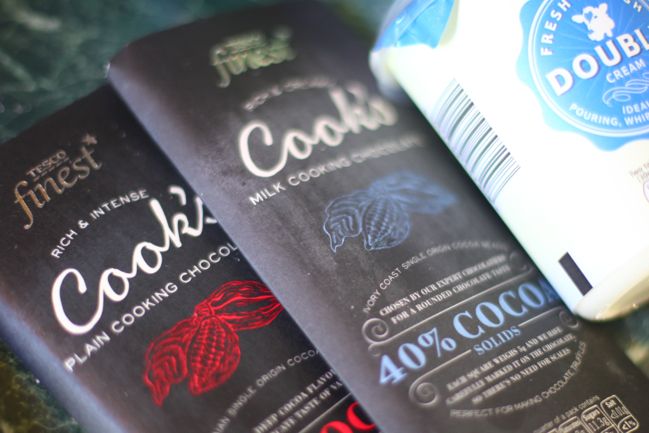
100g of double cream, 100g of 85% dark chocolate, and 100g of 40% milk chocolate melted together made a pretty good amount for these cakes, and into the fridge it went for more bowls and more frosting.
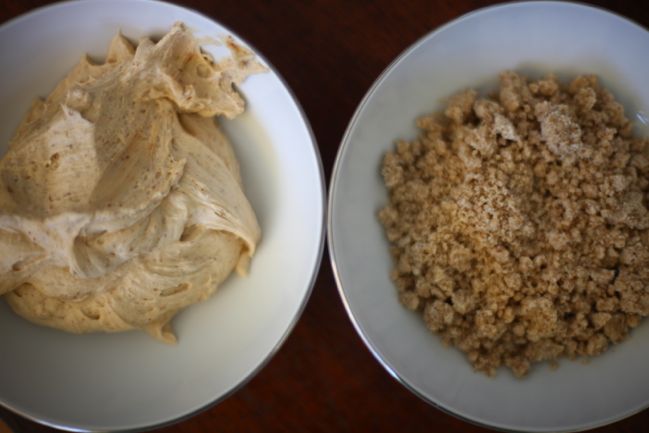
Gluten-Free Oreo Mokatines inspired by the Great British Bake Off @ shimelle.com

I tried to follow Mary Berry’s recipe for the coffee buttercream. In fact, I followed it twice. One of these bowls is the second attempt at that recipe and the other is a coffee buttercream I’ve made so many times I could make it in my sleep. I couldn’t get the instant coffee to dissolve in the butter no matter what, and it just came out a terrible mess and went in the bin. Yet another reason I would have been kicked out of the tent by this point. But making a buttercream with butter, icing sugar, vanilla, milk, and a tiny bit of concentrated espresso? That worked, and I can say with experience that it tastes very nice on a homemade Oreo.
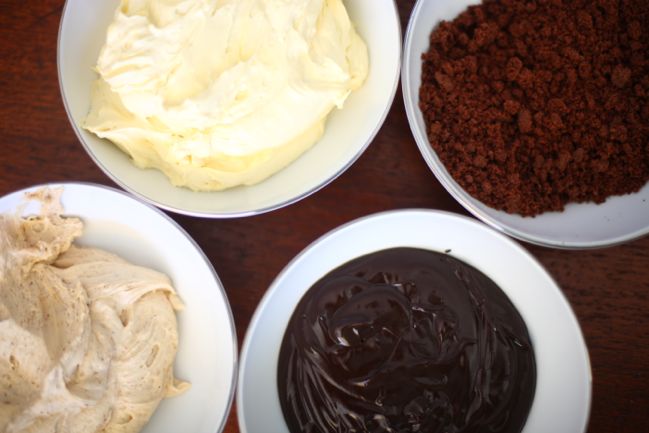
Gluten-Free Oreo Mokatines inspired by the Great British Bake Off @ shimelle.com

This post is getting ridiculously long, much like the process of making these tiny cakes. Suffice to say the crème beurre au moka, or coffee-flavoured French buttercream, basically, is really really good. Once again, YouTube delivered all the secrets I needed.

So that is three bowls of different frostings plus a bowl of crushed faux Oreos, ready to turn that light little sponge into something completely and totally over the top.
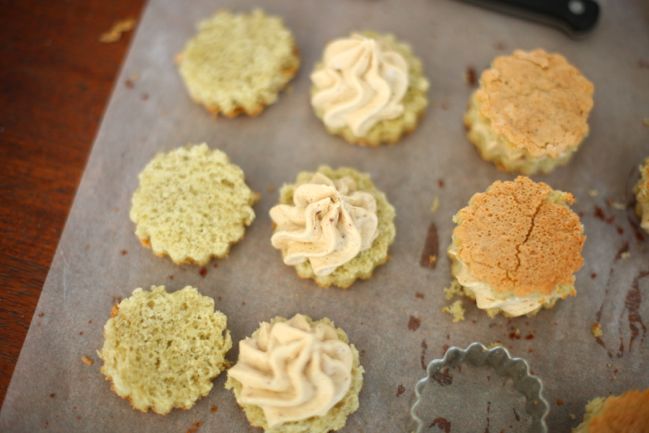
Gluten-Free Oreo Mokatines inspired by the Great British Bake Off @ shimelle.com

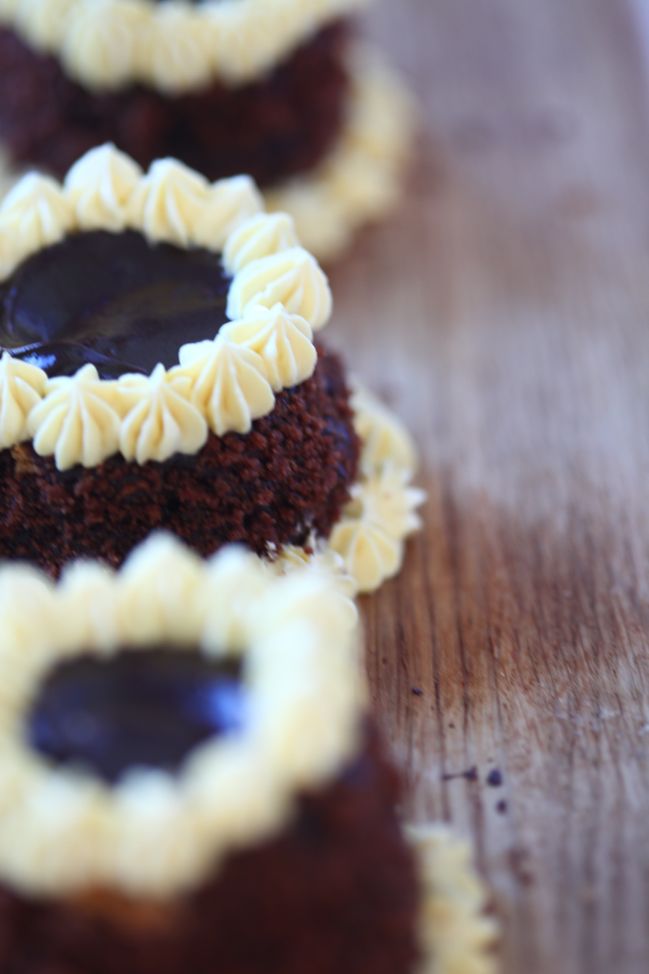
Delicate sponge rounds cut into layers! Centres piped with delicate coffee buttercream!
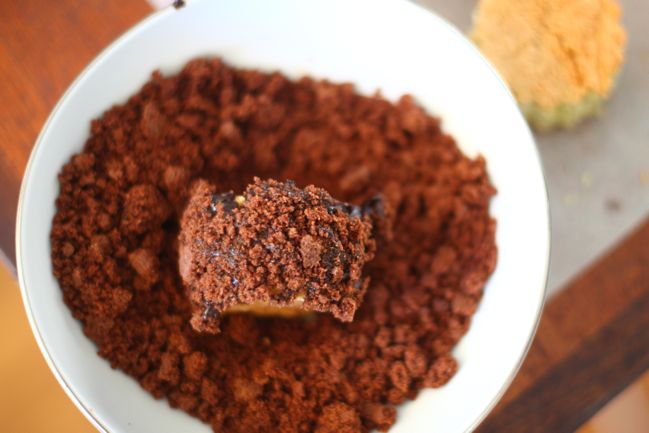
Gluten-Free Oreo Mokatines inspired by the Great British Bake Off @ shimelle.com

Then came the part where they ceased being delicate in any fashion because they were coated in ganache and rolled in cookie crumbs.
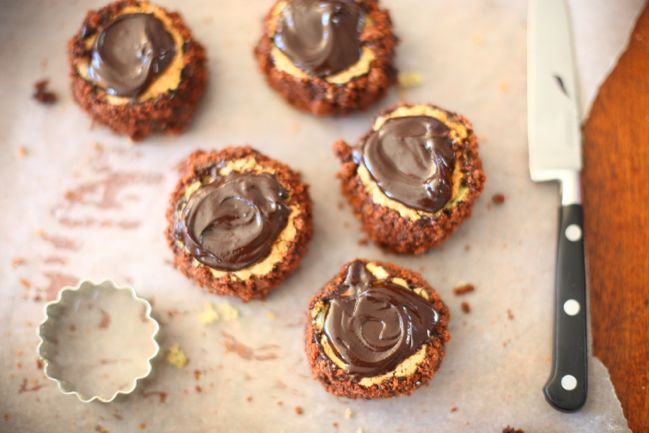
Gluten-Free Oreo Mokatines inspired by the Great British Bake Off @ shimelle.com

Delicate is overrated.

Gluten-Free Oreo Mokatines inspired by the Great British Bake Off @ shimelle.com

French buttercream piped around the edges, and they are finally complete!
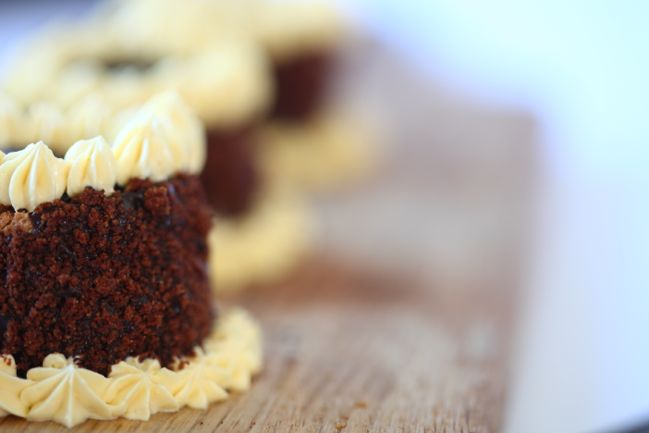
Gluten-Free Oreo Mokatines inspired by the Great British Bake Off @ shimelle.com

It took two days and every bowl I own to make eight tiny cakes. Once a year is enough for patisserie week, I think.
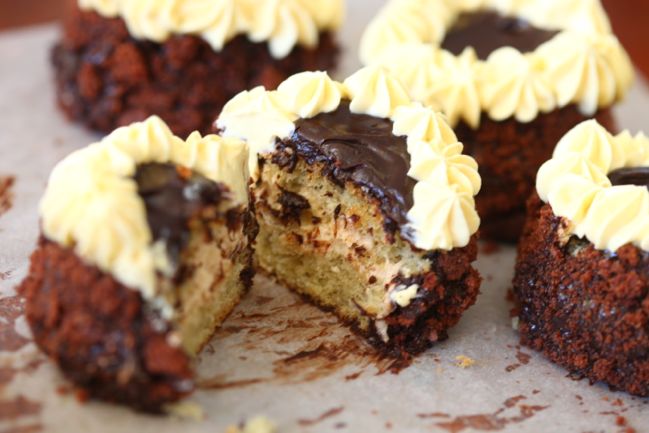
Gluten-Free Oreo Mokatines inspired by the Great British Bake Off @ shimelle.com

But it won’t take two days for them to disappear. Cookies and coffee cream and chocolate and cake. It’s all my food dreams in one. Happy (yet dangerous!) times.


Great Bloggers Bake Off is organised by Jenny at Mummy Mishaps. See more bloggers’ bakes this week at participating blog, Bluebird Sunshine. Special thanks this week to Tesco, who sent me a gift card, and have a big section of baking recipes on their RealFood site.
Please no spoilers from the actual show in the comments, for those who watch later than the original broadcast! Thanks.

5 scrapbooking projects with the True Stories Phrase Roller Stamp and Notepad by Alissa Fast

5 things with the true stories phrase roller Stamp and notepad with alissa fast @ shimelle.com

Today I’m delighted to welcome Alissa Fast, who I ‘met’ when she first signed up for a class many years ago. Since then, she’s done Christmas journals and Learn Something books aplenty, amongst all her other lovely projects! I hope you love her inspiration for getting more from your phrase stamps. -Shimelle

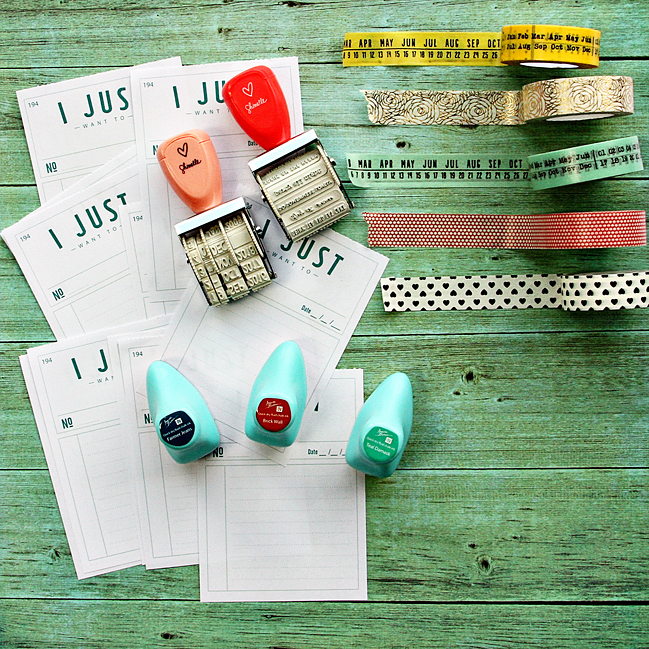
I love roller stamps. It’s that simple. I’ve always loved roller stamps and it all started with an office supply store date roller stamp so many years ago. Today the roller stamp has evolved to a supply I cannot live, or scrap, without. They just add that special touch to all of my projects. Sometimes a finishing touch. Sometimes as the journaling. Sometimes as a design element. Always something. Shimelle went a step even better with this little set. The notepad that comes with the True Stories Roller Stamp is so versatile and, well, amazing. I loved working with it to create these fun projects and I hope you find them inspiring.

5 things with the true stories phrase roller Stamp and notepad with alissa fast @ shimelle.com

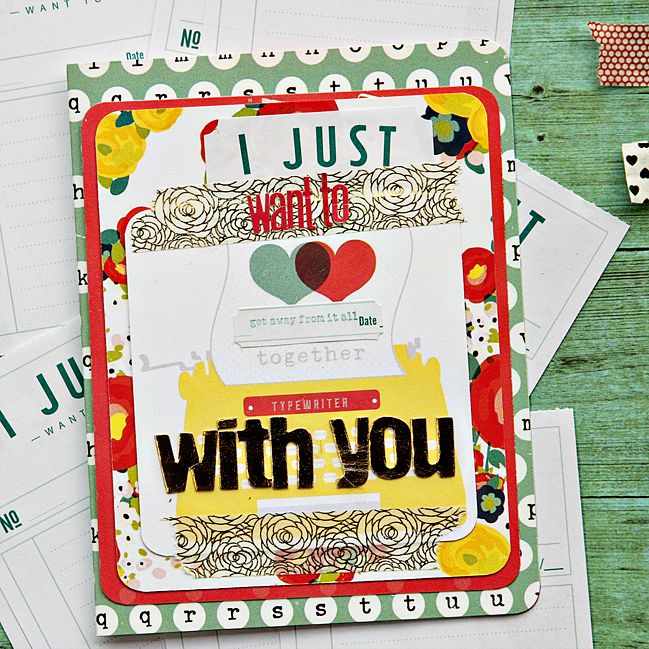
The card.
I started with a fun card for my sweetie. I punched out a couple labels from a sheet of the notepad and strategically layered papers from the True Stories collection, washi tape, letter stickers and a phrase from the roller stamp to personalize my card. Layering papers, washi tape and letter stickers are my go to techniques when scrapping.

5 things with the true stories phrase roller Stamp and notepad with alissa fast @ shimelle.com

5 things with the true stories phrase roller Stamp and notepad with alissa fast @ shimelle.com

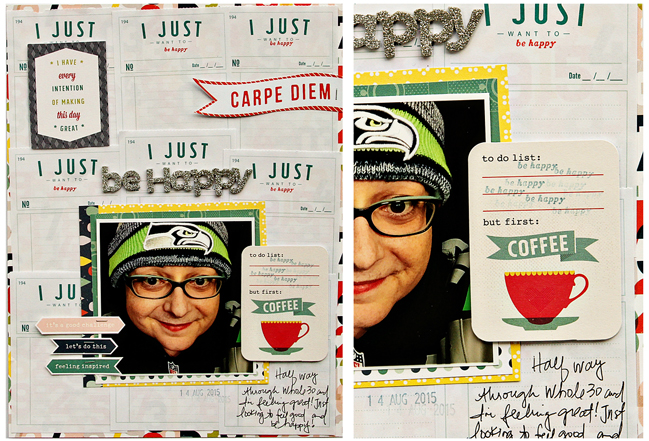
The layout.
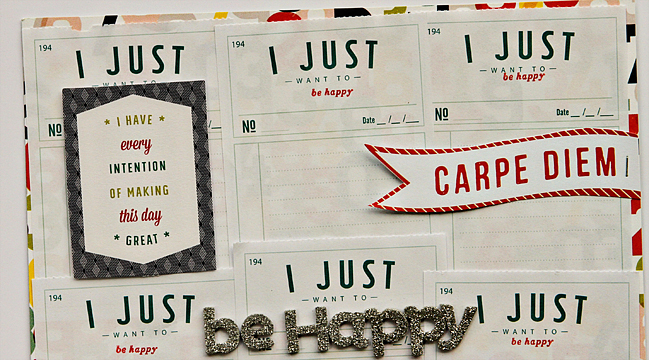
I really wanted to tear off a bunch of the notebook pages and layer them up for a background page. Reminds me a bit of a messy pile of papers and I love all the layers. I stamped all of the ones I could still see with the “be happy” phrase and made it my tile of the pages. Lots of layers, staples, a little glitter and stamping. These are a few of my favorite things.

5 things with the true stories phrase roller Stamp and notepad with alissa fast @ shimelle.com

5 things with the true stories phrase roller Stamp and notepad with alissa fast @ shimelle.com

5 things with the true stories phrase roller Stamp and notepad with alissa fast @ shimelle.com

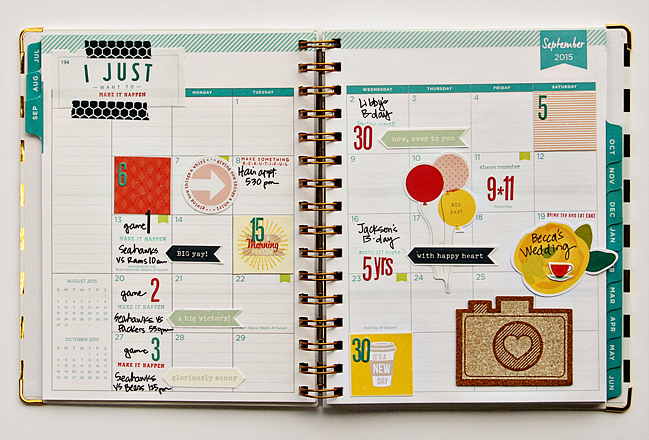
The planner.
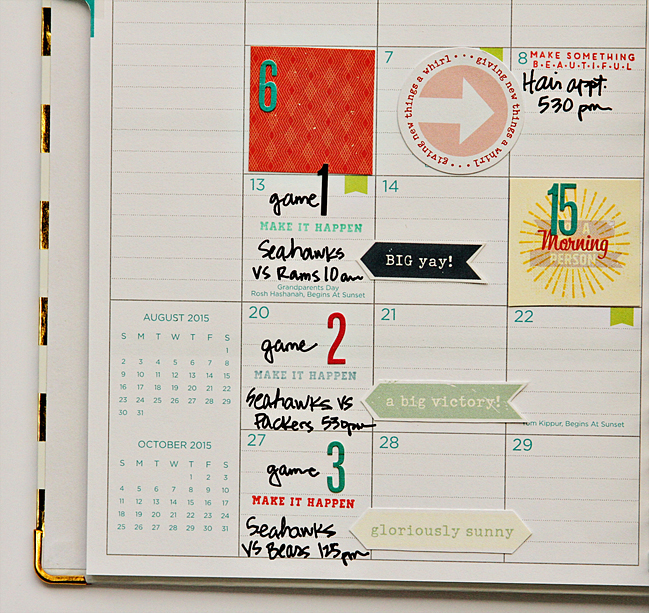
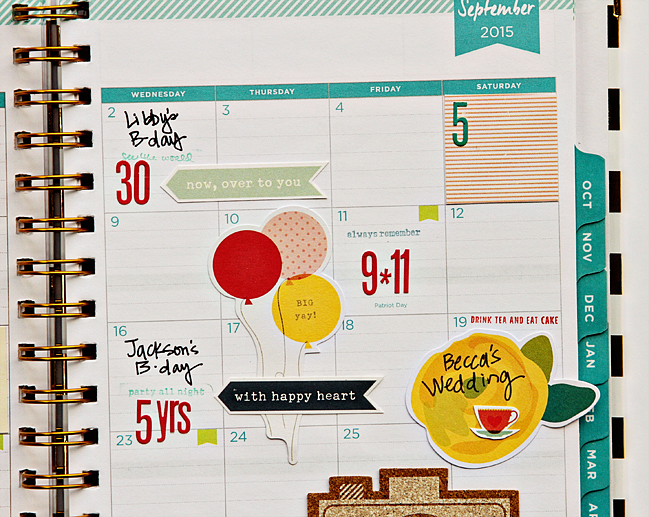
Next up was the September monthly spread in my home planner. I love my planners because they help me “make it happen” every day. They keep me on task, which I love. I snipped off the top of one of the notebook sheets and stamped it with the “make it happen” phrase as the title to my month. I stamped random, appropriate, phrases to my special days in September and added a few bits from the True Stories Die Cut Cardstock Shapes. This spread just makes me happy to look at it and really motivates me to get things done. Don’t forget your scrapbook supplies are perfect for decorating your planner pages. I find it’s a great way to use up your stash.

5 things with the true stories phrase roller Stamp and notepad with alissa fast @ shimelle.com

5 things with the true stories phrase roller Stamp and notepad with alissa fast @ shimelle.com

The pocket page.
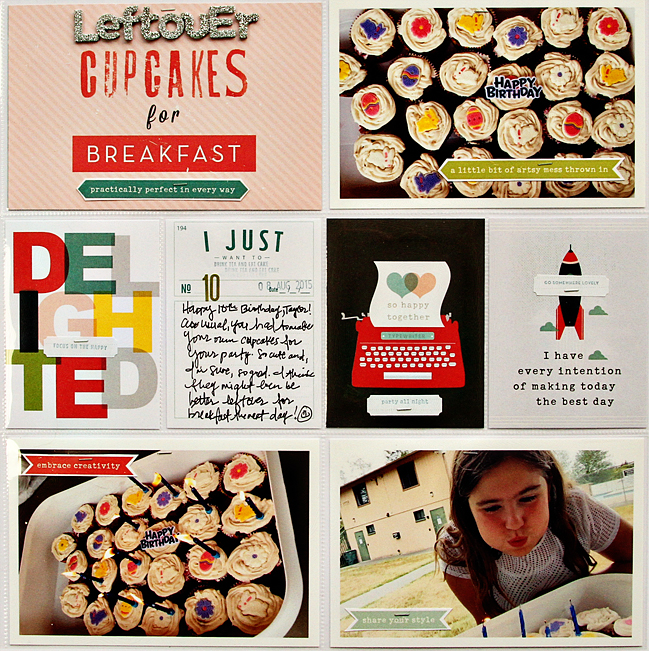
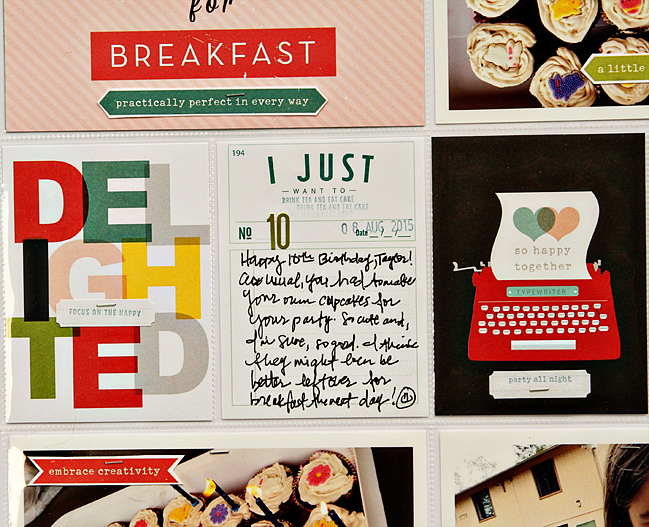
I think pocket pages are my favorite to scrapbook lately. Each little pocket is like a tiny little scrapbook layout or page in a mini book. I find that they also come together pretty quickly. Here, I selected a cut apart page from the Tue Stories collection and a page from the roller stamp notebook to fill the pockets. The notebook is the perfect size for 3×4 pockets and it’s a perfect spot for the journaling on this page about my niece’s recent 10th birthday. I also punched out labels from another sheet of the notebook to add to each of the other 3 3×4 cards with a stamped phrase from the roller stamp. Staple them on and we are good to go! The perfect little design element on this page!

5 things with the true stories phrase roller Stamp and notepad with alissa fast @ shimelle.com

5 things with the true stories phrase roller Stamp and notepad with alissa fast @ shimelle.com

The mini book.
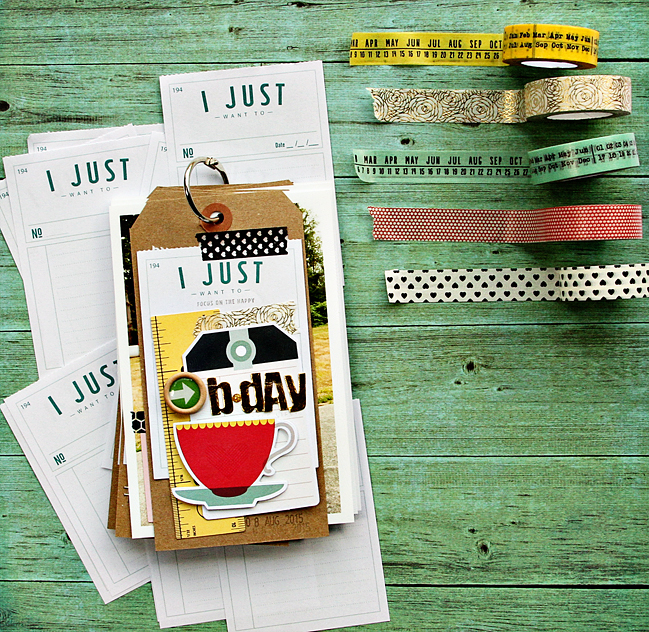
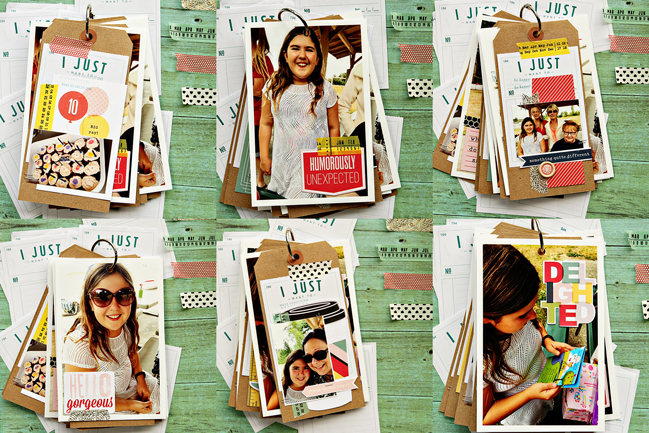
My last project is a mini book I made out of tags and 4×6 photos. On each of the tags I layered a sheet from the notebook and stamped it with a different phrase from the roller stamp. This mini book came together fairly quickly by using the same design idea for each page. I just varied the washi tape, die cuts and photos to provide a little variety, while still keeping the whole book cohesive.

Now, I encourage you to take one of these ideas for the phrase roller stamp and notebook set and make it your own. There are so many uses for a roller stamp that I didn’t even get to them all. You could stamp them all over the page, or pocket card, as a background element (similar to the “to do list” card on my page layout) or add them as a simple journal element on the photos in a mini book. So many ideas I could go on for days! I hope you’ve enjoyed these ideas and have been just a little bit inspired.
Thanks for stopping by today!


Alissa Fast lives in Ferndale, WA with her hubby of 28 years and her beloved cat, Stormy. She loves taking photos and documenting her everyday life. Her all-time favorite scrapbooking products are her tiny attacher stapler and washi tape. The last thing she made was a mini book about her family’s last trip to the pumpkin patch last fall. See more of her work on her blog, Instagram or on Facebook . She also designs for Cocoa Daisy, Simple Stories and Elle’s Studios.