pretty paper. true stories. {and scrapbooking classes with cupcakes.}

lovely to meet you Twitter Facebook Pinterest YouTube

Take a Scrapbooking Class

online scrapbooking classes

Shop Shimelle Products

scrapbook.com simon says stamp shimelle scrapbooking products @ amazon.com shimelle scrapbooking products @ amazon.co.uk

Reading Material

travel

Best of Both Worlds Kit Category

Best of Both Worlds :: My scrapbooking product picks for April 2013
Best of Both Worlds Scrapbooking Kit @ shimelle.com
It may be the first of April, but I promise I have no April fools planned here! It’s still a holiday here today and I’m looking forward to a day of mostly scrapping! My studio is almost all back in place, and taking all my supplies off the shelves, into boxes, and back onto the shelves again has made it so tempting to just give up on the unpacking and scrap away for hours and hours.

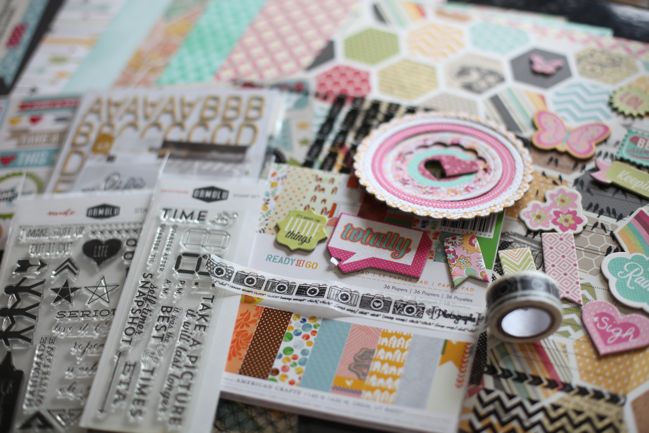
One thing I’m very much looking forward to diving into is the new box of goodies set aside for April’s Best of Both Worlds collection. The April selections are now available to add to your shopping cart, and you can find them right here. Of course there are a few things I hope you’ll keep in mind, as each month’s product picks have a slightly different train of thought behind them!
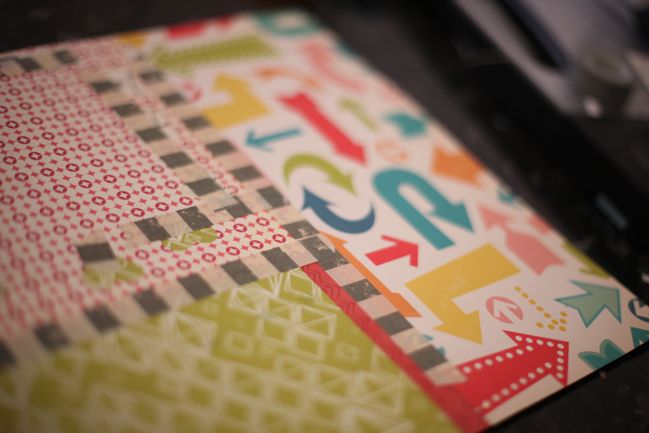
patterned paper b-sides
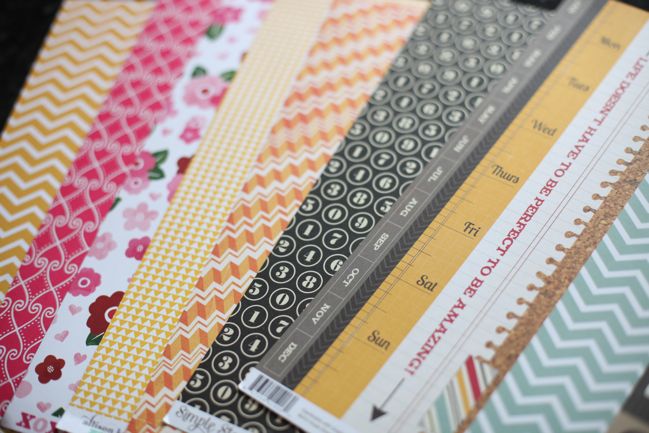
A look at the b-sides of the patterned papers.

This month I’ve included a 6×6 paper pad and just a couple fewer 12×12 papers (there are still seven 12×12 sheets plus a 12×12 transparency). The 6×6 paper pad is on sale at a great price, and it’s a collection of papers I have really loved using. Throughout the next month’s projects, I’ll be including different tips for using 6×6 papers on 12×12 pages, plus a few thing along the way will highlight other useful spots for 6×6 papers too. If you’re already a 6×6 fan, you might already have that tablet in your collection; if you haven’t yet ventured to 6×6, this is a great way to give it a try at very little cost, and I know this particular one is very versatile and will mix and match easily with lots of other supplies.
scrapbooking supplies - stamps
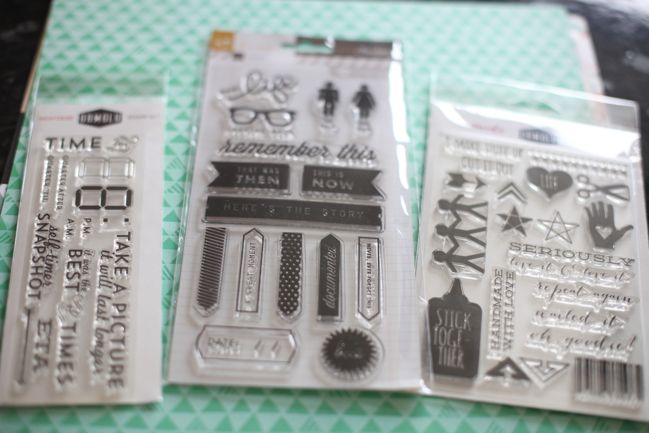
You’ll also notice there are three sets of stamps on the list this month. I don’t expect you to order all three (unless you are a total stamp fiend, and then by all means go ahead), but much like the letter stickers last month, I’ve included three different designs so you can pick something that is most likely to fit the type of pages you do. One has a very general theme, one is more specific to daily routines or everyday documentation, another is quite quirky with a crafty vibe. They are three different prices so you can also look at what best fits your budget – they range from $7.99 to $14.99. Of course, if you prefer not to stamp at all, you can omit the stamps from the kit and take the price point down straight away.

Click here to shop for the April Best of Both Worlds scrapbooking kit.
scrapbooking supplies
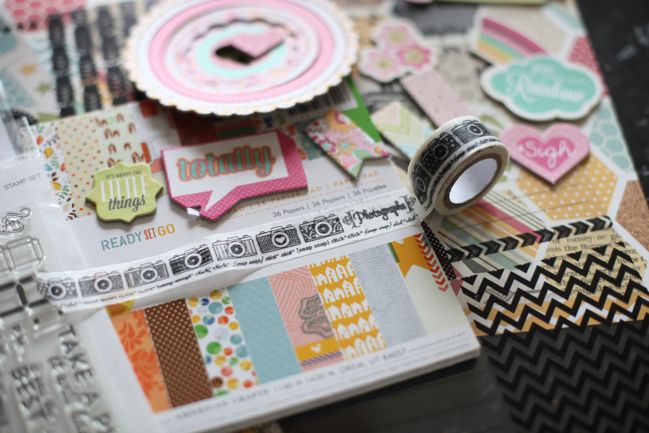
One of the embellishment choices this month is a great pack of printed chipboard shapes. I’ve chosen the more girly colour option, though there are only a couple pieces that are really specific to little girls (there is a pink crown that says ‘princess’, for example, but there are also lots of butterflies, circles, and flowers). If you have a household of boys and don’t do any pink scrapping at all, it still may be too much. There is a boy equivalent of this same pack here, but it’s currently sold out. I would suggest this die-cut pack instead, but please note that’s not chipboard so they will be flat embellishments (that’s fine – pop dots are your friend), and I don’t have that one in my own stash so I won’t be showing examples that use that pack specifically.
scrapbooking supplies - Thickers
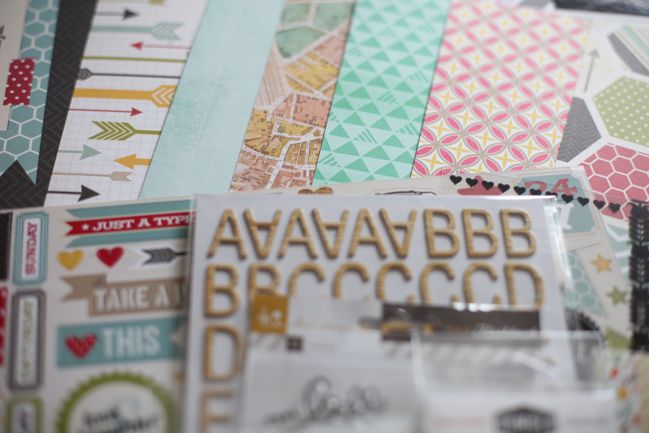
For lettering this month, I have only added one option to the list – a set of woodgrain Thickers. It’s actually not the set in this picture, I’m afraid. The set in the picture is the Goodness font in woodgrain, but that’s sold out at the moment. I’ll actually be using the set that is in the list – the darker woodgrain alphabet in the Patchwork font. It’s just that those are newer and my set is still on its way! I think either would work fine, so if you have one of the two sets already, you’re all set. But I think the darker woodgrain will be easier to read on the patterned papers. The Thickers are often the first things to sell out from the list, so if that happens quickly, I will come back to this post and add some suggestions for others that would work too. But I just wanted to point out that I didn’t add the usual set of smaller letters too. Right now, I have a big stash of all sorts of half-used sheets of small letter stickers, and I’m thinking that maybe quite a few of us are in the same boat. So this month rather than add yet another sheet, I’m challenging myself – and you! – to use those sheets that are stacking up in our own collections. If you don’t fit that description in the slightest, choose a lovely new sheet of a small alphabet you will use and consider yourself a pillar of virtue when it comes to getting the most from your scrapbooking purchases!

If you’re new to the Best of Both Worlds idea, the basic premise is that it has the convenience of a scrapbooking kit, but without the subscription concept – so you can jump in on the months you like and sit out when you know your scrapping time or budget is limited or you’re just not convinced the selections are your style. Plus you can make customisations – so if I’ve selected an item you already have, you don’t need to pay for that duplicate as you can just pull it from your existing stash. Likewise, you can add more of something if you know it will suit your style best that way – add two of a patterned paper if you like double page layouts; add cardstock if you tend to use it as a base for your pages and don’t already have it to hand. Make sense? Then throughout the next few weeks, I’ll be using those supplies on my layouts here on the blog, including plenty of them in videos. That’s all free to read and watch right here.

All the order placement is done through Two Peas in a Bucket and you’re welcome to add in any other shopping you want from their wide variety of supplies (and amazing sale section). If you’re treating yourself to some lovely crafty luxury, don’t forget that Two Peas offers free US shipping for orders that include $50 of full-price goods, and that same order qualifies for a $5 discount on international shipping. You will need a coupon code for that – it can be found at the bottom of their weekly newsletter. Your Best of Both Worlds purchases count toward their loyalty program too. There is good stock of all items as this post goes live, though it is all first come, first served – leaving items in your shopping basket doesn’t reserve them, just to make that clear. (It happens to me all the time with my own orders – I tend to leave my shopping for a week or so and then I find some of the most popular items have jumped out of my cart. Such is life, I suppose.) If the items you would like are out of stock by the time you are ready to buy, you have two options – click the ‘request and notify me’ button on any sold out item, and Two Peas will send you an email as soon as that is restocked. Or take the shopping list elsewhere and collect your supplies from wherever is best for you.

Purchasing through the links from shimelle.com (and my Twitter and Facebook pages) to Two Peas helps support this blog – it makes the free videos and guest artists all possible, so if you are sharing or bookmarking this shopping list, I would love for you to link or bookmark this individual post and not the shopping list itself, as going straight to the shopping list does not support those projects here. I hope you understand and I thank you so much for making this all possible.

A couple important notes before I go for now!
…Yes, there are more videos with the March product picks! I’ve finished those now, but for as lovely as our new/old home and studio can be, fast and reliable internet is not a bonus here. That’s okay, as I have somewhere else I can do all that sort of thing – but they have been closed for the long holiday weekend while I have been scrapping and filming! So my first order of business at work tomorrow when they reopen is to get all those videos and blog posts uploaded. You’ll see them here throughout the coming week, and I hope you enjoy using up the the end of your March kit while April wings its way to you in a cardboard box!

…Thanks for all your patience while we’ve moved yet again. I won’t fib and say we’re completely organised and out of boxes just yet, but it is fabulous indeed to be back in a place we love so much, with friendly neighbours and happiness! I’m sure we’ll get everything back in its place soon.

Click here to shop for the April Best of Both Worlds scrapbooking kit.

Sketch to Scrapbook Page :: Using triangles in your scrapbooking design

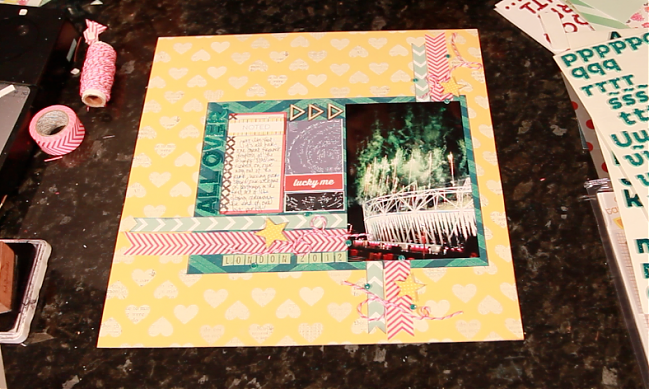
scrapbook page by shimelle laine @ shimelle.com
Usually when I share a Sketch to Scrapbook Page video, I stay quite true to the sketch and the guests sometimes give it a bit of a twist, but today we’re swapping that around. I designed this sketch thinking of triangles cut from various patterned paper scraps, but once I had my supplies on the desk, I decided to take it in a different direction to embrace the current trend of chevrons and arrows. Maybe I will come back and give the triangles a try too, but rest assured, today’s guest has made that look ever so pretty.

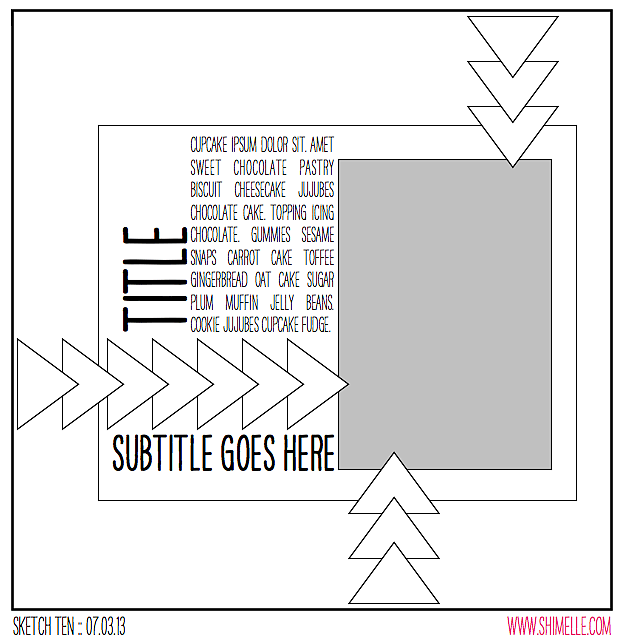
scrapbooking sketch by shimelle laine @ shimelle.com
I imagined this sketch with a single photo (4×6 or 5×7 would both work) so the triangles form arrows that point to that important picture. You could replace that single photo with a collection of smaller pictures, or include more photos across that central block of the page if that’s better for your style.


The supplies for this page are all from my March product picks for the Best of Both Worlds, plus some paper stars left on my desk from a project months ago and a bit of baker’s twine. The photo is of the fireworks at the end of the closing ceremony at the Olympic Stadium – taken as we were leaving the park just ahead of the crowd. Bittersweet! Although my Olympic album will have a few stories that chronologically take place after this photo, I think it will mark a sort of end to a chapter within that book as it comes together. That’s the plan, anyway!

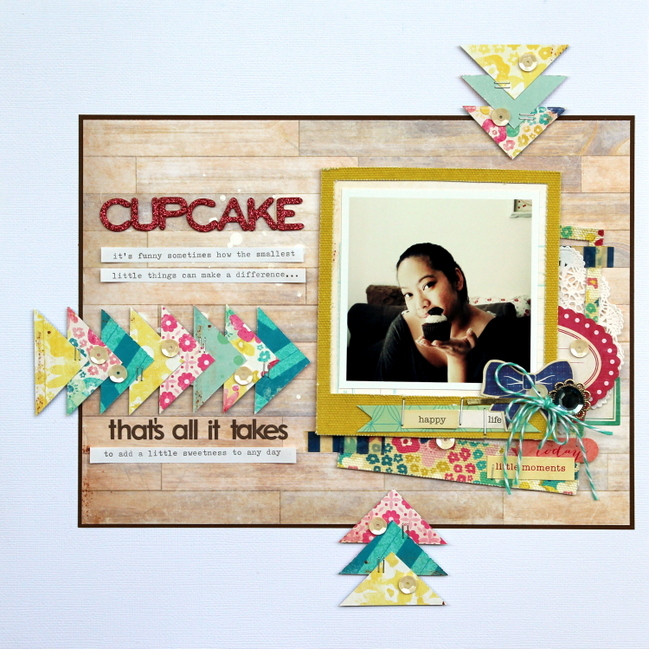
scrapbook page by Piradee Talvanna @ shimelle.com
Today’s guest, Piradee Talvanna, stayed true to the idea of all those paper triangles and I love the look of all the patterns she selected. Plus there’s a little something else with her page that may have made me smile!

scrapbook page by Piradee Talvanna @ shimelle.com
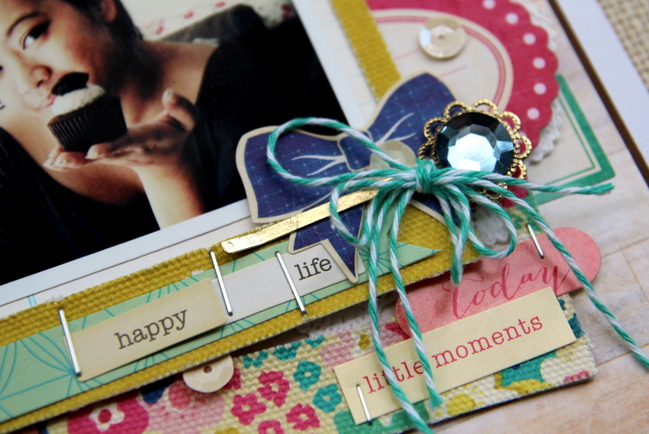
I had a fun time using this awesome sketch as it gives you a lot of room to play around with; although I did pretty much keep to the sketch only switching the placement of the title and adding in some fun layering details behind the photo. In creating this layout, I used the Maggie Holmes collection by Crate Paper, which had a lot of fun colors and I wanted to be able to incorporate all the colors into the layout without overwhelming it. Hence I decided to keep the background neutral (one color) and instead played on the arrow design with the various colors and balancing it out with the colorful layering/cluster behind the photo. Also I noticed that the fabric frame from the collection had some staples (to keep the lettering in place) and therefore also added some to the arrow design along with some neutral sequins for more details. On the topic of cupcakes, well what more is there to say? Love them!


Piradee Talvanna is from Bangkok, Thailand but currently lives in Singapore with her husband. It was there that she was introduced to the wonderful world of Scrapbooking in mid 2008 and quickly became addicted to all the beautiful papers and fun embellishments. Scrapbooking not only allows her to explore and challenge her creativity but also helps her de-stress after along day at work. She is currently a design team member for Crate Paper, Maya Road and Webster’s Pages and has been part of the Creating Keepsakes Dream Team Member for 2011, 2012 and 2013. You can find more of Piradee’s work on her blog.


Sketch to Scrapbook Page :: Scrapbooking with a central focus

scrapbook page by shimelle laine @ shimelle.com
Sometimes a sketch helps things come together so quickly on a scrapbook page, and I think this might be a design I’ll be coming back to the next time I need to scrap without a lot of time to spare. It came together quickly, yet I really like the end result – and often when I scrap quickly I am quite disappointed with the end page. Not this time, so hurrah for that.

scrapbooking sketch by shimelle laine @ shimelle.com
The sketch is designed for two landscape 4×6 photos, a matted square of patterned paper in the background and one tall column down the middle. That column is the same size as the two photos – 4×12. It’s essentially an off-set plus sign, and I’m sure it could be turned and work well too because it’s just basic page geometry of all those rectangles and squares – plus three circle embellishments to balance all those straight lines.


All the supplies for this page come from my March product picks, plus black cardstock, some yellow sewing thread and stamping ink in black and hot pink.

scrapbook page by Shimelle Laine @ shimelle.com
I need to remember that word stamping idea for future pages. I am always lamenting that I have plenty of colours of ink but almost always use the same three ink pads! Definitely liked the bright colour here to change it up, but glad I stamped off that first ultra-strong layer of colour so the tones would be a better match to the patterned papers.

scrapbook page by Becky Novacek @ shimelle.com
Of course this isn’t the only way you can interpret the page, and today’s guest, Becky Novacek, has her own unique twist – and she shares how she adapted the page from a 12×12 size to her 8.5×11 scrapping style:

scrapbook page by Becky Novacek @ shimelle.com
It’s Becky here today, sharing my take on this very versatile sketch, that inspired me a lot. I stayed pretty true to the sketch, although it would have been easy to flip it horizontally. Since I’m an 8.5×11 designer, I found it easy to switch it up to the rectangle versus square design. As I approached this layout using the sketch, I enjoyed using many older products, mixed with new products. I find it gratifying to use favorite older and in the case, no longer available beauties. The background paper and the blue/gold pattern papers were part of one of my favorite Hambly collections. I mixed them with new Basic Grey, Amy Tan, Dear Lizzy, Crate and American Crafts, as well as a really fun Pam Garrison stamp. I switched the circle embellishments to hearts.

Becky Novacek lives in Fremont Nebraska with her husband Tom and faithful dog Scooter. Tom and Becky have 4 grown, married children and ten grandchildren. Becky has always been drawn to paper and photos. As she tried different creative endeavors and eventually discovered scrapbooking, she was hooked. It became an almost daily respite after a long day of work in the beginning, and now it has become an important part of her daily work. Creating free style, homespun layouts that speak her thoughts are what she enjoys most about scrapbooking. You can see more of Becky’s work and daily ramblings at Becky Novacek Photography. You can also follow her on Instagram and Pinterest.

And now it’s your turn! Create a page in your style with this sketch, post it online, and share it with us. You can upload to your blog or to a scrapbooking gallery like Two Peas or UKScrappers, then just follow the steps to link to your project wherever it can be found online!

Using up the last scraps from a scrapbooking kit

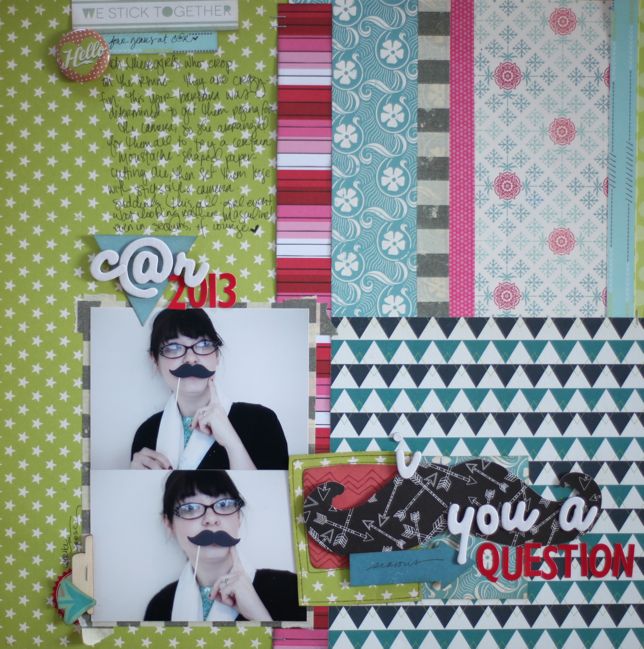
making scrapbook pages from paper scraps by shimelle laine @ shimelle.com
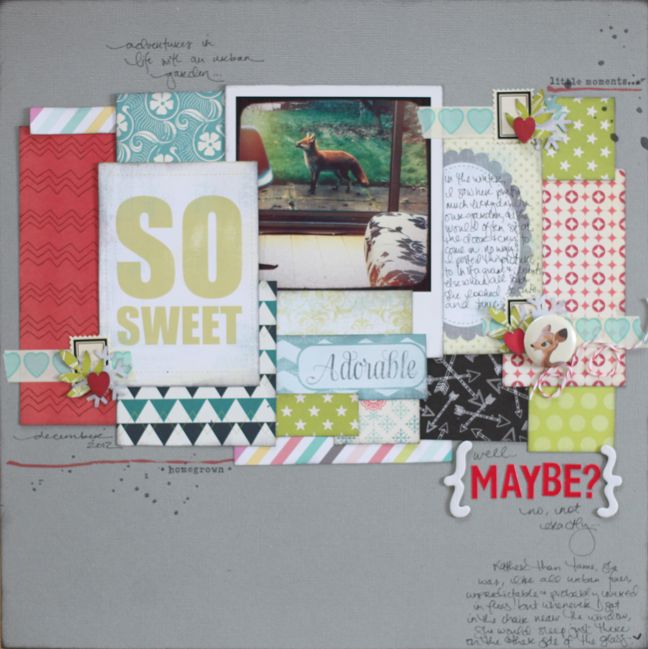
I figured I’d just commit to the randomness of this post up front. There is no point in hiding it. And what you see here is the back of one of my recent scrapbook pages.

See, I had come to that point when I had no full 12×12 sheets left in my February kit and I was moving the pieces about on my desk trying to figure out what to do with them. Usually I would add a sheet of cardstock or grab another patterned paper from my existing collection at this point, but someone had to step up and challenge me: Why couldn’t you just make a 12×12 from all those blocks that are left?

Well, why not indeed.

I also had the added challenge of scrapping on the road, and I didn’t have a trimmer or a ruler or anything quite so useful for patchworking a 12×12 sheet from a bunch of off-cuts. Thankfully one of the patterns was still the full length in one direction (the green star print), then I used a branding strip to measure the other side of the 12×12, and just kept taping and stapling all the different pieces together until it filled the whole space. And seeing as this crop in Germany had a photo shoot with moustaches on sticks, I had the perfect excuse to buy into the whole moustache-motif-and-pun-title trend, just for a bit of fun. The end result on the front of the page is a bit more successful than the back, I hope.

scrapbook page from kit leftovers by shimelle laine @ shimelle.com
(Many thanks to Barbara Haane and Canon for the photo shoot.)
That challenge turned out to be a good reminder that I don’t need to cheat and add another sheet of paper every time! This has more pattern than I might usually put on one page, but I quite like how they all look together (well, I suppose that is the point of a kit really).

making scrapbook pages from paper scraps by shimelle laine @ shimelle.com
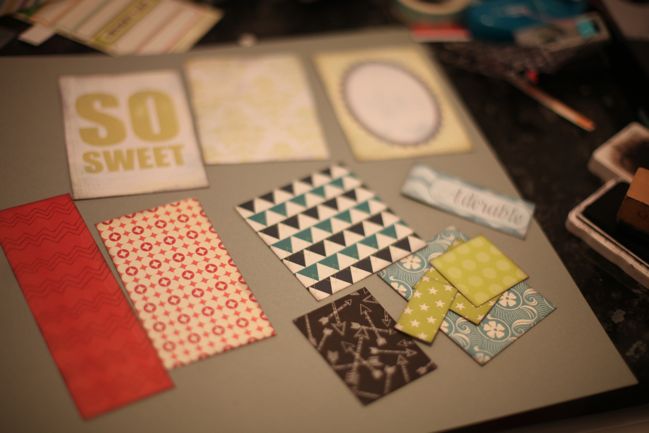
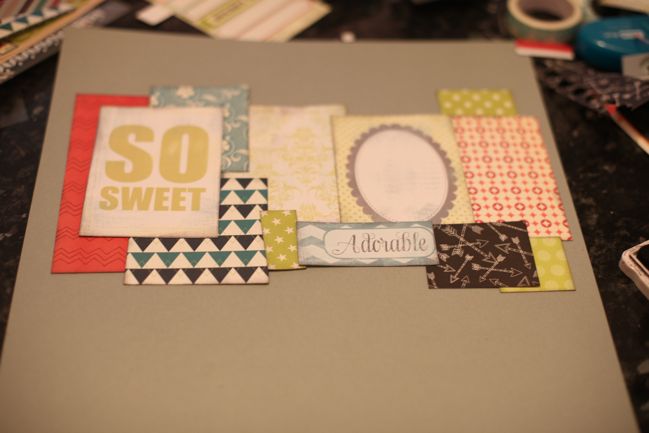
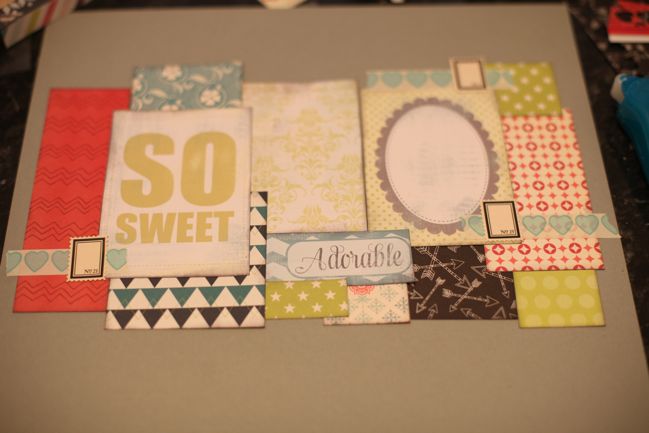
Trouble is, that left me with even smaller scraps, but still a noticeable pile of scraps from this kit. Too much to say I was just done, but not enough to tape together into a 12×12. I needed to cheat this time – so I grabbed a sheet of grey cardstock and cut all the odd-sized pieces into nice orderly blocks, and inked the edges all in black for a bit of uniformity. One of those pieces is actually a title block from the cut-apart sheet turned over, because it has one of those ‘text-speak’ abbreviations using just a single letter to represent an entire word (I think it was R for ‘are’, though I have partially blocked it from my mind) and I just can’t cope with the idea of that on my page. So the reverse wins out, and that worked quite well.

making scrapbook pages from paper scraps by shimelle laine @ shimelle.com
It turned out quite easy to piece these together to fill about a third of the page. Admittedly, at this point I wasn’t even thinking about photos. I figured if I could make the papers work, I’d find a photo that would work somehow. Surely something somewhere in all my photos would be ‘so sweet’ and ‘adorable’, even if I had to be a bit liberal with the terms?

making scrapbook pages from paper scraps by shimelle laine @ shimelle.com
Then for a little embellishment: like a few other pages this month, I started with a horizontal line of the tape (I switched over to the heart tape, which had arrived by this point!) and a Jenni Bowlin postage stamp sticker. These would need something else, but I wasn’t sure what that something else should be since I didn’t know what this page was about or what photos I was going to use. I suppose that means it’s time to figure that out then.

making scrapbook pages from paper scraps by shimelle laine @ shimelle.com
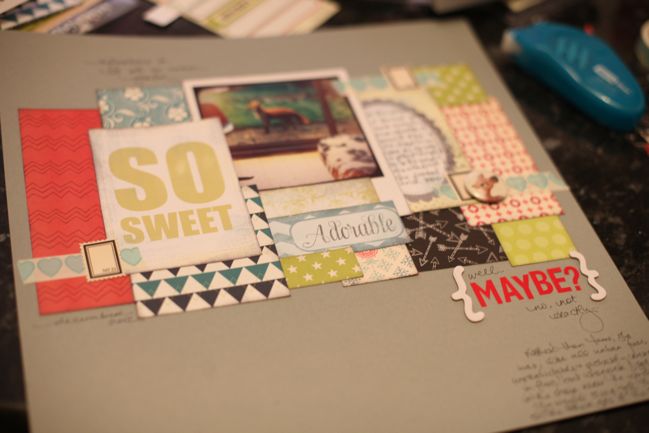
In the end, I went with this photo of the fox that has spent all of this winter trying to convince me that she should live inside our house instead of outside. When I posted this picture on Instagram, it became one of my most popular photos ever, which cracked me up since it was such a random shot of life. But urban foxes are definitely part of the landscape! So many people left comments saying she was so cute and tame and so forth, but up close, I promise that is not really the case. It seemed like a good excuse to work with these extra cute titles without being too sickly sweet, because I could add the other side of the story in my writing on the page. That seemed to work well as a way to tell this story of the cute versus the pest!

That print, by the way, is from Origrami. I don’t have any connection to them other than ordering a set of prints, and I’m pleased to say they are very nice quality and came very quickly despite the international shipping (they are shipped from Australia, but arrived within a week of placing my order). You can load in your Instagram feed and select the pictures, and I mostly chose all my prints from last summer to add to my Olympic album, but I finished off the pack with a few other random images, and that’s how this funny little fox ended up as a Polaroid-style postcard.

making scrapbook pages from paper scraps by shimelle laine @ shimelle.com
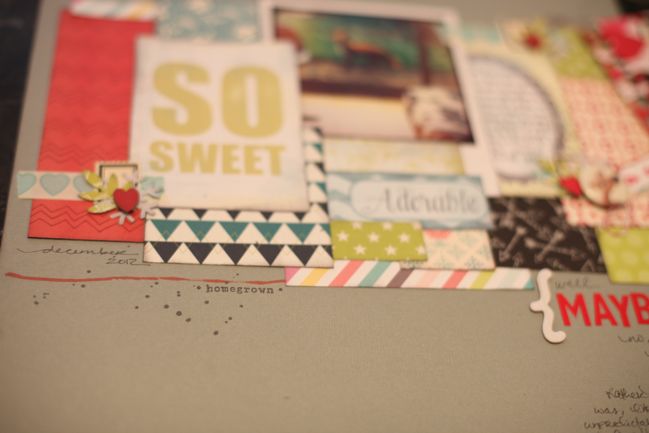
Aside from stamping with it and dying embellishments like wood veneer, fabric Thickers, and ribbon, sometimes another colour of mist can really help the red colour option look like something other than a crime scene. In this case, I used the spray tube from the red Mister Huey to draw a line on the layout, then splashed a bit of grey mist into the mix too. I know, if a red Mister Huey was your first and only spray, then this is a useless tip, but I’m crossing all my fingers that maybe you have something a little more neutral too. I added in some of the word stamps from the Dear Lizzy stamp set too, just for good measure.

scrapbook page from paper scraps by shimelle laine @ shimelle.com
And here’s the final version of the little vixen from our garden! For the embellishments that I needed to finish, I used three punches: a snowflake, a branch with leaves, and a heart. Totally simple layering, but it worked with those teeny-tiny pieces of paper I had left, and fit the theme of the garden in the winter… I think. I may have over-thought this by now!


With my February kit, I made a total of eight layouts and one card. This video is a very simple look at all of them and also shows you what I had left when I declared this kit finished.

If you’ve been scrapping with the February Best of Both Worlds kit and have posted your pages anywhere in particular, feel free to link it up in the comments so we can see the different looks that came from that same start! I hope you enjoyed scrapping with this selection of supplies.

Sketch to Scrapbook Page :: Making a Banner with Photos

scrapbook page by shimelle laine @ shimelle.com
I’ve been meaning to discuss a little something with all of you about how my philosophy has changed since so much of my teaching now comes in the form of videos. There is one really big idea I hope you will take on board: some times I try things so you don’t have to. I scrap so much and I share almost all of it with the world in some way or another – either in blog posts, in Glitter Girl videos at Two Peas, or in my class content for those of you who sign up for my online scrapbooking workshops. In the past year, I can count the pages I have kept to myself on a single hand.

That doesn’t bother me in the slightest: it is my choice to share with all of you, and if I didn’t want to, then this would not be the right job for me! But it does mean that there isn’t a nice, safe, secluded place for me to go through random ideas without sharing it with you as it happens. If I make every page in a style that’s too similar, you’ll get bored, and some will let me know. If I make every page wildly different from the rest, I won’t be happy with my albums and those of you who like the style I’ve shown you up to now may not be big fans, and some will let me know. So I try different things and I show you right there on the video as it goes. Sometimes I find a real win; sometimes I get the page to a point where I’m happy with it, but I make a big note to self about whatever particular element I probably won’t try again.

When you watch, you can make that decision from what you see, and if you want, you can essentially learn from that in the same way that you learn from a mistake. If I run my title up the side of the page and you don’t like it, you know not to run your title up the side of your page – and you don’t have to go through the stress of moving your title and trying not to ruin your letter stickers to figure it out. Maybe you look at my layout and think you don’t like that patterned paper. Perfect: don’t buy or use that patterned paper. What you see that you don’t like can be just as useful as what you do. But whatever you see? I like it for me and I’m happy to have it in my album – or I would keep working on it or start over!

With this sketch and video, I wanted to really demonstrate what I mean by this process. I wanted to take an idea I have used many times and try it in a way that I hadn’t used before and I wasn’t completely sure would work. I gave it a try and I kept working on the page until I got to a point where I was happy with the layout – but now I know the difference between the way I used this technique on this page and the way I’ve used it before, and I know what I will take forward from there. You can simply look and see what you like and take that forward for your own process without the frustration of discovering it for yourself. I think that’s what I mean. Of course, I also know some of you are stubborn like me and will want to try it for yourself. That’s totally okay too.

scrapbook page sketch by shimelle laine @ shimelle.com
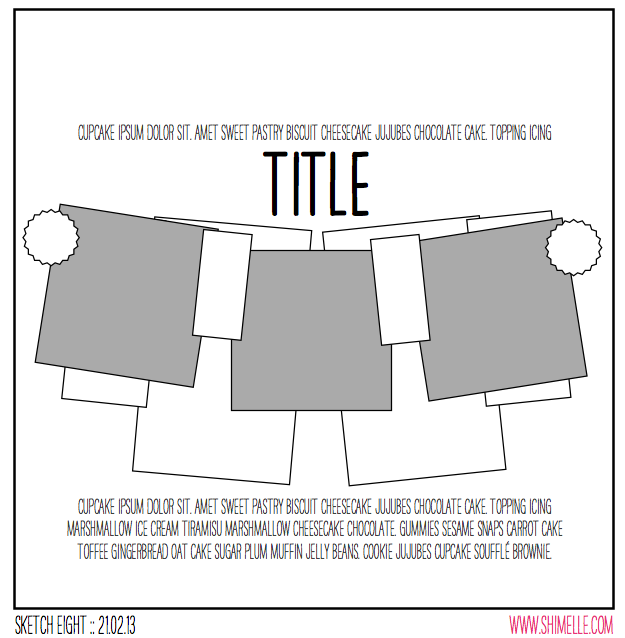
Getting on with it then, here’s the sketch. It’s a bunting-inspired banner design across the whole page, on a quite large scale. I’ve used this idea in the past but always on a much smaller scale for the banner, and this time I wanted to use it as a big element that would take up most of the page. Of course, that makes it quite different from the usual way I start my pages with a bunch of different boxes of patterned paper in the background!


This page was made with supplies from the February Best of Both Worlds kit. (And the next sketch video moves to the March kit, by the way.) Of course you can try it with any papers you like! I added some eyelets and twine too, and for those of you who have requested eyelets on pages – I’m afraid this is pretty much the only time I use them these days. I passed my giant jar of eyelets to another scrapper many years ago and haven’t looked back. I just prefer brads, rhinestones, enamel dots, and other simple little embellishments like that to the extra steps of eyelets. But they do add a lovely bit of polish to banners!

scrapbook page by shimelle laine @ shimelle.com
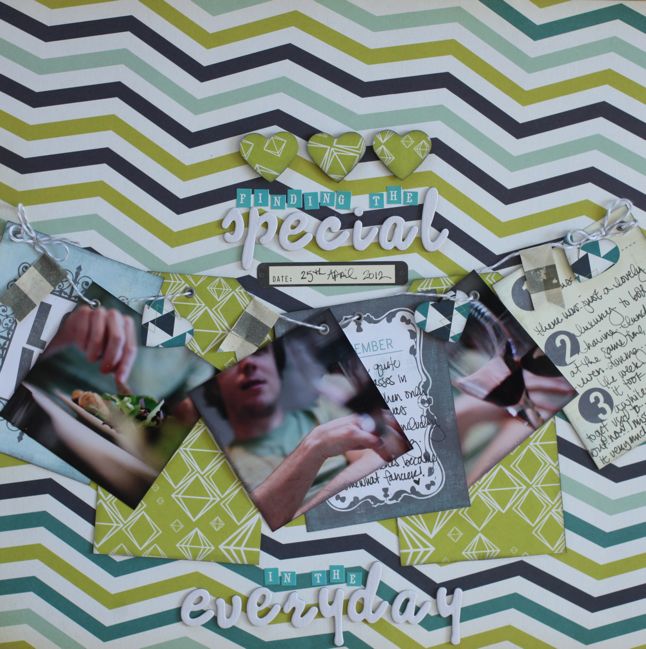
Here’s my resulting layout with the idea of banners gone big! But how does it compare to when I’ve used banners on a smaller scale? You can see three different examples in videos when I’ve used them as a smaller part of the page: the Glitter Girl episodes on breaking through scrapper’s block and using scenic patterned paper designs, plus this video when I guested for Studio Calico. But I ask you that in a way that it’s useful for you to figure out for your style! I’m happy with all four layouts in my albums and they all have a different look. If you like one more than the others, then you might want to remember that if you use this sketch but in your own style. All part of the learning process, and drawing those conclusions for yourself can be really important in defining your own style, if that’s something that interests you.

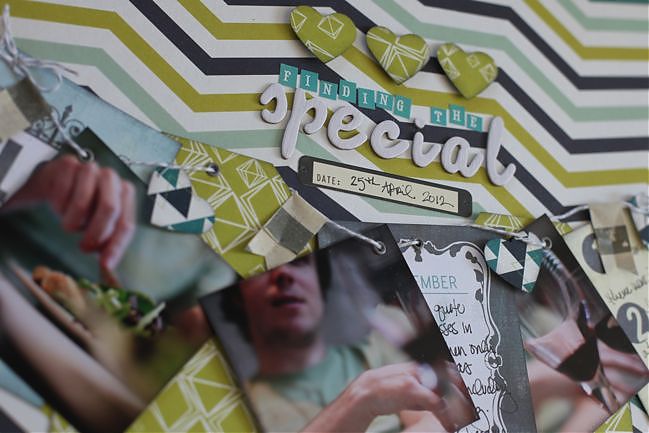
scrapbook page detail by julie kirk @ shimelle.com
But of course I’m also delighted to include another version from this same page so you can compare already and keep those notes to self in your own mind. So much good stuff with this page by Julie Kirk!

scrapbook page by julie kirk @ shimelle.com
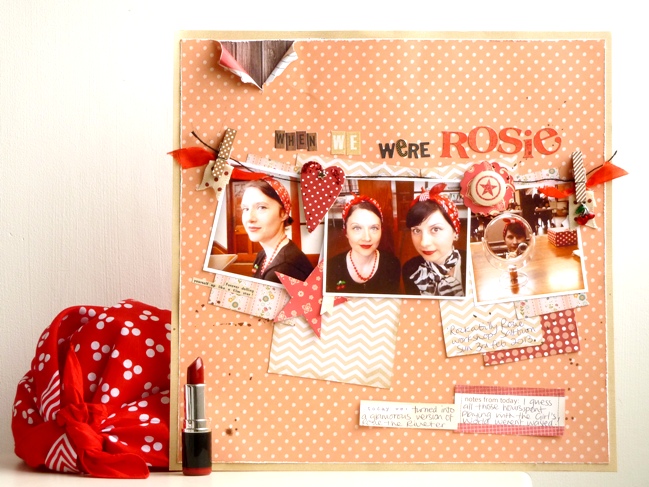
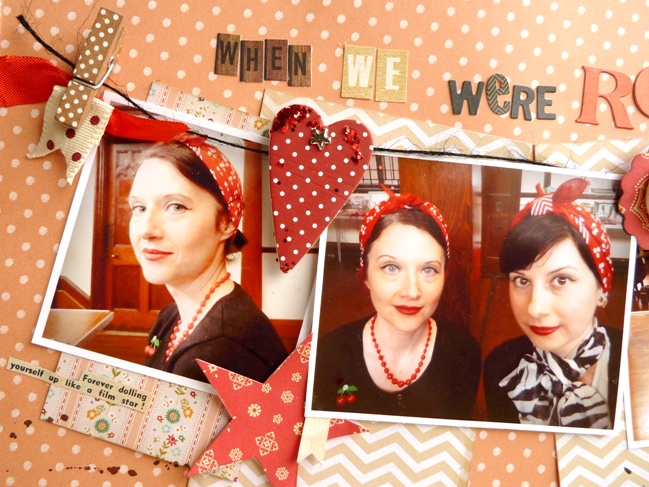
If scrapbook sketches can feel theatrical then this one, with its title taking centre stage and the photos stretched out like a banner, certainly fits the bill making it easy for me to decide which photos to use with it. My sister and I recently spent the day at a ‘Rockabilly Rosie’ workshop where we tried out glamorous vintage-style make up, hairstyles and dance steps. Not all at the same time I might add … although we would have had fun trying! And the retro results seemed just perfect for this style of sketch.

I adapted a few things to help me tell this particular tale such as adding a narrow frame around my background paper as a way to pull in another colour which, like all the shades of papers I chose, was drawn from the colours within the photographs. I also added in a few vintage themed touches like the rip in the top corner and a snippet of text [beneath the left hand photo] which I cut from a 1950s magazine. I couldn’t settle on a way to write my journaling across the page, like the sketch, so I just used a couple of journaling blocks instead. But overall, looking back at my version I realise I’ve stuck fairly closely to the original, which is a bit surprising really as I didn’t think I was that obedient!
Julie Kirk documents everyday stories through her scrapbooking often in combination with vintage supplies and lots of patterned paper. She is regular designer for Papercraft Inspirations and Creativity! Magazines and contributes to the 3DJean design team blog. Through her own blog, ‘notes on paper’ and her Facebook page she shares creative projects, hints and tips, stories, and anything which might raise a smile. Meanwhile she shares her love of vintage supplies through her Etsy shop.

And now it’s your turn! Create a page in your style with this sketch, post it online, and share it with us. You can upload to your blog or to a scrapbooking gallery like Two Peas or UKScrappers, then just follow the steps to link to your project wherever it can be found online!


Using a Polaroid frame stamp on a scrapbook page

scrapbook page by shimelle laine @ shimelle.com
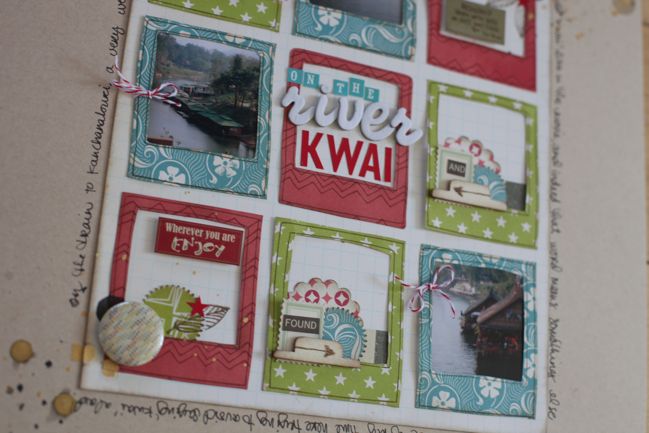
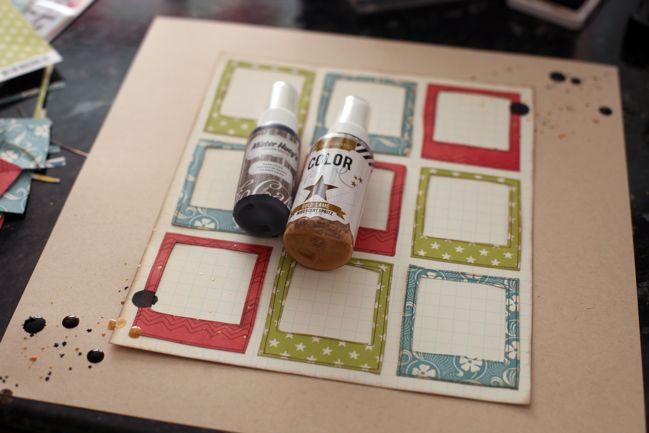
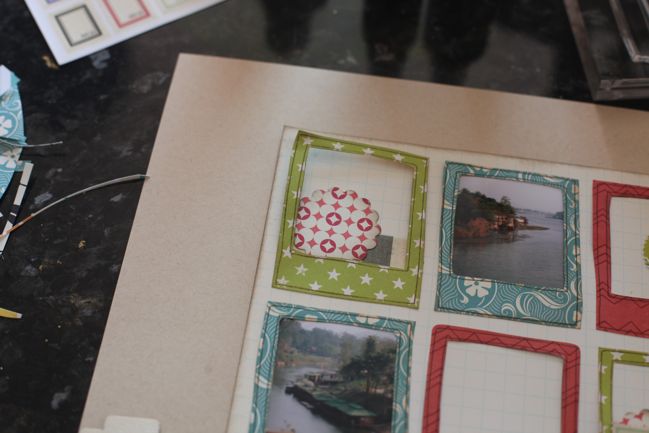
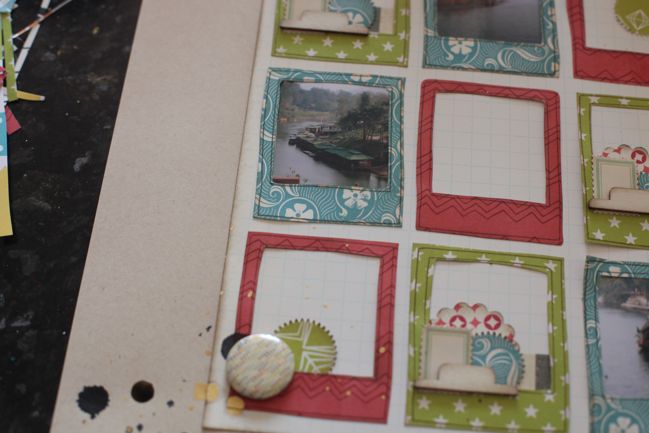
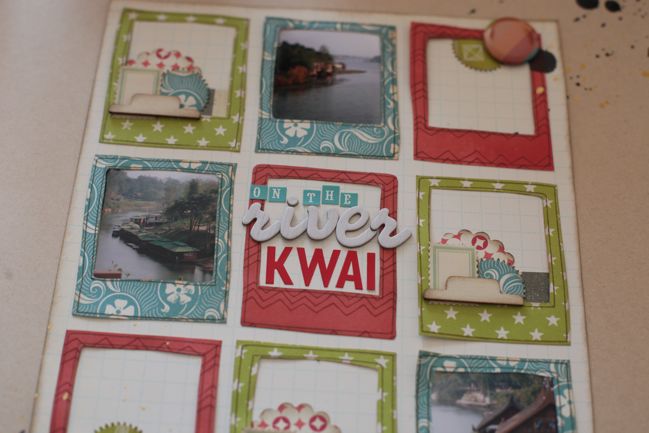
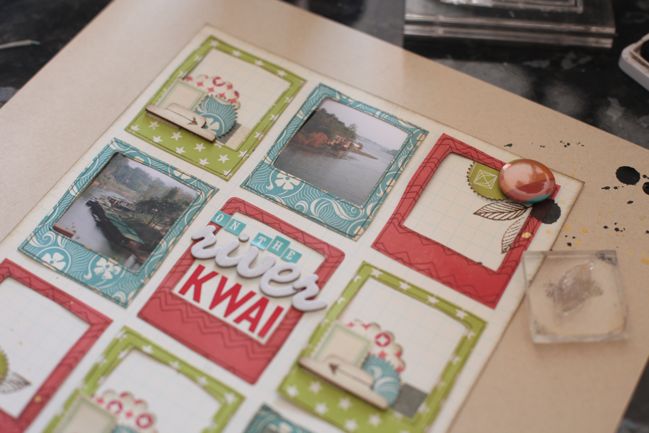
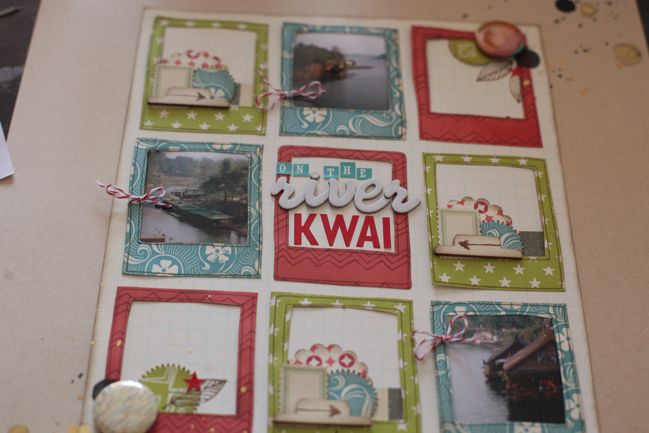
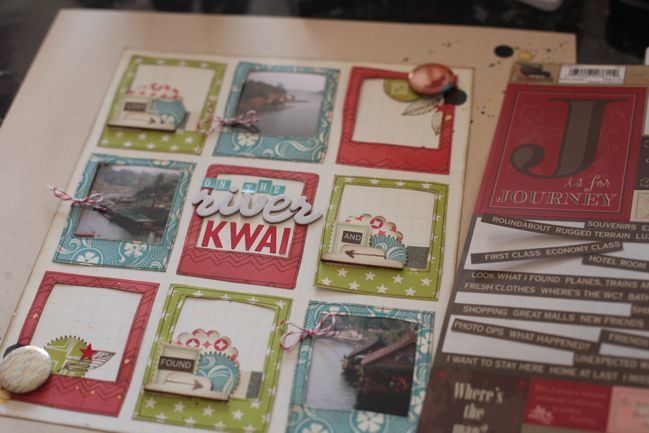
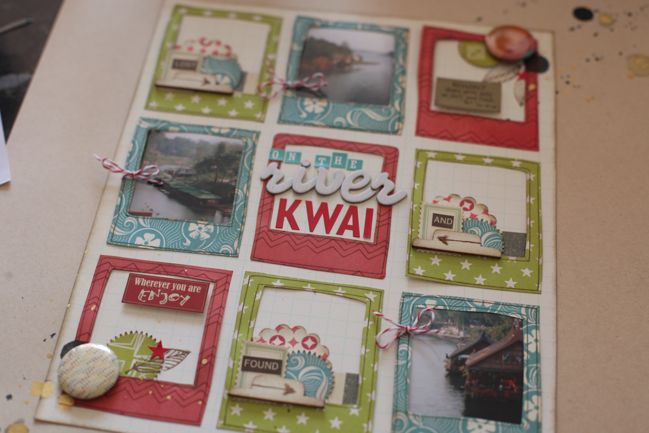
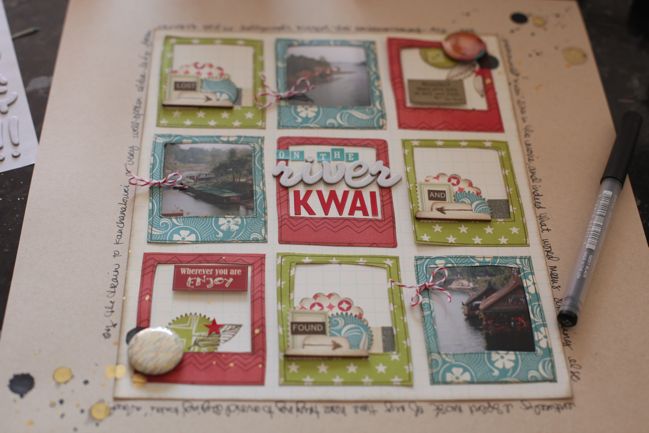
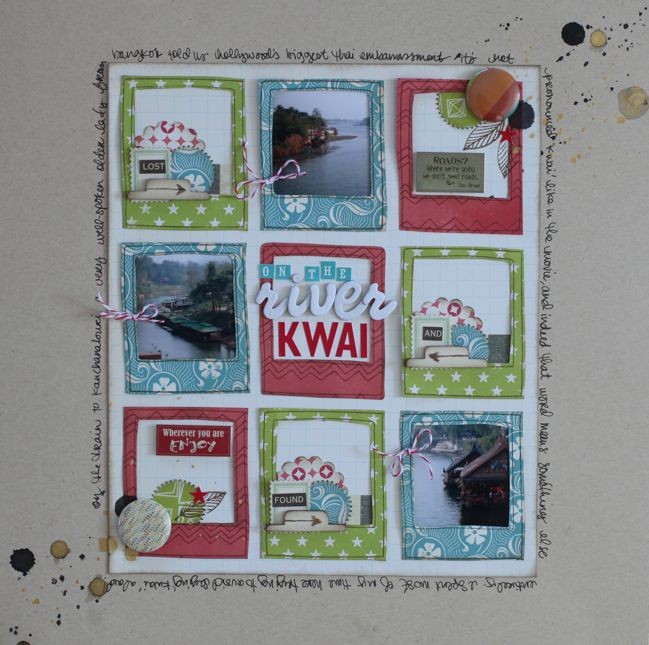
Oh, how I love it when inspiration comes along at just the right time. That beautiful scrapbook page tutorial by Kirsty Smith went live at just the same time when the Dear Lizzy 5th & Frolic stamps were sitting on my desk. I’d been using the word stamps in that set a lot more than the image stamps in this set, so Kirsty’s page quickly reminded me how easy it would be to make something lovely with the Polaroid-style frame. I put it together with a sheet of kraft cardstock and scraps from my February Best of Both Worlds kit.

scrapbooking tutorial by shimelle laine @ shimelle.com
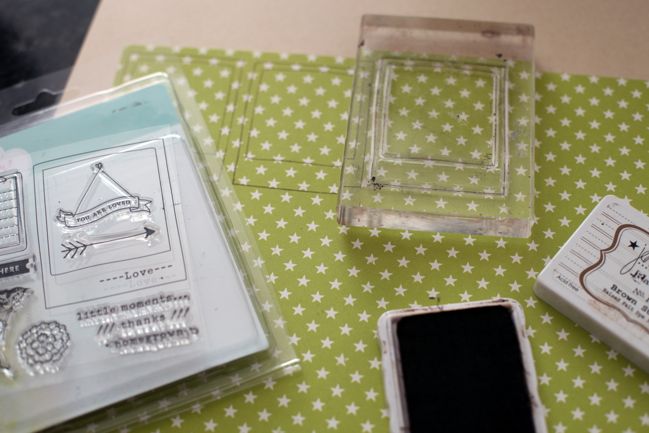
First I stamped the Polaroid frame in brown dye ink…

scrapbooking tutorial by shimelle laine @ shimelle.com
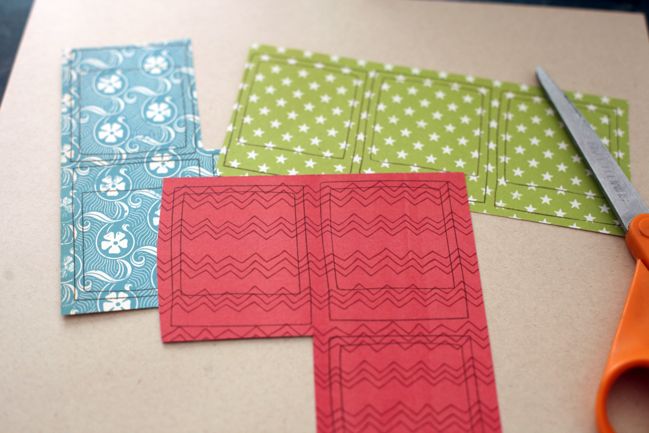
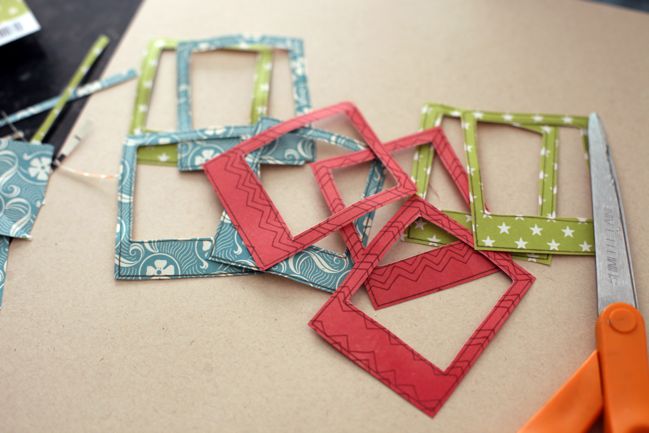
…three times on each of three patterned papers, for a total of nine frames.

scrapbooking tutorial by shimelle laine @ shimelle.com
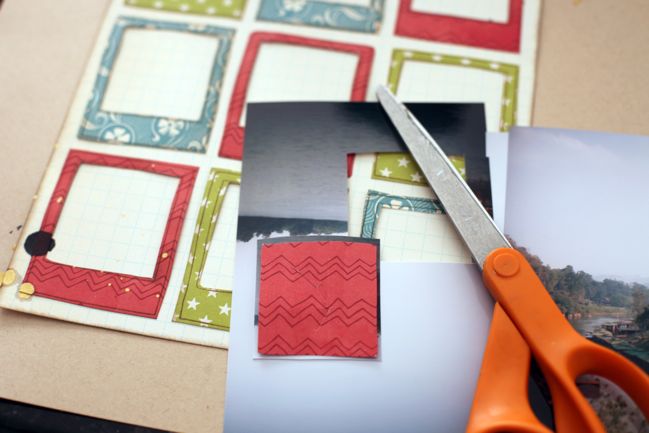
Then cut out all those frames with scissors. Easy enough.

scrapbooking tutorial by shimelle laine @ shimelle.com
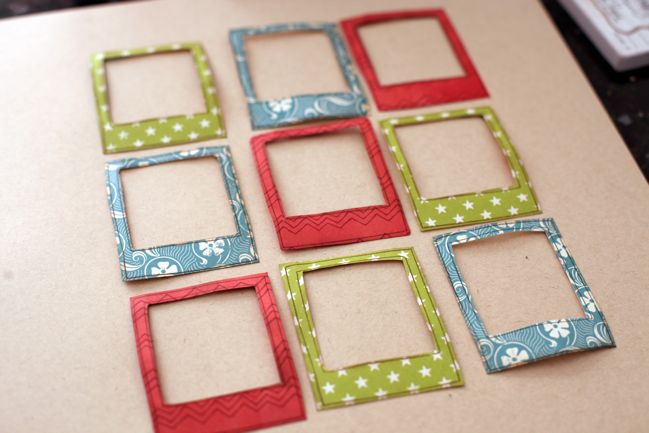
Spend twenty minutes moving the patterns around in a grid until finally settling on this arrangement. Then spend the next twenty minutes wondering why that took twenty minutes to decide. This is a slippery slope.

scrapbooking tutorial by shimelle laine @ shimelle.com
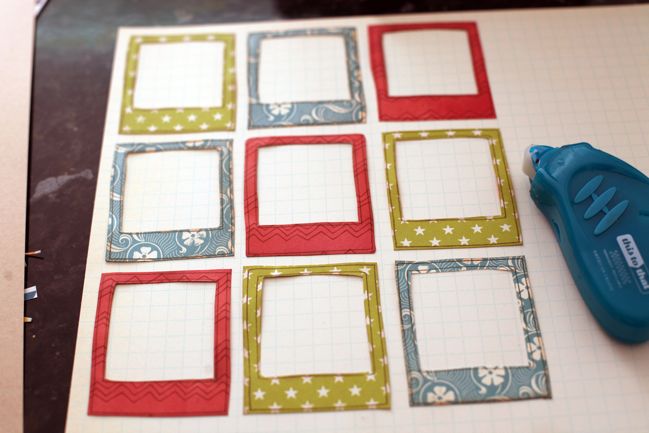
Transfer the frames – in that much pondered order – to a sheet of neutral patterned paper. Kirsty’s pages often remind me to use all that grid paper in stash. Attach with adhesive that allows for things to be moved about – or just be way more graceful than I am and not knock the frames onto the floor six times while you’re trying to figure out the rest of the design. Your choice.

scrapbooking tutorial by shimelle laine @ shimelle.com
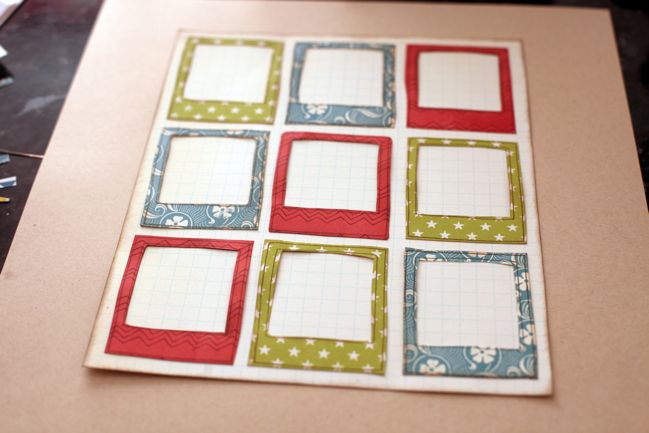
Cut the grid paper to frame the frames, ink the edges, and attach it to the centre of the kraft cardstock background. Exhale happily that this step had significantly fewer opportunities to derail for another twenty minutes.

scrapbooking tutorial by shimelle laine @ shimelle.com
Use the spray tube and an eye dropper to splatter mist on two corners of the page to form a diagonal line. I used gold lame color shine spray by Heidi Swapp and Studio Calico Mister Huey’s spray in Dark Calico (that one is on sale at the moment if you’re looking for a dark neutral shade, by the way). Be completely impatient and refuse to wait for the larger droplets to dry, and enjoy the feeling of living dangerously throughout the rest of the creative process as a result.

scrapbooking tutorial by shimelle laine @ shimelle.com
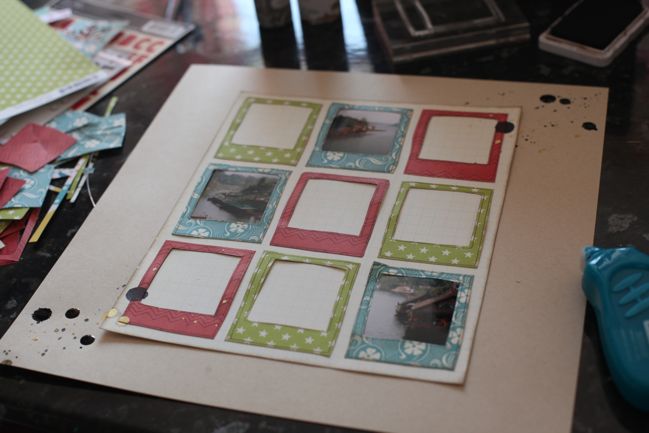
Use the scraps from cutting out the centre of the stamped frames to cut three photographs to a size that will sit nicely behind three frames. I picked photos that had some nice details that were otherwise lost in a larger image when printed at 4×6.

scrapbooking tutorial by shimelle laine @ shimelle.com
Realise it might be simplest to make all the red frames match, all the green frames match, and all the turquoise frame match. Spend another twenty minutes deciding which colour would be best for the photographs. Eventually choose turquoise. Live the rest of my entire life wondering if this was the right decision.

scrapbooking tutorial by shimelle laine @ shimelle.com
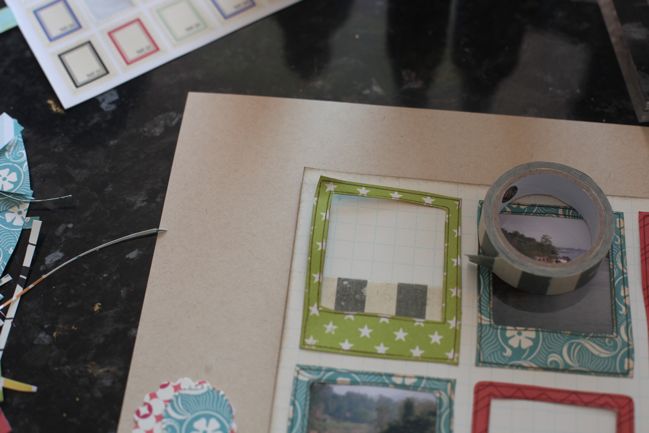
Start the green frames with a stripe of tape inside the window.

scrapbooking tutorial by shimelle laine @ shimelle.com
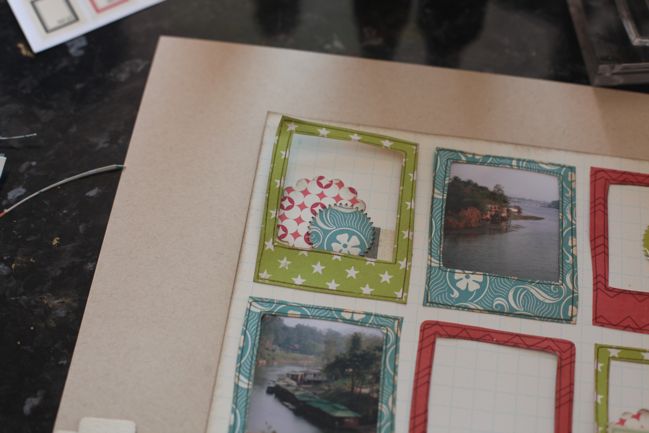
Then a punched circle in the corner…

scrapbooking tutorial by shimelle laine @ shimelle.com
…and a smaller punched circle over the top. Feel like I just won house points for Hufflepuff by managing to get all three patterned paper colours into this embellishment grouping.

scrapbooking tutorial by shimelle laine @ shimelle.com
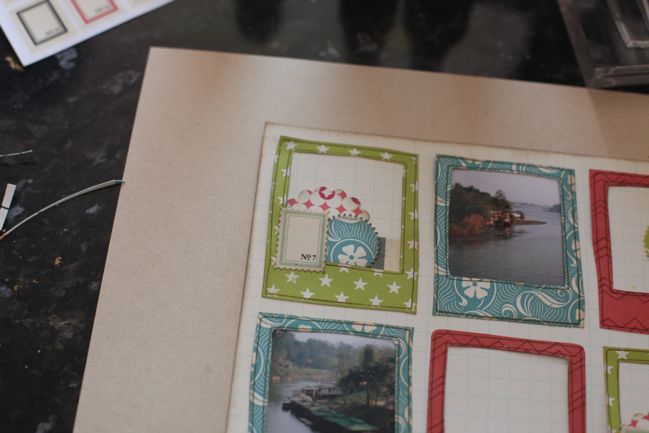
Top with a postage stamp sticker from Jenni Bowlin Studio.

scrapbooking tutorial by shimelle laine @ shimelle.com
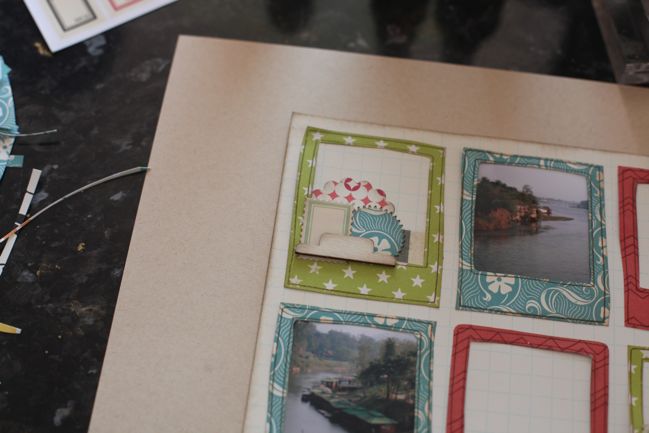
Add dimension with a wood veneer file tab by Studio Calico.

scrapbooking tutorial by shimelle laine @ shimelle.com
Realise the red frames are now looking very naked by comparison. On the two corner frames, add a punched circle and a Studio Calico badge embellishment. Ten points to Hufflepuff for the group of three formed by the circle shapes in the punched piece, the badge, and the closest large droplet of ink, all overlapped.

scrapbooking tutorial by shimelle laine @ shimelle.com
Title gets the centre square. The white woodgrain Thickers and the red Jenni Bowlin letters are both from the kit, plus those tiny turquoise letter stickers are an older set in my stash by Cosmo Cricket. Congratulate self that ‘Kwai’ fits so perfectly in the frame, since I didn’t think to check that before this step.

scrapbooking tutorial by shimelle laine @ shimelle.com
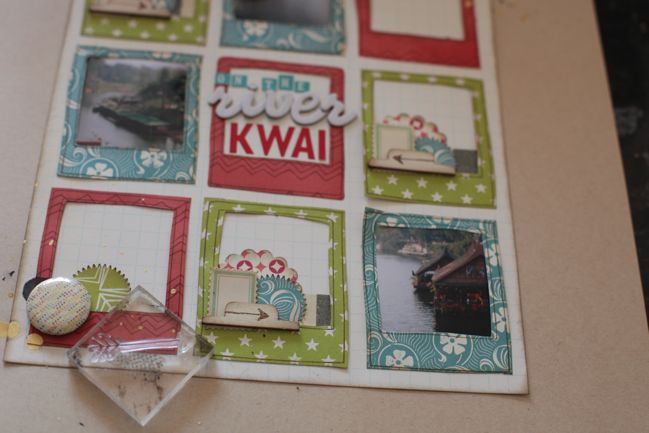
Use the arrow stamp in brown ink on top of the wood veneer tabs, mostly because I’ve fallen in love with the look of stamped veneer. Point the arrows toward the nearest photo to help direct the eye to the photos, which is extra helpful with the combination of small photos and plenty of embellishment.

scrapbooking tutorial by shimelle laine @ shimelle.com
Add some leaf stamps to the corners of the two red frames.

scrapbooking tutorial by shimelle laine @ shimelle.com
And some little red star stickers too. Then I noticed the turquoise frames started to feel too plain, so I added red baker’s twine to the edges. Award ten points to whatever house baker’s twine belongs to for its amazing ability to be a perfect little detail on pretty much anything.

scrapbooking tutorial by shimelle laine @ shimelle.com
At this point, I headed to my ‘use it or lose it’ box. I constantly go through supplies and try to clear out the things I will not use. Sometimes I end up with items that I still like but they are old enough that I haven’t been using them as much and I need a little push to grow up and choose a side: use them or lose them. I write a deadline somewhere on the product and whatever I don’t use by that date heads to the donation box. Right now there are a few sheets of these 7gypsies stickers, which are fab for cutting into little word blocks…

scrapbooking tutorial by shimelle laine @ shimelle.com
…and also has a few labels with phrases that will fit this page.

scrapbooking tutorial by shimelle laine @ shimelle.com
Then finish with writing around the grid paper, and make a serious note to self that Kirsty’s layered page idea would allow for significantly more writing than this.

scrapbooking tutorial by shimelle laine @ shimelle.com
Award Kirsty at least fifty house points for her inspiration that lead to this new page whilst feeling a sudden urge to go through my entire basket of scrap papers and stamp them all with Polaroid frames.

Decide that would take way, way too long.

Sketch to Scrapbook Page :: Scrapbooking with a patterned paper you don't want to hide

scrapbook page by shimelle laine @ shimelle.com
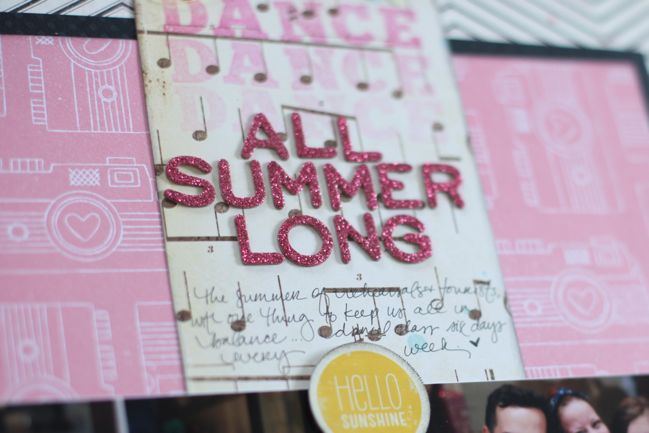
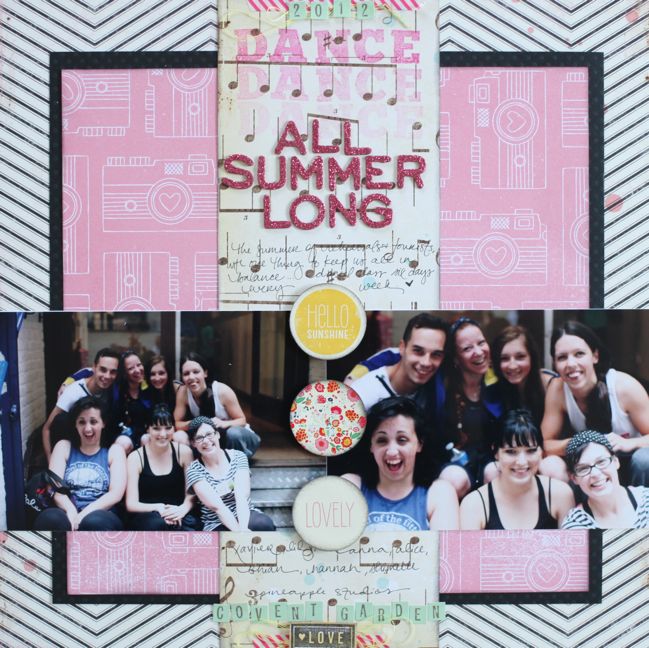
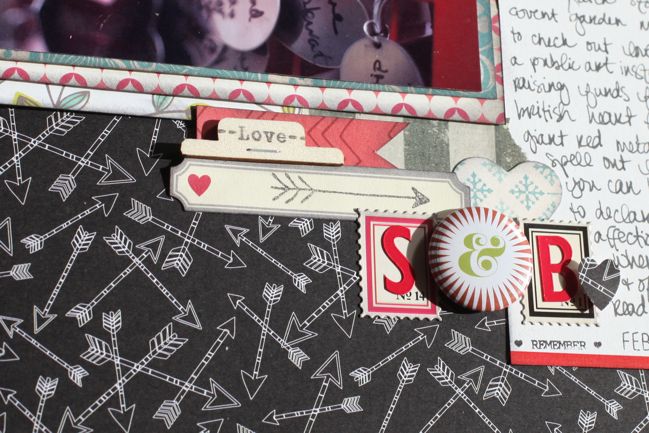
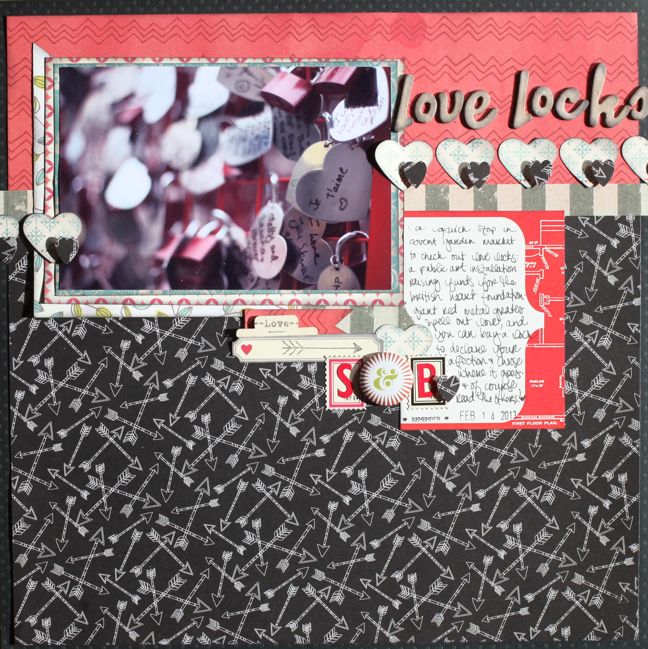
I love little groups of random items from my desk that can come together to make some sort of lovely embellishment on a scrapbook page. Well, I guess you knew that. But when it does honestly happen from just bits and pieces sat on the desk – remainders of a kit or cast-offs from other projects – it makes me happier than searching out all those pieces for ages. This was one of those times when the pieces were all there and they just fit into the space to finish the page. A journaling card, then washi tape, a strip of paper to bring in some colour, a label to bring in something lighter, letter stickers for initials, postage stamps with the right numbers to back those, something round to add a bit of variety (and an ampersand), and some stamping to pull everything together. That’s how I finished this most recent Sketch to Scrapbook Page project.

scrapbook page sketch by shimelle laine @ shimelle.com
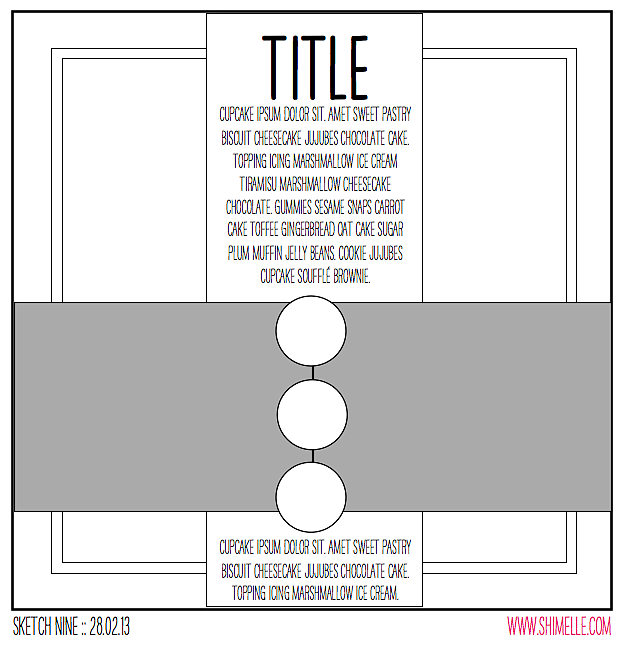
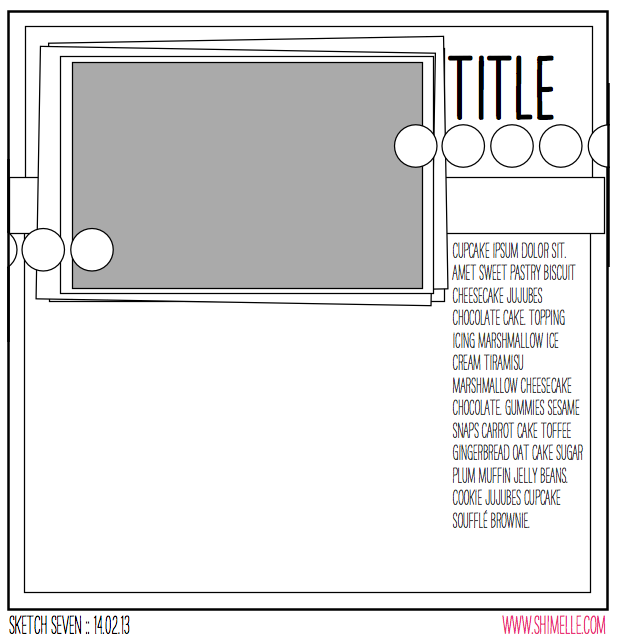
This sketch is designed for those patterned papers you don’t want to cover up. Something with a print you really like to see or a pattern that doesn’t read well in small amounts. It gives you plenty of room for writing and the chance to showcase a 4×6 landscape photo with some repeated embellishment – perfect for punching shapes from papers to make your own accents.


All the supplies used for this project are from the February product picks for Best of Both Worlds, with the addition of a sheet of 12×12 black cardstock for the background and a date stamp at the bottom of the journaling card. I used an embossing stylus for the dotting tool with the mist – that’s a quite general craft supply that you might already have on hand, but if not they aren’t too hard to find.

scrapbook page by shimelle laine @ shimelle.com
Love locks are something you can see on bridges all over the world, but just in time for Valentine’s Day, there were some special love locks in Covent Garden in support of the British Heart Foundation. It was just as interesting to look at all the other locks as to leave your own. And so pretty through the lens.

stitched camera by Julie Campbell @ shimelle.com
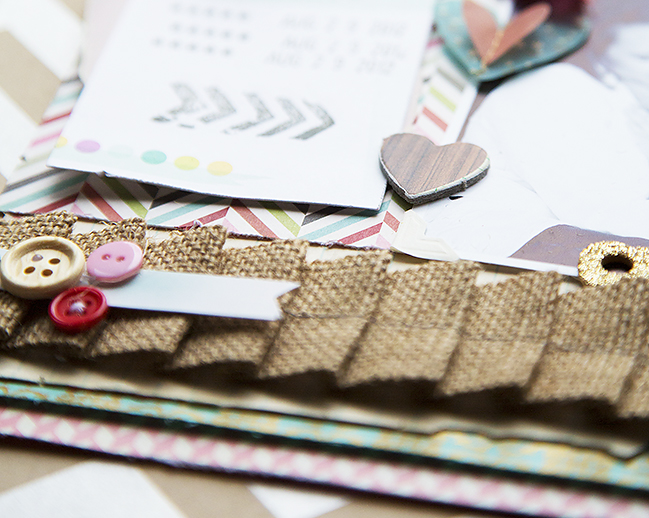
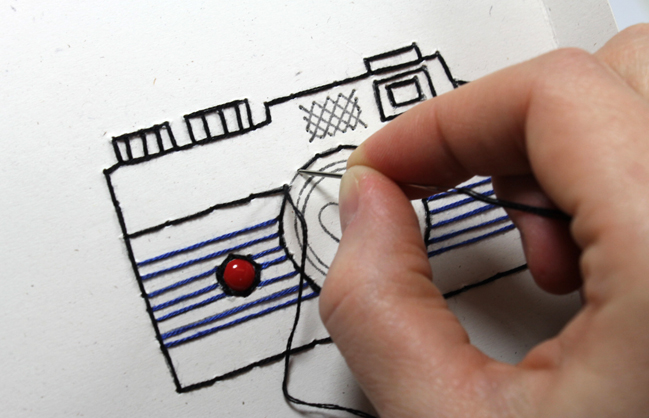
Because I was cheeky and running behind, I’ve already shared the guest project for this sketch. It’s a Valentine card by Julie Campbell, and in addition to making a card from the sketch, she shares a clever trick for using rub-ons with stitches to amaze your friends with your hand-sewing skills! Perfect.

And now it’s your turn! Create a page in your style with this sketch, post it online, and share it with us. You can upload to your blog or to a scrapbooking gallery like Two Peas or UKScrappers, then just follow the steps to link to your project wherever it can be found online!


Best of Both Worlds :: My scrapbooking product picks for March 2013

March is the time when I do most of my on-the-road scrapping for the season, and pretty much every weekend this month will see me lugging my scrapbooking things near and far. This week not too far, but then a few trips long enough to require a passport – I’m off to Germany and Italy to teach. (If you’re reading in Italy and would like to come along, let me know! The event in Germany is sold out but there may be a few seats for you in Italy.) But long train journeys or no, it is now March! And that means a new set of scrapbooking product kits for the Best of Both Worlds!

Click here for the March 2013 Best of Both Worlds shopping list.

If you’re new to this idea, the basic principle works like this… throughout March, I’ll be using this set of supplies to make pages. You’ll see them in Sketch to Scrapbook page videos and other posts, like Starting Points. If you want to have the kit just like I do, click that link and add one of each thing (well, almost – more on that in a moment) and check out your order! BUT this set-up gives you the freedom to make changes for whatever reason: maybe you already have some items or some really similar items in your stash and you don’t need duplicates, maybe I’ve picked something that you would never use and you can substitute it for something you would love. Plus of course there is no subscription – you can join in on the months you want to and leave others out with no obligation, though of course it does take a little more effort on your part to check this post and click over and add the items. But it’s another option if you like the idea of a subscription kit but in practice it turns out not to be your favourite thing in the world. That’s the general idea!

Now, there is one thing to note about this month’s shopping list. I’ve included some options for the large set of letters, and I don’t expect you to order them all! With this kit, I really wanted to put something together that could be very feminine or by turning the papers to the other side, could be quite neutral or even masculine. It was an interesting challenge! But lettering is something you can’t just turn over and find the perfect set on the back, so I added some options and you can choose the set that is the best balance to your style: black if you prefer quite neutral titles, turquoise if you want something colourful that can work toward either masculine or feminine pages, or a rose-coloured glitter alpha if you want to fully embrace the most girly looks this kit can provide. There’s also a set of letter stamps on the list – it’s a set that is exclusive to Two Peas and is currently half off, which makes it a great bargain. If you like letter stamps, then this is a great time to add it to your collection and if you’ve wanted to try letter stamps but haven’t so far, this is a great way to add a good set at a fab price. It’s a really versatile alphabet in a size that works great for titles, subtitles, and embellishments. During March, I’ll be sharing a few different techniques for letter stamps, and they work specifically well with something that has some weight to the letters like this set. But the general idea with all that lettering is that you would choose one or maybe two from those options rather than all of them!

Of course you can also do other shopping while you’re picking up your kit. There are hundreds of new items, including the lines from Amy Tangerine, Dear Lizzy, Maggie Holmes, Studio Calico, My Mind’s Eye, Echo Park, Bella Blvd, and Jenni Bowlin! Lots of great things to add to your stash, and don’t forget Two Peas offers free domestic shipping to orders over $50 or $5 off international orders at the same level. You need a code to claim that discount – it can be found at the bottom of the Two Peas newsletters.

Have a great weekend, wherever you may be!

xlovesx