pretty paper. true stories. {and scrapbooking classes with cupcakes.}

lovely to meet you Twitter Facebook Pinterest YouTube

Take a Scrapbooking Class

online scrapbooking classes

Shop Shimelle Products

scrapbook.com simon says stamp shimelle scrapbooking products @ amazon.com shimelle scrapbooking products @ amazon.co.uk

Reading Material

travel

On Scrapbooking Outdoors & On the Go

on scrapbooking outdoors and on the go
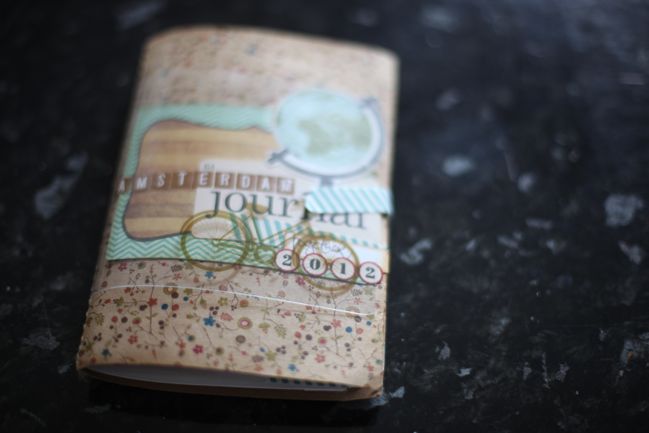
mini travel scrapbook
Last month I had so much fun shopping for supplies to design the minibook crafting kit for Jenni Bowlin at JBS Mercantile. And apparently the Mercantile subscribers thought it was pretty fun too, as it sold out before I even had a chance to blog about it! (Thank you!) But today seems like pretty good timing to share my finished mini, considering most of this was created outdoors or at the very least on the road… and that’s exactly what we’re discussing on the latest episode of the Paperclipping Roundtable!


You can listen here by pressing play or you can listen via streaming or download on iTunes (it’s free to subscribe on iTunes and get each new episode as soon as it’s available). Check this post for post-show discussion in the comments.

This week Amy Tan and I were the guests of the regular crew of Noell, Izzy and Nancy to chat about scrapbooking and crafting outdoors, and there is some humour in how all of them live in much warmer climes but I will take any chance to scrapbook outside that I can! But I think that is part of living somewhere that isn’t always sunny – we all head straight out the door as soon as it’s a lovely day, just in case there isn’t another for weeks! I definitely see that attitude in our local park… it’s just that most people take a picnic or a football out for their sunny day, while I tend to bring a scrapbook page! (For the record, this still works even if The Boy and I head out together – he takes something to read and I cut and paste It works.)

In the episode, we talk about what we scrapbook outdoors, and I’ll certainly work on 12×12 pages without any trouble, but in this case it was a travel journal, filled in as we went, sitting outside in parks, at cafes, on the train and so forth. I started with this kit but if you wanted to assemble something similar, you can find almost all of those items here so you could pick and choose if you already have some elements in your stash. (By the way – I also made a few 12×12 pages from the kit in addition to the minibook.)
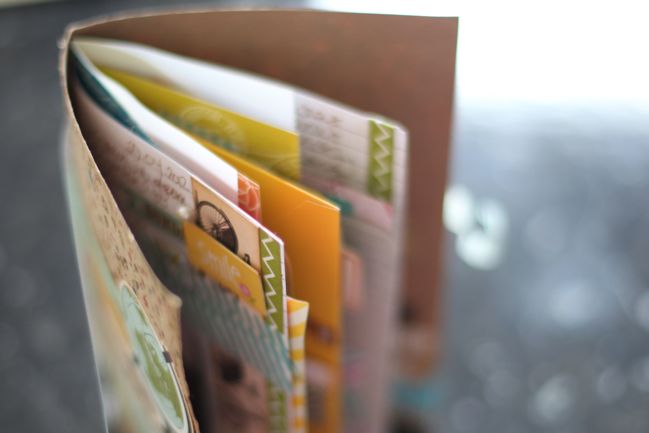
mini travel scrapbook
The base for the book is one of Amy’s Daybooks – my pick of the week on the Roundtable. (There are several styles available here.) It comes prebound with a variety of pages inside – different shapes and patterns and colours, plus an envelope and sticker sheets. The bicycle cover is my favourite because the sticker sheet is a tiny alphabet, perfect for adding titles and captions as you go.
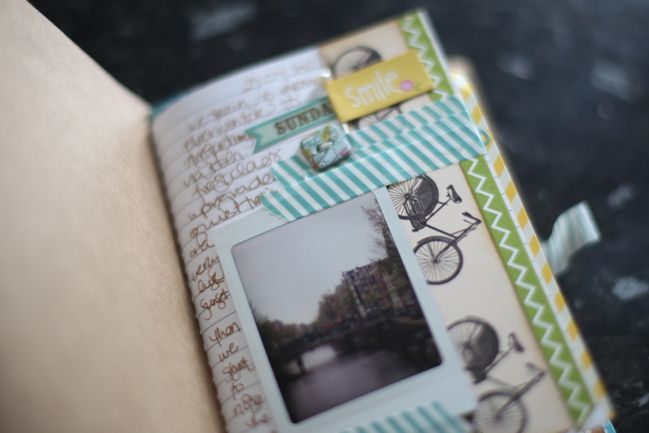
mini travel scrapbook
I used my DSLR to take photos throughout this trip, and printed them on the road with a Pivi printer – a tiny little gadget that attaches by cable to a digital camera, then prints the digital image as an instant photo, like a mini Instax. (I love the Pivi but it is a real treat – they are only widely available in Japan. I bought mine from an international seller on Ebay and stock up on the film packs the same way. The film packs are different from what you would put in an Instax camera, so importing is the way to go. But it is fantastically fun!)
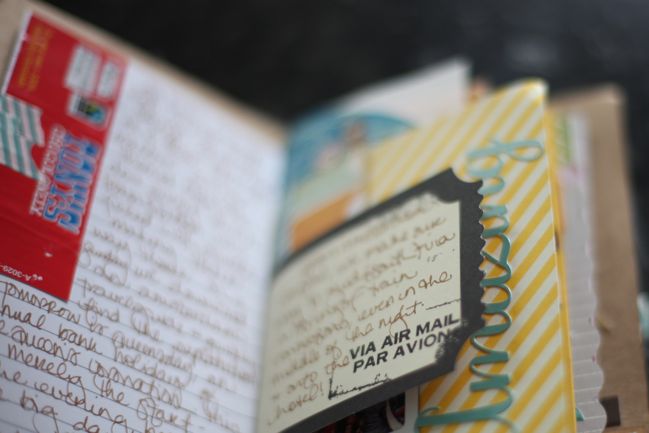
mini travel scrapbook
I love that the Daybooks are small enough to pop in my handbag or the pocket of my backpack but they can work with that same philosophy of a Smash book – just sticking in bits and pieces from daily adventures then surrounding them with writing. The wrapper at the top left was from the chocolate in our hotel room.
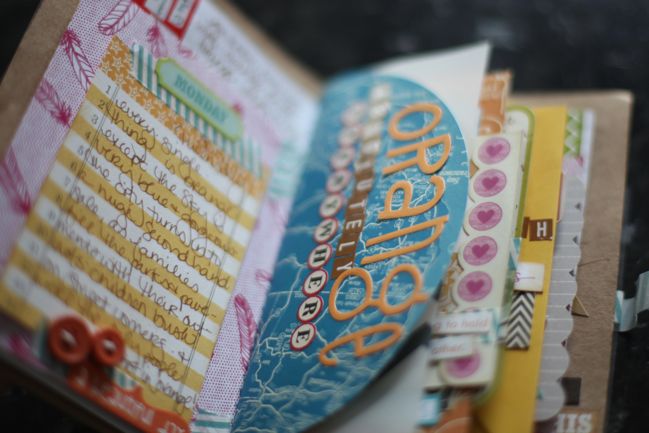
mini travel scrapbook
A sheet or pack of small journaling cards goes perfectly for writing along the way… and if you’re really crammed for space you can just keep some journaling cards with you all the time and add them to a book when you get home.
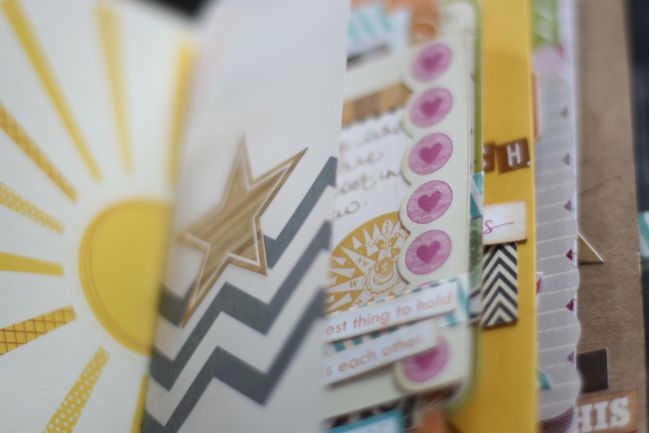
mini travel scrapbook
I like keeping some of the more designed pages as accents – like just adding a woodgrain sticker to the vellum page.
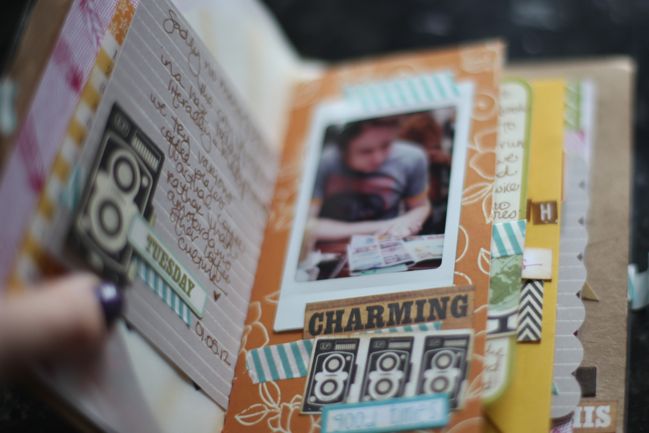
mini travel scrapbook
Page design concepts from traditional 12×12 scrapping can still come in useful on tiny little pages… like repeating a motif from one side to the other. The large camera here comes from the sticker sheet while the smaller cameras are part of a border strip. It makes it more obvious that the writing on the left corresponds to the photo on the right.
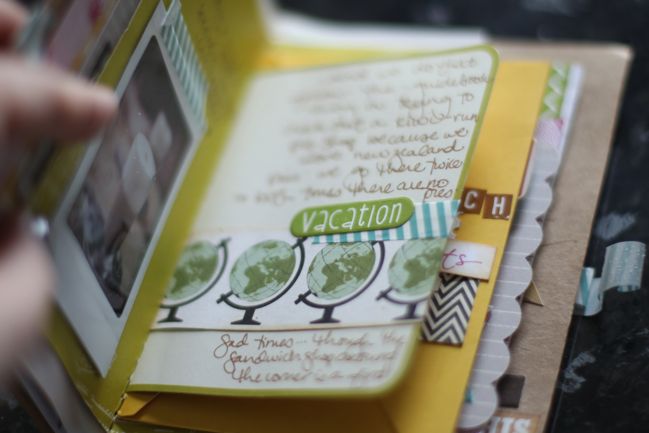
mini travel scrapbook
Washi tape is a great component to any travel journal kit because you can just stick anything in the book but still have the freedom to move it around later… plus it’s cute enough to use as an accent layer too. So you’ll see a lot of that turquoise striped tape showing up throughout this book, but I love how it’s both practical and a design element with continuity.
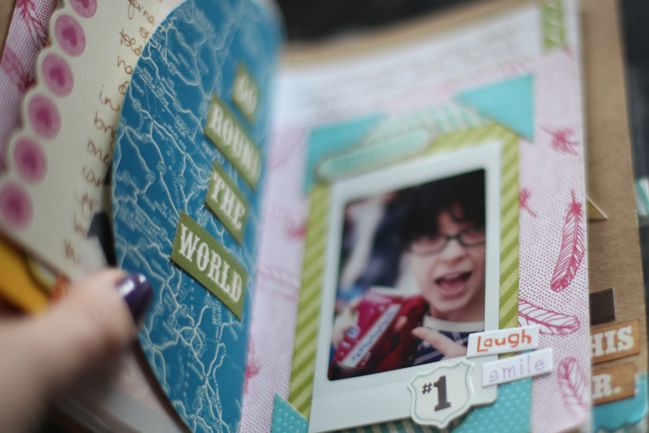
mini travel scrapbook
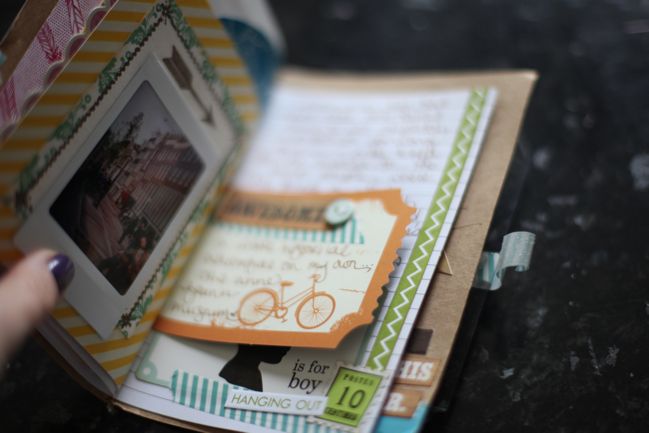
Cutting up border strips with printed phrases can create something new. For the map at the left, I cut out the words from the phrase ‘you make my world go round’ and rearranged to say ‘go round the world’. Because believe it or not, ridiculously super sweet Surinamese/Dutch soda does not make my world go round. (But it does make for a funny story I wanted to include in the book!)
mini travel scrapbook
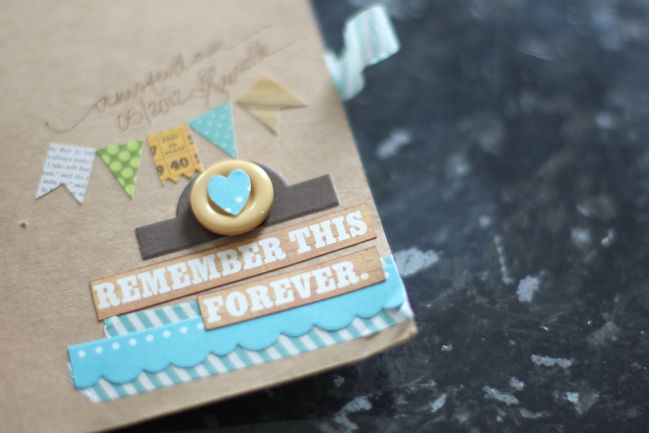
The balance of page sizes and types in this book is just right, so there are pages that look great with just a photo or a phrase, but there are others that include plenty of room to write about the adventure.
mini travel scrapbook
And that’s that!

By the way, you can still grab one of the other kits from Mercantile for May – the main kit is here and there are a few left. I’ll be back soon with a video to show you what I’ve been making with that!

Have a fabulous weekend!

xlovesx

PS: for those of you who have listened to the episode – would you like to see what I keep in my lunchbox for outdoor crafting? I don’t always use this because I tend to just take my basics if I take page kits, but it’s what I carried for years before I committed to packing ultra light!

Scrapbooking Giveaway Day

scrapbooking giveaway day
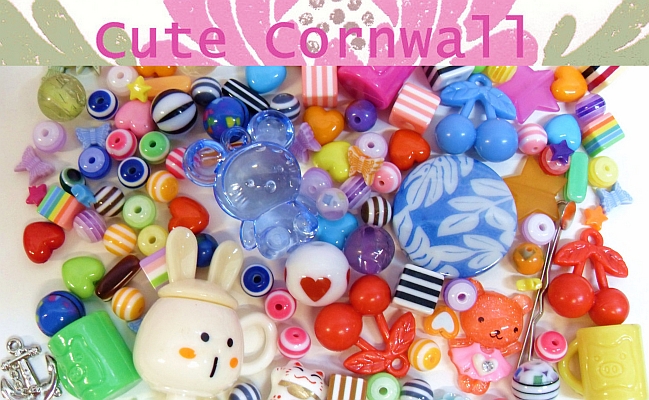
Cute Cornwall
This weekend, one commenter will win a destash collection of cute and colourful beads from Cute Cornwall.

Natalie from Cute Cornwall describes her store as “Filled with fun brightly coloured Kawaii themed resin beads and charms which I love! I am a Potter in ‘real life’ where I make quite simple functional pots, so my CuteCornwall shop is my guilty pleasure where I can go a bit crazy with colours and materials! I am a little obsessed with collecting anything colourful, Kawaii, cute, Japanese, pink, round, stripey or glittery!

To enter, just leave a comment on this post describing what your favourite pattern is.

Entries close at midnight Thursday UK time and the winner will be posted Friday evening, so be sure to check back to see if it’s your lucky day!

Good luck!


Congratulations to Lindsay, who wins PRIZE from Retro Modern Art
Lindsay, please email me (shimelle at gmail dot com) with your address.

There’s a new giveaway every Friday night, so check back next week for another chance to win just by leaving a comment.

Glitter Girl and tricky title typography (letter sticker scrapbooking video)

Glitter Girl and tricky title typography - letter sticker scrapbooking video
Glitter Girl and the tricky title typography Class content ©twopeasinabucket.com

This week, Glitter Girl tackles a bit of tricky title typography… or what to do when you’re running out of letter stickers! In this discussion on the message board, the question specifically came up to how to make mixed-font titles without it going all wrong, so Glitter Girl has a few hints to share with you!

Truthfully, I could spend an entire workshop discussing things to do with letter stickers, so this week Glitter Girl focused on just that specific question, but she also curated a collection of other examples for you! You can find that here, with an ongoing collection of ideas for mixed letter stickers.

All the supplies featured this week can be found here. Just scroll down and you can add anything you fancy! There are lots of Thickers and letter stickers to choose from, plus badges from Hello Forever and several items from the Amy Tangerine Sketchbook collection.

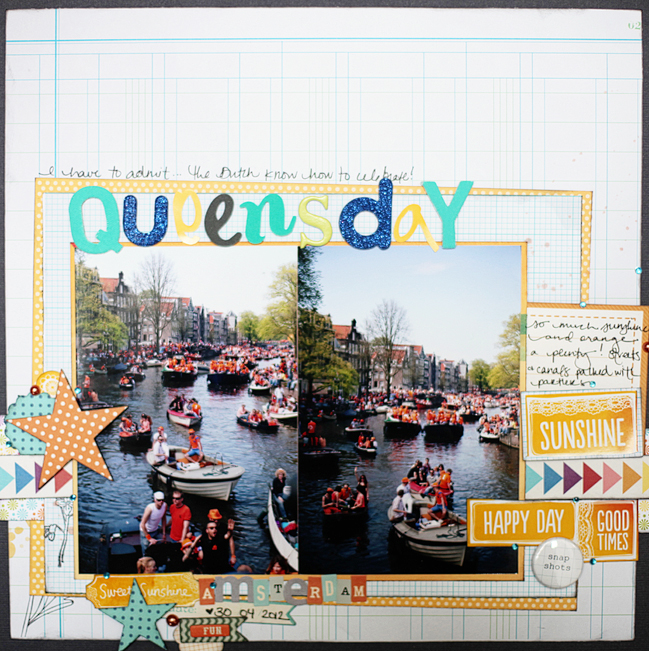
scrapbook page
Three things to keep in mind for great letter sticker titles:
…keep the height relatively similar, unless you’re trying to make some sort of point with certain letters larger (like spelling a second word)
…arrange them on a common baseline, and keep the letters close together. Both of these help make it easier to read a mixed-up title and make it look less like a ransom note. Both awesome.
…choose the colours from things that already exist on your page, even if they only appear in a tiny little area.

And now, put those tips to use! This week Glitter Girl challenges you to mix your letter stickers to create a title and/or subtitle on your project, then share it in the Two Peas gallery. You can also leave a link in the comments here if you like.

Onward, covered in glitter, my dear scrapbookers!

adventures of glitter girl

The Adventures of Glitter Girl is a weekly series on Two Peas in a Bucket, and goes live every Wednesday. I’ll share each adventure here shortly after that. I hope you enjoy her quests for crafting happiness, and if you ever have a scrapbooking dilemma yourself, you can always call her to action on the message board.

Scrapbooking Giveaway Day

scrapbooking giveaway day
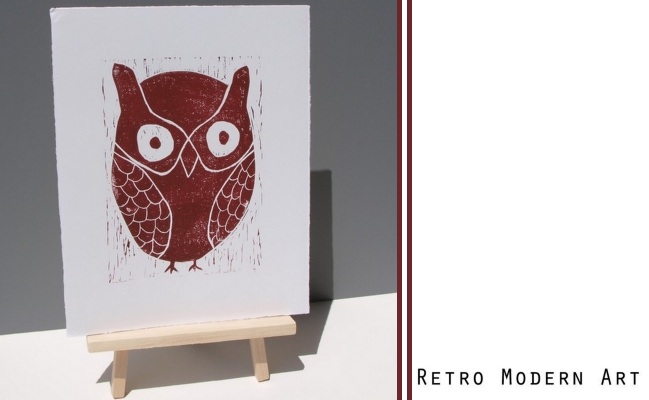
owl print from retro modern art
This weekend, one commenter will win a hand printed owl lino print created by Stacy Rajab from Retro Modern Art.

Stacy Rajab is a hand cut lino artist inspired by modern meets midcentury. She explains: I love anything bold. I love mixing the eclectic and new with recycled everyday items. I am a very casual person who loves art work to reflect the casual, fun side of a person…one that fits any decor. I use mostly earth-friendly or recycled materials to create your special piece of art.

You can see more of Stacy’s beautiful work on her blog and by following her Pinterest board.

To enter, just leave a comment on this post letting us know what your favourite piece of home decor is at the moment.

Entries close at midnight Thursday UK time and the winner will be posted Friday evening, so be sure to check back to see if it’s your lucky day!

Good luck!


scrapbooking giveaway winner
Mustache winner

Congratulations to Tine P, who wins the Mustache Cookie Cutters from Fuzzy Ink.

Tine P, please email me (shimelle at gmail dot com) with your address.

There’s a new giveaway every Friday night, so check back next week for another chance to win just by leaving a comment.

Glitter Girl on sketches, scrapbook pages and your style (scrapbooking video)!

Glitter Girl on sketches, scrapbook pages and your style
Glitter Girl on sketches, scrapbook pages and your style Class content ©twopeasinabucket.com.

You know that big giveaway that closed yesterday? Scroll down to the end of this post for the winner!

This week one of the topics up for the discussion on the general scrapbooking message board was whether it was considered ‘cheating’ to use a sketch for your scrapbook page. Glitter Girl says not at all – sketches shared by blogs, magazines and indeed Two Peas itself – are there to be useful for you so that’s their entire purpose. And of course the resulting page can become true to your style when you take care to add to, subtract from or otherwise edit the sketch from its original form to what is most suitable for your scrapping.

You can find a full shopping list for everything featured in this video here. On that page you’ll also find links to three free resources for sketches at Two Peas – Kelly Purkey’s Super Sketches (12 lessons of a sketch plus different interpretations), Jen Gallacher’s Stretch your Sketch (12 lessons with videos showcasing different ways to adapt sketches to your needs) and the archive of sketch challenges (including the current challenge with a sketch by Amy Heller).

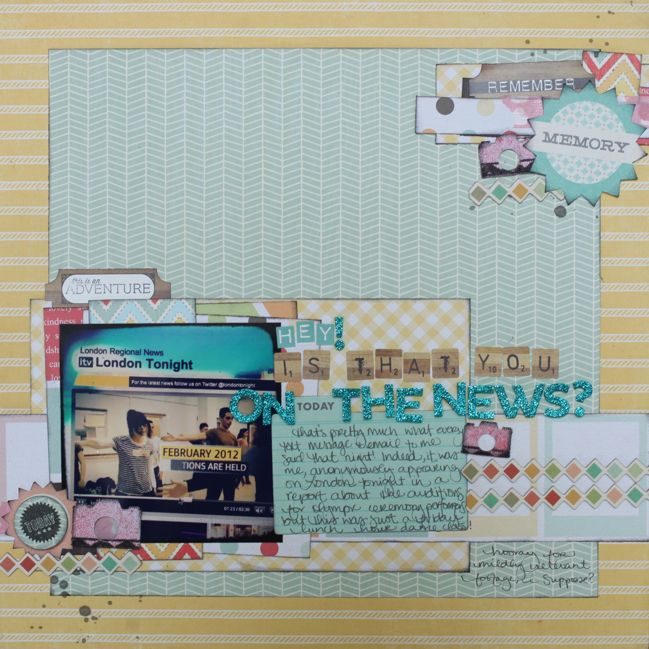
scrapbook page
This page started with a sketch by Kelly Purkey (here), and this was a sketch in the style I tend to imagine in my mind – the sketch gives just a general idea, then you can add what you like as you go. I love sketches that have plenty of room for that reinterpretation – I prefer more open space on the sketch than everything to be determined exactly from the beginning.

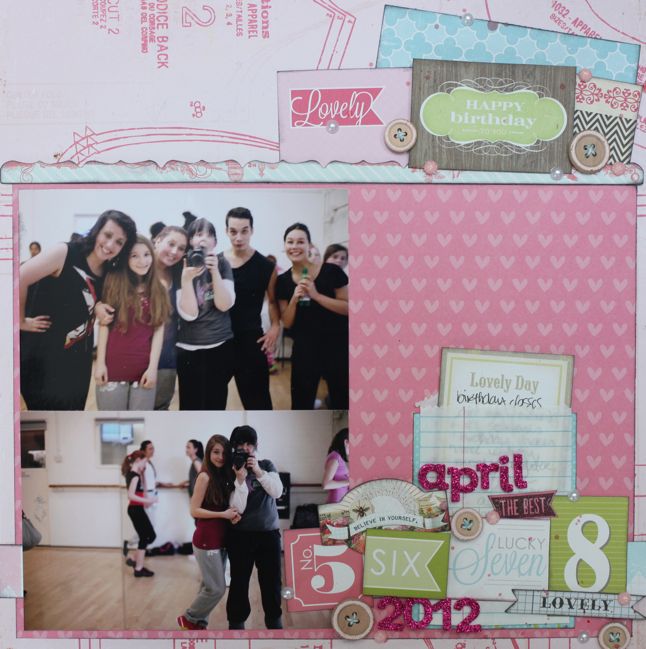
scrapbook page
This page started with a sketch by Jen Gallacher (here) and this one was not a sketch I would normally pick, as it fills the page more and includes a lot of photos, including a bunch of smaller prints. But sketches can be interpreted in your own style, of course! I swapped six small photos for one 4×6 photo of six people and replaced an additional two photos with a pocket for writing.

This week Glitter Girl challenges you to create a page inspired by either of the two sketches and share it in the Two Peas gallery. You can also leave a link in the comments here if you like.

Onward, covered in glitter, my dear scrapbookers!

adventures of glitter girl

The Adventures of Glitter Girl is a weekly series on Two Peas in a Bucket, and goes live every Wednesday. I’ll share each adventure here shortly after that. I hope you enjoy her quests for crafting happiness, and if you ever have a scrapbooking dilemma yourself, you can always call her to action on the message board.

Gardeners’ Digest Giveaway Winner!
Thanks so much for all your entries into the big giveaway – we had just over five hundred at the closing time, so that means our winner gets $10 to spend at Two Peas, the exclusive Oh Happy Day stamp set by Studio Calico and Hero Arts, five rolls of washi tape and the Pieces of Me Studio Calico kit! That’s a bunch of stuff! And here’s our lucky lady:
scrapbooking prize winner
And her goodies are on their way!

DIY Jubilee Party Dress

diy jubilee party dress
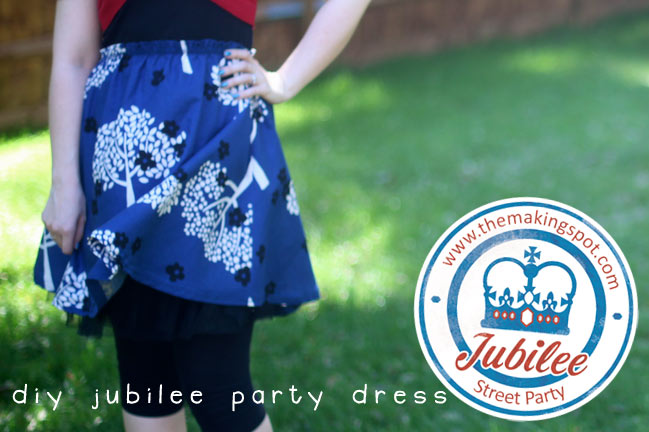
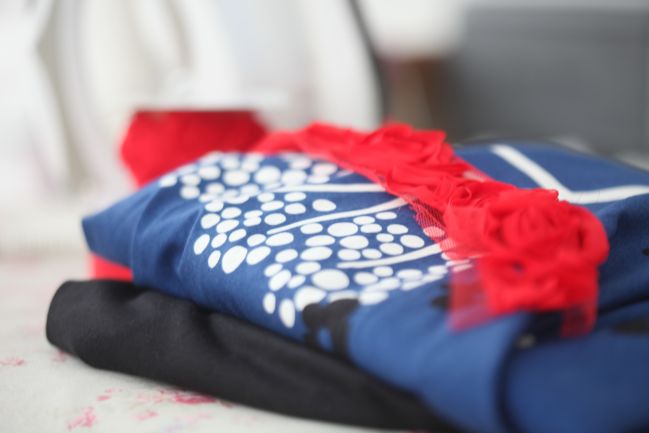
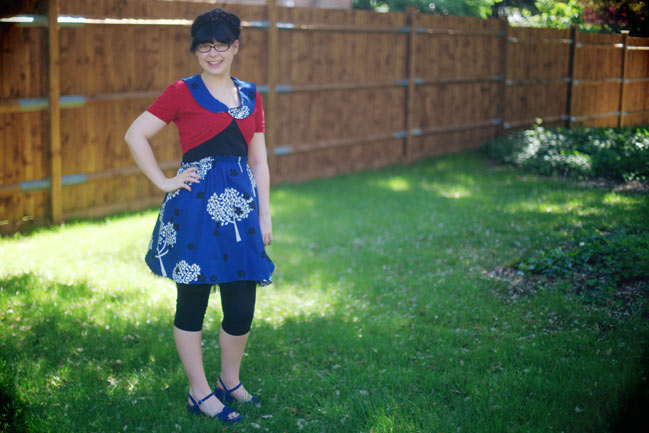
Oh, this glorious sunshine may have done crazy things to my head. Like how when someone said ‘I challenge you to DIY a special Jubilee party dress with only things you have on hand’, because I immediately thought oh yes, why of course! Then immediately wondered what on earth I would have on hand that could make something so very jubilant indeed. Sadly I didn’t have a giant supply of old union flags on hand, which might have been a more obvious choice, but it does mean you will be spared any sort of Spice Girls influence in patriotic dress sense. Instead, a bit of blue, red and black to make something for the Jubilee Street Party at The Making Spot. And to be worn on Jubilee weekend, of course, whilst the entire country tries to set a new world record for simultaneous barbecue cooking.

sewing supplies
In terms of supplies, I rummaged up one failed dress attempt, which had been added back to my fabric stash, still half-finished, plus one plain black t-shirt from my wardrobe. That, plus thread and elastic, made the dress – no buttons, zips or facings. But all that had zero red involved, so the red cardi came from my wardrobe and I’m thinking that by just adding red in the accessories, it’s a dress I can wear in a non-patriotic way too.

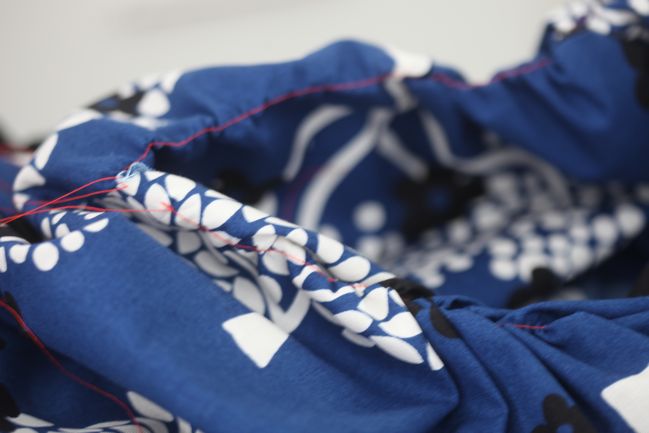
gathering the waist of skirt
It’s hard to tell from a photo, but it’s a dress rather than a skirt and top. But I started with a process of making the skirt, salvaging something between an a-line and a circle skirt from the original pieces of the abandoned sewing project from years ago. Using a running stitch on the longest setting, I basted a trial waistline and gathered the thread to see how it would look… and this sort of make-do-and-try-it-on is pretty much how I sew. It’s a little different to following directions, but I find I understand what I’m doing a bit better and therefore get less frustrated than when I follow a pattern with something not completely obvious. This stitch is just to see how the pleats and gathers will work, so I usually sew it in a contrasting colour to make it a bit easier to work with – and easier to find when I take it out later! Once the trial gathers were working just about right, I pressed the top edge back to get a clean crease at the top, then swapped out the thread in the bobbin for elasticated thread and stitched all the way around the gathered skirt three times, holding that top hem in place with the same stitches that secured all the gathering. The result is a simple skirt with a bit of flare to the length and a super stretchy waist.

DIY peter pan collar on t-shirt tutorial
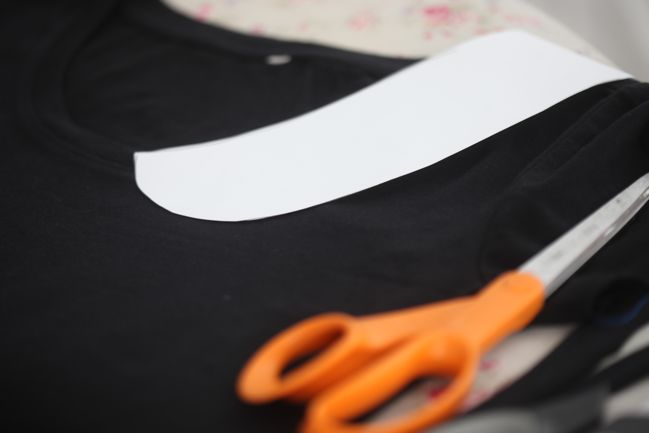
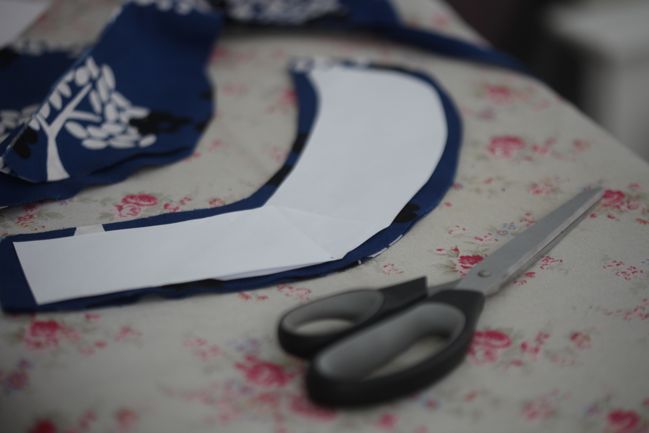
The top part of the dress started as just a plain t-shirt , but the cut was far too boxy to suit a dress, so I took it in with three darts – one on each side to taper in the waist and another at the back of the neck, as the neckline didn’t hang very well, which was how it ended up in my pile of ‘cut this up and sew it into something else’ clothes. And everything is both better and more 1952 with a peter pan collar, so presto! There are lots of templates and tutorials for adding a collar to a top, and some make it look complicated and others don’t. I had a look at them and then decided I mostly needed to make a template that would be the right length from the front of the collar to the centre point at the back. As the collar is made from a non-stretchy material sewn to a stretchy jersey t-shirt, the collar needs to be two pieces, so it’s still possible to get it over one’s head. (I hate it when I don’t think of those things and I make something that can’t physically be worn. I am particularly ace at knitting hats that look really cute on the needles but have one or two rows of intarsia so tight you can’t stretch it over your head. It’s a talent, I tell you.) So anyway: paper template to find the right length from the front to the back on one side, then a bit of playing to get the rounded part right.

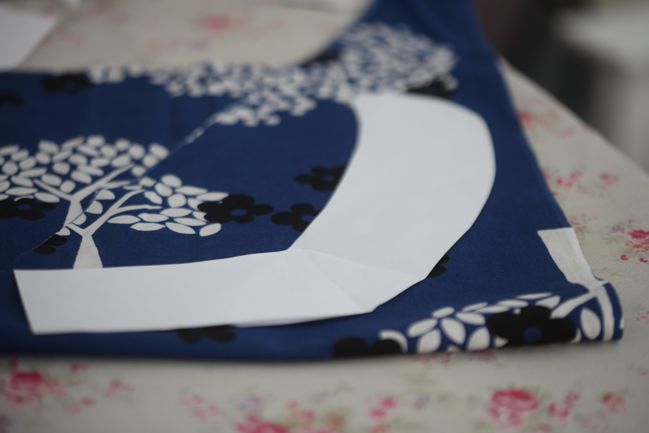
diy peter pan collar on a t-shirt tutorial
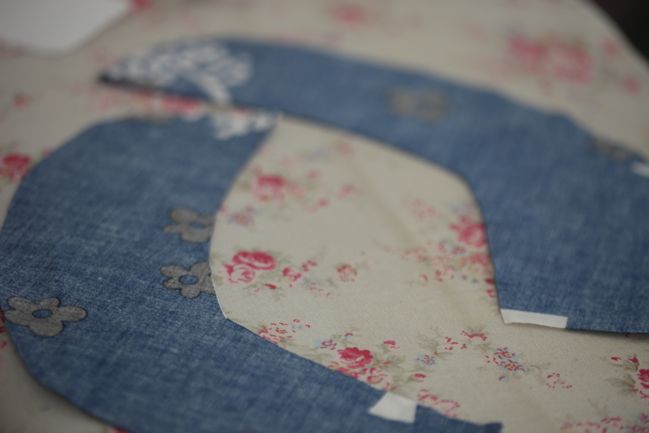
Folding the fabric up so two sides are pattern up and two sides are pattern down, then it’s just a case of cutting all four layers at once to make four identically shaped collar pieces.

diy peter pan collar on a t-shirt tutorial
I cut outside the pattern to create a seam allowance. It turned out I didn’t need to do this really and my collar is a bit on the extreme size. So keep that in mind, I think: collars could do with being slightly smaller than one might expect.

diy peter pan collar on a t-shirt tutorial
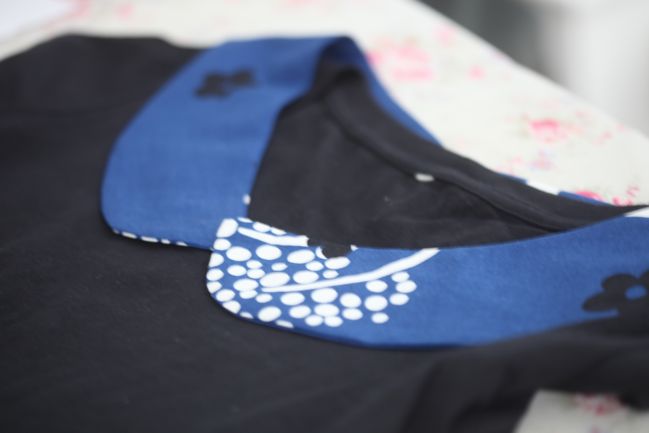
Pair the pieces, with right sides facing in. Cut a few little slices at the very edges of the curves so it won’t pucker. Sew almost around all the edges – leave a spot on the short straight edge open so they can be turned inside out. Then press them out, including folding in that unstitched spot, and top stitch around all the collar edges.

diy peter pan collar on a t-shirt tutorial
Then stitch it to the edge of the t-shirt – easy as that. Try the shirt on with the skirt and mark where you want the two to meet. I started out thinking the skirt should sit at a natural waist line, but in the end it looked more like a party dress with the waistline raised a bit. It’s not quite empire height, but it’s a couple inches higher than my actual waist. Oh – and that top edge of the skirt! Because there are no zips or buttons, the gathers create a quite bulky top edge, so I stitched it to the outside of the top rather than putting the two right sides together and stitching around. Either would be easy enough, but this has a cute texture with that top edge of the skirt, I think!

diy jubilee party dress
But of course it was still very blue and black at this point, so some red to accessorise for all things jubilee! I was going to wear red shoes as well but remembered I bought this pair of blue platform sandals at the end of last summer for a big day out and then it absolutely bucketed with rain that day so I couldn’t bring myself to wear them and ruin them, of course! Bonus of brand new shoes just waiting for this summer then – and they match perfectly. Plus every party dress needs a petticoat, right? At least in honour of 1952. I don’t have a red petticoat. I do have black, white and pink. That’s perfectly acceptable in 2012, right?

Fancy some more jubilee-themed fun? The Making Spot are hosting a street party right on the interwebs, so check out this post for plenty more projects! They also have a special offer of half off crafting patterns this weekend as part of the celebration, if you fancy something to knit or stitch. (I quite like this to pop in a frame above my sewing machine, but I haven’t the slightest idea when I would get it finished!) Or you might find a little jubilee inspiration here with this ridiculously easy bunting tutorial or five ideas with bunting including gift wrap, cakes, party decor and papercrafts!

Have a beautiful weekend and thanks for stopping by!

Scrapbooking Giveaway Day

scrapbooking giveaway day
Mustache Cookies
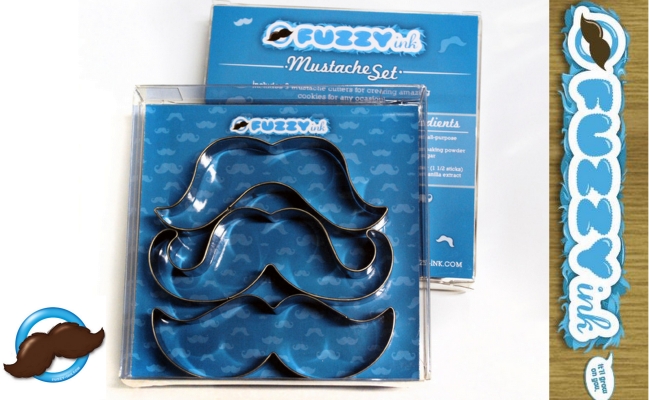
This weekend, one commenter will win Mustache Cookie Cutters from Fuzzy Ink.

Fuzzy Ink is an awesome shop dedicated to top lip fuzz, John the owner says “Fuzzy Ink is a brand based entirely around mustaches. Offering everything from t-shirts, plushies and even cookie cutters, all of our products are facially friendly and sure to make you smile. Give us some time and we’ll grow on you!”

To enter, just leave a comment on this post describing, how, if you had a mustache, you would style it!

Entries close at midnight Thursday UK time and the winner will be posted Friday evening, so be sure to check back to see if it’s your lucky day!

Good luck!


scrapbooking giveaway winner
Colour class pass

Congratulations to Selenaintx, who wins a class pass to Through the Kaleidoscope

Selenaintx, please email me (shimelle at gmail dot com) with your address.

There’s a new giveaway every Friday night, so check back next week for another chance to win just by leaving a comment.

Glitter Girl's tips for scrapbooking about yourself

Glitter Girl's tips for scrapbooking about yourself
Glitter Girl's tips for scrapbooking about yourself Class content ©twopeasinabucket.com.

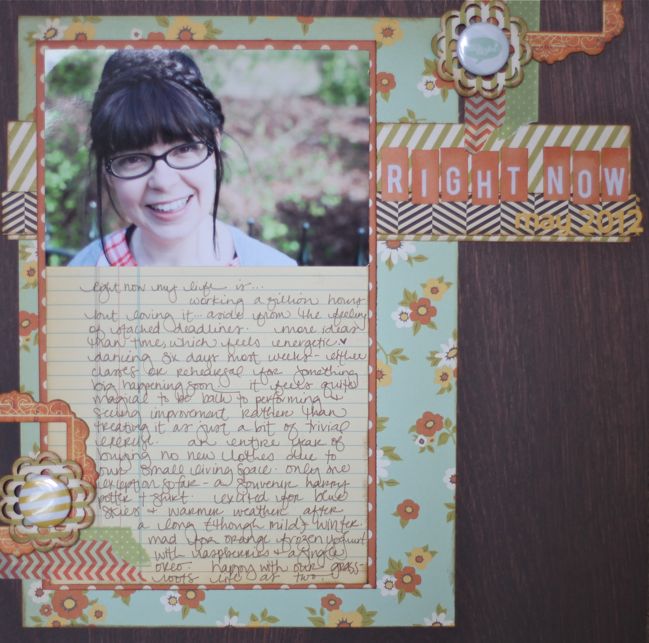
This week Glitter Girl takes on a question from the Two Peas community about where to start when scrapbooking about yourself. She has two layouts to share with you this week – one with an older photo and one with a current picture. So you can take your pick of perspectives to make your own scrapbook page.

For a full list of this week’s supplies and a collection of some of my favourite ‘about me’ pages from other scrapbookers at Two Peas, please see this page with all that goodness!

scrapbook page :: right now
This week Glitter Girl challenges you to scrapbook yourself in any style and share it in the Two Peas gallery. You can also leave a link in the comments here if you like.

Onward, covered in glitter, my dear scrapbookers!

adventures of glitter girl

The Adventures of Glitter Girl is a weekly series on Two Peas in a Bucket, and goes live every Wednesday. I’ll share each adventure here shortly after that. I hope you enjoy her quests for crafting happiness, and if you ever have a scrapbooking dilemma yourself, you can always call her to action on the message board.