pretty paper. true stories. {and scrapbooking classes with cupcakes.}

lovely to meet you Twitter Facebook Pinterest YouTube

Take a Scrapbooking Class

online scrapbooking classes

Shop Shimelle Products

scrapbook.com simon says stamp shimelle scrapbooking products @ amazon.com shimelle scrapbooking products @ amazon.co.uk

Reading Material

travel

Sketch to Scrapbook Page :: Using triangles in your scrapbooking design

scrapbook page by shimelle laine @ shimelle.com
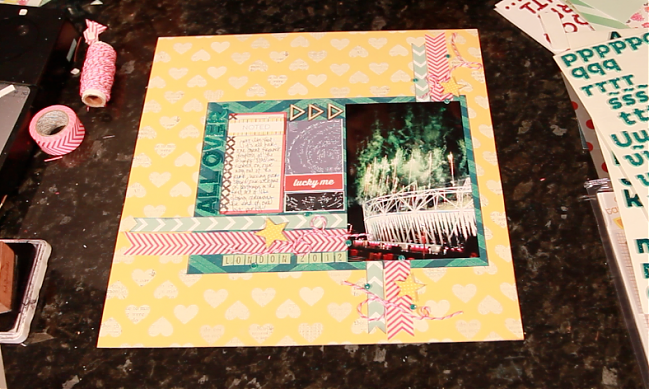
Usually when I share a Sketch to Scrapbook Page video, I stay quite true to the sketch and the guests sometimes give it a bit of a twist, but today we’re swapping that around. I designed this sketch thinking of triangles cut from various patterned paper scraps, but once I had my supplies on the desk, I decided to take it in a different direction to embrace the current trend of chevrons and arrows. Maybe I will come back and give the triangles a try too, but rest assured, today’s guest has made that look ever so pretty.

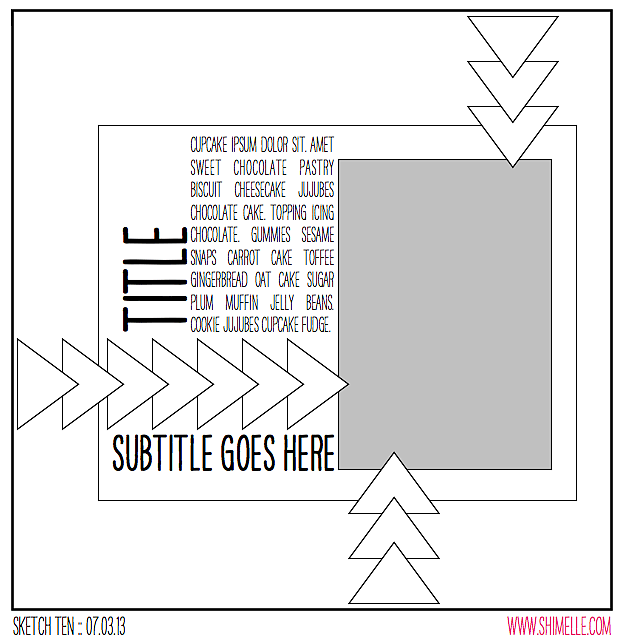
scrapbooking sketch by shimelle laine @ shimelle.com
I imagined this sketch with a single photo (4×6 or 5×7 would both work) so the triangles form arrows that point to that important picture. You could replace that single photo with a collection of smaller pictures, or include more photos across that central block of the page if that’s better for your style.


The supplies for this page are all from my March product picks for the Best of Both Worlds, plus some paper stars left on my desk from a project months ago and a bit of baker’s twine. The photo is of the fireworks at the end of the closing ceremony at the Olympic Stadium – taken as we were leaving the park just ahead of the crowd. Bittersweet! Although my Olympic album will have a few stories that chronologically take place after this photo, I think it will mark a sort of end to a chapter within that book as it comes together. That’s the plan, anyway!

scrapbook page by Piradee Talvanna @ shimelle.com
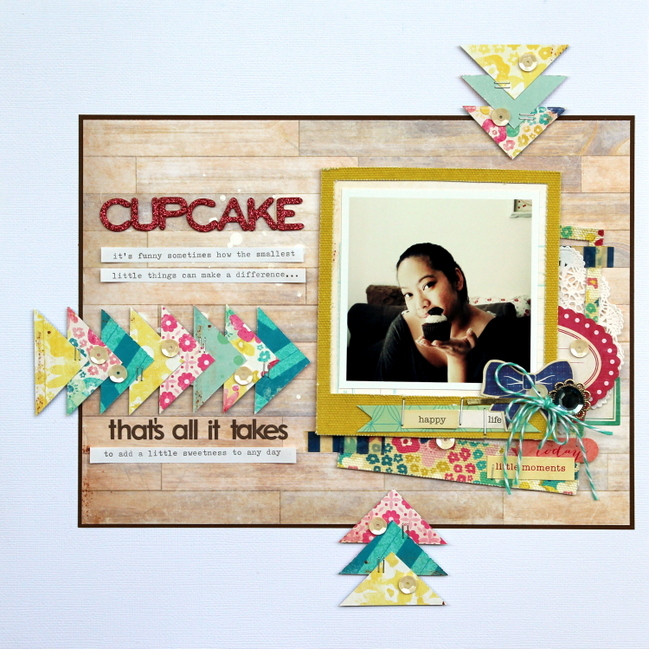
Today’s guest, Piradee Talvanna, stayed true to the idea of all those paper triangles and I love the look of all the patterns she selected. Plus there’s a little something else with her page that may have made me smile!

scrapbook page by Piradee Talvanna @ shimelle.com
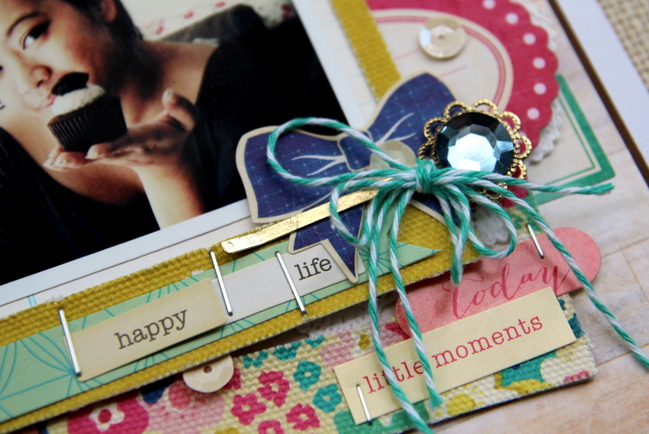
I had a fun time using this awesome sketch as it gives you a lot of room to play around with; although I did pretty much keep to the sketch only switching the placement of the title and adding in some fun layering details behind the photo. In creating this layout, I used the Maggie Holmes collection by Crate Paper, which had a lot of fun colors and I wanted to be able to incorporate all the colors into the layout without overwhelming it. Hence I decided to keep the background neutral (one color) and instead played on the arrow design with the various colors and balancing it out with the colorful layering/cluster behind the photo. Also I noticed that the fabric frame from the collection had some staples (to keep the lettering in place) and therefore also added some to the arrow design along with some neutral sequins for more details. On the topic of cupcakes, well what more is there to say? Love them!


Piradee Talvanna is from Bangkok, Thailand but currently lives in Singapore with her husband. It was there that she was introduced to the wonderful world of Scrapbooking in mid 2008 and quickly became addicted to all the beautiful papers and fun embellishments. Scrapbooking not only allows her to explore and challenge her creativity but also helps her de-stress after along day at work. She is currently a design team member for Crate Paper, Maya Road and Webster’s Pages and has been part of the Creating Keepsakes Dream Team Member for 2011, 2012 and 2013. You can find more of Piradee’s work on her blog.


Gardeners' Digest scrapbooking blog hop (March 2013)

scrapbook page by shimelle laine @ shimelle.com
Today is moving day. Yes, we are moving house (and my studio) again. Yes, that is three moves since the end of 2011. Yes, that is more packing tape and cardboard and bubble wrap than I would care to see in a lifetime, but this time we are very happy to be making this move, hassle aside. We’re actually moving back to a place we never wanted to leave, which is a long story for another day perhaps.

But in addition to moving day, it’s also Gardeners’ Digest day, so I just wanted to drop by quickly to share a few things with you from my Two Peas world and then get back to the moving van, I’m afraid! The sooner I can reconstruct my studio, the better. I may have danced with joy to return to that room today with its giant wall-sized window. Oh, natural light. I love you so.

Since we last caught up with all things Garden Girl, Glitter Girl has been on a few adventures, including the one above, wherein she made two pages with the same construction process, and an episode wherein she was very brave and scrapbooked with some of her oldest scrapbook pages. As always, you can find all my Glitter Girl pages and videos here.


New in the Garden this month is the lovely Celine Navarro, who has joined as a new Garden Girl and is part of the 213 in 2013 video series. Take a look and see what you can pick up from her beautifully artistic style! You can see even more lovely work from Celine in her gallery.

scrapbooking supplies
Now… usually I would share links to five products I’ve purchased (and loved!) from the Two Peas shop this month, but because I only have a moment to pause the loading-boxes-into-the-van activity, I have a little challenge for you! In Glitter Girl’s latest video, she shared some of her latest product acquisitions with you! In the comments, tell me your favourite of her new products, and I’ll pick one for something a little special.

I’m the last stop on the hop this month, so if you’re jumping in now, click over to Celine for the first stop or take a look at the Two Peas blog to catch the details.

Wishing you a very happy weekend, and if you don’t see me soon, send in a search party to make sure I’m not under a stack of cardboard boxes!

Five Ideas for Using Digital Brushes by Stephanie Baxter

five ideas for using digital brushes by Stephanie Baxter @ shimelle.com
Today I am delighted to welcome another scrapbooker close to home: Stephanie Baxter, who lives close enough to come to my neighbourhood to watch the Opening Ceremonies on the big screen at the Royal Naval College last summer! But her extensive travels have shown her things that may be far closer to your neighbourhood than mine, and I love getting a look at how she creates scrapbook pages and other projects in her own beautiful style. I’m so grateful she stepped up to share some ideas for making digital brushes easy to use on your paper (and fabric) projects, and I hope you enjoy.

Just recently I have been getting into a bit of hybrid scrapbooking and I’ve found the best and easiest way for me to do that is to use digital brushes. I love the variety that are currently available right now. There are so many amazing designs that can add such a fun element to your projects. And the best thing is about digital brushes is that you can use them over and over again… they will never run out! If you’re anything like me, you’ve got an ever-growing collection on your computer’s hard drive and sometimes overlook them because you forget they are even there. Today I’d like to share with you five ideas to get you using digital brushes.

five ideas for using digital brushes by Stephanie Baxter @ shimelle.com
As a Title for a Scrapbook Page
This is one of the most simple ways to use a digital brush but can make such an impact on your pages. I watched this video to help me figure out how to colour my brushes (paint splatters and a Studio Calico sentiment brush) in a way that seems to be a growing trend right now. Using Photoshop Elements, I opened the brushes on an 8.5 × 11 inch canvas and coloured them according to Shanna’s tutorial. I printed the document on a piece of white cardstock before adding Mister Huey’s mist, my photo, embellishments (sequins, Studio Calico wood veneer and die-cuts) and a date stamp.

five ideas for using digital brushes by Stephanie Baxter @ shimelle.com
On Photos
I am totally in love with using digital brushes directly on my photos, particularly for my Project Life style pages. For this page in my travel album, I opened my photos up in PSE and stamped on them using digital brushes from Studio Calico. Sometimes I like to use a bit of text with them, so I will add that immediately after stamping the brush. It’s also sometimes fun to play with the opacity of the brushes…if you stamp them on a new layer, you can reduce the opacity to make it so that you can still see the photo under the brush, which becomes slightly transparent, rather than a solid colour.

five ideas for using digital brushes by Stephanie Baxter @ shimelle.com
As a Transfer
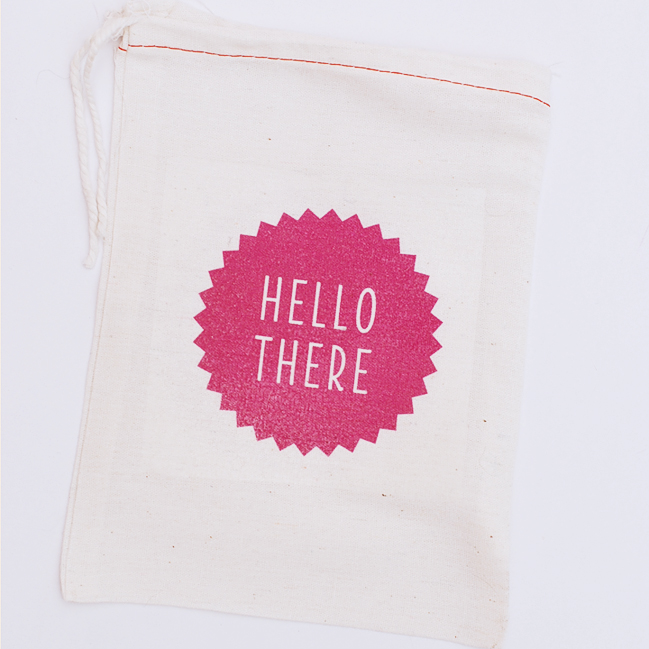
I’ve been collecting little canvas bags that I thought would be great to re-purpose as little gift bags. Wanting to jazz them up a bit and make them look at bit more pretty, I decided to buy some inkjet transfer paper to use with my brushes. I recoloured a Studio Calico digital brush in PSE and printed directly on to the transfer paper before using an iron to adhere the transfer to the canvas bag. Do remember to let the transfer paper cool down before peeling it off, as you might peel off some of your image with it!

five ideas for using digital brushes by Stephanie Baxter @ shimelle.com
To Make your own Project Life Filler Cards
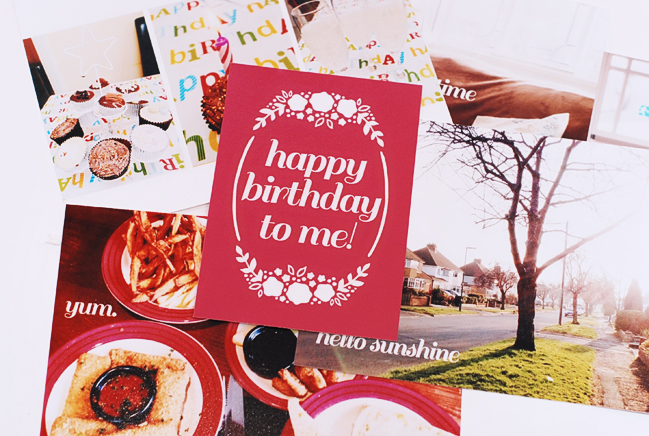
I am loving Project Life this year, especially because there are so many fun cards out there to use in my album! For my birthday week, however, I wanted a special card in my spread to mark the occasion. I couldn’t find any birthday themed filler cards, so I decided to make my own using a Studio Calico digital brush and some text. I love how it turned out and the fact that it’s totally unique, especially since I could choose my own background colour and font.

five ideas for using digital brushes by Stephanie Baxter @ shimelle.com
As a Sentiment for a Quick Postcard
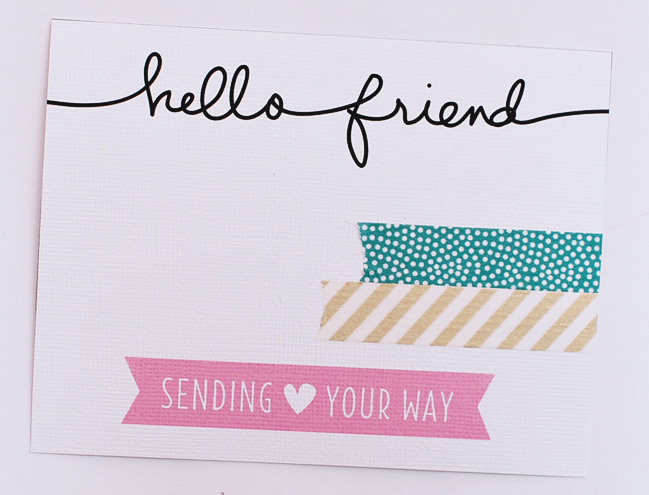
This project was SO quick and easy… perfect for a time when you want to send a card to a friend but are a bit pushed for time. I stamped some brushes from Ali Edwards and Studio Calico on to a canvas sized 4.25 × 5.5 inches and printed it out on a piece of white cardstock. I trimmed the card down to size and then added a bit of washi tape for a bit of extra interest. You could definitely make something similar in under five minutes… how great is that?!

I hope that’s got you inspired to sort through those digital brushes that you’ve got sitting on your computer and put them to good use. As you can see, you can use them in so many different ways and, like I said before, you can use them time and again, so they’re great value for money too!

Have you used digital brushes on a paper project? Share it with us! Or does it seem like something too far from your comfort zone? We’d love to hear your thoughts.


Stephanie is a teacher living in Epsom, near London, England. She graduated from university back in 2008, before spending some time working as a journalist and an air hostess. She counts herself incredibly lucky to have been able to explore some of the world’s most amazing cities. She now spends her days teaching – her true calling in life.
When not working, she can be found hanging out with friends, cooking, watching films, reading Jane Austen and Charles Dickens, laughing uncontrollably with her sister and, of course, scrapbooking. She has been published in Creating Keepsakes and Scrapbook Trends and had the amazing opportunity of writing her own eBook for Ella Publishing, entitled Scrapbooking Your Single Years=. She is currently on the Project Life Creative Team, as well as being a design team member for Ormolu.

Glitter Girl and her tips for mixing patterned papers and other scrapbooking supplies

Glitter Girl Adventure 062: Mix and Match Materials class content ©twopeasinabucket.com.
This week Glitter Girl returns to an old question that comes up now and then: all about mixing patterns. Funny that Glitter Girl likes that topic, since it’s one of my favourites too! Okay, rubbish jokes aside, the Out of the Box adventure was one of the most popular episodes in 2012, and similar questions come up on the board quite often, so with a brand new order on my desk, this was a great time to revisit the idea of mixing products from a variety of collections and manufacturers with an up-to-date look at current lines and trends.


You can find all the supplies for this project here at Two Peas, and there are plenty of new things in the shop, of course, like all those lovely new papers, overlays, and embellishments from Allison Kreft’s new lines at Webster’s Pages.

And yes, that is a Hello Kitty bandage. It turns out Glitter Girl is not immune to cardboard cuts and packing up the studio for this week’s move was a bit treacherous. I hope it wasn’t too distracting! Clearly hand models are not allowed to pack their own homes when moving. Oh well: welcome to my real world, plasters and all!

scrapbook page by shimelle laine @ shimelle.com
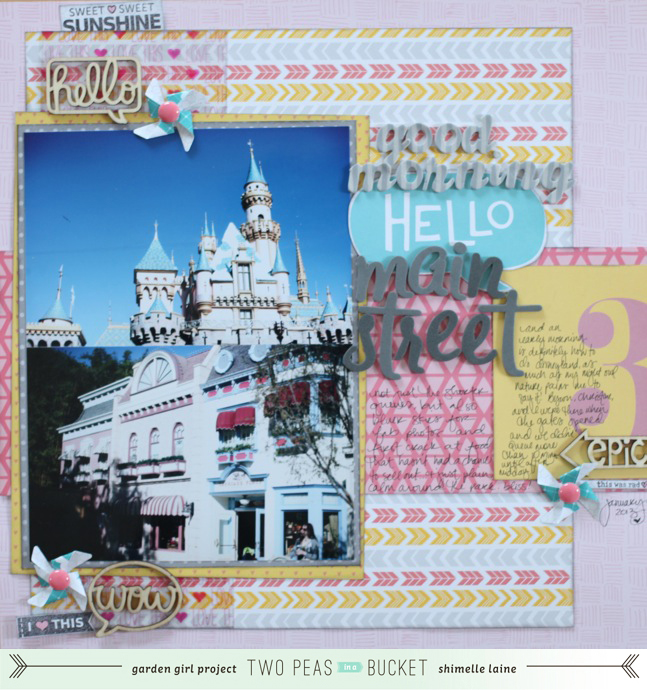
This January was the first time I had been to a Disney park since the grand opening of Epcot, so that would be long, long before I was a scrapbooker, or indeed holding a camera! Now I suddenly understand the entire Disney-related challenges brought to scrapbookers. I’ve heard about them for years but never really imagined them in full. I was only at Disneyland for a few hours really and have plenty of photos to scrapbook, but not really enough stories to fill a full separate album. And of course, I’ve now done the child-free version of Disney, and that’s a very different experience. I have come up with a few stories I want to tell that are more reflective (especially as I don’t think there are any photos from my childhood adventures at Disneyworld, so this is as good an opportunity as any to recall what memories I still have) but some are quite simple and everyday, like this particular page recounting how it was definitely worthwhile for non-morning-person me to get up and go to the park as soon as it opened, since we had very short queues and gorgeous blue skies – until around midday, when more people started to arrive and the haze of white rolled over in the sky. I’m still thinking about what I’ll do with the slightly less obvious photos from the day. Exactly what journaling might go with photos of the birds in the Enchanted Tiki Room? Yeah, I’m not quite sure either! We shall see.

Of course, Glitter Girl always challenges you to join in, and this time it’s to make your own mix of materials for your next page. Upload it to Two Peas to share it with us!

Sketch to Scrapbook Page :: Scrapbooking with a central focus

scrapbook page by shimelle laine @ shimelle.com
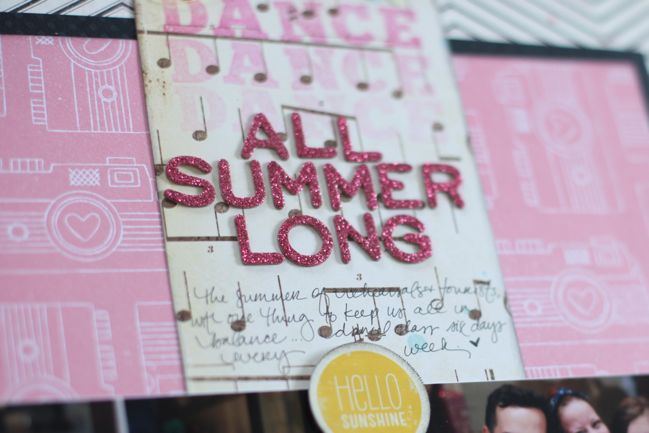
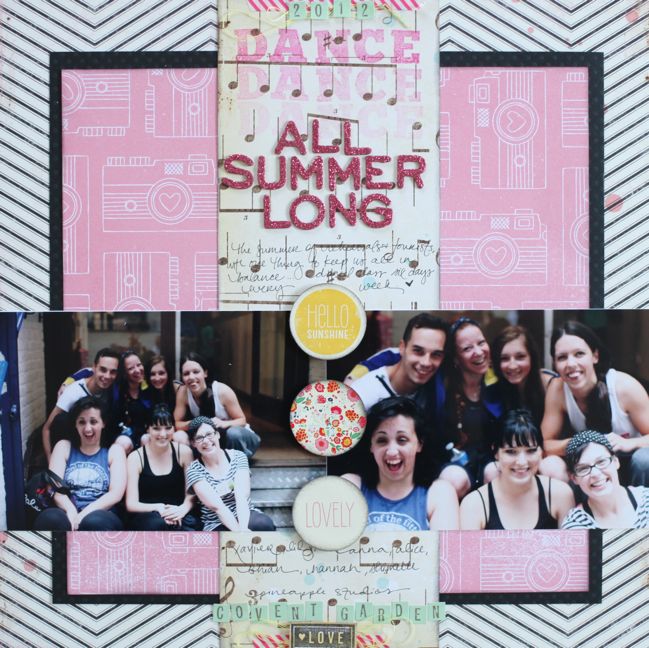
Sometimes a sketch helps things come together so quickly on a scrapbook page, and I think this might be a design I’ll be coming back to the next time I need to scrap without a lot of time to spare. It came together quickly, yet I really like the end result – and often when I scrap quickly I am quite disappointed with the end page. Not this time, so hurrah for that.

scrapbooking sketch by shimelle laine @ shimelle.com
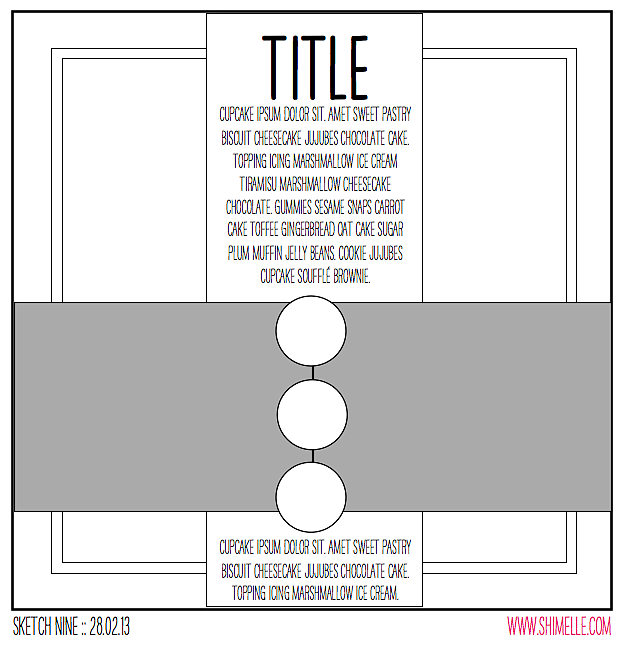
The sketch is designed for two landscape 4×6 photos, a matted square of patterned paper in the background and one tall column down the middle. That column is the same size as the two photos – 4×12. It’s essentially an off-set plus sign, and I’m sure it could be turned and work well too because it’s just basic page geometry of all those rectangles and squares – plus three circle embellishments to balance all those straight lines.


All the supplies for this page come from my March product picks, plus black cardstock, some yellow sewing thread and stamping ink in black and hot pink.

scrapbook page by Shimelle Laine @ shimelle.com
I need to remember that word stamping idea for future pages. I am always lamenting that I have plenty of colours of ink but almost always use the same three ink pads! Definitely liked the bright colour here to change it up, but glad I stamped off that first ultra-strong layer of colour so the tones would be a better match to the patterned papers.

scrapbook page by Becky Novacek @ shimelle.com
Of course this isn’t the only way you can interpret the page, and today’s guest, Becky Novacek, has her own unique twist – and she shares how she adapted the page from a 12×12 size to her 8.5×11 scrapping style:

scrapbook page by Becky Novacek @ shimelle.com
It’s Becky here today, sharing my take on this very versatile sketch, that inspired me a lot. I stayed pretty true to the sketch, although it would have been easy to flip it horizontally. Since I’m an 8.5×11 designer, I found it easy to switch it up to the rectangle versus square design. As I approached this layout using the sketch, I enjoyed using many older products, mixed with new products. I find it gratifying to use favorite older and in the case, no longer available beauties. The background paper and the blue/gold pattern papers were part of one of my favorite Hambly collections. I mixed them with new Basic Grey, Amy Tan, Dear Lizzy, Crate and American Crafts, as well as a really fun Pam Garrison stamp. I switched the circle embellishments to hearts.

Becky Novacek lives in Fremont Nebraska with her husband Tom and faithful dog Scooter. Tom and Becky have 4 grown, married children and ten grandchildren. Becky has always been drawn to paper and photos. As she tried different creative endeavors and eventually discovered scrapbooking, she was hooked. It became an almost daily respite after a long day of work in the beginning, and now it has become an important part of her daily work. Creating free style, homespun layouts that speak her thoughts are what she enjoys most about scrapbooking. You can see more of Becky’s work and daily ramblings at Becky Novacek Photography. You can also follow her on Instagram and Pinterest.

And now it’s your turn! Create a page in your style with this sketch, post it online, and share it with us. You can upload to your blog or to a scrapbooking gallery like Two Peas or UKScrappers, then just follow the steps to link to your project wherever it can be found online!

Using up the last scraps from a scrapbooking kit

making scrapbook pages from paper scraps by shimelle laine @ shimelle.com
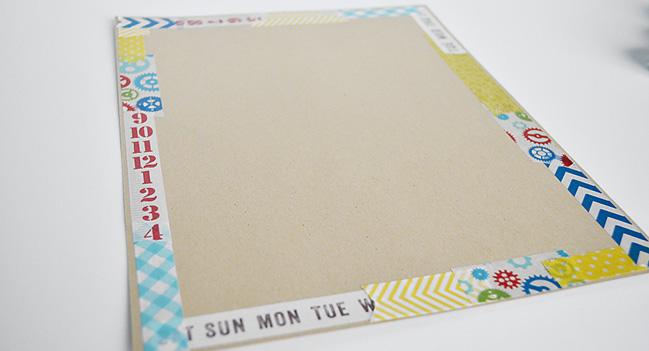
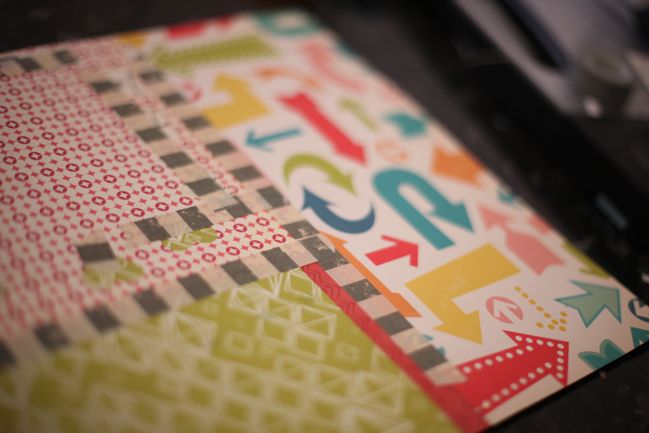
I figured I’d just commit to the randomness of this post up front. There is no point in hiding it. And what you see here is the back of one of my recent scrapbook pages.

See, I had come to that point when I had no full 12×12 sheets left in my February kit and I was moving the pieces about on my desk trying to figure out what to do with them. Usually I would add a sheet of cardstock or grab another patterned paper from my existing collection at this point, but someone had to step up and challenge me: Why couldn’t you just make a 12×12 from all those blocks that are left?

Well, why not indeed.

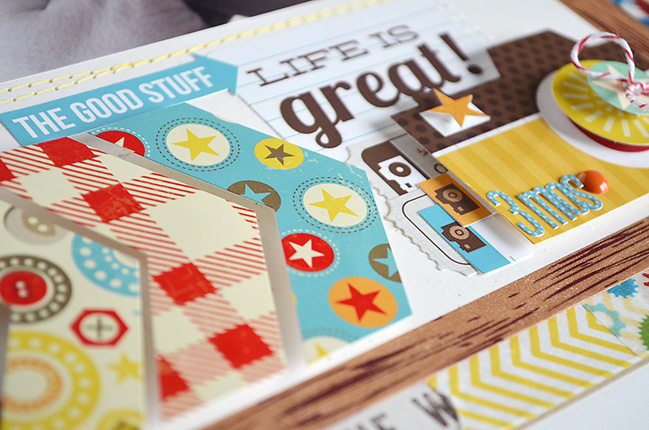
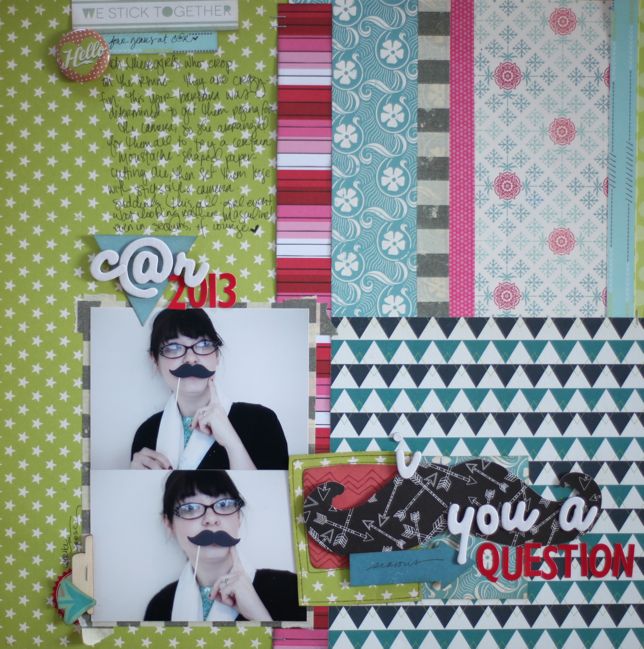
I also had the added challenge of scrapping on the road, and I didn’t have a trimmer or a ruler or anything quite so useful for patchworking a 12×12 sheet from a bunch of off-cuts. Thankfully one of the patterns was still the full length in one direction (the green star print), then I used a branding strip to measure the other side of the 12×12, and just kept taping and stapling all the different pieces together until it filled the whole space. And seeing as this crop in Germany had a photo shoot with moustaches on sticks, I had the perfect excuse to buy into the whole moustache-motif-and-pun-title trend, just for a bit of fun. The end result on the front of the page is a bit more successful than the back, I hope.

scrapbook page from kit leftovers by shimelle laine @ shimelle.com
(Many thanks to Barbara Haane and Canon for the photo shoot.)
That challenge turned out to be a good reminder that I don’t need to cheat and add another sheet of paper every time! This has more pattern than I might usually put on one page, but I quite like how they all look together (well, I suppose that is the point of a kit really).

making scrapbook pages from paper scraps by shimelle laine @ shimelle.com
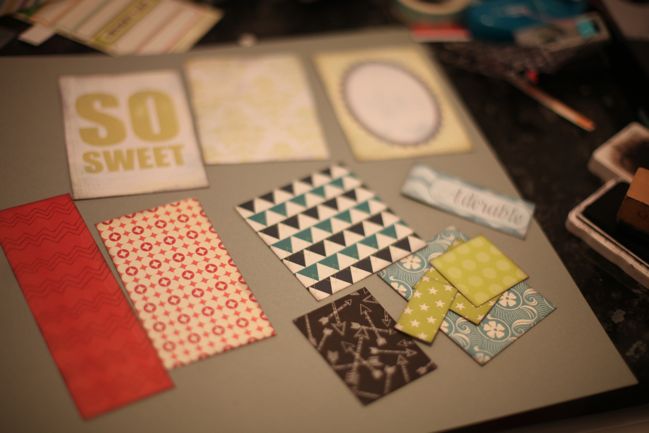
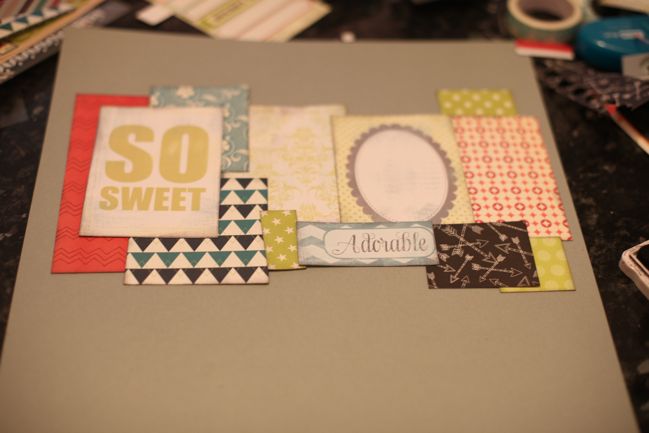
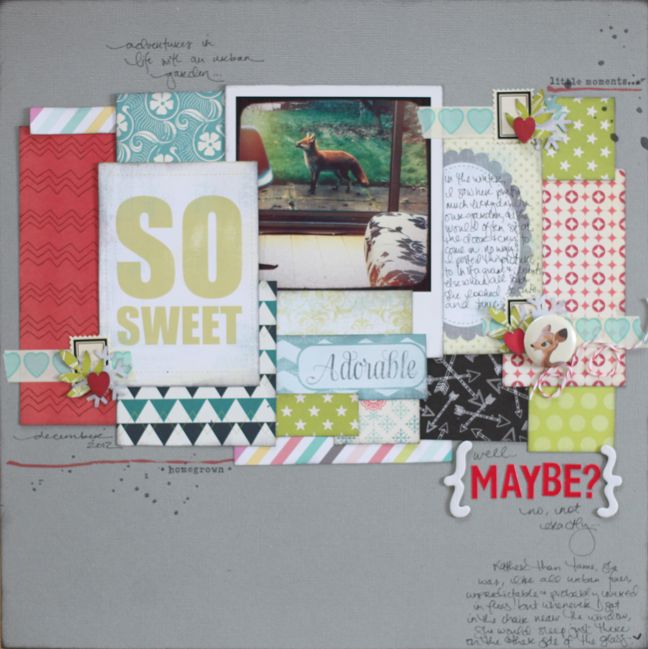
Trouble is, that left me with even smaller scraps, but still a noticeable pile of scraps from this kit. Too much to say I was just done, but not enough to tape together into a 12×12. I needed to cheat this time – so I grabbed a sheet of grey cardstock and cut all the odd-sized pieces into nice orderly blocks, and inked the edges all in black for a bit of uniformity. One of those pieces is actually a title block from the cut-apart sheet turned over, because it has one of those ‘text-speak’ abbreviations using just a single letter to represent an entire word (I think it was R for ‘are’, though I have partially blocked it from my mind) and I just can’t cope with the idea of that on my page. So the reverse wins out, and that worked quite well.

making scrapbook pages from paper scraps by shimelle laine @ shimelle.com
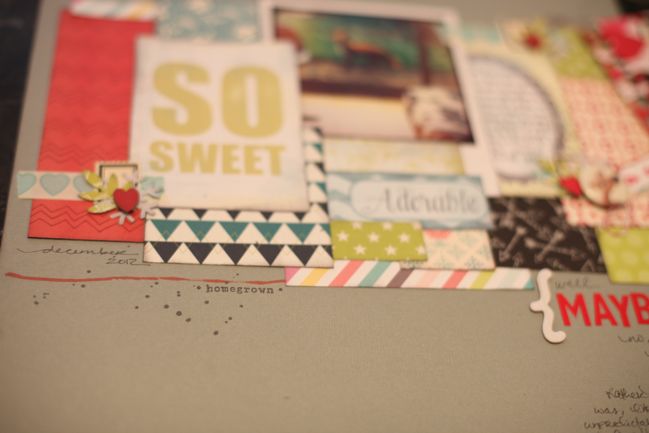
It turned out quite easy to piece these together to fill about a third of the page. Admittedly, at this point I wasn’t even thinking about photos. I figured if I could make the papers work, I’d find a photo that would work somehow. Surely something somewhere in all my photos would be ‘so sweet’ and ‘adorable’, even if I had to be a bit liberal with the terms?

making scrapbook pages from paper scraps by shimelle laine @ shimelle.com
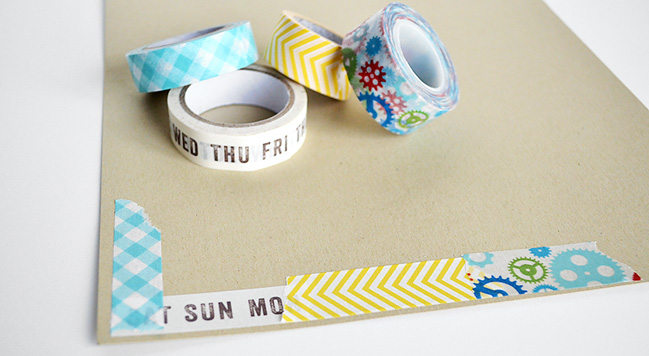
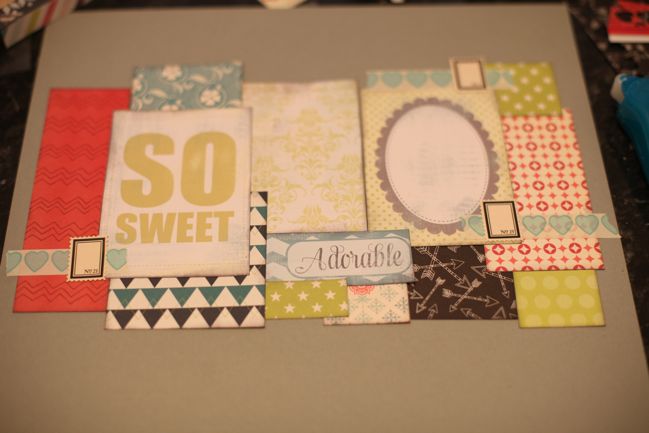
Then for a little embellishment: like a few other pages this month, I started with a horizontal line of the tape (I switched over to the heart tape, which had arrived by this point!) and a Jenni Bowlin postage stamp sticker. These would need something else, but I wasn’t sure what that something else should be since I didn’t know what this page was about or what photos I was going to use. I suppose that means it’s time to figure that out then.

making scrapbook pages from paper scraps by shimelle laine @ shimelle.com
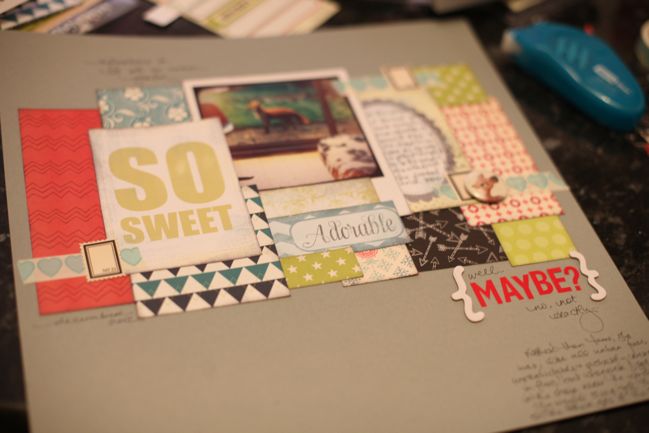
In the end, I went with this photo of the fox that has spent all of this winter trying to convince me that she should live inside our house instead of outside. When I posted this picture on Instagram, it became one of my most popular photos ever, which cracked me up since it was such a random shot of life. But urban foxes are definitely part of the landscape! So many people left comments saying she was so cute and tame and so forth, but up close, I promise that is not really the case. It seemed like a good excuse to work with these extra cute titles without being too sickly sweet, because I could add the other side of the story in my writing on the page. That seemed to work well as a way to tell this story of the cute versus the pest!

That print, by the way, is from Origrami. I don’t have any connection to them other than ordering a set of prints, and I’m pleased to say they are very nice quality and came very quickly despite the international shipping (they are shipped from Australia, but arrived within a week of placing my order). You can load in your Instagram feed and select the pictures, and I mostly chose all my prints from last summer to add to my Olympic album, but I finished off the pack with a few other random images, and that’s how this funny little fox ended up as a Polaroid-style postcard.

making scrapbook pages from paper scraps by shimelle laine @ shimelle.com
Aside from stamping with it and dying embellishments like wood veneer, fabric Thickers, and ribbon, sometimes another colour of mist can really help the red colour option look like something other than a crime scene. In this case, I used the spray tube from the red Mister Huey to draw a line on the layout, then splashed a bit of grey mist into the mix too. I know, if a red Mister Huey was your first and only spray, then this is a useless tip, but I’m crossing all my fingers that maybe you have something a little more neutral too. I added in some of the word stamps from the Dear Lizzy stamp set too, just for good measure.

scrapbook page from paper scraps by shimelle laine @ shimelle.com
And here’s the final version of the little vixen from our garden! For the embellishments that I needed to finish, I used three punches: a snowflake, a branch with leaves, and a heart. Totally simple layering, but it worked with those teeny-tiny pieces of paper I had left, and fit the theme of the garden in the winter… I think. I may have over-thought this by now!


With my February kit, I made a total of eight layouts and one card. This video is a very simple look at all of them and also shows you what I had left when I declared this kit finished.

If you’ve been scrapping with the February Best of Both Worlds kit and have posted your pages anywhere in particular, feel free to link it up in the comments so we can see the different looks that came from that same start! I hope you enjoyed scrapping with this selection of supplies.

Twine Twirling: A Scrapbook Tutorial by Laura Craigie

scrapbook tutorial by Laura Craigie @ shimelle.com
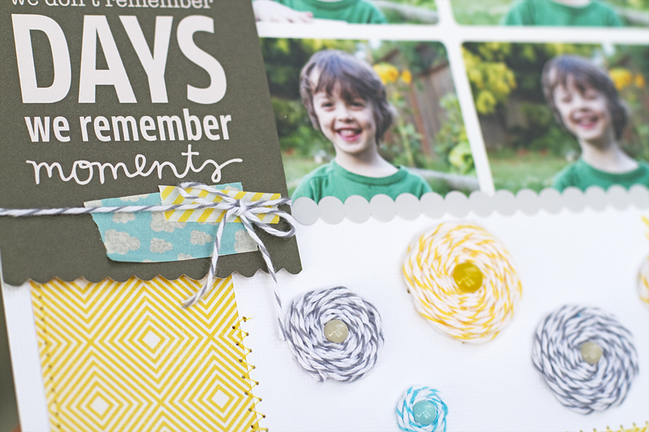
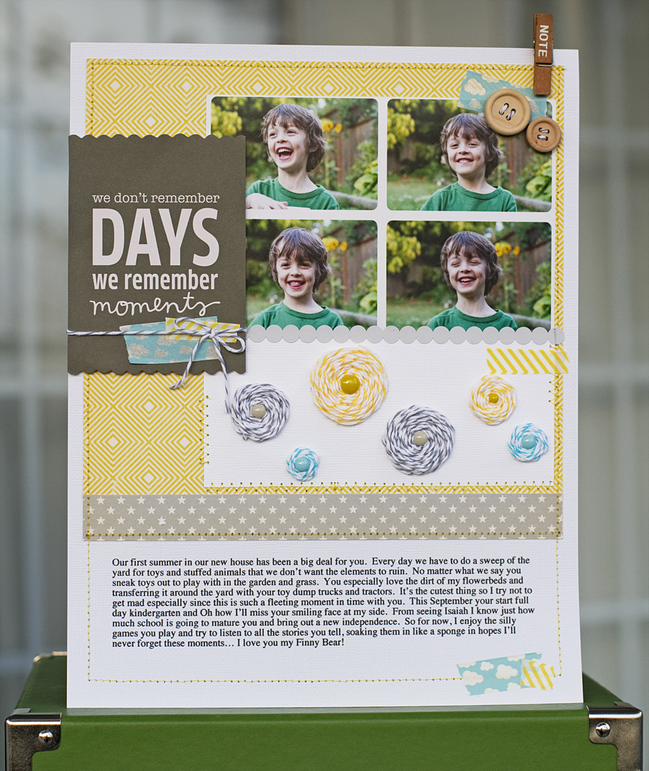
Today I am happy to share with you guys a video of a scrapbook page and tutorial from start to finish. I am a big fan of Bakers twine and adding a bit of whimsy to my pages. Since I love a good deal I bought my twine on these large spools that will last me for years. The benefit of that is I don’t feel I have to hoard them as there is SO much, and use them freely in my designs. I decided to put them to work and make some cute little swirls of twine. They are sewn directly to the page so they won’t go anywhere and require no adhesive apart from securing the ends to the back of your layout or card. I hope you’ll watch my video and see just how easy and fun they are.

scrapbook tutorial by Laura Craigie @ shimelle.com

Thank you guys so much for watching! I hope you were able to lean a fun new technique to apply to your paper crafting. I was also just thinking how much fun this would be to do with multiple colours of twine on one twirl. You could cut them in short lengths and tie them together for one big length before sewing it around. Anyhow, If you feel inspired to try it please leave me a link in the comments as I’d love to see, and I promise to check back in.


Laura Craigie lives with her husband and three busy boys on the west coast of Canada. She started scrapbooking in 2004 while pregnant with her first son, the rest as they say is history. Laura is proud to design for Pebbles, Fancy Pants Designs, and work as a Garden Girl at Two Peas in a Bucket. She can’t quite decide if she’s a “Scrapbook making Card maker” or a “Card making Scrap booker” or if it even matters. Bottom line is she is happy making either and loves nothing more than a quiet evening crafting. You can catch up with Laura on her blog PaperLulu or on Instagram as Justlulu.

Five Creative Ways to use Mini Pattern Paper by Connie Mercer

scrapbooking tutorial by Connie Mercer @ shimelle.com
Truth be known, I love the mini pattern paper. It is a sampling of all the papers in the paper collection. It is one paper that is never used to its full potential. I would like to correct that and show you five projects you can make using the mini pattern paper. My projects are done using papers by Jenni Bowlin Studio.

scrapbooking tutorial by Connie Mercer @ shimelle.com
Window watching
In this first layout the paper was cut in two places making three strips of paper. The paper was trimmed 1/8” of an inch on the top and bottom. This made sure the lines of the grid would match up. The layout looks like it is squares but it is really three strips of paper. I used scraps from other projects to complete the layout. The small red letters are by Kaiser and the journal stamp is by Wendy Vecchi. The cardstock is by Bazzill and the remainder is all Jenni Bowlin Studio.

scrapbooking tutorial by Connie Mercer @ shimelle.com

scrapbooking tutorial by Connie Mercer @ shimelle.com
Colonial Williamsburg
This layout is using one of the strips of mini pattern paper, so that would be a 4 × 12. It is scored in two places, to make a tri-fold photo mat. I chose the lovely farm house picture, that folds down, as my focal design of the layout. Once the photo mat is secured to the middle of the layout, open it and you will have four photo mats to add photos on. I added a brad at the top middle, to make a closure for the tri-fold out of twine. You are ready to decorate as you wish. This idea is also a great place to hide private journaling. The small black letters are by Making Memories. The remainder is by Jenni Bowlin Studio.

scrapbooking tutorial by Connie Mercer @ shimelle.com
Keep Them Close
The next project is my favorite and very simple!! Cut the three top squares off, that leaves you six squares. The cut will be 4 × 12 a horizontal cut. Put that aside (that is what made the tri-fold in the layout before). Cut your remaining paper in strips, every 2”. That will give you six strips of paper. Cut the bottom on each strip into a ‘V’, to give it the banner look. Ink up the edges and lay them across the middle of your paper. I layered cardboard paper by Canvas Corp on top of my Jenni Bowlin Studio pattern paper and then added the banner strips. Finish by embellishing your project.

scrapbooking tutorial by Connie Mercer @ shimelle.com
2 mini note books
This is a great teacher’s gift. One sheet of the mini pattern paper will make three of the mini note books. Take two squares from your mini pattern sheet and score down the middle. That will make a fold. Adhere washi or tissue tape on the fold to make it more durable. Inside the folder adhere a forth of a tablet of sticky notes (3 × 3 size). Embellish the front with stickers or other embellishments. The tissue tape is by Tim Holtz and all other products are by Jenni Bowlin Studio.

scrapbooking tutorial by Connie Mercer @ shimelle.com
Mini Day Planner
Take the mini pattern paper and cut it down the middle going horizontal. Don’t panic, you will be cutting the second row of squares in half. You should have two 6 × 12 pieces. Score all of the dividing lines on both sheets. Fold up the bottom 2” on both sheets and fold the remaining scores back and forth, giving an accordion look. You now have two accordion strips. Glue the two ends together and secure with tissue tape. Tip: I glued the tissue tape down, making the seam of the book stronger. Open the book and you should have pockets for list making, postage stamps or a calendar – whatever your needs are. Side note: The front and back cover will be about an eighth of an inch short ( because of the bulk in the middle of the book) just add a strip of decoration to the end to even up the front and back cover with the middle pages. Decorate the front and you’re ready to make another one. I used a clip to keep it closed.


Connie Mercer has enjoyed crafting for as long as she can remember. Working with her hands and creating have always been a big part of her life. She has been scrapbooking for 13 years and has served on several manufacturing design teams. Currently Connie serves on Vintage Street Market, Jenni Bowlin Studio, Darkroom Door and Avocado Arts design teams. She has five fabulous “grands” as she calls them. Her and her husband Randy live on a ranch in Texas. Connie enjoys junkin’ almost as much as she does craftin’!! You can find more of Connie’s work on her blog Crafty Goodies