




pretty paper. true stories. {and scrapbooking classes with cupcakes.}

lovely to meet you Twitter Facebook Pinterest YouTube

Take a Scrapbooking Class

online scrapbooking classes

Shop Shimelle Products

scrapbook.com simon says stamp shimelle scrapbooking products @ amazon.com shimelle scrapbooking products @ amazon.co.uk

Reading Material

travel

Apple Raspberry Honey Cake, inspired by the Bake Off
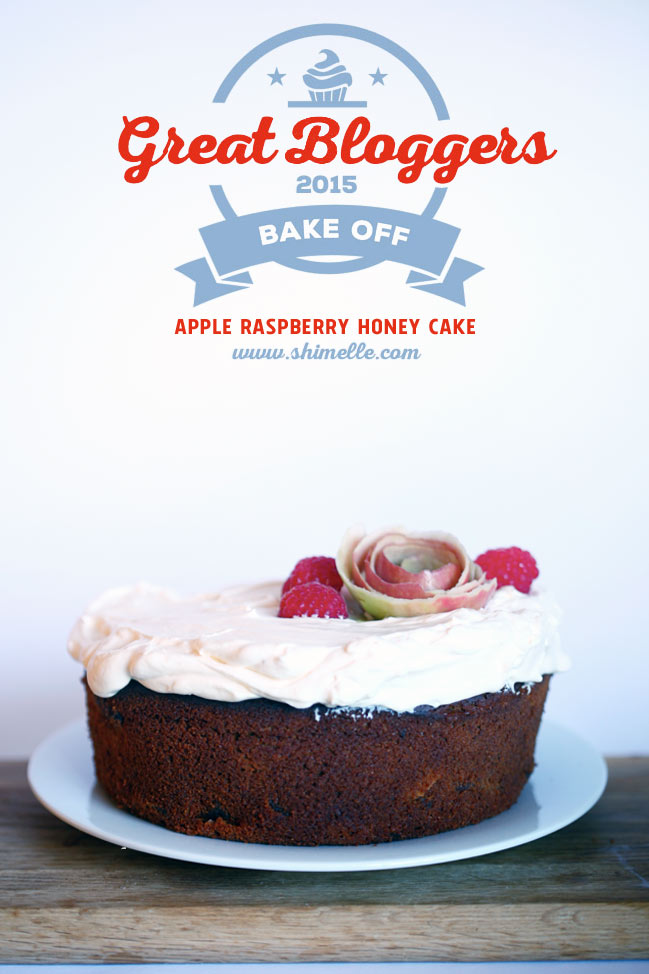
gluten-free apple raspberry honey cake #gbbo @ shimelle.com

Week five of this year’s Bake Off brought a new theme they hadn’t challenged the bakers with in previous years – alternative ingredients. This episode featured signature challenge of a sugar-free cake, a technical of making gluten-free pita (pitta?) bread, and a showstopper involving dairy-free ice cream, and a few stunners and a lot of things going wrong. Great, that just sounds brilliant for baking along, especially after last week.

I’m sure the gluten-free technical is probably what I should learn to do but honestly I don’t miss pita or pitta bread, and it seemed an absolute nightmare to make, so perhaps something less likely to end in another disaster would be useful. I opted for the sugar-free cake and followed the rules of the show, but honestly, I’m not entirely sure how useful this challenge could really be. It seems like the idea of removing gluten or dairy would be to show you could still make something amazing with a diet that restricts those items, but the sugar-free challenge was just to use something other than table sugar. Honey, agave, various syrups and fruits were all fine, so it’s hardly like you could call this the cake to eat if you were diabetic. I think I had a revelation about why they included this challenge once my cake was out of the oven.
gluten-free apple raspberry honey cake #gbbo @ shimelle.com
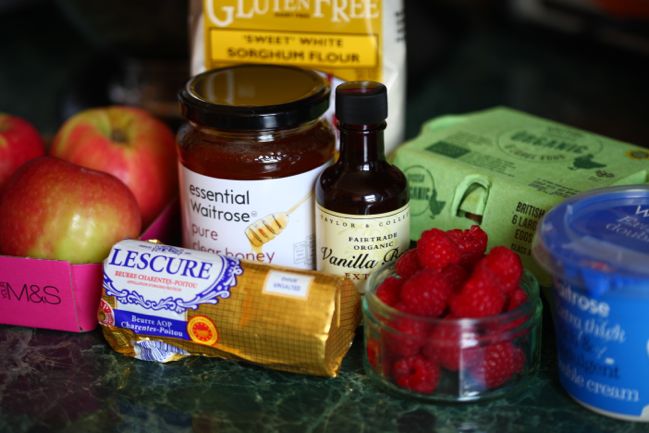
This week, I started with less of a plan, so the ingredient photo isn’t particularly accurate. The challenge didn’t require the cake to be gluten-free, but I wanted to eat it, so I ended up working with both restraints. This is what I put on the counter to start and see what I could cobble together! It wasn’t all that far from the real list in the end:

for the cake
2 apples (3 if they are tiny)
handful of raspberries
150g + 1 tablespoon unsalted butter
140g honey
85g oat flour
60g sorghum flour
1 teaspoon baking powder
pinch of salt
2 eggs, separated
1 teaspoon vanilla extract
60 ml (1/4 cup) milk

for the frosting
200ml double cream
2 tablespoons honey
1/2 teaspoon vanilla extract
gluten-free apple raspberry honey cake #gbbo @ shimelle.com
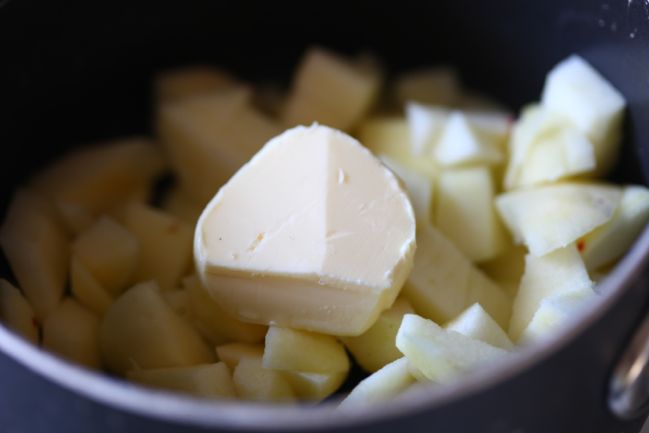
Preheat the oven to 160C. Peel the apples and reserve the peelings for the decoration. Chop into bite-size pieces. Place in a small saucepan and add just enough water to cover the bottom of the pan. Top with the spare tablespoon of butter. Cook on a low heat, stirring now and then to make sure nothing sticks to the pan while the apples soften.

That seemed straight forward enough, but I wondered if honey and butter would eventually get to a fluffy texture similar to normal sugar and butter? So while the apples cooked, in went the rest of the butter and the honey into the mixer for a good five minutes of whizzing round and eventually it was less syrupy and more fluffy. Hurrah.

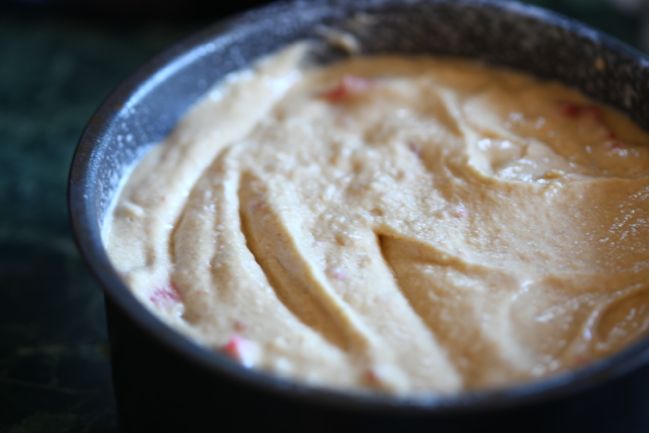
From there, I stirred in the egg yolks and vanilla, then the flours, baking powder, salt, and milk, until it was all nice and even, but quite thick. One of the big criticisms of plenty of the sugar-free bakes on the show was that it was all too dense and heavy (or ‘close textured’, as they are so in love with saying!) so I hoped the old trick of egg whites could help in some way. But right about this time, the apples were definitely cooked through. I added the raspberries for the last few minutes so that would all caramelise and hopefully bring some depth to the sweetness that wouldn’t just be some sort of injection of honey. (I kept three raspberries back for the top of the cake.)
gluten-free apple raspberry honey cake #gbbo @ shimelle.com

Egg whites whisked to soft peaks (egg whites and whipped cream are the entire reason I kept my hand mixer after upgrading to a standing one!) and then folded into batter as gently as possible to keep all that air, and then the apples and raspberries folded in as well, and that seemed to be everything.
gluten-free apple raspberry honey cake #gbbo @ shimelle.com

Into a greased cake tin and into the oven – mine took 40 minutes at 160C for a skewer to come out clean. This is where I discovered what I think was the reason they added sugar-free challenge. I’m convinced it was less about dietary concerns and more about the complexity of baking with something else, because the texture of this cake is so soft. Not at all dry, not grainy, just soft and a bit delicate. But not thinking about that at all, I tipped it out onto a wire rack like I would with any old sponge cake and oh goodness, the cracks. It wasn’t that it wasn’t holding together – it was just a softer texture and it needed more care to stay completely intact. I would let it cool in the tin next time.

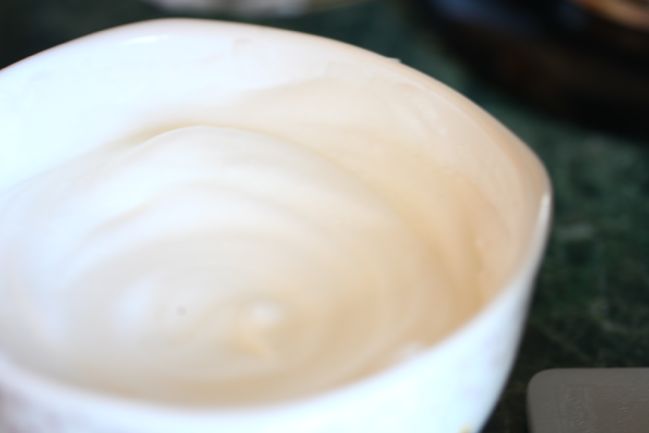
And while that was cooling, I made honey whipped cream, which is literally just cream, honey, and some vanilla whisked until thick. Almost all of them made mascarpone or cream cheese frostings, but they would be quite heavy for this cake I think. Whipped cream is light and works well with honey, but probably far too simple for the likes of Bake Off really!
gluten-free apple raspberry honey cake #gbbo @ shimelle.com
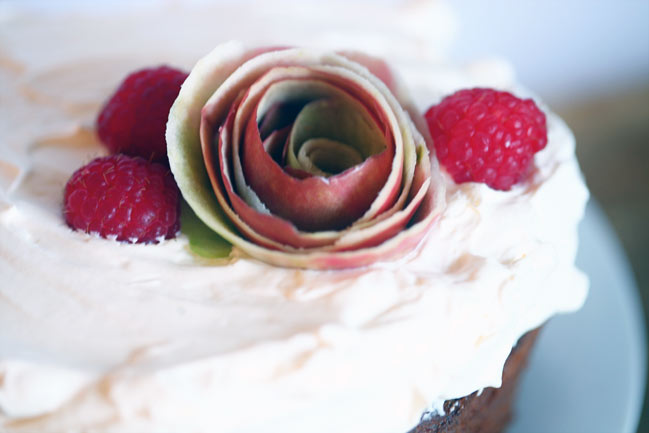
I might have gone a bit Pinterest here… a rose from an apple peel! I just had to give that a try. It reminds me of making fabric roses for scrapbook pages and it is literally just apple peel, round and round in a loop, and stuck into the whipped cream.

The verdict was this was a recipe worth keeping in our house, and that’s always nice! And the whipped egg whites did seem to keep the fruit from all falling to the bottom! Hurrah. As always, if you’ve come to this recipe because it’s free of one thing or another, please know your own tolerances and read your labels – I am no expert and am just having fun baking for our family and our assorted minor ailments.


Great Bloggers Bake Off is organised by Jenny at Mummy Mishaps. See more bloggers’ breads this week at participating blog, Hijacked by Twins.
Please no spoilers from the actual show in the comments, for those who watch later than the original broadcast! Thanks.

Baileys Crème Brûlée... a tale of disaster before victory

baileys crème brûlée #gbbo @ shimelle.com

Four weeks into the Great British Bake Off and we’re presented with Dessert Week: the first round challenge to put a signature spin on crème brûlée, a technical challenge of the meringue madness that is apparently Spanish Windtorte, and a showstopper challenge of cheesecake, cheesecake, and more cheesecake. Crème brûlée came at an apt time on the calendar, because The Boy and I have a habit of making family announcements over crème brûlée, like when were at a big fancy Christmas meal with all of his family, only for the dessert to come out with a positively terrible crème brûlée that left everyone with nothing else to say, so we decided it was as a good of time as any to tell them we were getting married. It seemed so perfect to make crème brûlée for our seventh anniversary this weekend. I may have missed out a bit of logic though: that announcement and the ensuing long-standing joke all came from a truly terrible creme brûlée. Ahem.

I also decided this week I would save time by just following a recipe for once. I haven’t made this dish from scratch before, so it didn’t seem the right sort of thing to do lots of experimenting to come up with my own signature version. Just pick one that seems like it should be legit, and go. When big companies publish recipes on pages that look all beautiful and well-branded, surely the recipe would be pretty trust-worthy, right? Ahem. Baileys, I am looking at you and your beautiful and well-branded recipe page.

baileys crème brûlée #gbbo @ shimelle.com

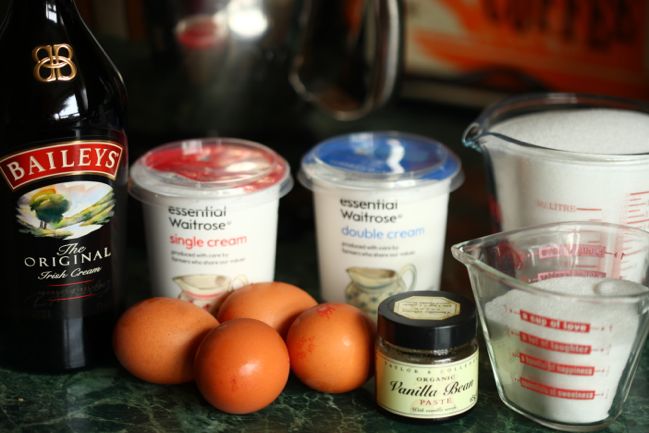
According to their recipe – presented in both written and video formats – the recipe made six servings and required 4 eggs (1 whole + 3 yolks), 300ml each of single and double cream, vanilla, Baileys, and a mere 750g of sugar. I went ahead and measured out the 750g of sugar for this photo at the start, just so we could all have a laugh at how you could make this recipe but would need to call ahead to your dentist before preheating the oven to the denoted 160C. Double checked to make sure the 750g was indeed the same in both the printed recipe and the video. Yep. And double checked the 750g was all to go into the custard and not a total measurement including the caramel topping too. No, that was listed separately. And double checked we were definitely talking Celsius and not Fahrenheit, since the 160 seemed high after watching the Bake Off episode. Yep, definitely 160C. Oven heating, cream and vanilla warming in a saucepan, eggs and sugar whisking in a bowl, and so on.

It made so, so much custard. I put the regular ramekins away and pulled out six juice tumblers. I thought maybe the people at Baileys Canada just really loved this and thought the portion size should be massive. Except even when I had filled six juice tumblers, I still had enough to fill five regular ramekins too. Oh well, dessert for all!

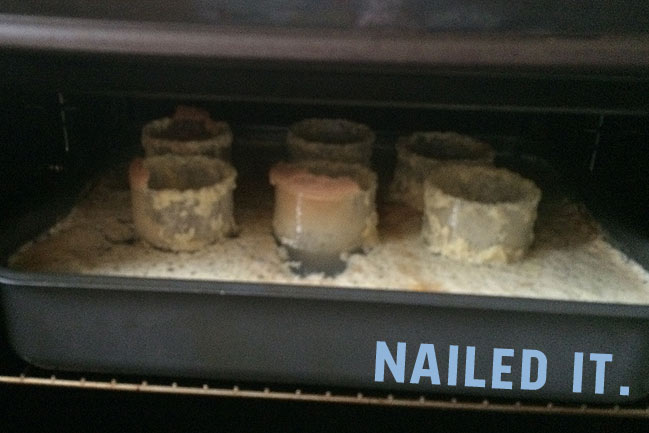
Into a roasting tin, tumblers and ramekins sitting in boiling water, and into the oven… and a few minutes later, this happened:

baileys crème brûlée #gbbo @ shimelle.com

We both sat there staring at this mess, wishing we had something to announce over our very own truly terrible crème brûlée. The only thing we could think of announcing was ‘thank goodness we are going out for dinner tomorrow’!

We pulled up a few more classic crème brûlée recipes. We went to the shops for more cream. We managed to whip up a simple three serving success with significantly less sugar, and have come to the conclusion that the 0 on the end of 750 grams of sugar has appeared from absolute imagination, as 75g would have been enough to make it super sweet. C’est la vie: at least it didn’t use up the entire bottle of Baileys?

Now I have a much better understanding for why the signature challenge seemed to truly be a challenge to many of the Bake Off participants this week! At least we managed to have something nice in the end… now excuse me while I clean up this nightmare of a kitchen mess.


Great Bloggers Bake Off is organised by Jenny at Mummy Mishaps. See more bloggers’ breads this week at participating blog, Utterly Scrummy.
Please no spoilers from the actual show in the comments, for those who watch later than the original broadcast! Thanks.

It's not too late to Learn Something New!

Learn Something New Every Day - online scrapbooking class @ shimelle.com

With just the last tiny bit of August remaining, I’m breathing deeply and looking forward to September, a month filled with reflective tradition. While the resolution-crafting, be-your-best-self energy of the new year hits in January, I also feel that same hope at back to school time, even though I probably won’t find myself inside a traditional school in the month ahead.

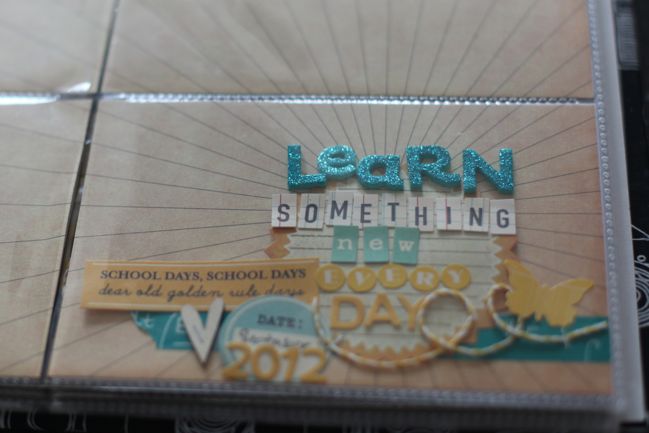
That reflective tradition is an online class now in its ninth year: Learn Something New Every Day. It is something I started as a scrapbooking class, but it works well for a variety of memory-keeping formats, be that a mini book, a Project Life or pocket style scrapbook, a full-size scrapbook, a journal, a diary, a planner, a social media account, or a blackboard. Essentially, you need your pen and a few moments to reflect on the day. That’s it. If you want to add photos, then include some kind of camera. Everything can be as simple or as creative as you desire.

The entire idea of Learn Something New is to open your eyes, your ears, and possibly even your heart to the world around you and record one thing you learn from that world each day for a month. Sometimes we learn from our mistakes. Sometimes we learn from watching others. Sometimes we learn from things that seem more like school, from a training session or reading an article. Live the day, then take a moment to sum up something you have learned in a single sentence. Leave it at that, or complement it with photography, art, or more writing if you wish. That’s why it’s so easy to adapt to a variety of formats.

You can read more about the course here, including a bit about how I’ve used a few different formats for this project over the years.

Each day in September, class participants receive a PDF prompt by email with something to read and set you on the way to various ways you might learn from your environment, plus visual inspiration from a variety of crafters. There’s also a class forum to chat and share in a members-only environment, or hashtags to share your thoughts and images in a more open format. This annual class has a great wealth of materials from previous years, including video, galleries, digital templates, and printables, all of which you can access when you join.

This year, I will be adding a new video series to the class materials. It was developed from working through my lessons from September 2014 and how September was unfolding differently for me with a baby than in all those earlier years, but it’s not a parenting video series in the slightest and my hope is that it’s useful for a variety of life circumstances. I simply had a different perspective in that particular September and wanted to share how that made a difference to my process with this annual project.

Learn Something New has a one-time registration fee of £10 GBP or $15 USD, and then you can participate as many years as you would like at no further cost. I’d love for you to join us!

These buttons will allow you to pay by your choice of credit/debit card or Paypal account – your choice. Please make sure you are using a valid email address. Registrations can take up to twenty-four hours to process. If you do not receive an email in that time, please check your spam folder, then email me at shimelle@gmail.com. If the email address on your paypal account is not where you would like to receive class materials, please let me know that too. You can leave a note on your payment, or send an email if you miss that bit. (If you would like to gift the class to a friend, just sign up as normal and in the comments or an email, let me know her email address. Simple as that.)

Previous class participants, the first message goes out on the first of September, and includes an easy way to opt out of mailings if you prefer not to have emails this year. If your email address has changed in the past year, drop me an email and let me know so I can update that for you.

May back to school be wonderful for you in whatever form it takes!

Inspired by... Scrapbooking with May Flaum

inspired by.. with may flaum @ shimelle.com

Today I’m delighted to welcome May Flaum to share how she’s been inspired to get scrapbooking with the True Stories collection. May is hilarious and has an above-average appreciation of Zoolander, and this along with her fabulous crafting and teaching skills, make her one of my favourite people. I wish she lived much closer than the zillion miles away of reality. But at least today we can be found here in the same place, in some way or another. I hope you enjoy her video!

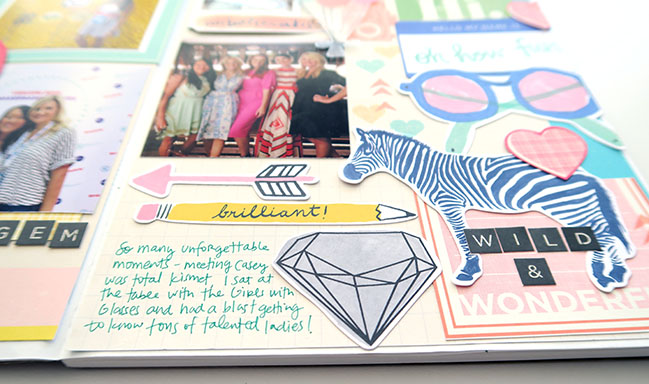
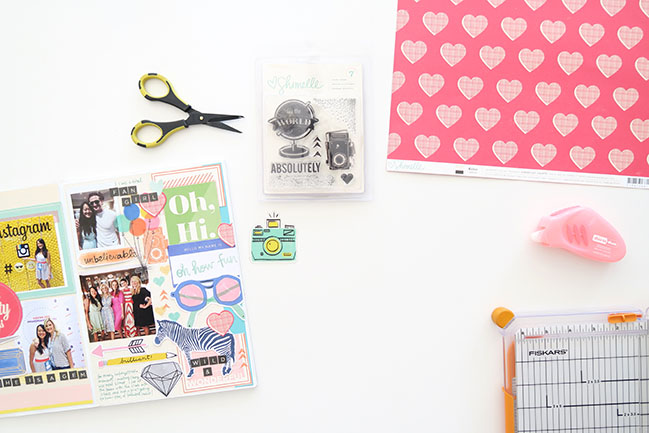
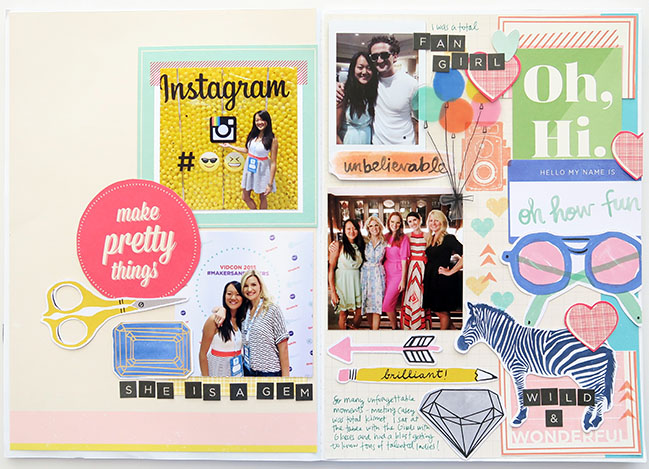
scrapbook page by shimelle laine @ shimelle.com

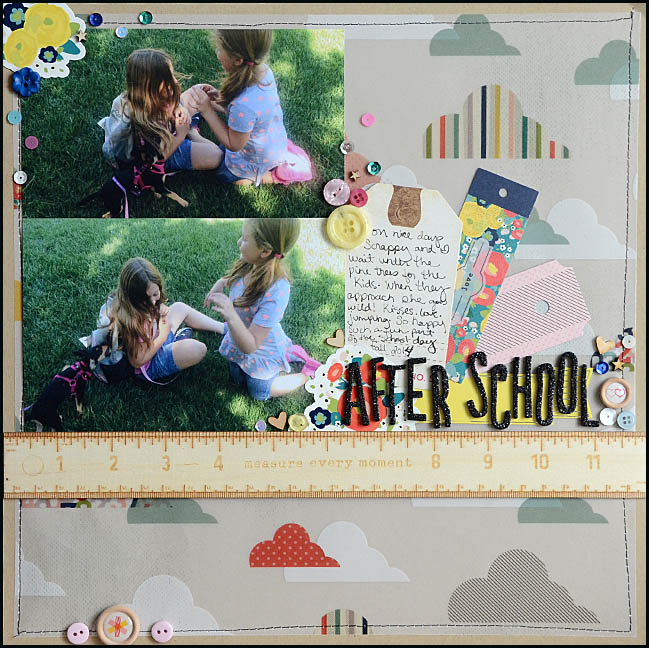
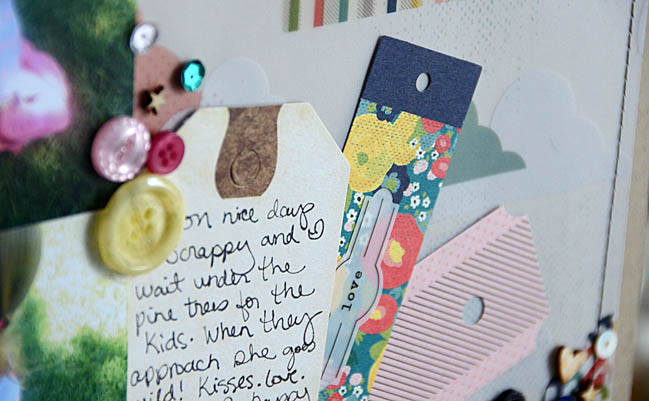
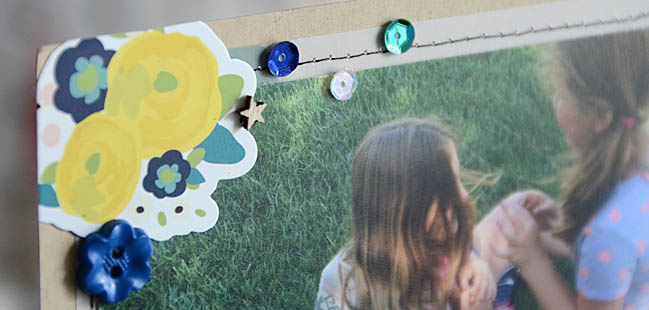
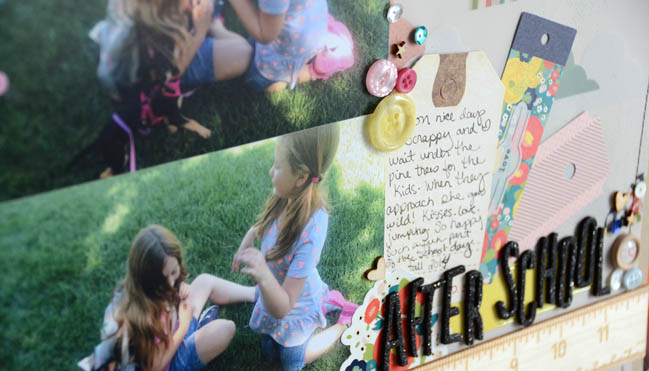
I was inspired by this layout and really was struck by the simple design for two landscape oriented 4×6 photos – something I rarely do! I was also struck with the challenge of using a lot of patterned paper. I tend to be a mostly cardstock girl so I was excited to get in touch with my patterned side and play.

inspired by.. with may flaum @ shimelle.com

inspired by.. with may flaum @ shimelle.com

inspired by.. with may flaum @ shimelle.com

The vellum paper (BlueMoon // SB.com) was perfect for this layout, and I had an absolute blast mixing and matching new favorites with a few classic supplies. I was able to be inspired by Shimelle’s layout and get that lovely paper used while staying true to my own style. To me, being able to try new things and incorporate fresh ideas while staying true to what feels like you is crafty nirvana.

inspired by.. with may flaum @ shimelle.com
Other supplies for this page include wood veneer borders, vellum tags, wooden buttons, and sticker book from the True Stories collection (BlueMoon // SB.com), black glitter Thickers, plus wood veneer hearts, buttons, sequins, and kraft cardstock. (Shopping through these affiliate links adds no cost to your order but supports this site and makes guests like May possible. Thanks!)

How long has it been since you made a page with two 4×6 photos? May and I want to see! Share a link to something new or an old favourite with this photo arrangement in the comments or tag us on Twitter or Instagram. Happy scrapping!


May Flaum is a lifelong crafter that makes her home with her two daughters and husband in California. She doesn’t believe her scrapbooks can have too much stitching, sequins, or kraft cardstock and is never found without a great pair of scissors. From scrapbook layouts to mixed media creations, when not traveling she can be found spending time in her studio blogging, creating, and teaching on-line classes. For more information about her classes and read her blog visit her website or follow her on Instagram

Gluten-Free Coca-Cola Soda Bread - inspired by the Bake Off

gluten-free coca-cola soda bread #gbbo @ shimelle.com

Let’s just say this week there is no way I could have coped with Paul and Mary’s tough timings in the bake-off tent. I finished my bread in a flash actually, but right around midday on Monday, plenty of panic bells started going off around here and it’s only now on Friday that I can come back and actually post this and some other fun crafty stuff too. Hurrah for a day that seems much better from the outset, may we all cross our fingers that everyone stays well and safe and happy and let’s talk about fun things now!

Week three of the bake off focused on bread, with a new category of ‘quick breads’ for the signature challenge, classic baguettes for the technical, and bread sculptures for the showstopper round. The showstoppers included an amazing cornucopia that went right past the the producers and much of the audience, I think, as it seemed to be based in a North American Thanksgiving idea, and it was truly the sort of thing Norman Rockwell would have painted with a family around the table. Well, I appreciated it at any rate! But it wasn’t the only thing I found interesting in a lost-in-no-translation sort of way: quick bread has a totally different definition on the bake off than what I grew up knowing. Ask this girl who baked 4-H projects for the county fair about ‘quick breads’ and I’m thinking banana bread, zucchini (courgette!) bread, pumpkin loaf, and poppy seed bread most likely. It’s a cake really… it’s just baked in a loaf tin and tends to have something vaguely healthier than chocolate somewhere in the ingredient list. Were I to bake one of those in bread week, I would have been laughed out of the tent, regardless of cherished purple ribbons of my youth! They meant things more like bread than cake but without yeast. Soda bread seemed to be the thing of the day.

Our local bakery does a lovely soda bread on special occasions (I’ve never figured out the actual special occasions, but it only appears on the menu now and then) that is dense and sweet with a maple edge to it, though definitely still like bread more than cake, and topped with oats and seeds. They have an open kitchen and I’ve never seen bonkers ingredients like cola going into their bread dough, so I’m sure the maple flavour comes by way of things like actual maple syrup, but all the watching and inward amazement of these two lands separated by a common language made me leap to something else that is a pretty American phenomenon, but I see it often now by way of Pinterest and Facebook. It’s the ‘Two Ingredient’ recipe, where a headline claims you can make a cake or something else by just ‘two ingredients’ but when you look at the ingredients, they are a can of soda and a cake mix, or a pre made meal and a tin of soup, or some other shortcut that yes, involves tipping just two items into a single bowl, but in fact probably has eleventy ingredients in the final concoction.

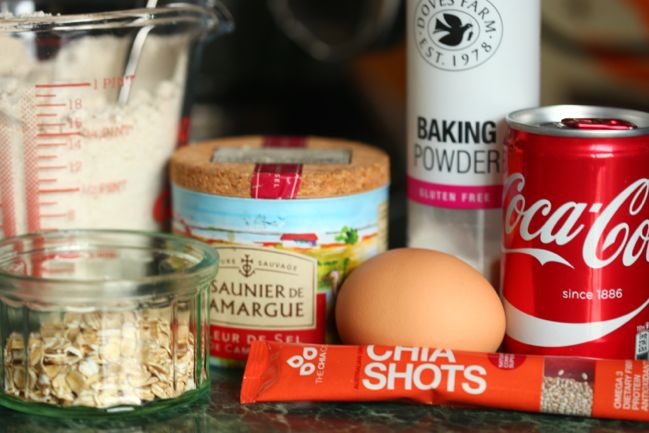
That amazingly scattered train of thought left me wondering: could I make soda bread from Coca-Cola? (And yeah, in order to try it without getting hives, it’s gluten-free. More oat flour. My world is oat flour, I tell you. I’ve ordered something new to try next week before I bore the world and my family to tears with my oat flour.)

gluten-free coca-cola soda bread #gbbo @ shimelle.com

There are actually more than two ingredients, but relatively few at least!
200g oat flour + extra to dust the outside and any surfaces
1/2 teaspoon baking powder
150 ml Coca-Cola (I’m guessing it needs to be the real sugar stuff and wouldn’t work with Diet Coke, but I could be wrong)
pinch of salt
1 egg
8g chia seeds (that’s how much is in one of those Chia Shot packets, anyway. You could use other seeds.)
10g oats

This makes one small free-form loaf.

As always, if you’re making this recipe due to food sensitivities, know your specific reactions and read your labels.

Preheat the oven to 190C and cover a baking tray with parchment.

Combine the flour, baking powder, and salt in a mixing bowl, along with roughly half the chia seeds (4g) and oats (5g), and stir through until it’s all mixed. Add the egg and mix on low speed until you have an even but very dense dough.

gluten-free coca-cola soda bread #gbbo @ shimelle.com

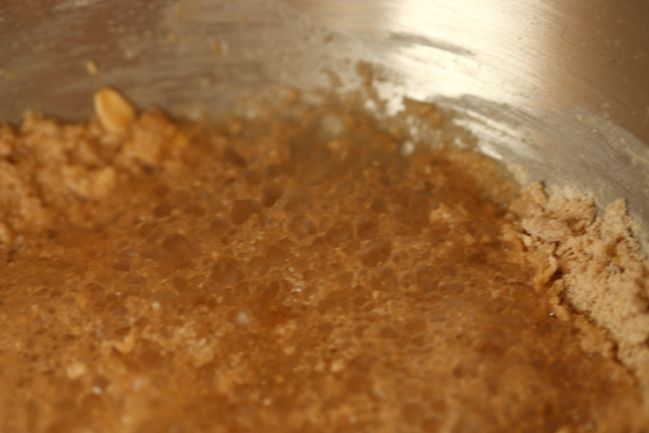
Then add the Coke! Excuse this picture as it’s not the best, but the bubbly reaction is pretty quick! These bubbles will get the air into this loaf and make it rise, so work quickly to get from this stage to in the oven. Stir through until the cola is incorporated and you should shave a dense and sticky bread dough. If it’s exceptionally wet, add more flour at this stage.

gluten-free coca-cola soda bread #gbbo @ shimelle.com

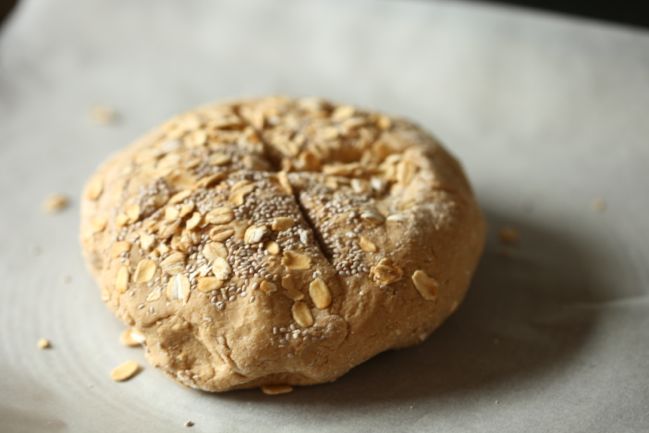
Form the dough into a ball with your hands and dust with the extra flour. Add the remaining oats and seeds to the top of the loaf, and score an X in the top. Place on the parchment-covered baking tray and bake! Mine took about 35 minutes.

gluten-free coca-cola soda bread #gbbo @ shimelle.com

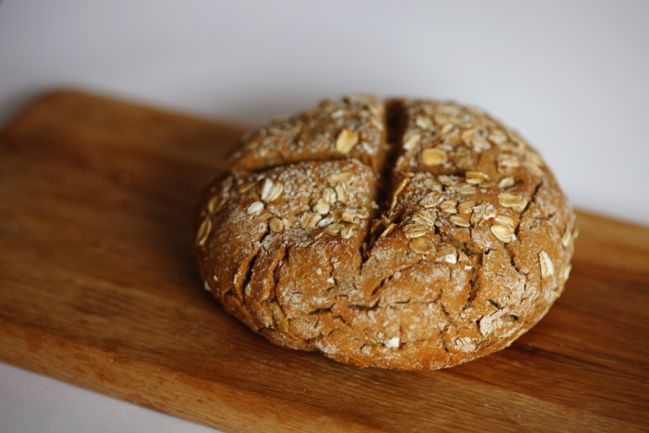
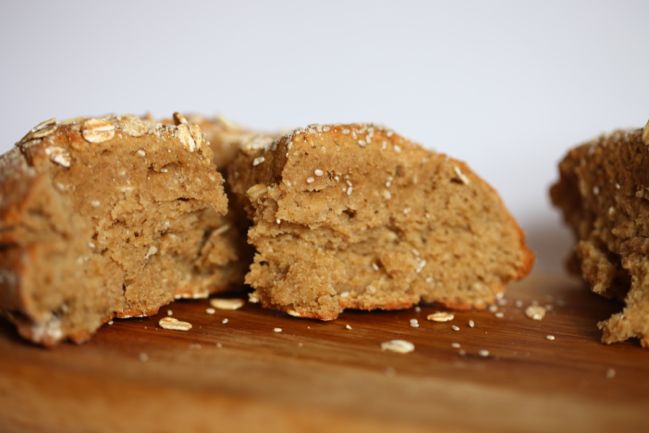
I added a pyrex pie plate of water in the bottom of the oven to see if it would produce a crispier bread crust, since they talked about this so much in the episode. Well, the crust of the bread was lovely but I’ve no idea if it was the steam that did it!

gluten-free coca-cola soda bread #gbbo @ shimelle.com

I would never be brave enough to bake this on something like the actual Bake-Off, but I also would never have the nerve to apply for the show as I’m not nearly well-rounded enough! It was a fun experiment though and the results were definitely edible: it’s particularly nice hot with butter. It is sweet but more like a bread than a cake, so the sort of thing that seems like a breakfast treat along the same lines as a sweet danish. What it doesn’t have is staying power. Straight out of the oven, it has a caramel flavour that is relatively subtle though sweet. The seeds and oats keep it from being completely over the top. But by evening of the same day, it tastes undoubtedly like Coca-Cola. The texture also goes a bit too gummy with that added time, and I’m sure that’s down to the oddball ingredients of the cola continuing to react with the flour. On the positive though, it is pretty quick to make and bake, so even as a breakfast food it wouldn’t need to be baked the night before necessarily.

Next week, it’s desserts, and I hear someone has made cheesecakes flavoured like sodas?! Well maybe this experiment wasn’t that far removed from the tent after all!


Great Bloggers Bake Off is organised by Jenny at Mummy Mishaps. See more bloggers’ breads this week at participating blog, Jo’s Kitchen.
Please no spoilers from the actual show in the comments, for those who watch later than the original broadcast! Thanks.

Inspired by... scrapbooking with Amy Tan

inspired by... scrapbooking with amy tan @ shimelle.com
In this latest round of asking some of my favourite scrapbookers to share their work with you, I tried to put something that was in my mind into their thought process: almost the entire time that I’ve been scrapping less, I’ve been feeling inspired more. Perhaps we just replace one creative thought with another in the same space in our mind, so where I used to make at least a layout a day in one form or another and then found myself trying desperately to make one a week, all those other days there was some small part of my mind that was thinking about making stuff. I would catch a glimpse of a layout I’d made years ago or pass a previous guest project when reading through new comments and I’d find I had a new idea in my mind despite not finding the time to bring it to fruition. As I’ve found myself starting to improve on this and do a little something creative every day (albeit some days more and some days less), I’m delving into all those thoughts and really enjoying the creative process. I think I need to just write about where I am with my personal creative process lately, but I digress. What I really hoped was that some of my favourite scrappers would also find inspiration in the archives here and find something that brought renewed energy to their creative process, so when I got in touch I offered a few different ideas for posts they might contribute, and something inspired by the archives was just one of those options. It turned out to be the most popular option amongst the guests and now I have one slight problem: I am inspired by all their inspired by posts! I’ll work on turning that from frustration into some gloriously fun cutting and pasting, I think. I hope you find them inspiring too, and I’m pretty sure today’s guest will inspire much of the fun: she’s one of the only people I know who could tell me her middle name was actually ‘Superfun’ and I would believe her. Please welcome… Amy Tan!

inspired by... scrapbooking with amy tan @ shimelle.com

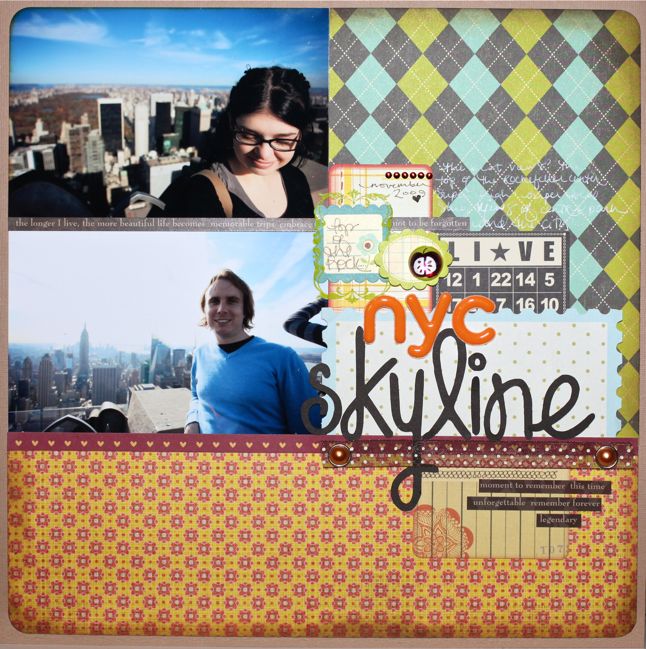
When I saw this layout – I immediately knew I wanted to scraplift it. Not only do I love the idea of clustering embellishments, but the appeal of using both old and new products for me is strong right now. I seem to hold onto things I love instead of using them up. Since we’re both designers collaborating with American Crafts, I thought it would be fun to use both our products and show how easy it is to mix the old with the new. For even more of a fresh take, I decided to work right into my notebook instead of doing separate scrapbook pages for this event. Check out the whole process in this video:

inspired by... scrapbooking with amy tan @ shimelle.com

inspired by... scrapbooking with amy tan @ shimelle.com

You can find Amy’s newest collection, Finders Keepers, at Blue Moon Scrapbooking and Scrapbook.com. (Shopping through these affiliate links adds no cost to your order but supports this site and makes guests like Amy possible. Thanks!)

And thanks so much to Amy! We’d love to see any projects you have made that combine products from our collections, so please share by leaving a link or tagging us on Instagram. Or if it’s just in that inspiration bank in your mind, tell us which collections you’d love to work with together or what other designs you’d bring to your crafting table. May you find some quality cutting and sticking time soon!


Amy Tangerine has always had a fresh outlook on life. Growing up in Chicago, she wallpapered her room with fashion magazines and dreamed of a life of visual creativity. By the time she was 23, she had founded the popular and award-winning handcrafted t-shirt line Amy Tangerine, featured in hundreds of retail outlets around the world, including Bloomingdales, Neiman Marcus and Barneys New York. But it wasn’t until 2007 that Amy discovered her true passion: scrapbooking. What started as a slice-of-life hobby blossomed into a full-time, fulfilling business venture that includes signature collections with American Crafts, her own book, celebrity events, consulting services, and teaching workshops all over the world. Most of all, she loves helping others tap into their creative sides. When she’s not at home in Los Angeles with two mischievous Jack Russell Terriers, her long-time partner, JC, and their adorable son, Jack, she is traveling, finding great places to eat, and doing her best to enjoy every moment. See more of her work on her blog, Instagram and YouTube

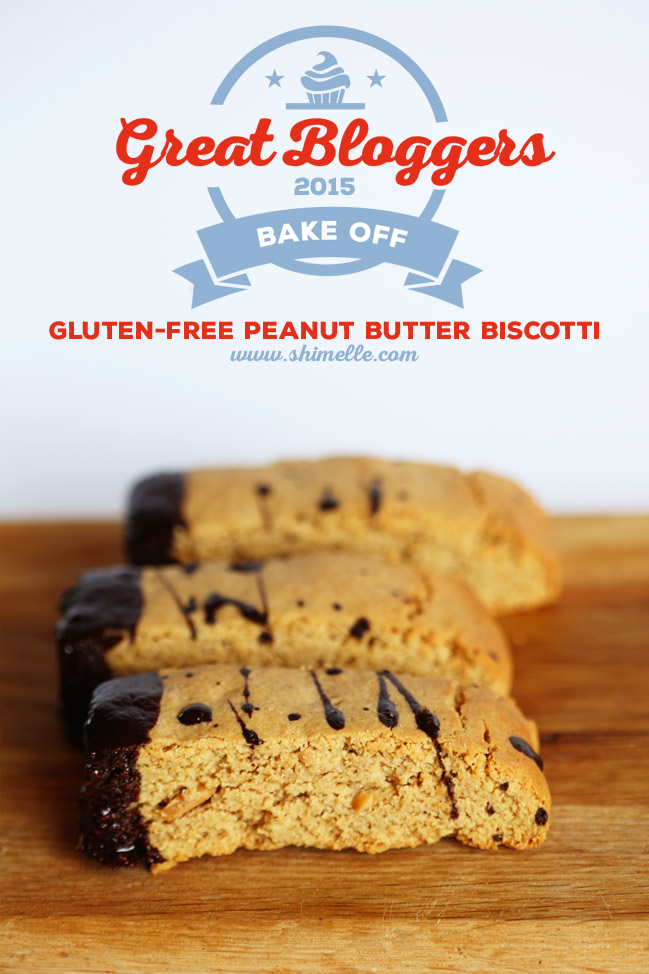
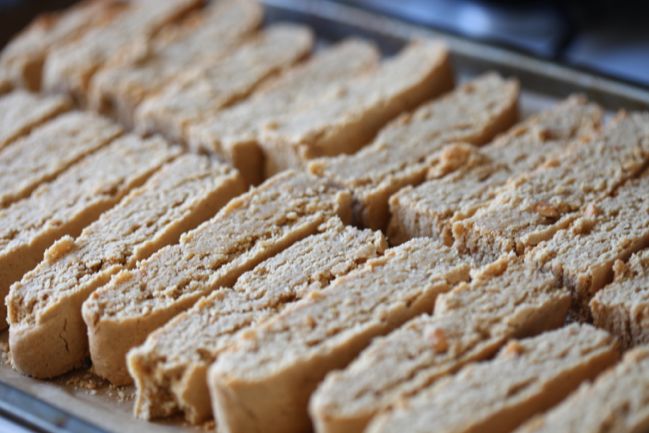
Gluten-free Peanut Butter & Chocolate Biscotti - inspired by the Bake Off!

Gluten-free Peanut Butter & Chocolate Biscotti - inspired by the Bake Off! @ shimelle.com

It’s biscuit week for the second round of the Great British Bake Off, a term that is always destined to confuse all the different varieties of the English language. In the UK, a biscuit is what Americans call a cookie. Except when it is also what Americans call a cracker. Indeed. Suffice to say, it is never something served with gravy. Just to make it less confusing all round, I chose the first challenge from the show for my baking this week – biscotti. It’s Italian so we can all agree! Twice baked and found in coffee shops!

Peanut butter and chocolate is a combination I rarely saw in the UK when I first moved here, but it seems to have really gained in popularity over the last few years, and you can even buy an assortment of Reese’s products in our corner shop. There is a still a divide though, and it doesn’t have the classic flavour combination status that it does in the states, so I’m not sure I would have the nerve to bake these in the actual bake off tent in case Paul and Mary were not fans from the start! But I am a fan, so peanut butter and chocolate are always a good thing in my world.

Gluten-free Peanut Butter & Chocolate Biscotti - inspired by the Bake Off! @ shimelle.com

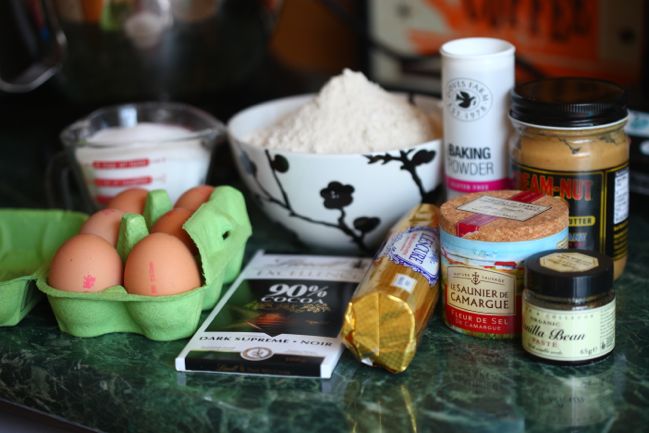
For 24 small biscotti, you will need:
350g oat flour
2 teaspoons baking powder
generous pinch of salt (adjust if your peanut butter contains lots or little salt)
100g unsalted butter
225g peanut butter
215g sugar
1 teaspoon vanilla paste (or 2 teaspoons vanilla extract or one vanilla pod scraped)
3 large eggs
100g chocolate

Preheat the oven to 180C.

Combine oat flour, baking powder, and salt in a bowl and set aside. (Same caveat for the oat flour still goes – check the labels and be aware of your specific sensitivities! I’ve been using Bob’s Red Mill oat flour and getting good results, but your needs may differ of course.)

Gluten-free Peanut Butter & Chocolate Biscotti - inspired by the Bake Off! @ shimelle.com

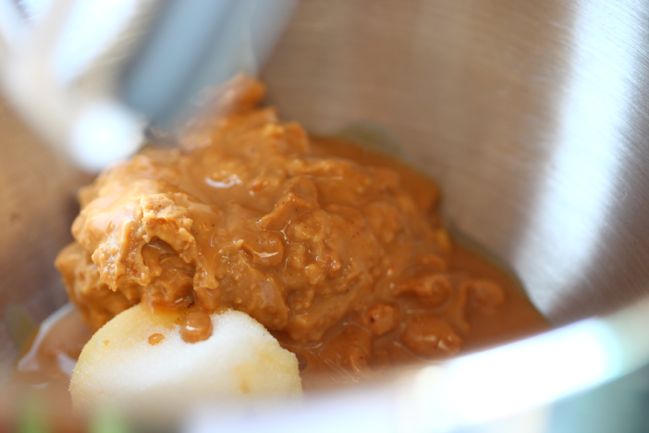
Combine butter, peanut butter, sugar, and vanilla in the mixing bowl. I ended up using half crunchy and half smooth peanut butter because the crunchy we had was a bit extreme, but I reckon the Bake Off judges would probably have liked it better that way actually! Cream these together with the mixer.

Gluten-free Peanut Butter & Chocolate Biscotti - inspired by the Bake Off! @ shimelle.com

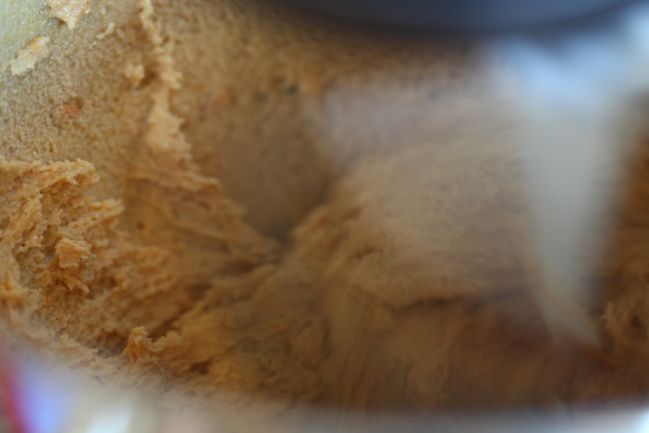
Huzzah for mixing. Mix, mix, mix so it gets fluffy and lighter in colour. Lots of air will open the texture and keep the peanut butter from creating a heavy, stodgy biscuit.

Gluten-free Peanut Butter & Chocolate Biscotti - inspired by the Bake Off! @ shimelle.com

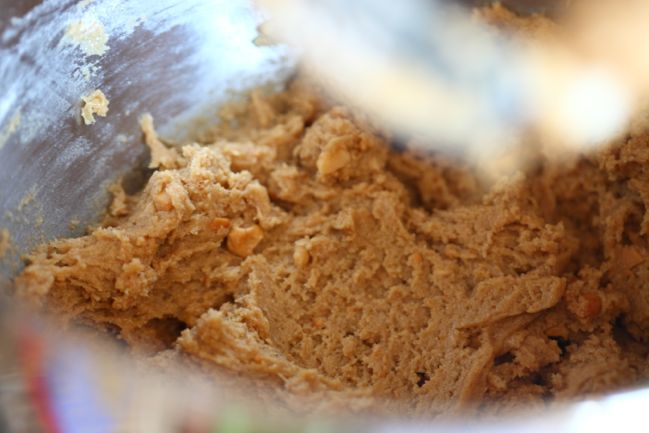
When you’re done mixing that into lovely peanut butter fluff (which smells pretty awesome to a peanut butter fan), stir in each of the three eggs by hand, then add the dry ingredients from your bowl and combine until it’s all lovely and even. It will be a pretty thick and dense dough and should not be wet or drippy.

Gluten-free Peanut Butter & Chocolate Biscotti - inspired by the Bake Off! @ shimelle.com

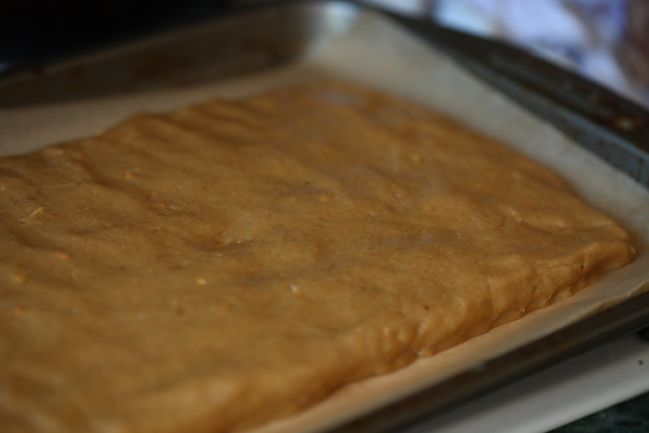
Line a baking tray with parchment or a baking mat and turn out the dough. Form it into as even a rectangle as possible!

Gluten-free Peanut Butter & Chocolate Biscotti - inspired by the Bake Off! @ shimelle.com

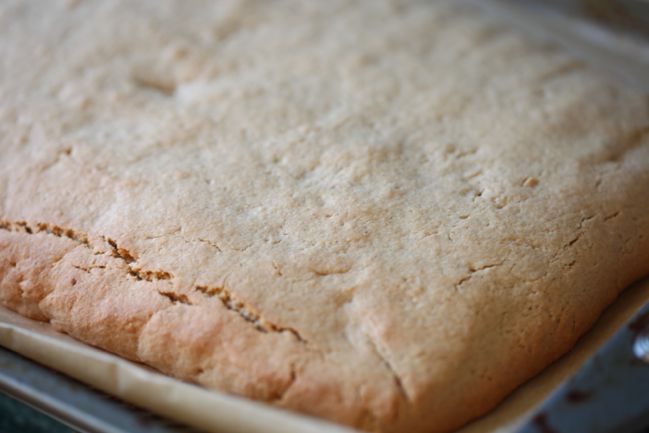
Bake at 180C for 25 minutes, then remove and turn the oven down to 140C. Give the big rectangle a few minutes to cool, then cut into twenty-four smaller rectangles – one big slice on the horizontal then twelve on the vertical, removing the teeny edges on the far sides. Because it is clearly important to taste-test at this point, I’m sure. Transfer to a wire rack if you’re stuck for time and need it to cool quickly or you live in a land of humidity and leaving them on the pan would let them soak up too much moisture. But leave them on the pan and just cool for longer if you are likely to drop them all on the floor in the process. Not that I have done that. No, of course not.

Gluten-free Peanut Butter & Chocolate Biscotti - inspired by the Bake Off! @ shimelle.com

Once cooled, it’s time for the second bake. I do this in three sets of eight minutes – eight minutes flat, eight minutes flipped on one side, then eight minutes on the other side. I have no idea how much this actually helps and how much is just a mental need for balance. Judge appropriately.

Gluten-free Peanut Butter & Chocolate Biscotti - inspired by the Bake Off! @ shimelle.com

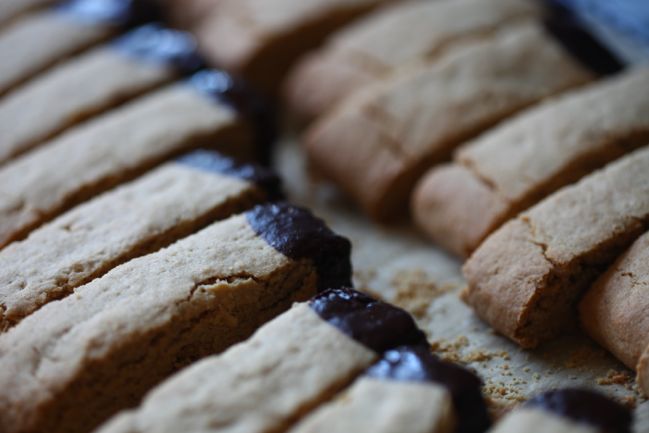
Let them cool again (for good this time) and melt the chocolate. We like ridiculously dark chocolate in this house, so I used 90%, but I have to say it is a bit of a shock if you’re used to dark chocolate being more like chocolate chips, which tend to be somewhere between 65% and 75%. Whatever chocolate you choose, melt in a glass bowl then dunk one end of each biscotti and return to the wire rack.

Gluten-free Peanut Butter & Chocolate Biscotti - inspired by the Bake Off! @ shimelle.com

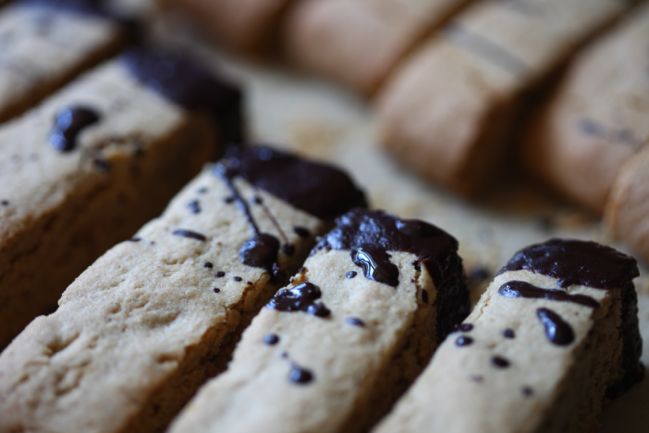
And finally, the step that is most like scrapbooking – use the remaining chocolate on a spoon to dot and drizzle, a process that is much like flicking Mr Huey’s mist over a finished page and hoping it goes well and also coating your crafting table in the process. There may or may not be chocolate dots all over the cooker at the moment.

Best served with a hot beverage, but these aren’t so crunchy they’ll break your teeth on their own, so you’re safe if you prefer them with a lemonade this time of year.


Great Bloggers Bake Off is organised by Jenny at Mummy Mishaps. See more bloggers’ biscuits this week at participating blog, All you Need is Love and Cake.
Please no spoilers from the actual show in the comments, for those who watch later than the original broadcast! Thanks.

Die Cut Shapes using the True Stories collection with Paige Evans

die cut shapes using the true stories collection with paige evans @ shimelle.com

Today I’m uploading videos to YouTube that will be live shortly and while I do that, the lovely Paige is here to share a beautiful project with the True Stories collection! Paige’s work is always so artful and unique, and I hope you enjoy her tutorial as much as I do. We’d both love to see what you make with the cut file she’s sharing with you too. -Shimelle

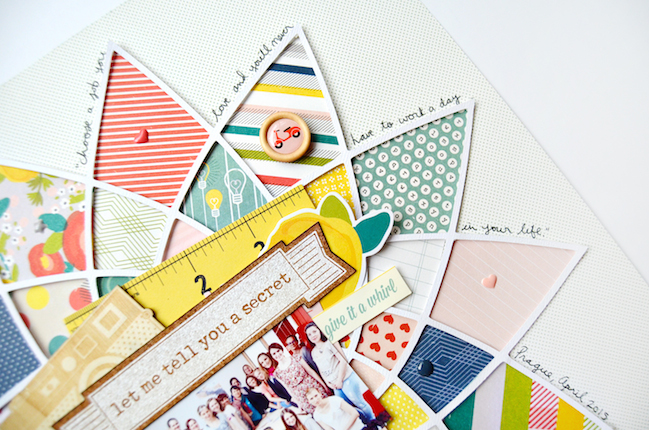
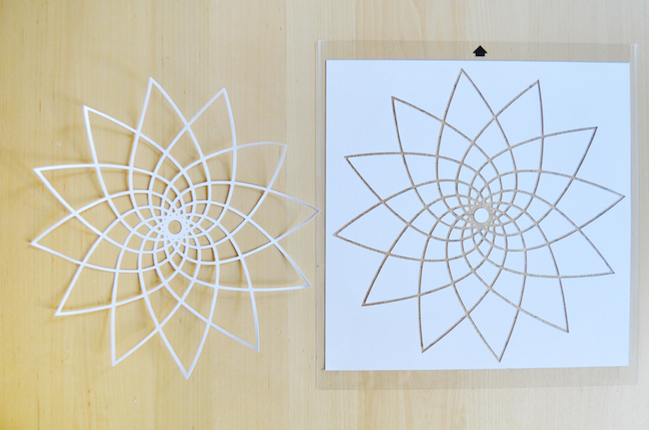
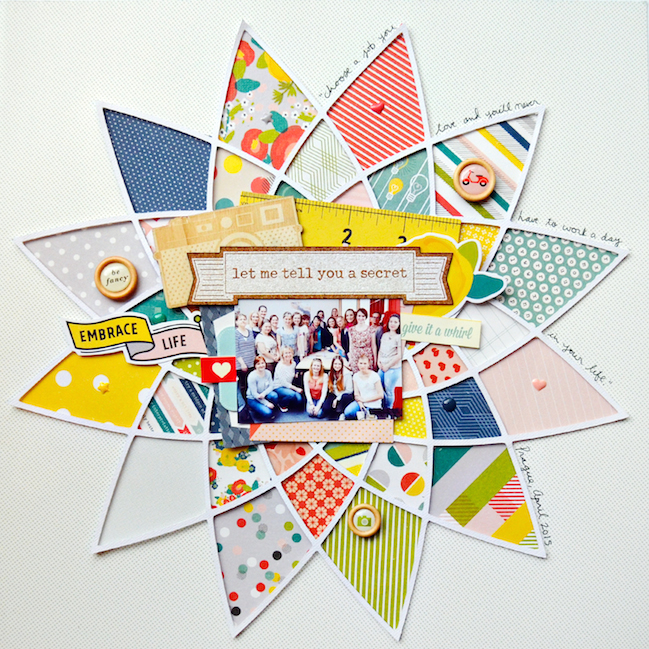
Backing die cut shapes with patterned papers is one of my favourite techniques and I was excited to try it out using the True Stories collection! Bonus: I’ve provided the flower cut file I designed (as a studio file, PNG, and PDF) so you can create this layout too!

die cut shapes using the true stories collection with paige evans @ shimelle.com

1) Die cut the flower from white cardstock using a Silhouette Cameo and carefully peel it off the mat.

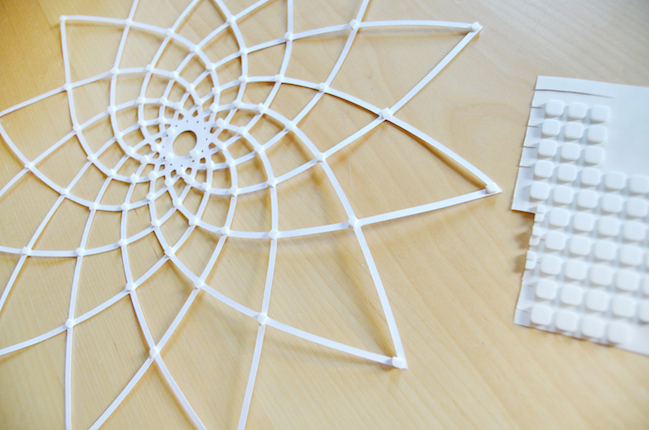
die cut shapes using the true stories collection with paige evans @ shimelle.com

2) Place a tiny foam dot between each petal intersection on the back side of the die cut. This will create dimension and shadows and make the papers really pop!

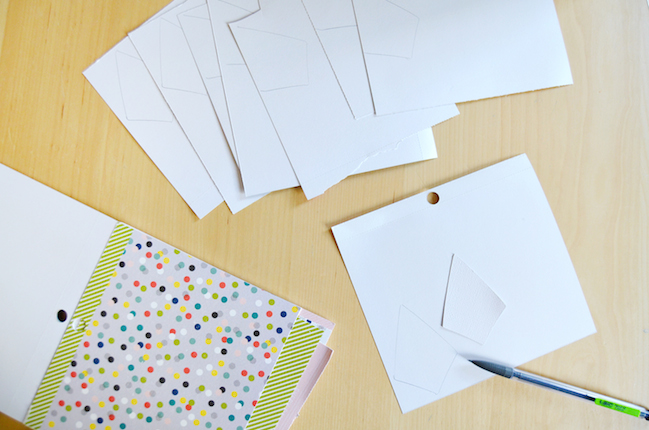
die cut shapes using the true stories collection with paige evans @ shimelle.com

3) Using the inner petal pieces on the mat as a template, trace a petal with a pencil on the backside of your chosen patterned papers then cut out the petals about 1/8” wider.

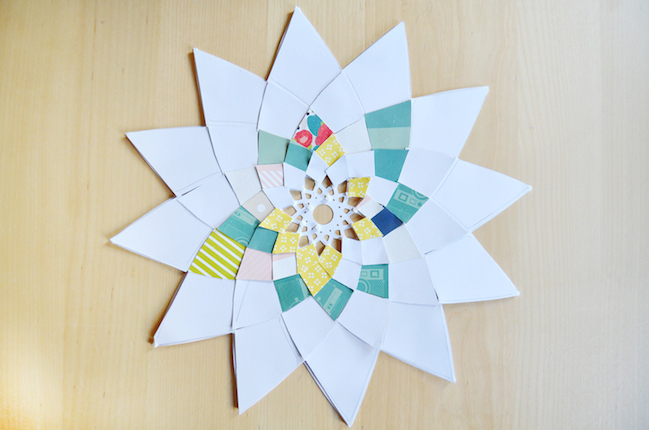
die cut shapes using the true stories collection with paige evans @ shimelle.com

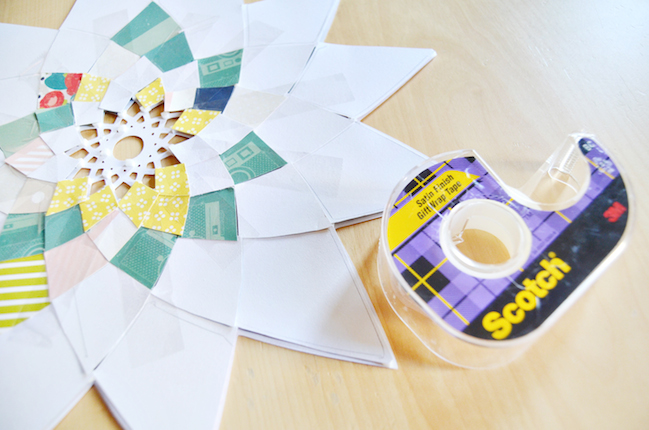
4) Place the petals on the back side of the die cut flower.

die cut shapes using the true stories collection with paige evans @ shimelle.com

5) To make sure all the petals stay in place permanently, place tape across the back of the flower.

die cut shapes using the true stories collection with paige evans @ shimelle.com

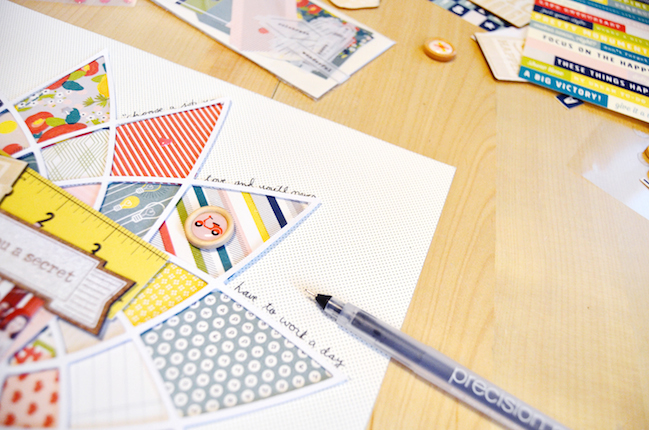
6) Write journaling with a pen around a few of the petals.

die cut shapes using the true stories collection with paige evans @ shimelle.com

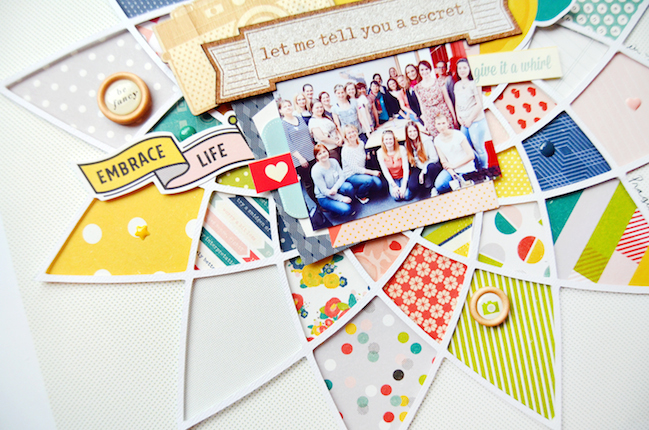
7) Embellish with epoxy stickers, wood veneer, a cork sticker title, buttons, die cuts, paper stickers, and more!

die cut shapes using the true stories collection with paige evans @ shimelle.com

You can find True Stories and other American Crafts products at Blue Moon Scrapbooking, scrapbook.com, and Amazon US or UK. (Shopping through those affiliate links costs you the same amount but helps support this site and makes guest artists like Paige possible. Thanks.)


Paige Evans has been scrapbooking since she was sixteen years old and worked at her first job at a local scrapbook store. The first time she put pictures and papers together it was a match made in heaven! She is the design team manager/blog hostess for American Crafts, a blog contributor for Elle’s Studio, a teacher at Big Picture Classes and Craftsy, a contributing team member for Studio Calico, and on the digital creative team for Ali Edwards. She loves traveling all over Europe with her family and teaching scrapbooking and bookbinding classes. You can check out more of her and her work on her blog, Instagram, Etsy shop, Pinterest, and Studio Calico Gallery