







Pretty jars for pretty weddings

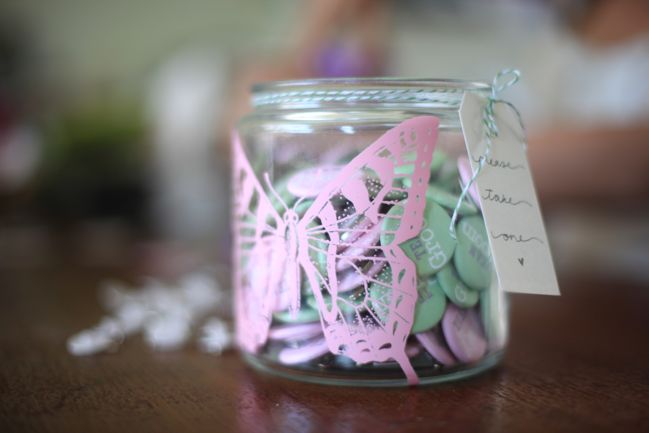 I really love Jenni Bowlin’s butterfly rub-ons, can you tell?
We’re off to the Sussex countryside today for what promises to be a beautiful day for the wedding of Laura and Will! If you know Laura (or her scrapbook pages!), do go send her wedding well-wishes at her blog if you fancy! I know it will make her smile when she finally gets back to her computer after the big day!
This jar of goodies is a finishing touch, and I can’t wait to see the rest of the amazing world of butterflies and bunting. I promise plenty of photos tomorrow!
But must dash for now!
xlovesx
 Comment [4]
Two frequently asked questions

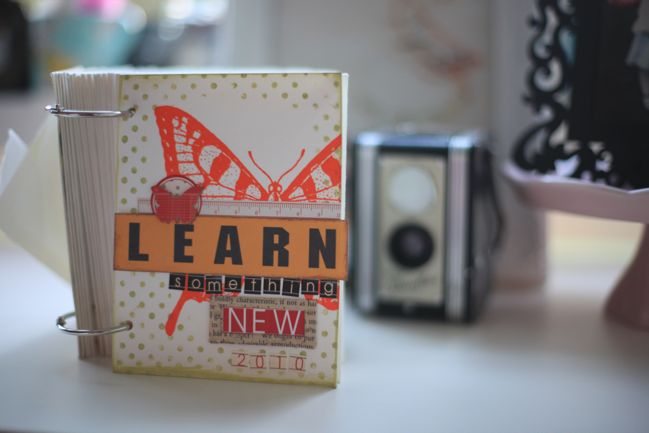
Just a quick answer to a frequently asked question for this week of the year — can I still sign up for Learn Something New even though it started on the first of September?
Yes. You can sign up at any time and have full access to all the materials, plus it’s a permanent membership so you can continue to participate as many years as you like at no extra cost. You can choose to start our album on any day and use the prompts for any month of the year – they are not specific to September.
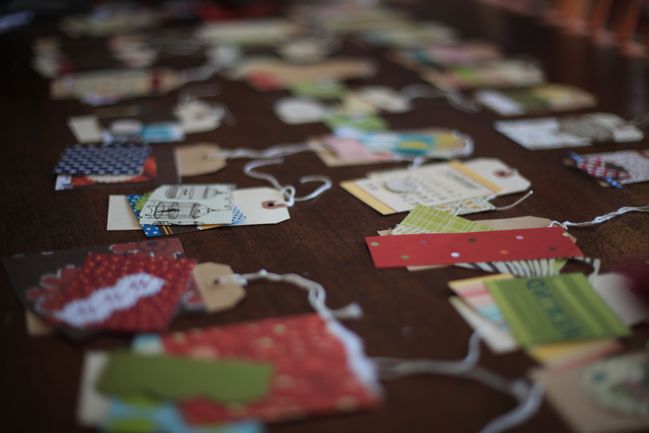
And the other popular question — do I need anything specific in terms of supplies?
No. It’s all about using what you have and love and working in a format that is fun for you. This year I’m working with tags and envelopes, and this process of taking bits and pieces from my scrap basket was the start of my album. We also have scrappers creating their books in 4×4, 6×6, 5×7, 4×6 and 8×8 formats, in both paper and pixels. Others use their blogs for their daily entries, write notes in a journal or take a photo each day. You are welcome to use exactly what’s best for you!
You can find all the class details here.
Next week I’ll share some of my favourite Learn Something New blogs with you too — you won’t want to miss the fab projects being posted around the web!
xlovesx
Comment [42]
Class starts tomorrow :: Join us!

It’s the last day of August already? Well, that lovely three-day weekend was brilliant and now there are only hours left until it is officially September. But I’m always excited for September as it’s the start of Learn Something New, an online class that lasts all month. And if you can write one sentence per day (even if it’s on your phone or on a bit of scrap paper), you can keep up with this project! Click here to find all the details and sign up!
A few pre-class blog posts have popped up from various participants already. I love this story of someone who paid it forward by anonymously gifting a class membership is so very sweet and inspiring. I love these photos that Christina took to get her in the mood and ready to learn this September! This handmade album by Connie is a fab mix of paper pockets and fabric – I can’t wait to see it come to life (and she’s used super lush papers from Studio Calico that I love). Alissa has repurposed an old book and it looks dreamy! And check out these projects started by Pascale, Tina, Sarah, Chris, Cal, Dolly and Sarah. I absolutely love how everyone adapts this project to a style that is all their own, no matter if it’s something simple or something oh-so-intricate.
You can join at any time but you don’t want to be late, so sign up now and be ready for your first day back to school! Or invite a friend to join you. Class starts tomorrow, the first of September! Click here for the full class details.
xlovesx
Comment [43]
The dress I didn't make

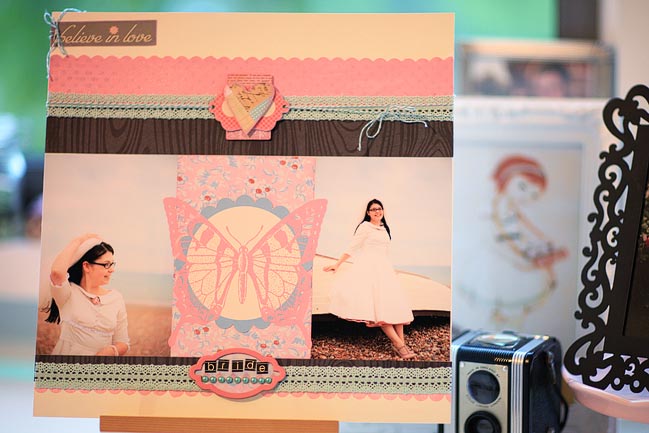 I tried out the brand new Jenni Bowlin inks and paints for this layout and I am so in love with the pink that I may need to stockpile it! I’ll show you the polka dot painting at the top in more detail soon.
I actually blogged about my wedding dress before the wedding, but of course I couldn’t share any pictures at the time — that would have ruined the secret! I actually went to every fitting on my own because I didn’t want anyone to know about the dress. Apparently I was so secretive that some of my friends had a betting pool about what colour it would be, so I suppose in the end it may have been far more traditional than some expected!
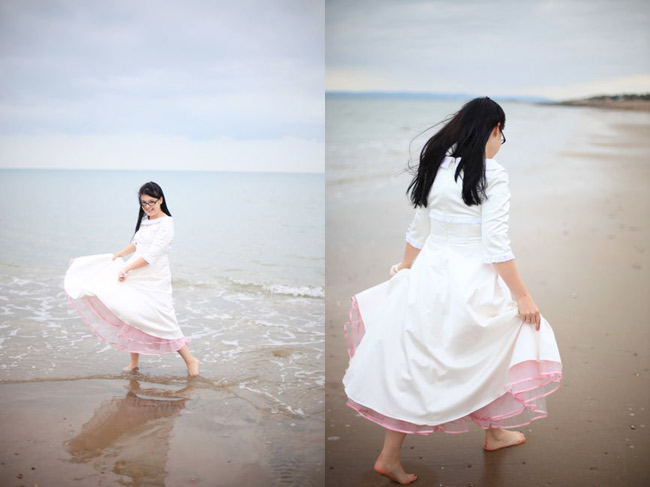
I actually only tried dresses on at one place. I looked at some others but couldn’t commit to trying things on that just weren’t right. The fabulous girls at Candy Anthony never tried to talk me into dresses that didn’t meet my little checklist of what I had imagined in my mind. It was so refreshing to have someone take me at my word when I made blanket statements like I don’t want a strapless dress. They never tried to change my mind like so many others. The studio is an amazing little place and the in-progress dresses just visible through a doorway were just as intriguing as all the beautiful things on display. Popping in to see the dress come together was particularly cool. Taking it home in that giant bag, I don’t think I stopped smiling at all, even though I had to take it on the train during rush hour. Men were clueless and thought I had clearly gone on some sort of ridiculous shopping spree; women knew exactly what would come in a bag that big and smiled or even asked about the big day.
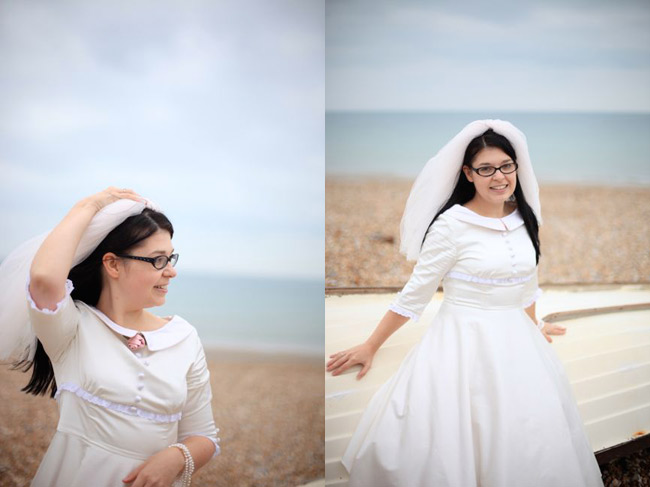
Originally I had imagined I would go with something a little more funky — I loved the idea of her polka dot dresses (and if this one had been in the collection at the time, it might have swayed me!) but in the end they seemed too much, and it was the simplicity of this dress that had me at hello. It wasn’t one they would bring out for an obvious choice of a summer wedding, but it turned out that sleeves were exactly what made the difference to me. I just liked the line of it all and when I asked if they thought I would melt wearing sleeves in August, the reply was Darling, you’ll be wearing a million layers of crinoline. If you melt, it will have nothing at all to do with sleeves. Oh: quite right.
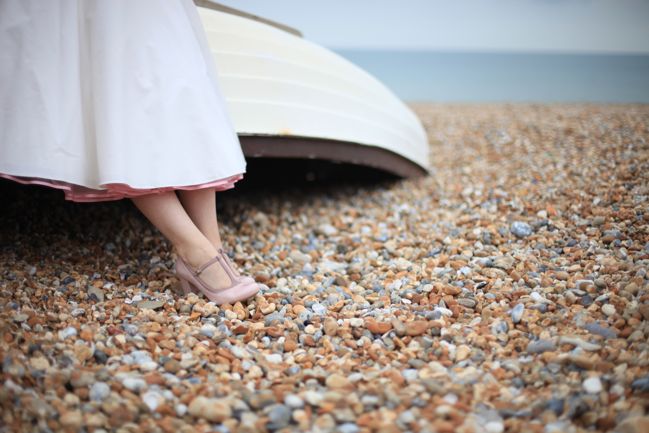
And pink crinoline, yes please! Pink and white in the veil too — although given the choice again, I think I would have gone for an additional petticoat and foregone the veil, but it was hardly an issue. As much as I wish I could wear my wedding dress for other occasions, I do actually wear that pink petticoat from time to time with other skirts and dresses. Once I wound up in a Marks & Spencer in full petticoat and it was quite amusing to try to fit through the sandwich aisle in all those layers of fluff!
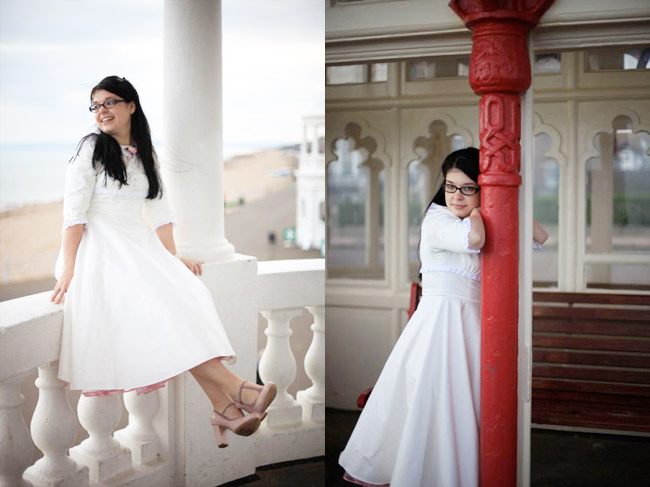
I have worn my dress exactly once since the wedding — for some photos taken by SJ in which we spent the day walking all over the picturesque seaside town where she lives. It’s a quiet place, so anyone who did see us seemed shocked at the idea of walking around in a white dress, and several people asked if we were going to a fancy dress party (what was SJ’s costume then? A photographer?) and some people stared a little more than what was comfortable but all in all it was a fabulous fun day and something I would totally recommend. We didn’t take lots of portrait type pictures at our wedding because we wanted to enjoy the day, so we knew something like this would be an option. Some people actually do trash the dress sessions, but I didn’t want to trash my dress in the slightest and I can assure you that it survived entirely. Perhaps another benefit of a slightly shorter dress was that I never had to worry about it dragging along the ground.
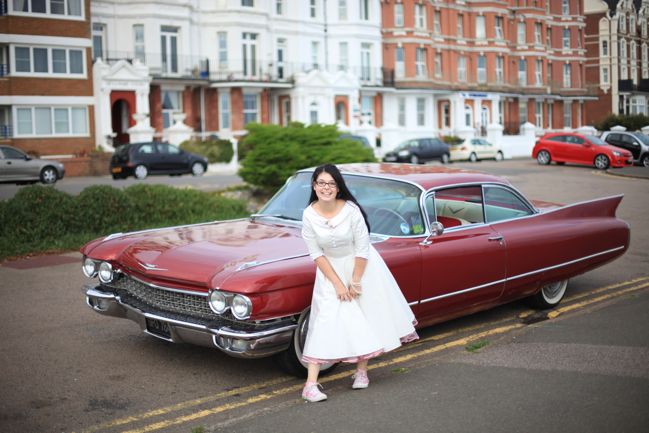
Also, I think if you have a friend who is a dab hand with a camera, this is exactly the type of photo shoot that is perfect for a friend. Don’t get me wrong – there are amazingly talented photographers out there who do bridal shoots and I’m sure the experience would be amazing! But it was also nice to have a known quantity for the support when you’re doing something a little out of the ordinary, like walking around town in your wedding dress. Some of the silly ideas we tried didn’t make for amazing photos after all, but some of them worked and some of them just happened — like when we walked along the sea front to see this gorgeous old car. The people who owned it were sitting nearby and they giggled as we tried to take the pictures quickly before anyone noticed. But really – how perfect was that?
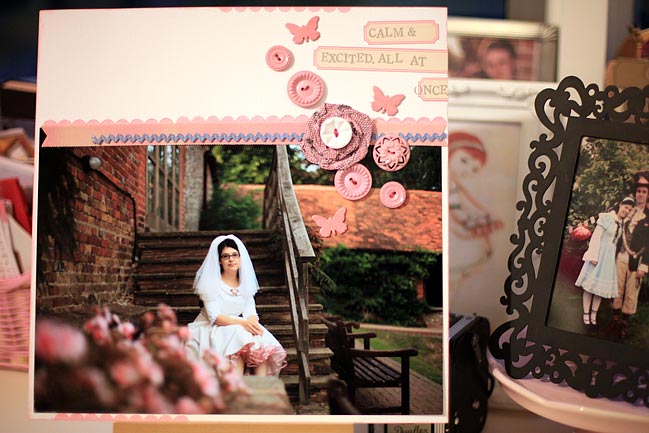 More Jenni Bowlin paint here – for the stamping and painted onto the back of crepe paper to make the flower. I promise to share more paint things once it hits the stores!
I have been trying to plan a day for The Boy to join in the photos as well but sadly he is a bit more camera shy. Seriously his suit was amazing so eventually he will have to give in to more Kodak moments at his sartorial best! Oh, and unlike my dress which was many, many months in planning, he picked out his suit about 72 hours before he walked down the aisle. And had it tailored in that time too. I kid you not.
For the record, I don’t think I have ever included so many photos of myself in one post and I’m not planning to do it again any time soon. Eeep. But many thanks to SJ Dowsett for taking these pictures for me!!
Also, I am loving the snippets of your own wedding stories that are being left in the comments this week. I can’t wait to hear your wedding dress stories now!
xlovesx
PS: I still have the giant purple bag, and although it is a ridiculous size to store, I have no intention of ever giving it up.
Comment [31]
Lessons learned from sewing dresses for bridesmaids
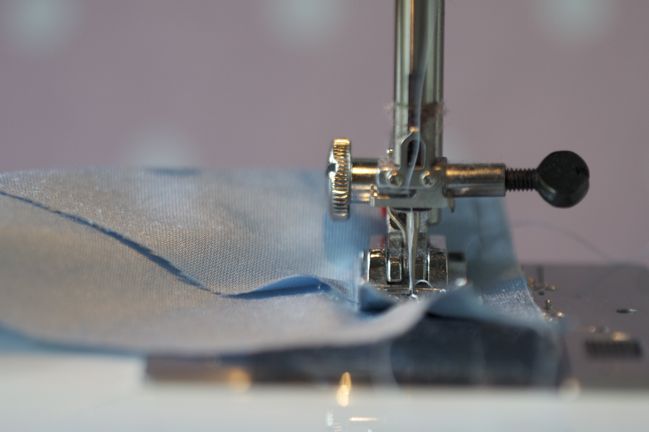
Oh dresses. I do love a dress. I will happily wear a dress every single day of the week (and in fact, I am wearing two dresses as I type this, for I am also rather in love with layering and quite unsure as to what has happened to our summer weather in recent days) so today I have not one but multiple posts about dresses for weddings. Starting with my bridesmaids.
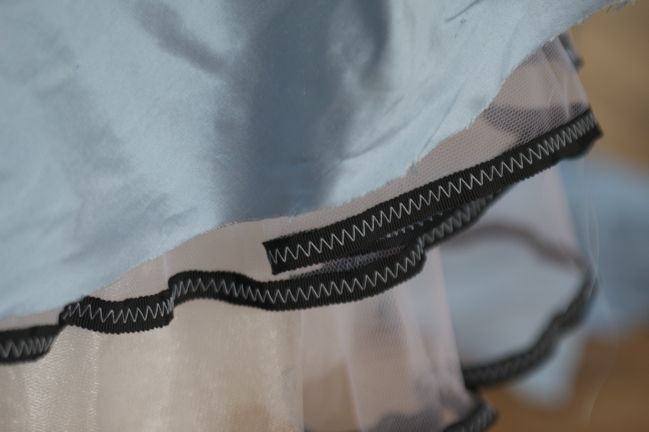
When I started, I had dreams beyond my league for the handmade creations I would sew for each of my three bridesmaids. The plan was for each girl to have a dress that was unique to her, but all made from the same fabric. All started well: something classic and feminine for Abbie, our maid of honour, something youthful but sophisticated for Cassie and something with a twinge of late eighties rock for Beks. All cut from a dusty blue starchy silk found on Berwick Street.
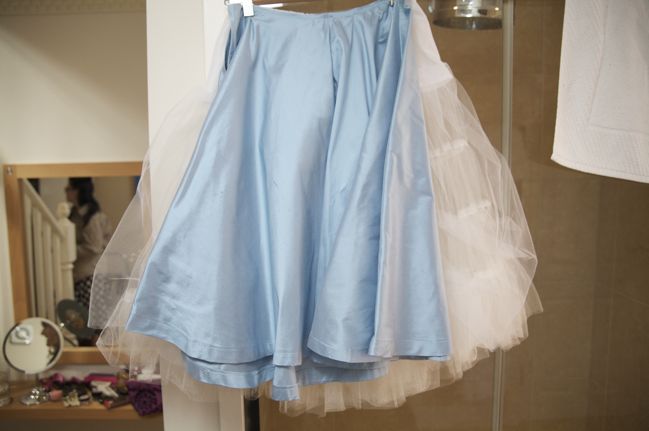
But it turns out that making dresses for other people is entirely different to making dresses for yourself. When I sew for myself, I just try it on before I sew each seam. By the time the dress is done, I’ve tried it on more times that I’ve actually worn some items in my wardrobe! And when you sew for someone else, it’s significantly more troublesome to get that exact fitting part right. Sadly, sewing with silk means you need to get the fit a great deal more exact than something like… jersey.
We were going fine until about a fortnight before the wedding when I made a huge mistake that just wasn’t something I could fix. And I didn’t think I had time to do the finishing touches on the other dresses and also pretty much make that one again from scratch.
Enter plan B.
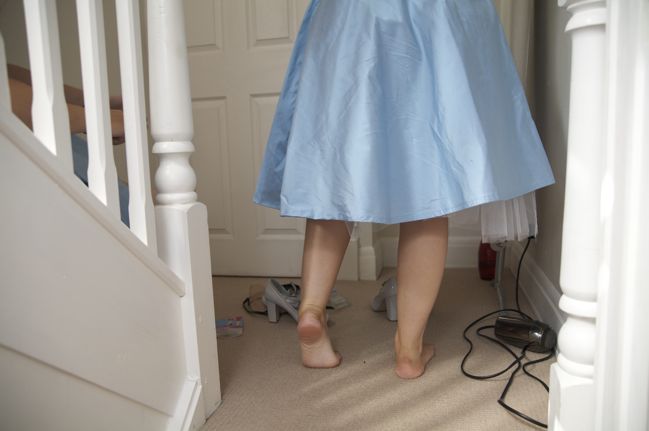
Through sheer coincidence, the dresses were all quite similar from the waist down. I quite literally sat on the sofa with a seam ripper and took the tops off all three dresses. All the stitching and paneling and details of the tops were tossed to the side and I ended up with three blue skirts and their three white petticoats and one night of horrible dreams in which my three bridesmaids wore ratty old t-shirts down the aisle.
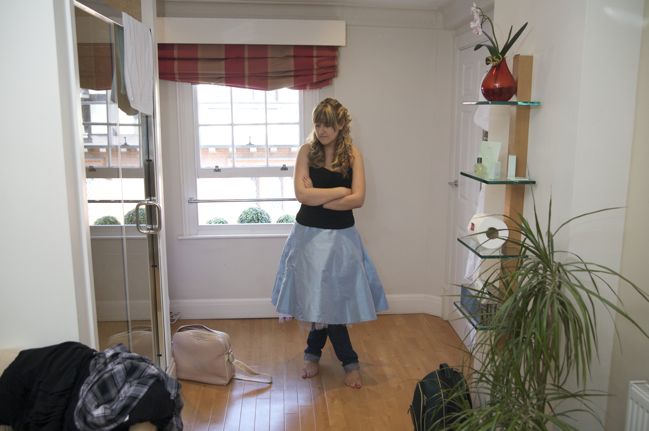 I promise she didn’t wear jeans during the ceremony. But somehow she still makes it look cute.
But everything was salvageable as skirts (aside from the fact that I made one at least a full size too big and she was so polite that she just coped and carried on, bless her) and I headed to Oxford Street to find three tops that would work, now that I had overcome the barrier of ‘it’s a bridesmaid’s dress – it shouldn’t be a skirt and top‘. Oh, and then I had to get over any worries about the girls wearing black at a wedding, because I found black formal tops at Coast, a sort of corset style with lots of layers of ruched fabric. A bit like this in their current collection, but sleeveless. I was in the store for ages as I worked out with a measuring tape and a patient sales assistant. I called Abbie and she actually went to a store near her to try the same top on. I remember having real discussions with the shop girl like ‘why are you still waiting?’ ‘oh, someone is driving to another store to try it on and see what will work’… but I think I must have been too nervous to leave the store without the tops in hand, so I stayed there for quite some time. Anyway, I left with four tops for three girls, as one of them I thought was going to be in between sizes and I figured whichever one didn’t fit I could return.
Meanwhile, my grandmother sat in my flat and fixed my wobbly hems, and said nice things like It’s only because I’ve been sewing for forty years more than you when I was about to break down at some of my mistakes. (Silk is not exactly the most forgiving of fabrics, but mostly I was just on emotional breakdown from having Ruined An Entire Dress. Sigh.) Her help was fantabulous.
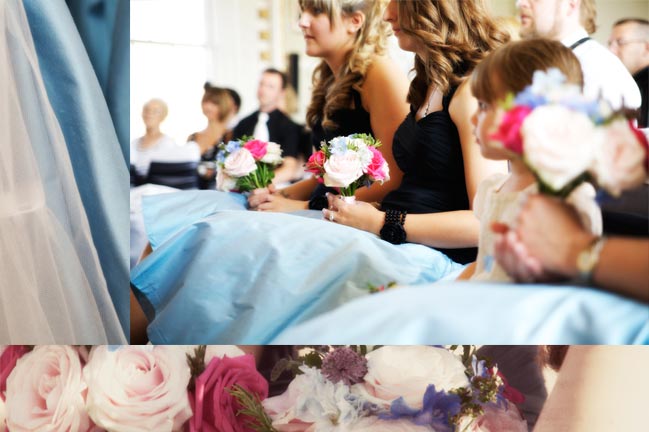
So on the day… petticoats (which I made quite early so they were hanging there for ages waiting for something to dress them up appropriately!), blue skirts and black tops, plus black beaded bracelets with one big rose, and blue-grey t-strap shoes from Aldo for the ceremony and blue Converse All-Stars for dancing, which happened to have a lovely print with handwritten words about love and friendship and other such sweet things.
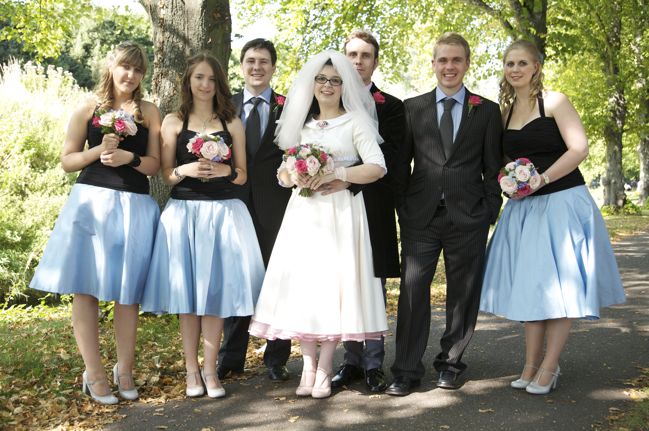
If you fancy making skirts and petticoats, this tutorial is pretty much how I made the petticoats (and I stitched ribbon around the bottom edge for my maid of honour) and this is the process for a flared circle skirt. You don’t need a pattern for either.
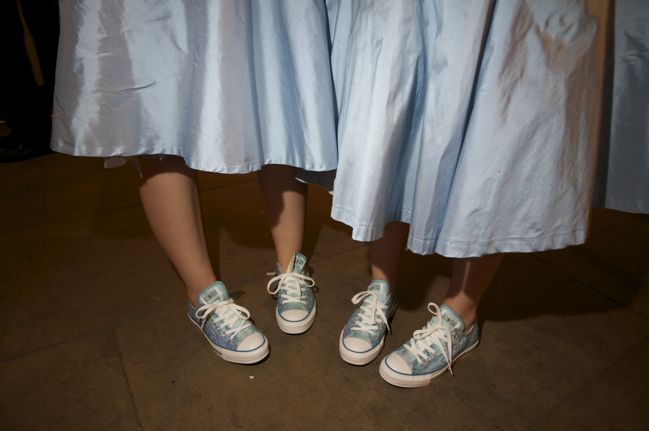
And after all that sewing for nothing and the breakdown and the stress, I actually loved how these all worked out in the end.
xlovesx
PS: I never returned the fourth black top. The extra one fit me, so I kept it thinking it would be such a good go-to piece for occasions that called for dressing up. The first time I wore it, I spent the entire evening feeling like I needed to apologise to these three lovelies, since none of them ever mentioned how wholly uncomfortable it was. Bless them.
Photos in this post – with the exception of the first two – were all taken by Ben Roberts who now shoots weddings with Jay and Ben photography.
Comment [14]
How to make the easiest of fabric bunting
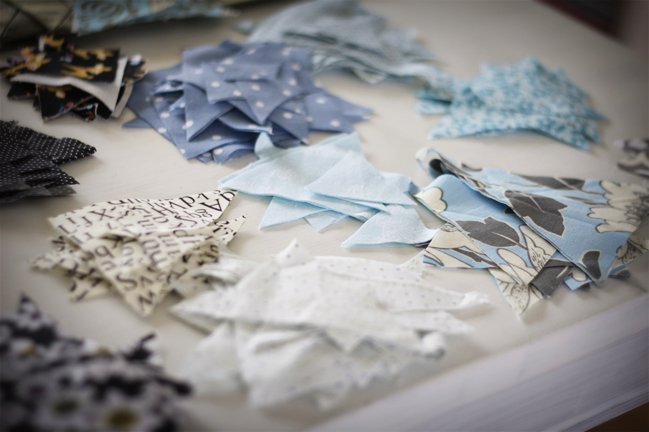
I know, in scrapbooking terms bunting is seen as a huge trend. And maybe on the wedding scene too. But I firmly believe that bunting is as British as a cup of tea and when I discussed this by email with a friend who qualifies as a real Brit rather than a poser like myself, she replied with just an image of a family having a picnic in the middle of the war, with bunting hanging between two Anderson shelters. That says it all to me: the British will hang bunting even in the middle of the blitz.
So clearly we need some for the wedding. (Which had nothing to do with the blitz. But say blitz out loud. It’s a rather cool word to say. I digress.)
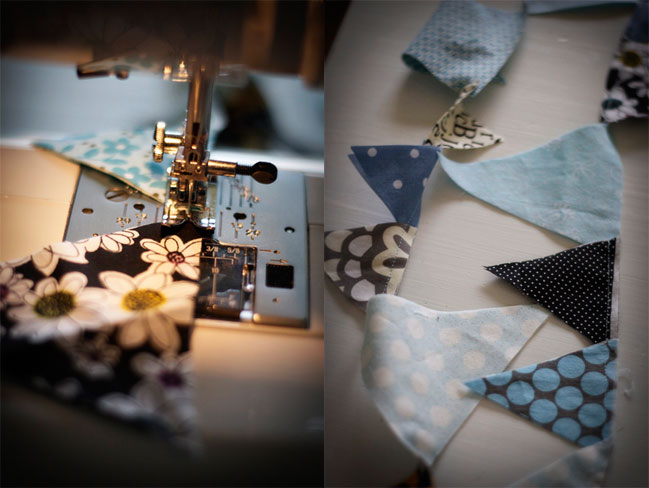
When I made our bunting, I made it in the easiest way possible, pretty much, and it turned out exactly how I wanted so hurrah for that. No hemming. No measuring. These were the steps:
…Gather fabrics from the ‘I really am going to sew something with this someday’ pile in shades of blue or black and white.
…Iron them. Fold them with the wrong side on the inside — the print on the outside.
…Put on a DVD and cut all that fabric into tons of randomly sized triangles, arranging them by pattern on the table. (Cutting both layers at once so the print is on both sides of the triangle pair, yes?)
…When things are cut and DVD is done, sit at the sewing machine, making sure both spools have as much thread as possible, and pick up one pair of triangles. Start sewing with a straight running stitch, across the wide top of the triangle.
…Continue to sew and just pick up another triangle pair at the end of each one and keep right on sewing. Don’t worry about what order the patterns go in or if the big triangles are all together or anything. Just pick them up as random as humanly possible. Keep sewing until they are all in one long string.
…Realise that this has essentially created one giant knotted string of bunting on the other side of the sewing machine.
…Put on another DVD and untangle the whole mess.
And seriously, I think the last step was the hardest.
Once it was untangled, it was just as perfect as could be, and it graced our dessert table at the reception. (I had hoped to string it across the room or the terrace, but it turned out our venue didn’t really have any way of hanging anything from overhead.)
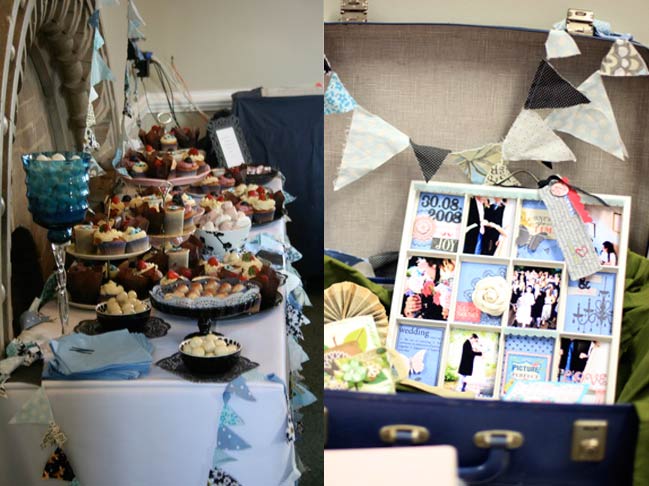
Since the wedding, the bunting has racked up quite a few miles, as it’s my go-to decoration for pretty much anything. The guest room, the Christmas tree, displays at craft shows — it always works. Since it isn’t hemmed at all, it has frayed and since it’s only one row of stitching holding it together, it does sometimes break. But both things are benefits in my mind — the fraying has given it much character now and the stitching is so easy to mend that I don’t mind pulling it apart to make it just the right length for any given space. Sometimes I even staple it back together for displays and it works just fine.
So yes, bunting. Oh how I love it. And don’t worry: I will dish more about the desserts later in wedding week, I promise. I’ll even share the recipes.
xlovesx
PS: I am curious as to how many of you actually said blitz aloud!
Comment [18]
How I made my wedding invitations
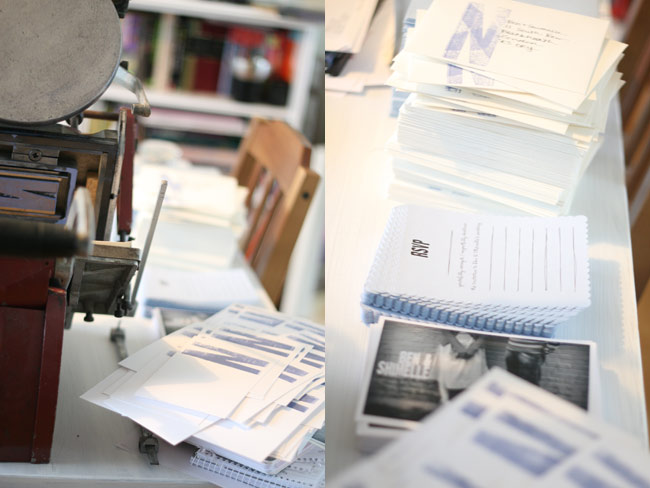
Two years ago, this Monday marked the start of one week of excitement and insanity leading up to our wedding. It was a very crafty, DIY affair in many ways, and at this point there were still skirts to hem, bunting to sew and cherry amaretto jam to stew, not to mention friends and family to collect from the airport, deliveries to make and dinner dates to keep! Oh, and the little extra insanity that I knew I only had one day between the wedding and the first day of this annual online class.
I loved every minute of it, but I didn’t really get time to blog very much of it. A few things have appeared here and there on scrapbook pages, but most of the projects remained just snapshots on my hard drive after the big day. But between that upcoming anniversary and constant crafty talking and planning for the September weddings of two of my favourite friends, I am back in wedding mode, so it seems the right time to share. So welcome to wedding week here at shimelle.com! (Don’t worry – I promise there will be some scrapbooking things this week too.)
Today I’m starting with one of the very first crafty things we finished: our invitations. They were very much a team effort, which is what made them so perfect to me.

We had quite a long engagement and didn’t really start planning straight away. Or actually, we did start planning in quite a traditional sense, like going to wedding fairs and such but I had a really horrible experience and went away knowing that pretty much all I knew was that I didn’t want some sort of template wedding that was chosen out of six options in a brochure, which was seriously what was being pushed by those vendors. So we backed off and let things happen as they did. (Yes, this is also known as procrastination. Shush.)
In that window of time between engagement and a real outline of the wedding, we turned a work trip to the Seattle scrapbooking convention into a holiday with a road trip through Washington and British Columbia. That included a day spent with the fabulous Joy Madison and her family. Now, Joy is an awesome photographer (and scrapbooker) and her husband Jon has this wicked-crazy street photography style that I love. So we spent the day eating Japanese food, getting leaves in our hair, chasing geese and standing in the middle of traffic while he took our pictures all over Seattle. Seriously: so. much. fun.
And the shot of our feet above became our wedding invitation. I love how it’s a slightly insecure picture with the body language. Not that we were insecure about getting married, just that we are both people who can be very shy and quiet at times and it was just very natural. We added the text to the wall and sent it off to an online printer, ordering plenty of these at 4×6 with a white border.
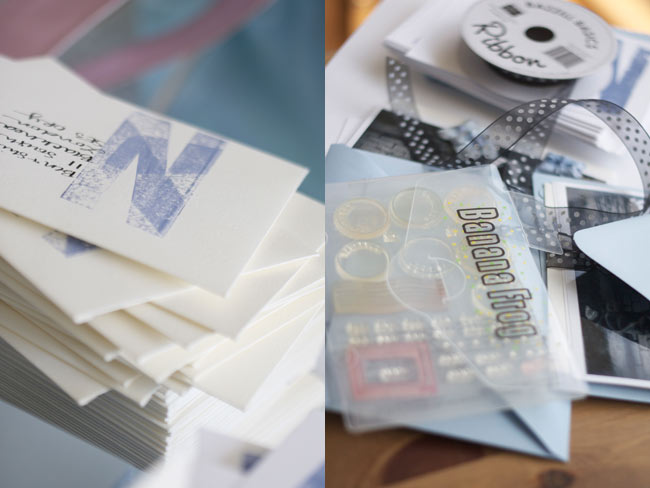
Ordering the photos was the easy part. Then there was the hard labour. First we letterpressed the letter N onto pretty much anything that didn’t move. (In case you haven’t ever guessed from the background of photos in our house, my married name starts with N! It just ended up easier to stay with Laine in the scrapbooking world, especially since really I just go by my first name so much of the time.) The various letter Ns came from a variety of market stalls around London, and we used a reinker bottle of Colorbox pigment ink in Colonial Blue for all the letterpressing. One big N on the front of the RSVP envelopes and a different big N on plain white 4×6 postcards and a swirl design on blue scalloped postcards for the RSVPs. Lots and lots of letterpressing.
The plain white 4×6 postcards were then glued to the back of the photo prints, and instead of bulk printing the details, I wrote everyone a personal note with a fountain pen. It was actually quite therapeutic but it was far, far more time-consuming than I ever imagined. But each person got their very own note written with my very own hand. Oh, and each card included details about the dress code wherein we asked everyone to wear their best black and white. (More about that later this week.)
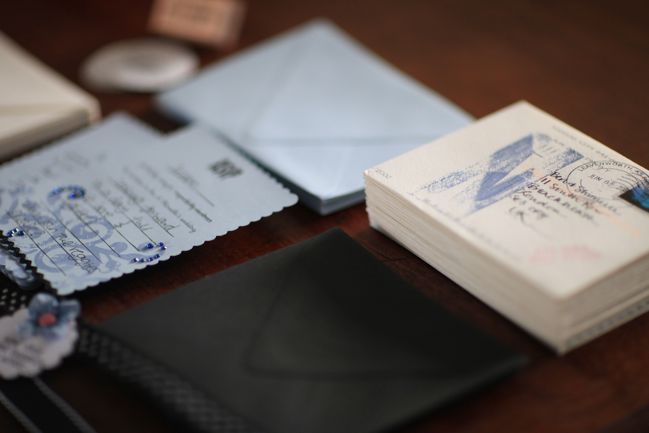
The RSVP cards were screen printed on our Gocco machine with black ink over the tone-on-tone blue design that we letterpressed. I loved that some of our guests dressed them up when they returned them, so we had some with gems, some with fancy silver lettering and some with very sweet notes. I kept them all – every single one.
The photo cards with the notes on the back were then bundled with the reply card and the return envelope and tied up with black sheer ribbon with white polka dots.
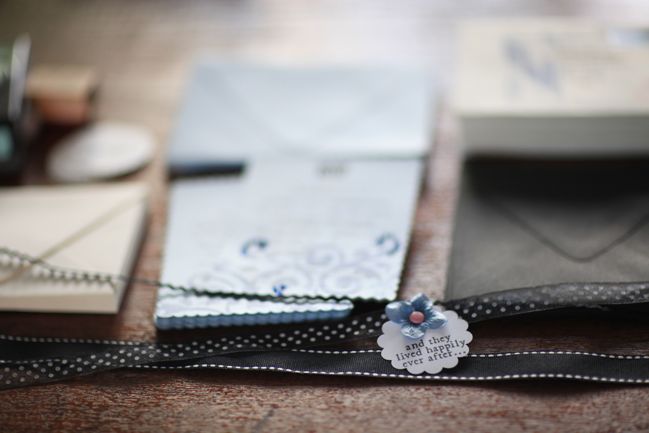
And then we sat one night and punched and stamped and stamped and punched until we had one of these little ‘and they lived happily ever after’ circles for everyone, and we attached that to the ribbon with a brad and a flower and packed the entire little set into a blue envelopes with more letterpressed monograms and sent the entire stack flying away in the post.
…and that is how we made our wedding invitations! But my favourite part of the entire process was when we both sat on the floor of our flat with tons of stamps and inks and ribbons and photos and we mixed and matched and pasted and punched until we found something that we both loved. Why didn’t I take a picture of our fifty half-finished drafts?
I have no idea.
xlovesx
Comment [27]