pretty paper. true stories. {and scrapbooking classes with cupcakes.}

lovely to meet you Twitter Facebook Pinterest YouTube

Take a Scrapbooking Class

online scrapbooking classes

Shop Shimelle Products

scrapbook.com simon says stamp shimelle scrapbooking products @ amazon.com shimelle scrapbooking products @ amazon.co.uk

Reading Material

travel

Writing memories on scrapbook pages

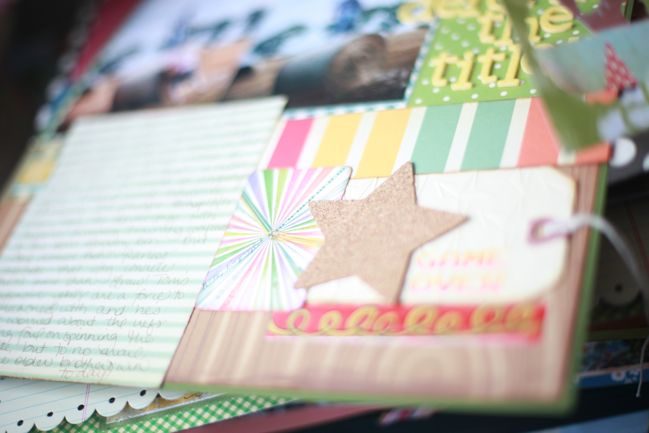
writing on scrapbook pages
writing on a scrapbook page
You may have noticed by now I’m rather fond of writing in scrapbooks. I love how written tales of little memories make a scrapbook so much more than just a photo album of anonymous people. It’s why I teach classes like Journal your Christmas and True Stories with their emphasis on committing those memories to paper before they fade into the busy nature of our day-to-day lives. I’m not the only person who shares this pro-writing ethos, and I’m happy to welcome Lain Ehmann today with her thoughts on her favourite scrapbook pages. Don’t miss your challenge at the end of this post!

When Shimelle asked me if I wanted to create a little post for her blog, my response was, “Heck, yeah! With glitter on top!”

Because if there’s anything I love almost as much scrapbooking itself, it’s writing about scrapbooking.

I’ve been scrapbooking a long time (fifteen years in the current incarnation, thirty-plus years if you count my Rick Springfield photo albums circa 1985). And I’ve learned an important lesson in that time.

This may shock you, but the pages I love best in my scrapbook albums are not the ones with the flashy flowers, fancy page elements, and awesome photography. Yes, I love to look at those (and, to be honest, pat myself on the back a bit!), but the ones I really am glad I created are those that capture a little hidden part of our life, something no one would ever know unless I wrote it down.

Like how I sometimes sneak into my kids’ rooms at night to listen to them breathe.
Or how my eleven-year-old steals every pen in the house (just like I used to do…!).
Or how my four-year-old (at the time) told Daddy he had “big hooters.”

These little butterflies of memory are the reason I scrapbook. Not to document one more Christmas or one more soccer game or one more Open House. But to tell the stories behind the pictures — and to tell the stories of my heart, the things that make me laugh and the things that make me cry. Sometimes they’re one and the same.

Let me illustrate. From my albums, I would choose this and label it an example of a Good scrapbook page:
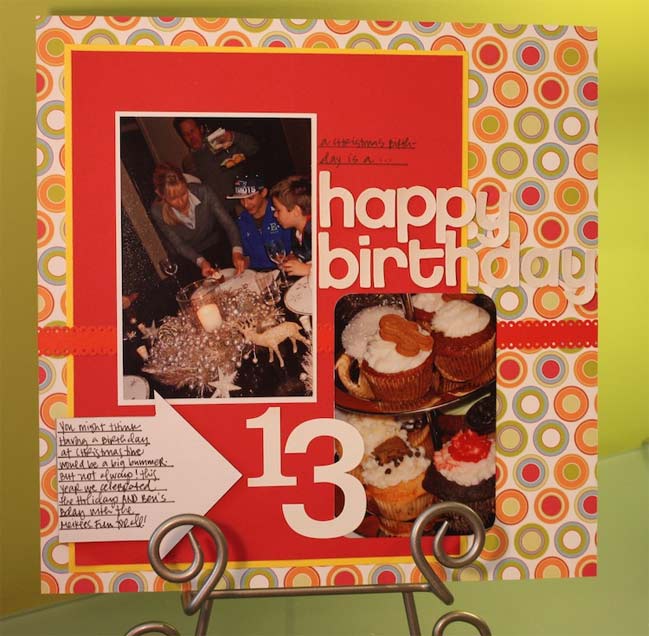
scrapbook page by lain ehmann

But then there’s the Bombdiggety scrapbook page:
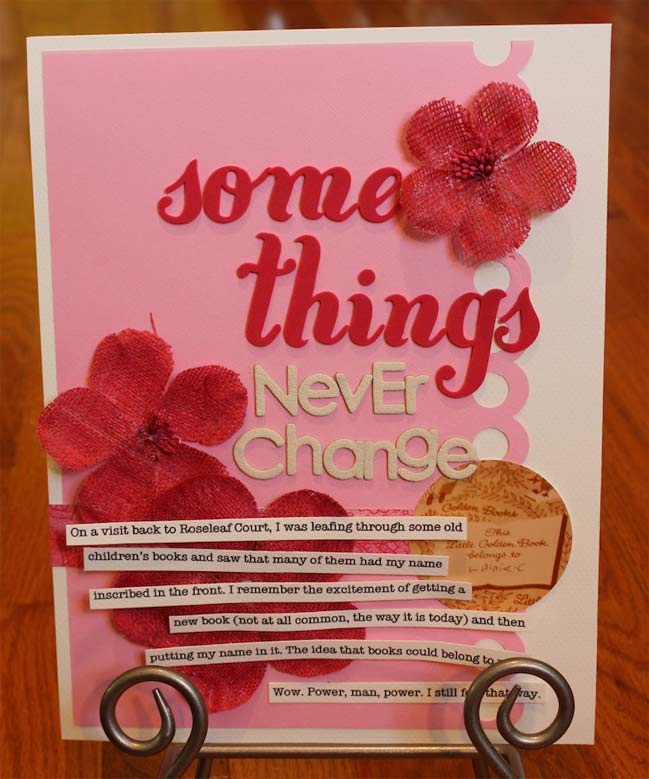
scrapbook page by lain ehmann

I love both these layouts, but the second one speaks to me more. Anyone could guess that my son celebrated his 13th birthday in some fashion. But would they know that I loved books so much, even at an early age, that I went around the house putting my name In every one I could find?

Your challenge: This is exactly the sort of thing we can all apply to our Christmas scrapbooking to get so much more value in our books than just the annual photos of the family in front of the tree. So today I challenge you to find a creative way to document a holiday memory that’s currently missing from your scrapbooks. Feelings, thoughts, memories hidden behind the pictures. It doesn’t have to be deep and angst-ridden. It can be light and breezy. But angst-ridden works, too, if that’s where you’re at! It’s all good.

And so are you.


About Lain…
Lain inspires women to make their scrapbooking fun and meaningful through her blog, classes, and live online papercrafting events. Her next class, Your Story Matters: A Guided Expedition of Self-Discovery helps scrapbookers gather their memories and stories in her signature effervescent style. The week-long class includes daily prompts, an online virtual crop, and more. You can find out more about Your Story Matters here.

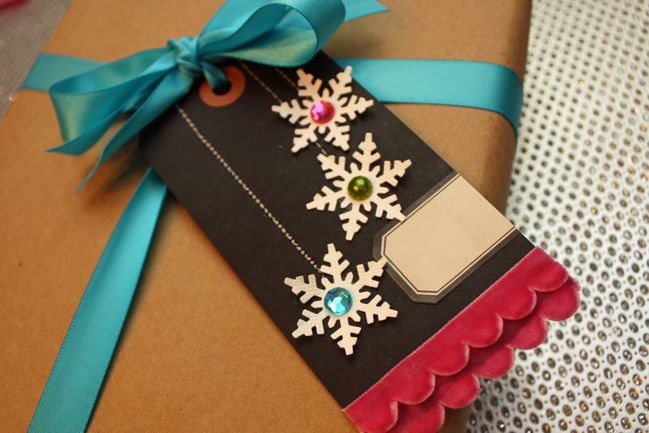
Christmas Gift Wrap Tag tutorial by Mindy Miller

Christmas gift wrap tag tutorial by mindy miller
Next up I’m excited to welcome Mindy Miller, who shares her secret for making Christmas gifts look amazing. Enjoy her Christmas tag tutorial and don’t miss your challenge at the end of this post!

Have you started your holiday shopping? Believe it or not, the shopping days are dwindling and it will soon be time to start wrapping.

Here’s an easy idea for handmade gift tags that will see you through the holidays and even into winter.

Christmas gift wrap tag tutorial by mindy miller
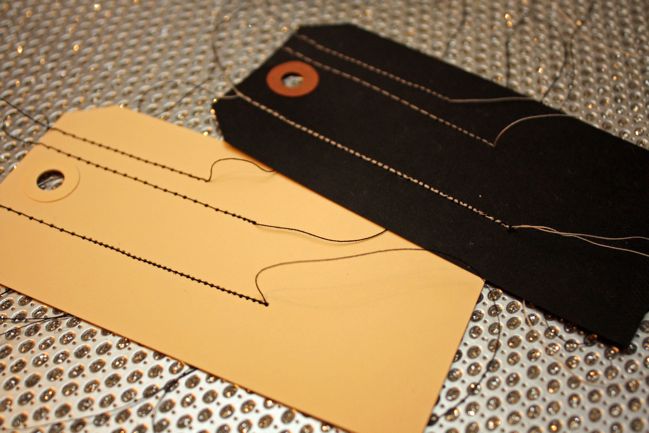
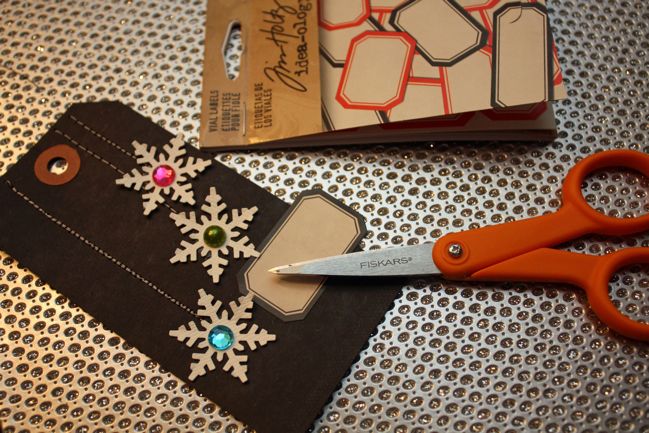
Start with a tag and add three lines of machine stitching. Use a color of thread that will contrast and stand out when stitched on the tag. Pull the threads through to the back side of the tag, knot the ends and cut off the tails.

Christmas gift wrap tag tutorial by mindy miller
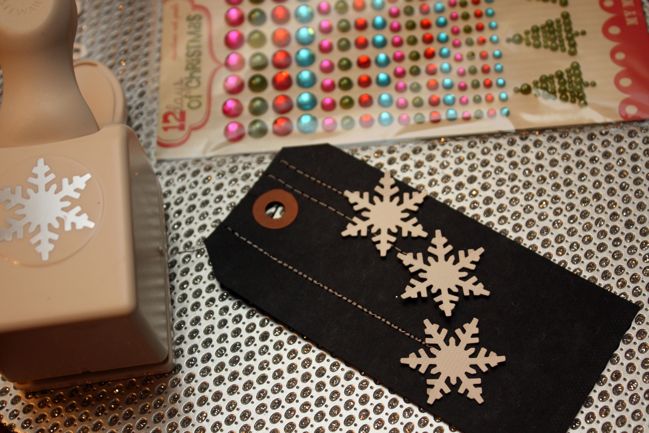
Punch three holiday or winter shapes from cardstock. Again, use a color or patterned paper that will stand out when placed on the tag. Place the punched shapes at the end of each stitched line. This will create the illusion that the shape is hanging from a string.

Christmas gift wrap tag tutorial by mindy miller
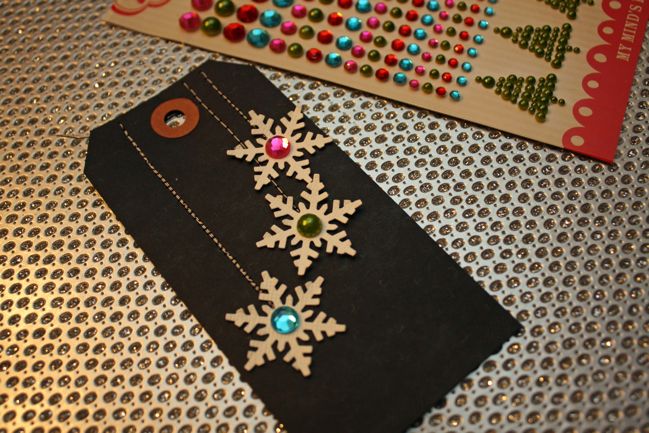
Embellish your punched shapes with jewels, buttons or other small accent. I used the bright and colorful twelve days of Christmas jewels and pearls from My Mind’s Eye.

Christmas gift wrap tag tutorial by mindy miller
Add a label sticker in the lower right quadrant of the tag. Cut off the excess sticker to the right side.

Christmas gift wrap tag tutorial by mindy miller
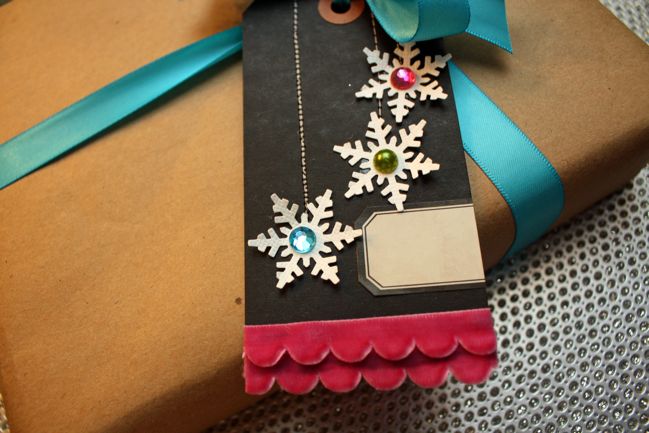
Then add two layers of either scalloped ribbon or a punched edge of cardstock to the bottom of the tag. When attaching the ribbon, cut the length longer than the tag and affix before trimming the edges. Once affixed, trim the edges on each side of the tag for a finished look.

Christmas gift wrap tag tutorial by mindy miller
Tie the tag to a package using fun and colorful satin ribbon. Write the recipient’s name on the label and you’re ready for the holiday!

Your challenge: Create a holiday gift tag design that’s easy to replicate! Make one or a bundle. Take a picture and upload it to your blog or an online gallery and leave a link using the button below. Deadline is the end of Sunday the 20th of November and one randomly selected entry will win a $10 gift certificate to go shopping for craft supplies!


About Mindy…
Hi! I’m Mindy Miller, a Kansas girl who loves crafts. You can find me scrapbooking, card making or sewing in my free time. My work has been published in Scrapbook Trends, CARDS and Simply Handmade magazines, plus several on-line publications. In addition, I am honored to have the opportunity to work on the Jenni Bowlin, Fiskars and Scrap-Mart design teams. Stop by my blog and say hello!

Christmas Card Tutorial by Leah Farquharson

christmas card tutorial by leah farquharson
christmas card tutorial
With the holidays just around the corner, I’ve been thinking about handmade cards. I’ll be the first to admit that I don’t send handmade cards to everyone on our list – it’s just too much and too stressful! But I do like to include them with special greetings to family members that we’re not able to see for the holidays. The time and effort are appreciated by them, so it makes every moment of the process that much more special.

christmas card tutorial
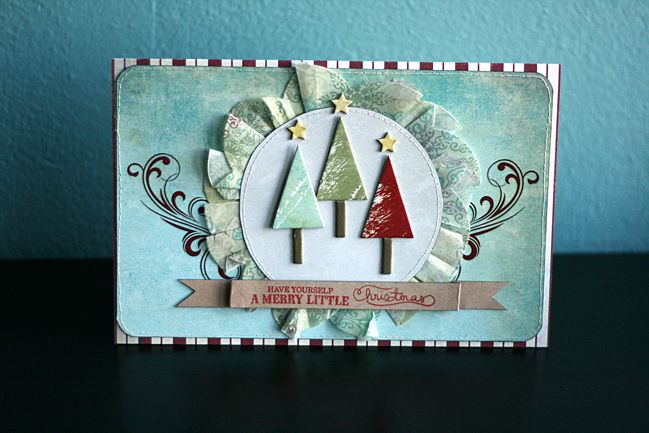
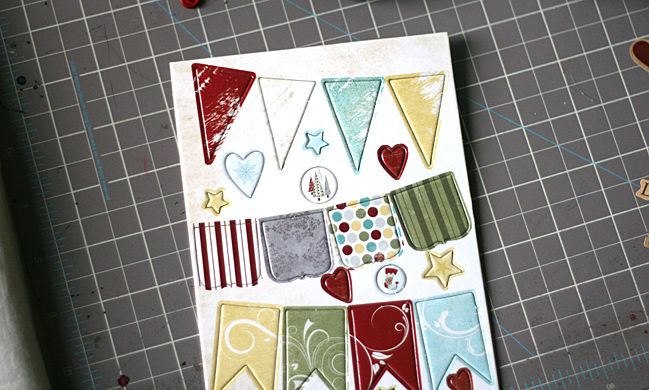
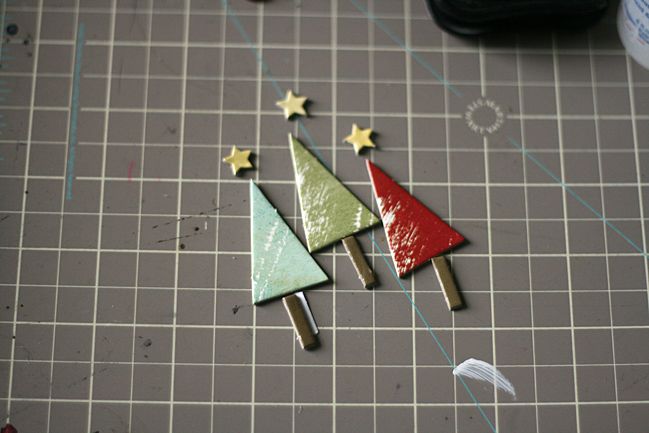
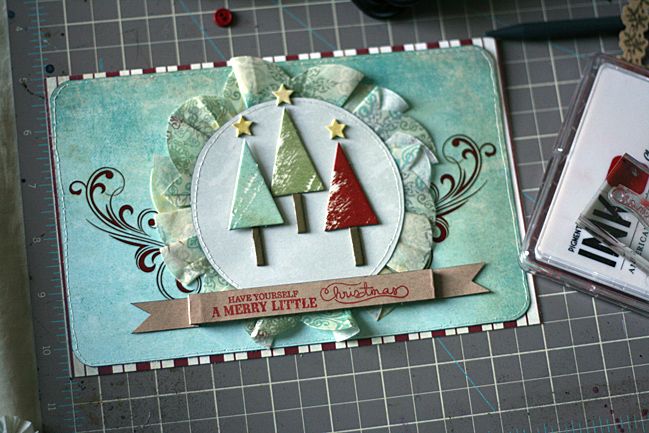
One of my favorite things to do when working with scrapbooking supplies is make something unexpected from a simple supply. Things don’t have to be complicated to be beautiful! For this particular card that I assembled, I chose to look at the hugely popular banner piece a bit more closely. By simply turning it the other direction, I was able to make a set of simple, but pretty trees to be the centerpiece of this card!

christmas card tutorial
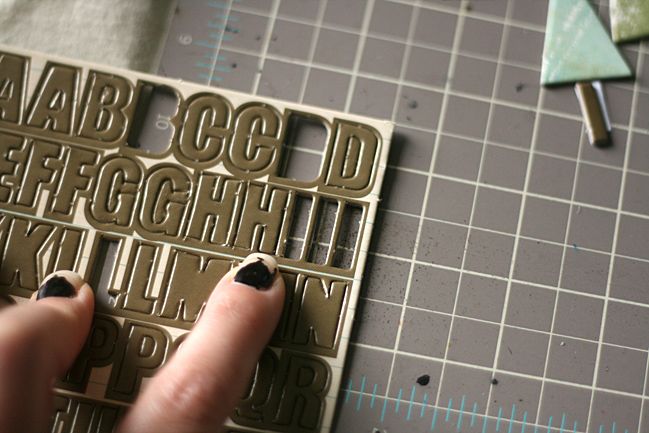
A set of chipboard letter l’s became trunks…

christmas card tutorial
and I was all ready to create!

christmas card tutorial
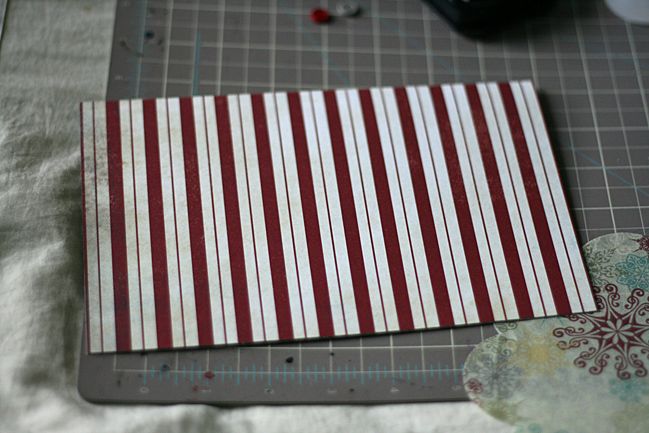
Start by cutting a sheet of patterned paper down to 8.5×11, then fold in half width-wise.

christmas card tutorial
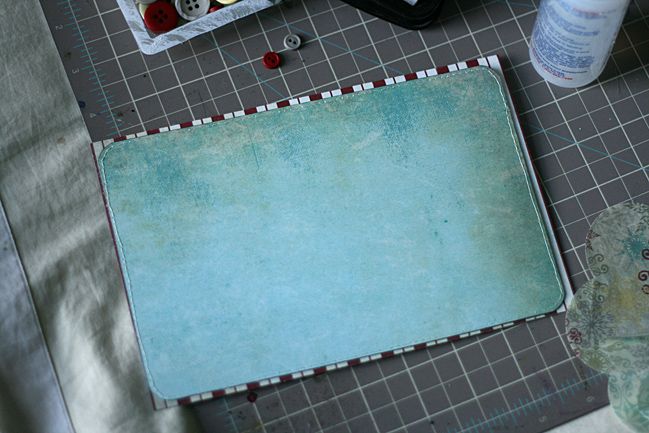
Cut a coordinating paper to 8.25“x5.25”, round the corners if you’d like, stitch around the edge and ink the edges as well. Adhere to your base.

christmas card tutorial
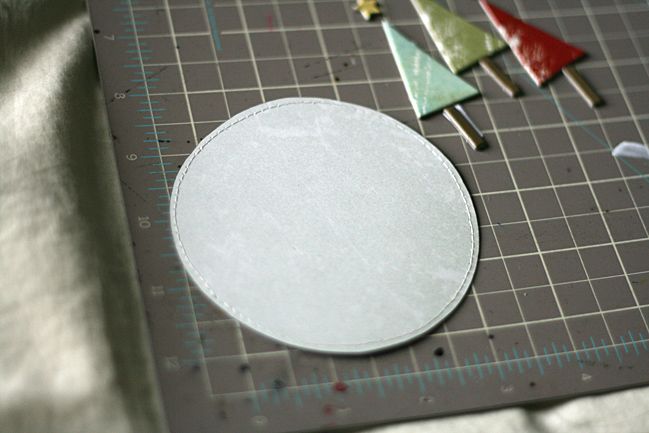
Cut a circle 3.75” wide, ink the edges and stitch.

christmas card tutorial
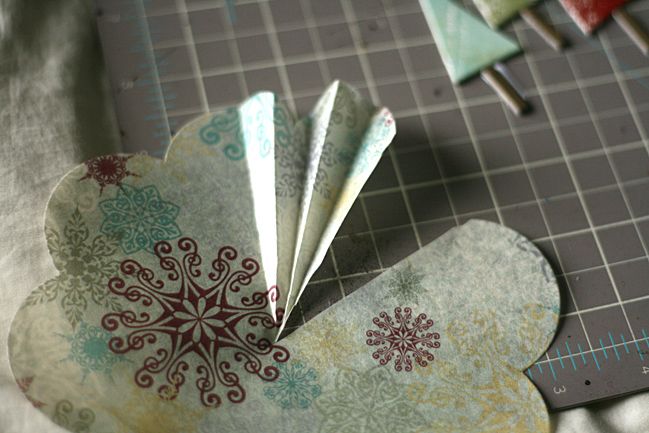
Next I accordion folded a filter embellishment to go around the edge, but you could use anything from a doily to another sheet of coordinating patterned paper.

christmas card tutorial
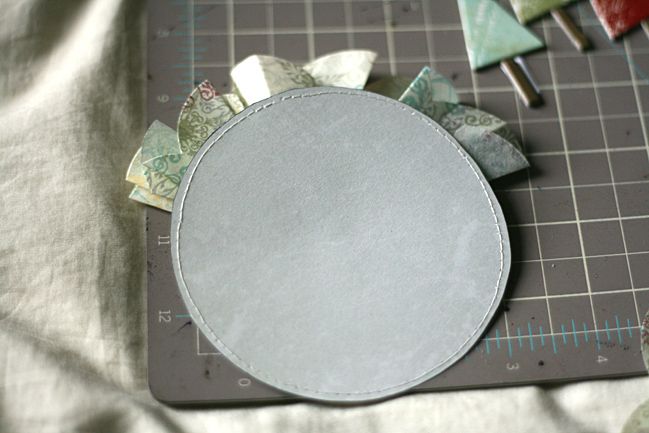
It took two for me to go all the way around the outside edge of my circle.

christmas card tutorial
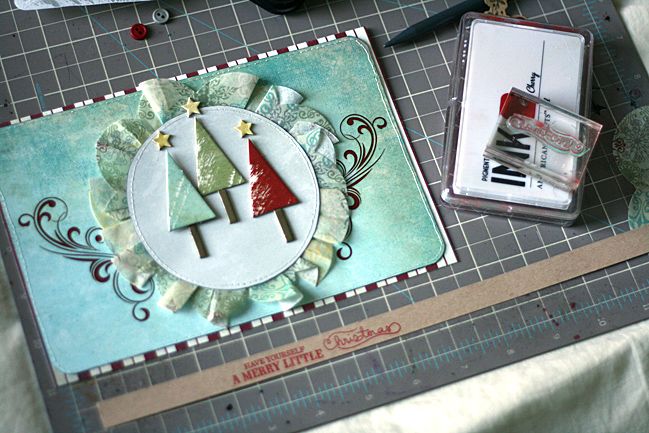
Apply rub-ons to the base of your card, and layer the circle with edging in the center. Adhere the christmas trees in the center.

christmas card tutorial
Stamp a sentiment on a strip of paper. Clip to fit outside the edges of your circle, and fold to make a banner. Ink the edges. Mount on foam squares on your card.

christmas card tutorial

Your challenge: Take inspiration from Leah’s card! Specifically in one of two ways: create a project with a circle design in the centre (of a card, a scrapbook page or another crafting project) OR create a project using your supplies in a different-than-expected way (like how Leah turned the banner upside down and added a letter to create Christmas trees). Take a picture of whatever you create and upload it to your blog or an online gallery. To enter, share a link to your project with the button below. Entries close at the end of Sunday the 20th of November. One randomly selected entry will win a $10 gift certificate to go shopping for scrapbooking supplies!


About Leah…
I reside in the South Florida metro area with my husband and two sons. I’m a busy mama who loves to keep life creative through sewing, crafting, scrapbooking, etc. Check out my blog and etsy shop to see more!

Share a Crafting Link

share a crafting link :: early bird challenge
christmas scrapbook page
Yesterday’s early bird challenge asked you to share a link to a favourite Christmas project of your own… today, let’s widen the circle a bit. What idea have you seen that made you really want to make a certain project for Christmas? Today, share a link to somewhere out there in the big world of the internet! It can be something made by a friend or something you just stumbled upon while surfing!

To enter leave a comment (no widget box for this challenge) with a link to a Christmas project you have seen and loved! Easy. From all the links posted, one will be randomly chosen to win a $10 gift certificate to Two Peas to choose some new scrapping stash!

Be quick – this challenge ends tonight, not next weekend like the other challenges.

By the way, two things about leaving a comment here that might be helpful:
1. You need to press the preview button first, then submit. That solves 99% of troubles.
2. To make your link clickable, you can write it like this: "Text here":http://webaddresshere – and just leave one link so it doesn’t get flagged as spam. (But if you just want to paste the link in, that’s fine for this challenge – it just won’t be clickable. I’m fine with either!)

I hope you’re ready for a fun-filled crafty Sunday! I’ll be right back with our first tutorial post of the day!

Now… what link will you share?

Scrapbooking Embellishments :: Journal your Christmas Page Numbers part one

page numbers for journal your christmas online scrapbooking class
scrapbooking embellishments :: journal your christmas page numbers
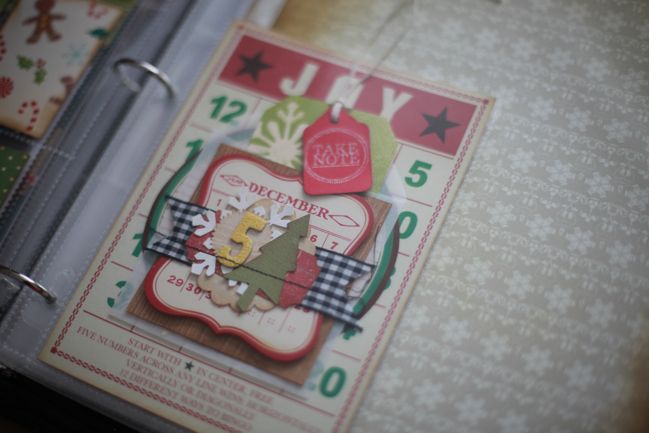
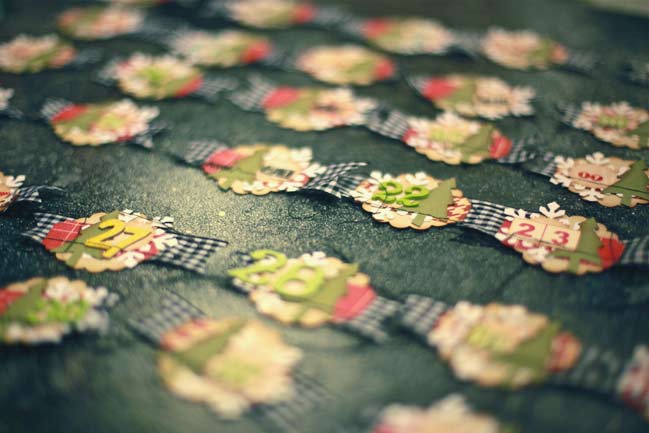
Aside from cutting pages to size, one other thing I find helpful to prepare in advance of Journal your Christmas is to create page numbers. If you intend to create daily entries in your album, then a set of numbers can help motivate you to keep those entries going and the number added to each page helps all the individual pages of the project come together as a whole. (If you take the option to make a few Christmas journal entries each year and build an album over several years, I don’t think page numbers make quite as much sense.)

I’ve created numbers in various styles over the years, but it was only this year in reviewing my past journals that I realised something: if my pages follow a similar format (all the same size, repeated colours, etc) then I like numbers that vary from day to day. If my pages are quite different (different sizes, a mix of page protectors), then I prefer the numbers to match throughout the project. Lightbulb moment!

christmas scrapbook
Last year I used a variety of page protectors, all mixed with different sizes and lots of different pockets to fill. And I kept the numbers quite similar for each day. This video shows the process I used to make them.

This year, my pages are the same size and format each day, so I’m varying the style of the numbers. Tomorrow I’ll share a selection of those!

…and yes there will be a challenge for page numbers, so if these page numbers inspire you to start creating your numbers, then go right ahead! I’ll post the page number challenge with tomorrow’s post with option B for varied page numbers.

And this is me signing out from crafty Christmas for Saturday – but there’s an early morning giveaway on Sunday so don’t be a stranger! Thanks for joining me so far and I hope you’re having a fabulous weekend.

xlovesx

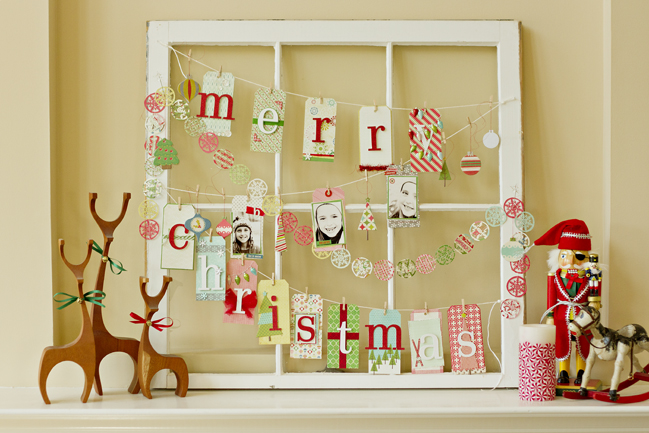
Decorate a Christmas Window :: Craft Tutorial by Corrie Jones

how to decorate a christmas window :: craft tutorial by corrie jones
how to decorate a window for christmas
Next up, I’m excited to share this gorgeous project from Corrie Jones! I’ll let Corrie show you how to make something like this, step by step! Enjoy.

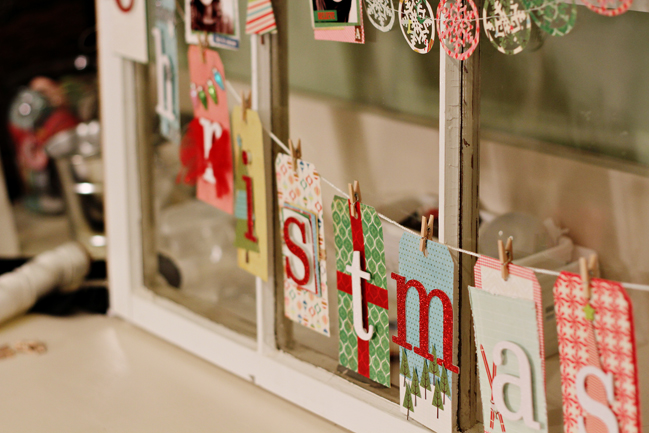
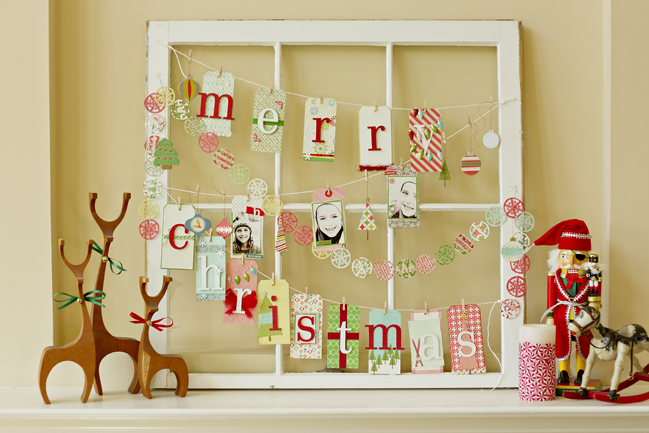
I bought this window forever ago with the intent of decorating it for my studio. I was going to create a window for myself in that windowless room. Well, it sat and sat until now, when I decided that it would be the perfect canvas for a Christmas decor project for right in my family room. Of course, this really is a garland project, and that very tag garland can be used to decorate just about anything, it definitely does not have to be an old window.

how to decorate a window for christmas
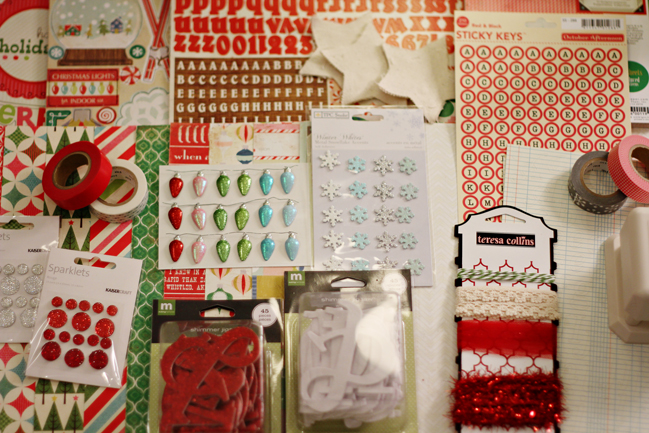
I used a bunch of Christmas supplies I had here.

how to decorate a window for christmas
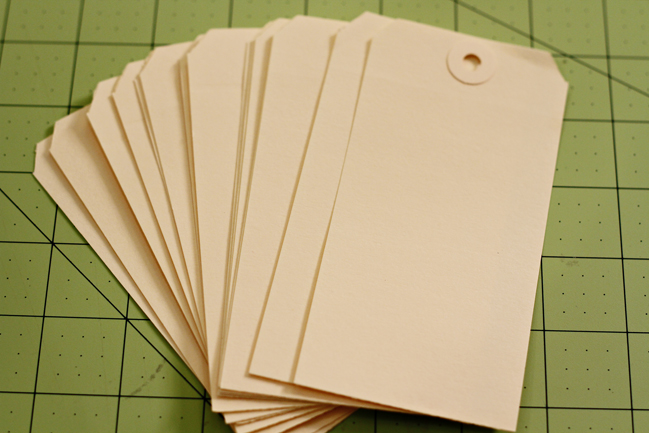
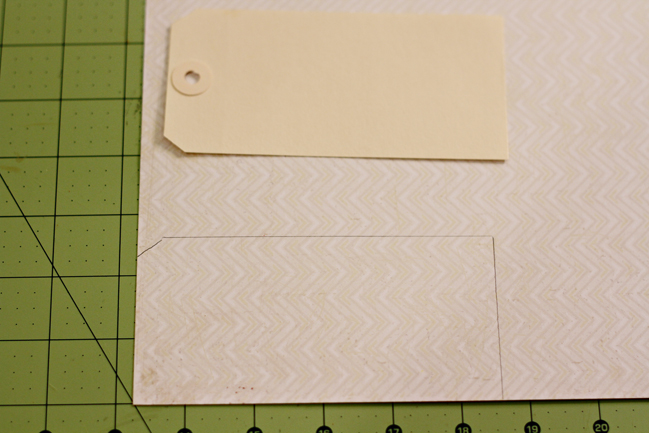
Gather a bunch of shipping tags of a size you like that will work in your space.

how to decorate a window for christmas
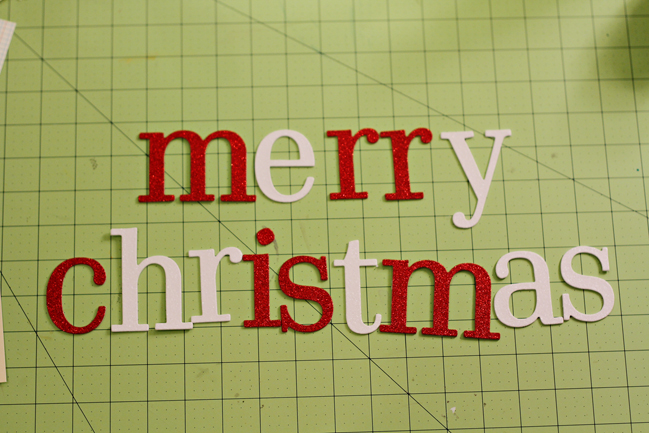
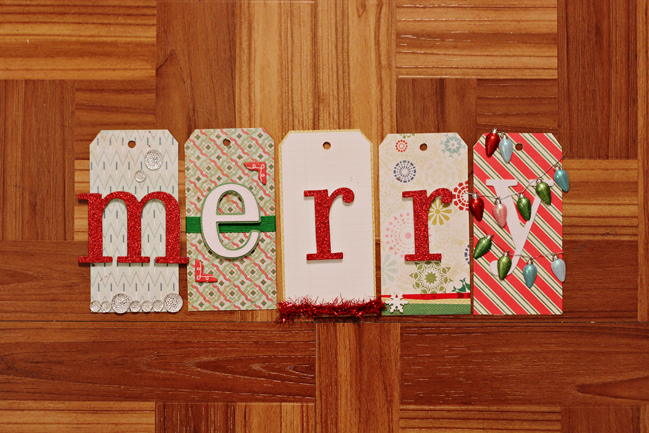
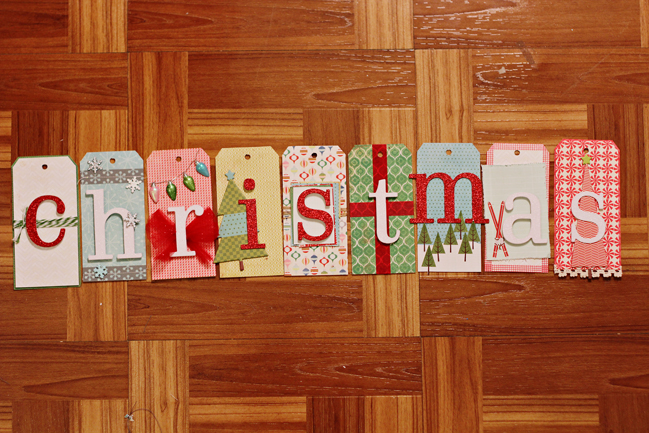
Spell out your holiday message.

how to decorate a window for christmas
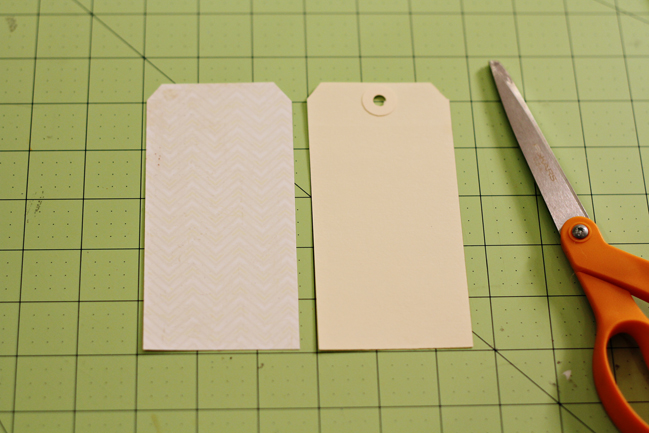
Use your tag as a template to cut out patterned paper the correct size to cover your tag.

how to decorate a window for christmas
Cut out your patterned paper.

how to decorate a window for christmas
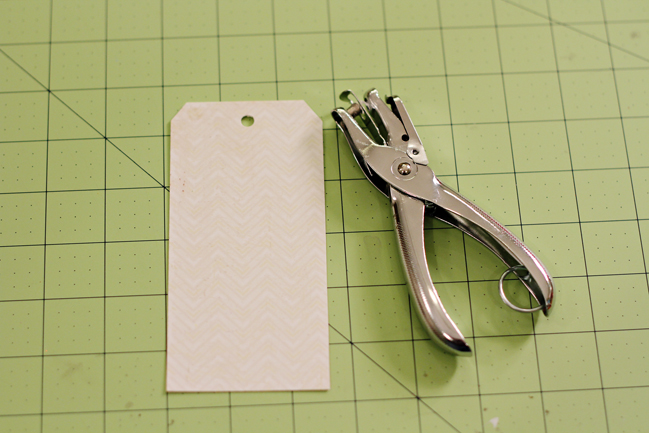
Cover your tag and punch a hole.

how to decorate a window for christmas
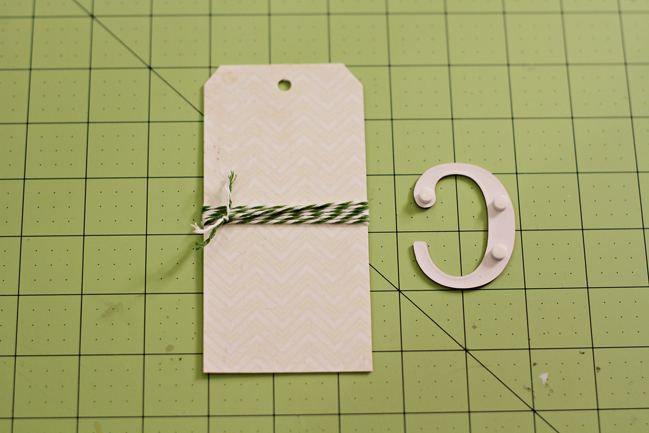
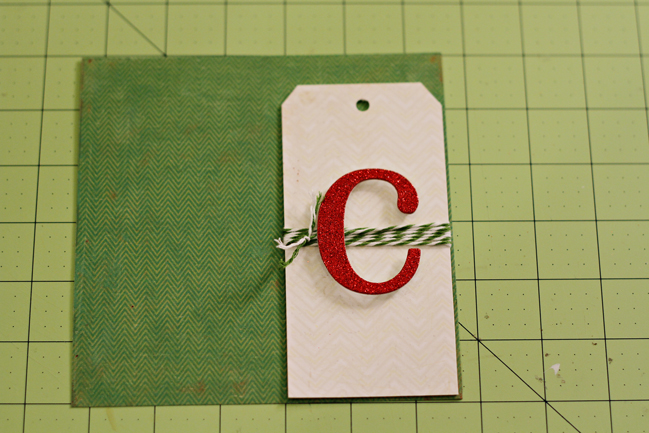
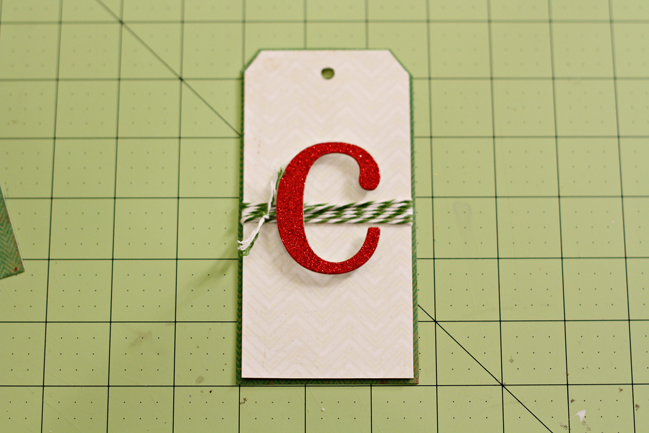
Here is the fun part. Decorate your tag. Add the first letter using pop dots. Have fun!!

how to decorate a window for christmas
Add a bit of darker patterned paper for some depth.

how to decorate a window for christmas
Step back and be happy with your small creation. And move on to the next one.

how to decorate a window for christmas
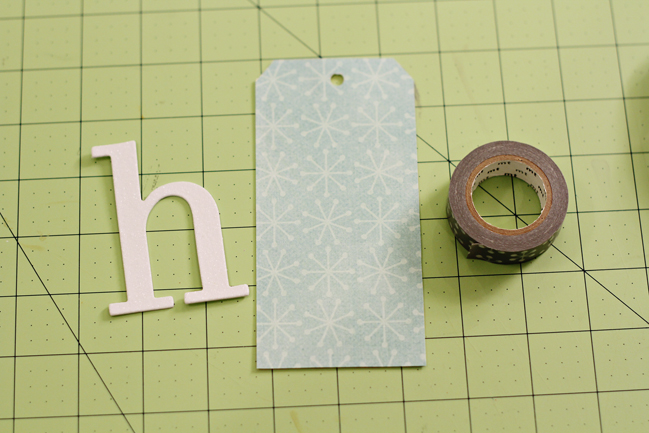
I like my tags all to be different, so here is the next one. Cover with patterned paper and use some washi tape as an accent.

how to decorate a window for christmas
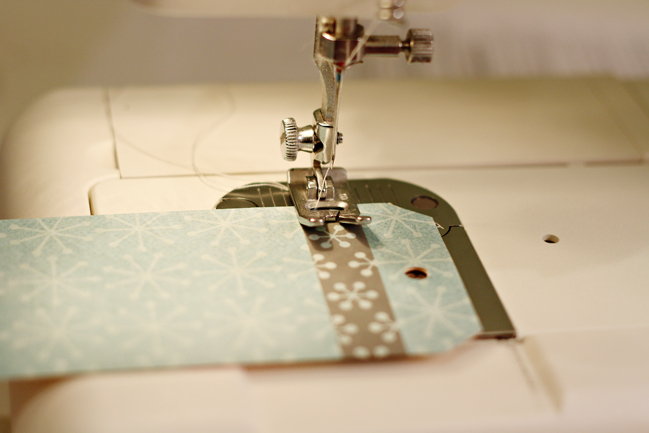
Use a sewing machine to add some stitching.

how to decorate a window for christmas
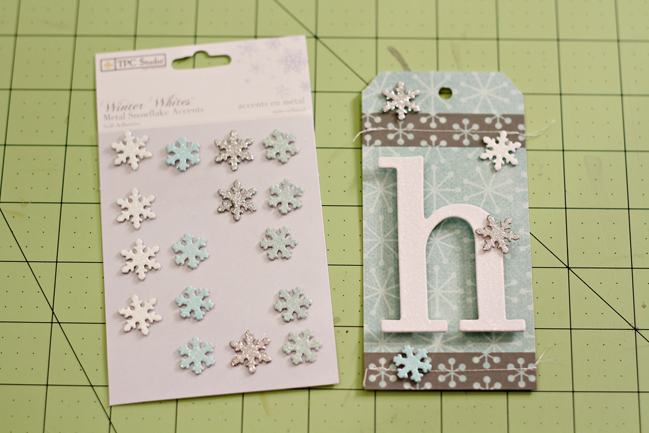
Add some metal snowflakes. (These are just ideas to get you started. Create away! One tag for each letter!)

how to decorate a window for christmas
Here are all of them.

how to decorate a window for christmas
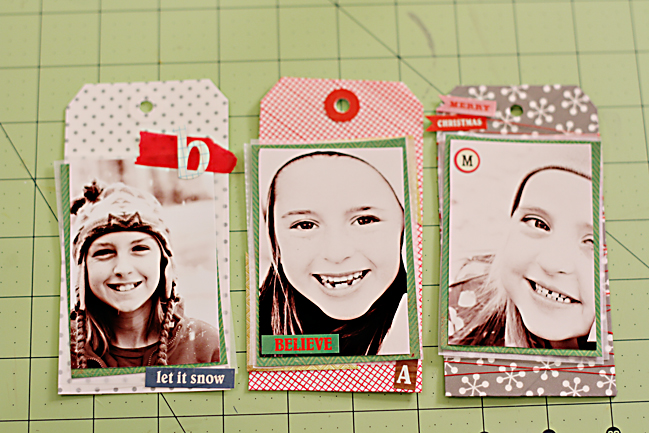
And what would a project using scrapbook paper be without some photos??

how to decorate a window for christmas
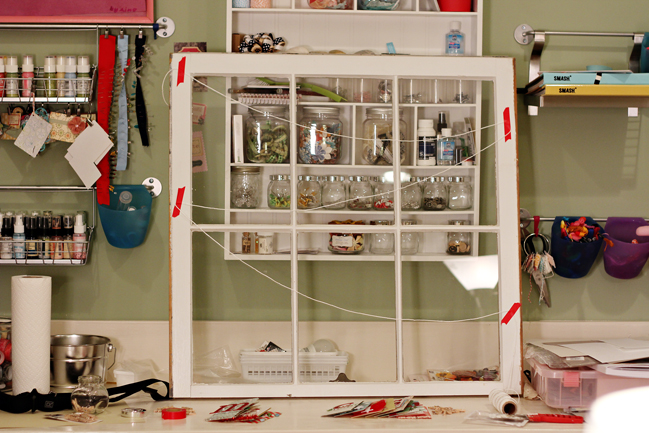
I now prepped my frame. I used my string and some tape to position where I wanted it all to be connected.

how to decorate a window for christmas
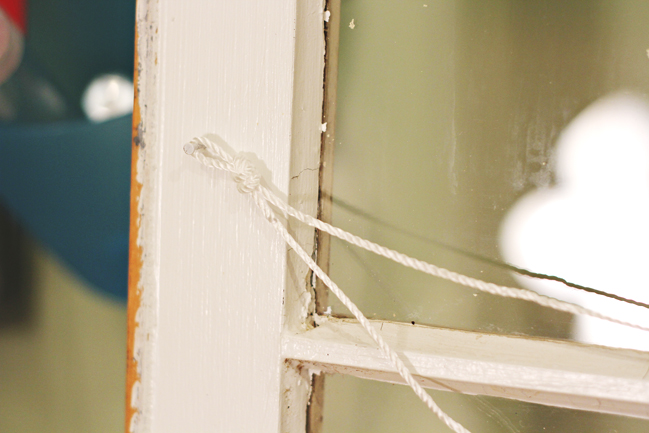
Sweetly ask someone who is good with a hammer to gentle add nails in your marked places and add your string. Knotting the string helps keep your lines in place even when the weight of the layers is different.

how to decorate a window for christmas
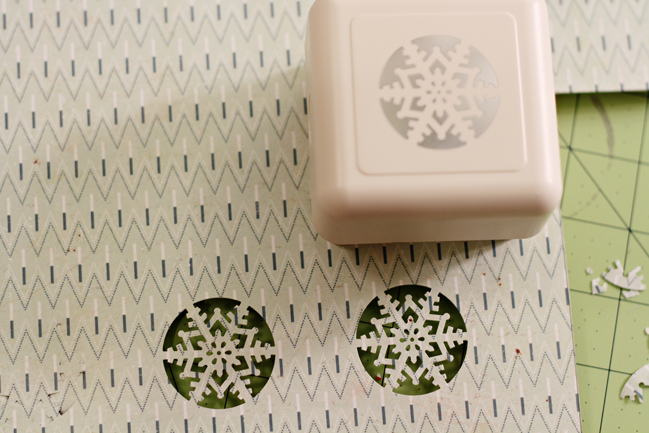
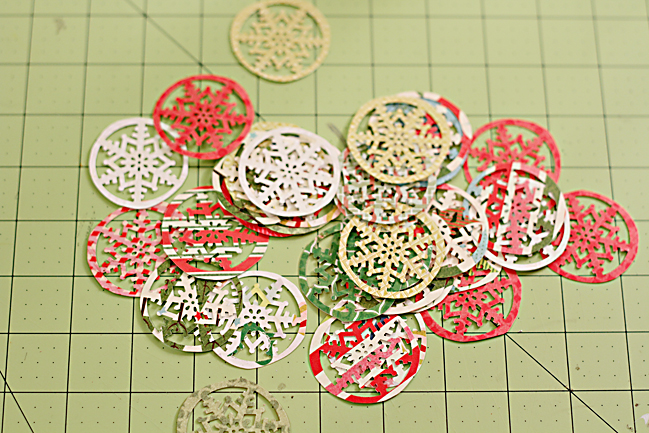
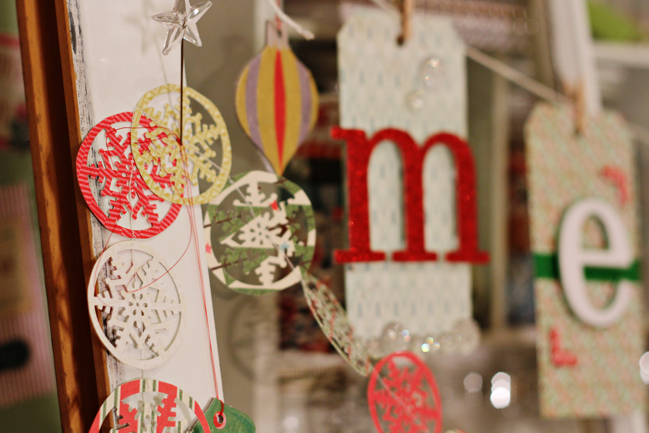
Now to make some snowflake garland. Punch out snowflake circles from various patterned papers.

how to decorate a window for christmas
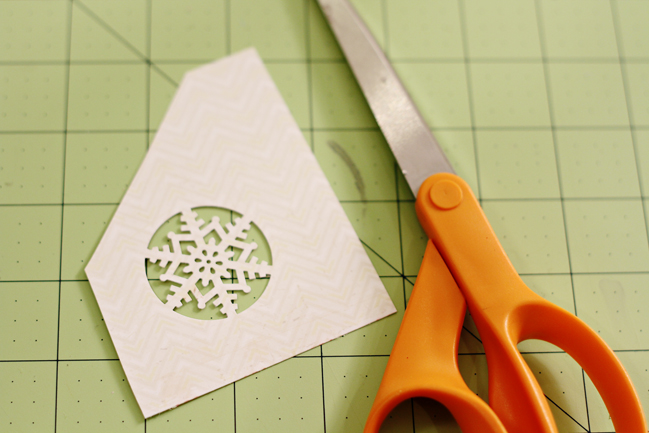
Cut out around your snowflake.

how to decorate a window for christmas
Once you have a bunch of circles, you are ready.

how to decorate a window for christmas
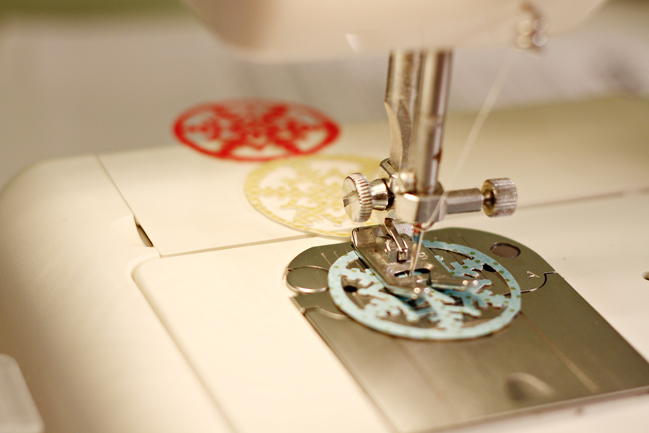
Feed the snowflake circles through your sewing machine one after another.

how to decorate a window for christmas
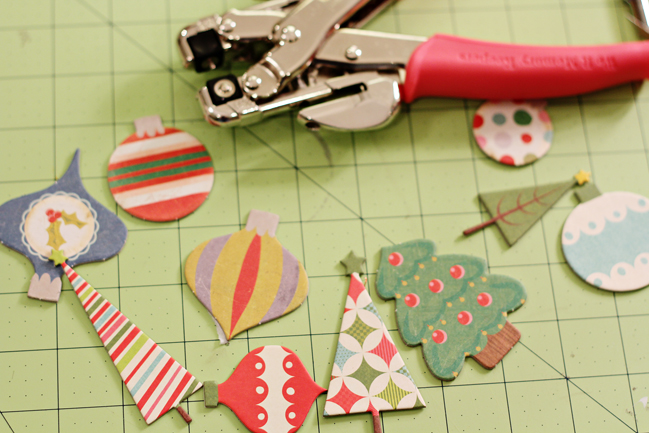
Make ornaments our of the larger chipboard shapes. Leave the backing on the adhesive. Punch holes using a crop-a-dile.

how to decorate a window for christmas
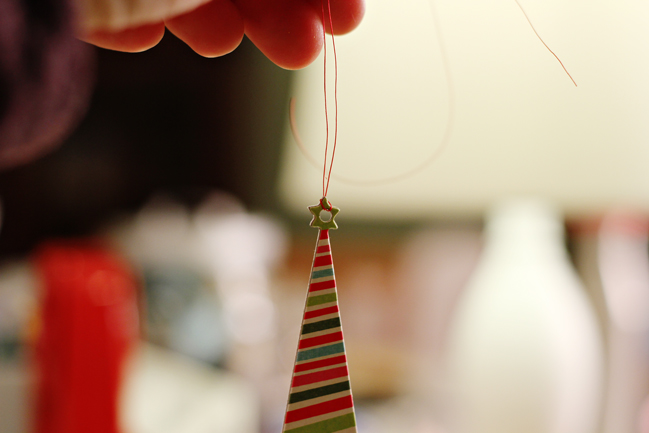
Tie the string.

how to decorate a window for christmas
Now is the fun part. Decorating!!!

how to decorate a window for christmas
Be creative and have a fun time.

how to decorate a window for christmas

Your challenge: Get creative with tags! Big tags, small tags, plain tags, shopping tags…whatever you choose! Make something big, something small. Time to tag it up! Whatever you make, take a picture and upload it to your blog or a scrapbook page gallery. Leave a link to enter. Entries close at the end of Sunday the 20th of November. One lucky entry will be randomly chosen to win a $10 gift certificate to go shopping!


About Corrie…
I am Corrie Jones. I happily design for American Crafts and Sketchy Thursdays. You can find me at my blog, or at American Crafts and Sketchy Thursdays.

3 ways to add pockets to scrapbook pages

pockets for christmas journal pages
3 ways to prepare pockets for scrapbook pages
There is a very simple reason why the Christmas class around here is called Journal your Christmas, and that’s because it is the written element of the process that really makes this project worthwhile, in my opinion. That doesn’t mean you have to write at length (though you can) and it doesn’t mean you have to write by hand (though you can) and it doesn’t mean you have to draft and redraft until it’s perfect (though you can). It’s just the idea of thinking about a certain topic and taking a few moments to compose those thoughts in writing rather than running off, mid-thought, to the next hustle and bustle of the holidays.

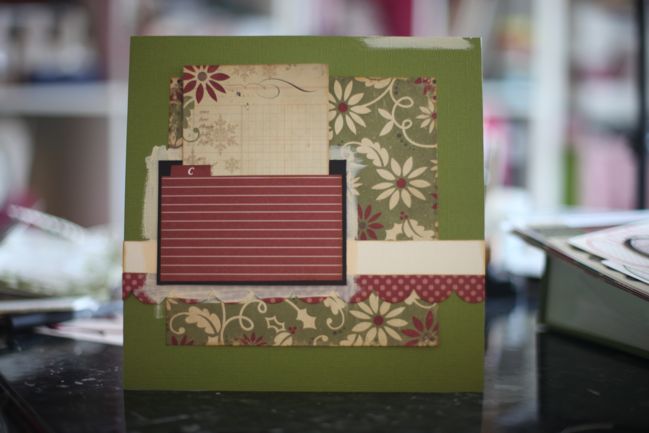
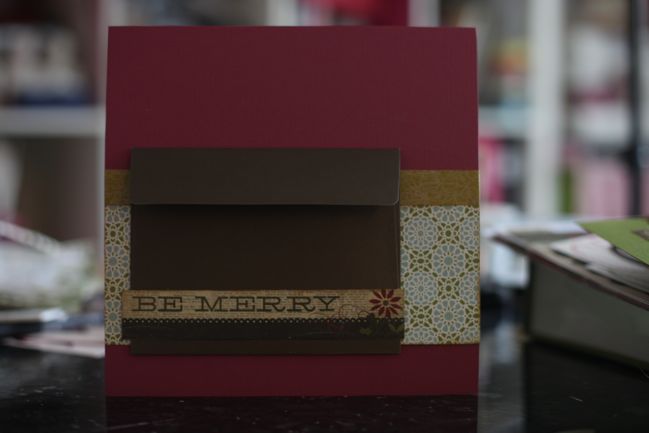
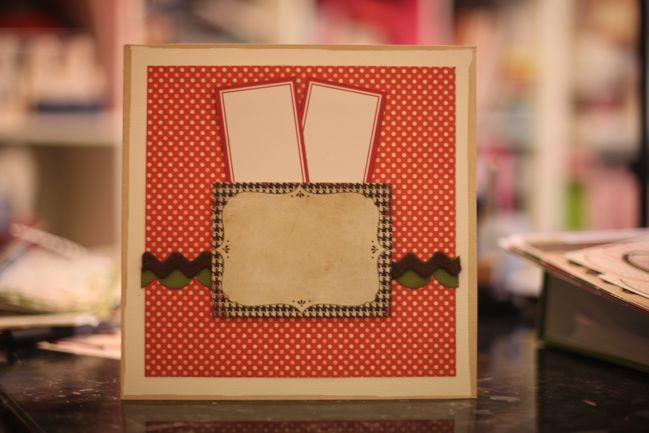
With that in mind, I love to have elements in my journal that encourage me to write a bit more than just what will fit on the front of the page. So pockets are the perfect way to throw that in the mix. About ten of my pages will include pockets of some sort where additional writing (or other papers from the season) can be tucked away for safe keeping. Here are three easy techniques to prepare pocket pages in your Christmas journal!

scrapbook page
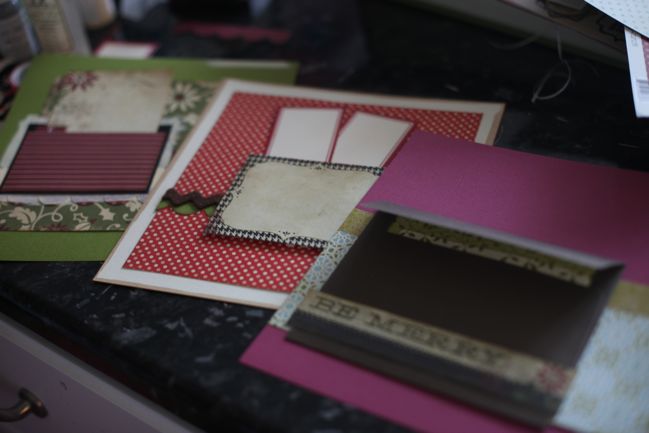
Remember, these are just pages in progress and they will come to life throughout December. (Come to life? Really, Shimelle? It is paper you know. It’s not really going to become animate and walk in and ask for a cup of tea. Which is a good thing really because apparently I am quite terrible at making tea.) So there are no page numbers, titles or other themes yet. At this stage I just prepare a few types of pages that can then be used for any entry in the project. In terms of supplies, almost everything is from this kit I assembled earlier. Plus my three shades of cardstock (I’ve cut the pages and have a stack of off-cuts to put to use) and a few little extras I’ve mentioned specifically in each example.

Pocket #1 is a die cut journaling card (it’s by Lily Bee and in the kit) adhered on three sides but left open at the top. I’ll probably stitch this to pocket to the page, but I tend to save up my stitching then sew a big stack of pages in one session. I’ve added part of a sheet from the 6×6 Simple Stories paper set (also in the kit) with a ledger design so there is already paper ready and waiting for writing. (By the way, a few people have asked about that 6×6 pad as it’s currently sold out. If you are signed in and click the ‘request and notify me’ link, you’ll get an email as soon as it’s back in stock. I use that button a lot actually, and it’s way easier than constantly looking to see if something is back on the shelf.)

envelope on a scrapbook page
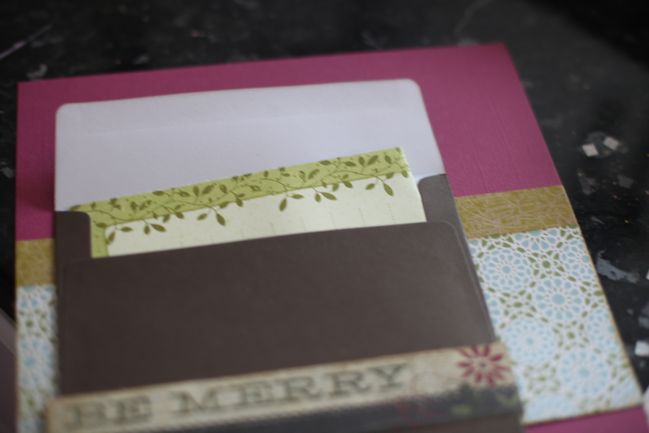
Pocket #2 I’ve used envelopes in every Christmas journal I’ve ever kept and I’m not stopping that tradition now. I use a mix of new envelopes and those that arrive in the post during December when Christmas cards start to arrive – especially if they have nice stamps! I love including our names and address written by our friends and family – there’s something very lovely when you pull a card from the letterbox and know who it’s from just by the handwriting, so I like that I can include that. But this page has a new envelope, ready to go. This was just a spare I had with a set of cardblanks (I always screw up at least one cardblank in the pack!) that I’ve glued to the page and topped with a border strip from the 6×6 paper pad. The patterned paper in the background is from the kit and the green border strip is from a roll of washi tape that I have been using so often lately that I don’t ever remove it from my desk! But that strip doesn’t need to be tape and could easily be replaced with a strip of paper.

envelope on a scrapbook page
As soon as I add an envelope, I add paper too! No excuses not to write that way. I have a giant stack of those journaling notebooks that Making Memories put out with every collection for quite a while, so I’ve pulled all the red, pink, green and cream pages and they are in my use-it-or-lose-it pile this Christmas. Whatever is left over in January will hit my donate box, as I’ve used these a lot over the years and I feel I will fall out of love with them soon. But for now, they are great for places to write!

christmas scrapbook page
Pocket #3 Sometimes it’s nice to have a pocket with some dimension so you can add more than a sheet or two of paper! I started this page with a 7×7 block of patterned paper (from the kit) and punched a border strip of cardstock (from the off-cuts pile) and added a bit of felt trim (this isn’t from the kit – any ribbon or fabric scrap would work or a border sticker). The journaling card in the middle of the page is cut from the 6×6 paper pad (the same as the other pages) and this time the pocket is adhered with foam tape to create the dimension. Use a roll of foam tape or a handful of pop dots to adhere the card on three sides, leaving the top open to hold whatever is needed. I’ve started with two labels cut from a Jenni Bowlin accessory sheet (from the kit) and I’ll probably add some real Christmas paper here too, like a tag from a present or part of a Christmas card.

Your challenge is to prepare a pocket for a Christmas page of your own! If you prefer to scrap some Christmas photos for your 12×12 albums, go for it with a completed page and a pocketful of writing. Or you can prepare pages ready for December! Whatever you make, take a picture and upload it to your blog or a scrapbook page gallery. Leave a link to enter. Entries close at the end of Sunday the 20th of November. One lucky entry will be randomly chosen to win a $10 gift certificate to go shopping!


Christmas Card Tutorial by Pam Brown

christmas card tutorial
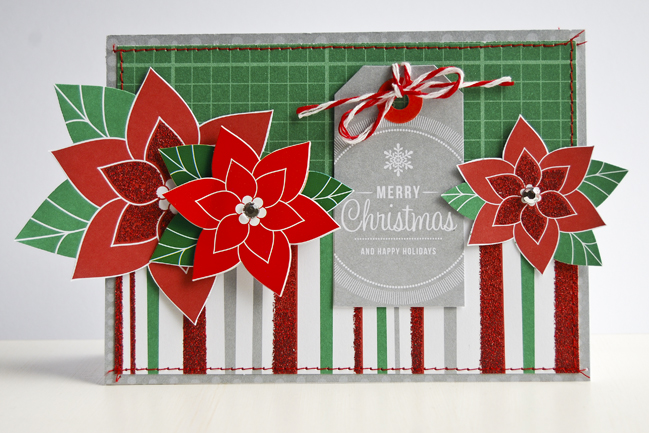
christmas card by pam brown
For our first tutorial today, I’m happy to welcome Pam Brown with a Christmas card project for you! Don’t miss you challenge at the end of this post!

I am pretty much at a loss when it comes to using patterned paper with big, bold prints. The best way for me to tackle them is to use them in small doses, or cut designs from them and use that as an embellishment. Here I cut the poinsettias out from a piece of patterned paper and used them as embellishments for my card.

christmas card tutorial
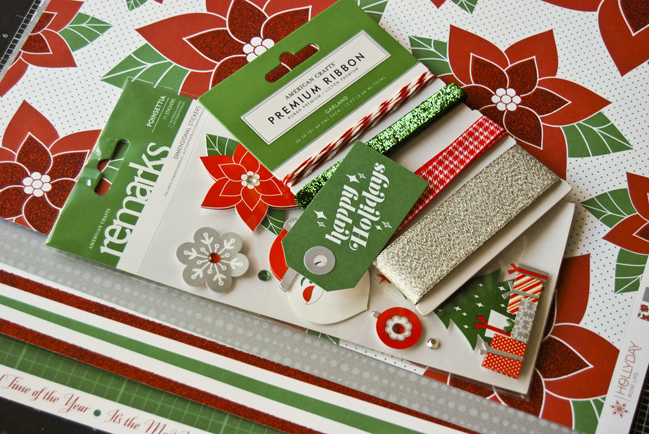
Gather up your supplies. You will need a couple of sheets of patterned paper, make sure one has a floral print, or some kind of large print you can cut out, ribbon, a sentiment tag, and dimensional stickers (or whatever embellishments you would like!).

christmas card tutorial
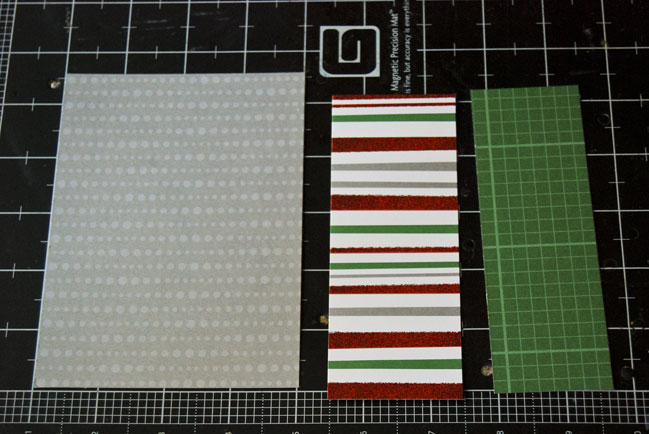
Create a card base measuring 5.5 inches wide and 4 inches high when folded. Trim one piece of patterned paper to measure 5.25 inches wide and 2 inches high, and the other to measure 5.25 inches wide and 1.75 inches high.

christmas card tutorial
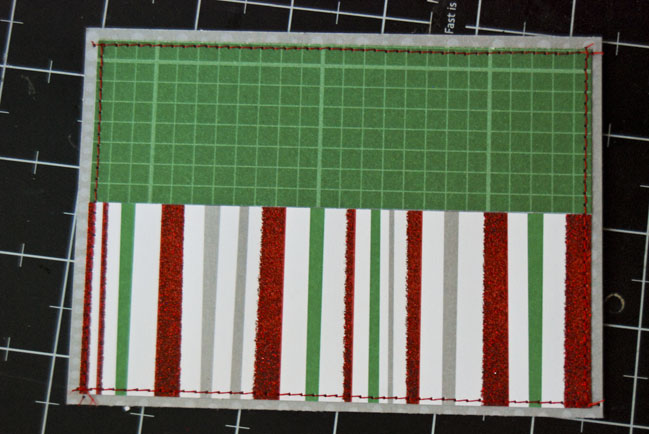
Adhere the strips of patterned paper to card base and stitch around the edges.

christmas card tutorial
Cut 2 poinsettias (or other flowers) from patterned paper.

christmas card tutorial
Add tag slightly off center to the right of the card. Tie ribbon through tag.

christmas card by pam brown
Add poinsettias cut from patterned paper, as well as a dimensional sticker and you are done!

Your challenge: Create a project with a design you have cut from patterned paper – like the poinsettias in Pam’s card. Take a picture and upload it to your blog or an online gallery, and share a link with the button below. Entries close at the end of next Sunday, the 20th of November. One randomly selected entry will win a $10 gift certificate to go shopping for scrapbook stash!


About Pam…
My name is Pam Brown, and I live in Santa Rosa Beach, FL with my 2 kiddos and husband. I started scrapbooking after the birth of my daughter in 2005, and haven’t looked back since! I feel so lucky to design for American Crafts, Ormolu, and My Scrapbook Nook kits. I also enjoy photography, sewing, cooking, baking, and running. Please visit me at my blog and follow me on Pinterest.