

pretty paper. true stories. {and scrapbooking classes with cupcakes.}

lovely to meet you Twitter Facebook Pinterest YouTube

Take a Scrapbooking Class

online scrapbooking classes

Shop Shimelle Products

scrapbook.com simon says stamp shimelle scrapbooking products @ amazon.com shimelle scrapbooking products @ amazon.co.uk

Reading Material

travel

Five Ways to Scrapbook What they Say by Sian Fair
Five Ways to Scrapbook What they Say by Sian Fair @ shimelle.com

Hello there. Yes, you’d be right: I do have a notebook in my hand. You won’t have known me for long before you realise that I’m a good listener – and that’s because I like to record what people say. Funny, sharp, profound or though provoking, if I like it enough to write it down, then I try to scrapbook it too. And I enjoy the challenge of finding different ways to pin down a word or two. These are my current favourites.
Five Ways to Scrapbook What they Say by Sian Fair @ shimelle.com

Go Stamp
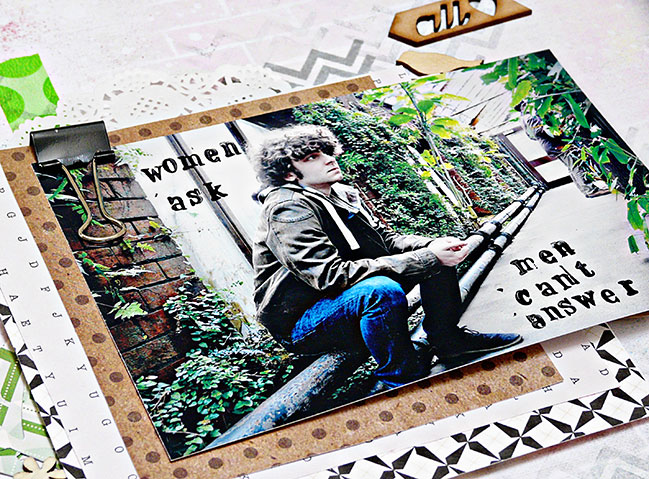
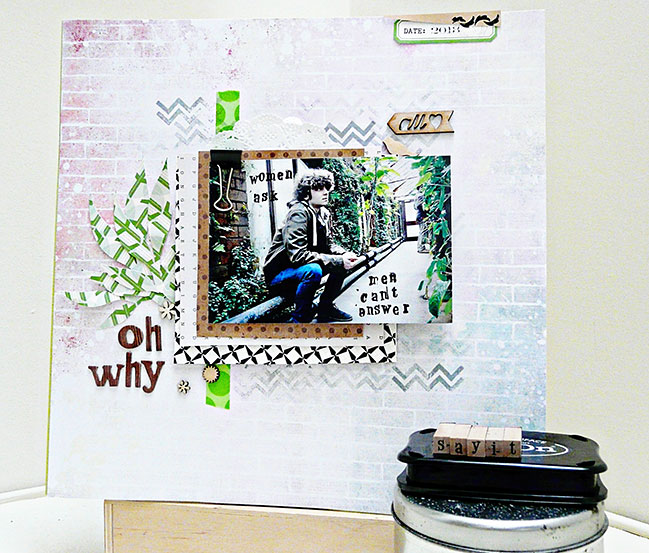
I stamp directly onto my photo. For this to work you need a picture with plenty of negative space – a wall or some sky is good – and Staz On ink so your stamping doesn’t smudge. You can create a mood for your quote depending on the style of font you choose: this is a little stamp set from the local discount store. When I’m stamping a whole sentence or more, I line up the letters and stamp a word at a time. The quicker you work the easier it is not to make a mistake – try it, you don’t have time to think about it! I’ve made a layout here, but this idea would also make a great addition to Project Life pages.
Five Ways to Scrapbook What They Say by Sian Fair @ shimelle.com

Go Ahead
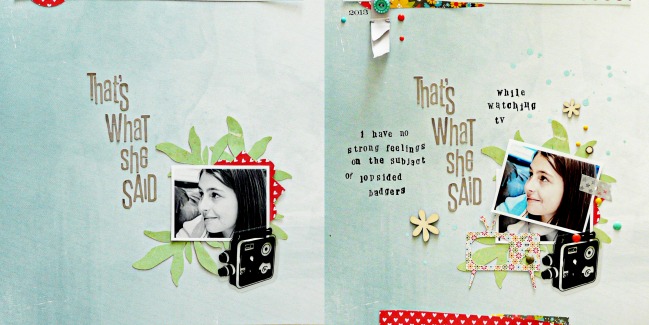
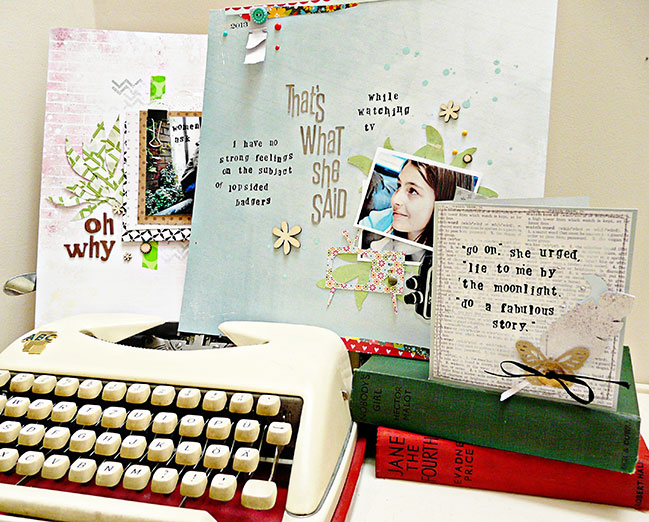
Prepare your page ahead of time. See the layout on the left of my pairing? I could have added anything at all she said to it. It’s a blank canvas page and I’ve started making up a couple of these when I don’t have anything else I want to scrapbook. I keep it simple with embellishments I can add to when I add the words. The completed version with a stamped on quote is on the right. I’m thinking I could turn this idea into a mini album, with lots of pages prepared in advance.
Five Ways to Scrapbook What They Say by Sian Fair @ shimelle.com

Go Small
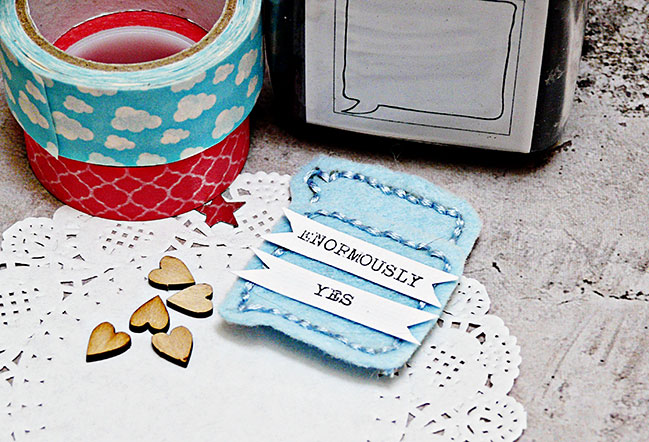
These are speech bubble embellishments. I stamped onto felt, stitched over the stamping line with six strands of embroidery floss and cut it out. ‘Enormously yes’ is what my nephew says when he is absolutely agreeing with me, so to record it I typed up a couple of word strips to add to my bubble.
Five Ways to Scrapbook What They Say by Sian Fair @ shimelle.com

Go Large
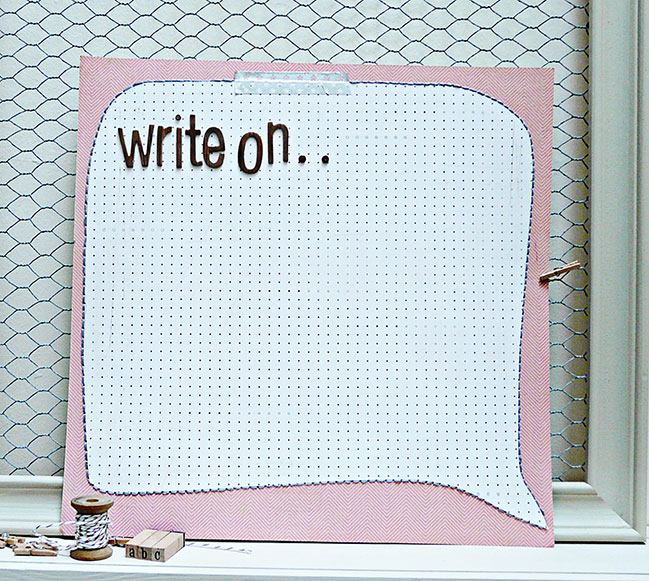
This is another speech bubble – large this time – I’ve prepared, ready for just the right words. I drew it onto dotted patterned paper – graph or ledger would be good too: something you’re going to want to fill in – stuck it onto the red for a brightly coloured contrasts and stitched round the edge. Use it like a notebook page to record what your family says: it doesn’t even need a photo because the big bubble tells everyone what’s important about this page.
Five Ways to Scrapbook What They Say by Sian Fair @ shimelle.com

Go Send a Card
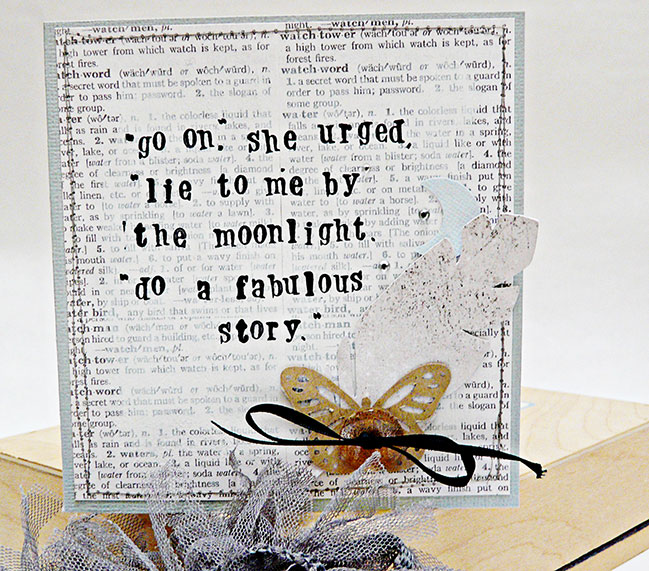
I don’t just note down things my family say. Sometimes I’ll see a great quote I’d like to remember too and it can be a nice idea to pass it on as a stamped greeting on the front of a card. Here I have used some words from F. Scott Fitzgerald, stamped onto a background patterned paper I had prepared with a light dry brushing of white paint. It’s also fun to give someone a card stamped with one of their own quotes. Give them their words back… or keep them to yourself to bring out and enjoy some rainy day in the future.
Five Ways to Scrapbook What They Say by Sian Fair @ shimelle.com

Go on: I bet if you ask around someone will remind you of the time you said… what? write it down! and then scrapbook it.


Sian Fair has been making stuff since she first discovered how to hold a pair of scissors. When she isn’t scrapbooking, she loves to stitch or knit and she’s happiest when she can do more than one of her favourite hobbies at a time: that’s a lot of sewing on paper, then she lives with her family in a very tall house in the city. Her crafting space is on the fourth floor and that’s why she blogs From High in the Sky. Sian currently contributes to Scrap 365 and Jot magazine and is a member of the Get It Scrapped Creative Team for 2013.

Gardeners' Digest Scrapbooking Blog Hop (October 2013)

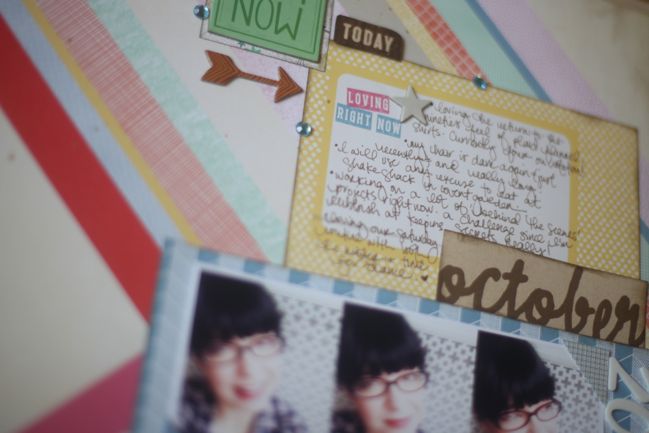
scrapbook page by shimelle laine @ shimelle.com
On the twenty-second of every month, the Garden Girls from Two Peas in a Bucket check in with a blog hop showcasing our projects, what’s inspiring us, and our favourite products of the month. Welcome to the October edition of Gardeners’ Digest!


Since we last caught up, Glitter Girl has been on four new adventures, covering ‘Right Now’ pages for scrapping yourself, childhood pages for photos that don’t necessarily have direct memories that come to mind, a return to creating clustered embellishments, and some ideas for black and white photos. You can watch those four adventures (and more) through the playlist above, and find all her adventures here at Two Peas in a Bucket.


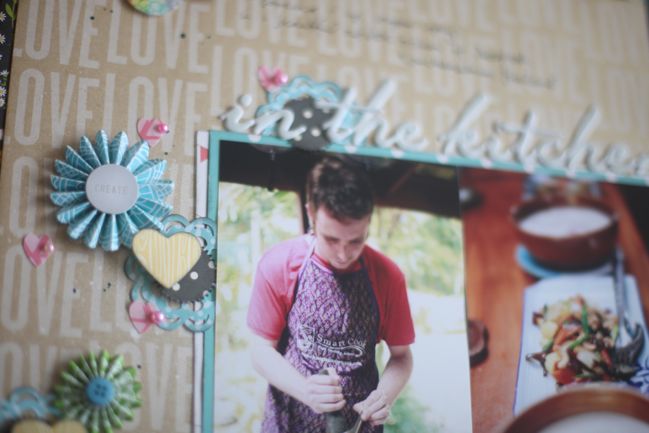
This project from Corrie Jones is one of my favourites in recent weeks. So pretty – and I’ve definitely inspired to try more with frames, especially with lighter colours, and maybe with a black and white photo too. Corrie’s work is always such a beautiful mix of creative freedom and great design.

scrapbook page by shimelle laine @ shimelle.com
In terms of products, I’d be silly to not say my own is one of my picks this month, right? If you haven’t signed up already, Glitter Girl’s Scrapbooking Survival Guide is ready for you to join in any time you want. It’s a new self-paced workshop with ten videos and five PDF chapters. There’s also a slightly different product in the shop from Glitter Girl: her guide to Stretching your Stash. This was offered as a bonus for earlybirds who signed up for the Survival Guide by the 2nd of October (if that’s you, you can access it under the workshops tab any time!) but it’s also available as a separate purchase any time for $10. Glitter Girl’s Guide to Stretching your Stash is all video – it’s over ninety minutes of video, in fact!

And for paper products, my desk has been covered in the latest Amy Tangerine collection for at least the last ten days. It’s lovely – I always love Amy’s autumn colour schemes the best, and I love it on its own or mixed with the older collections. You can find that here.

So… it would be lovely to hear from YOU! Who or what in this wide world is inspiring your creativity right now? Share with us in the comments, then your next stop on the hop is Michelle DeLeon, with beautiful paper goodness to share with you! Have a lovely day, wherever you may be.

Gardeners' Digest :: Scrapbooking News from the Garden Girls
Gardeners’ Digest is a monthly update from the Garden Girls, the design team at Two Peas in a Bucket. To keep up with the Garden Girls throughout the month, check out the garden gallery any time!

How to Hide a Story in Plain Sight:: A Scrapbook Tutorial by Kirsty Smith

How to Hide a Story in Plain Sight:: A Scrapbook Tutorial by Kirsty Smith @ shimelle.com

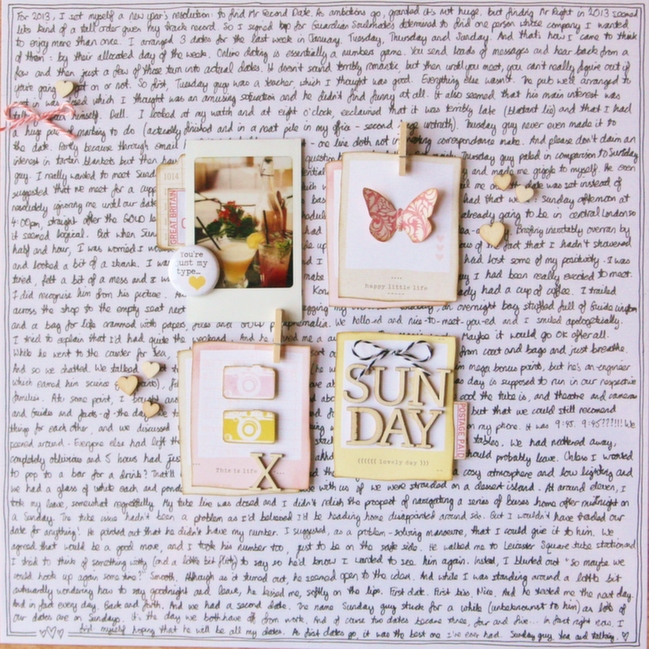
Lately I have really been admiring the sheets of patterned paper that are covered in beautiful handwriting and text. They look elegant and make lovely backgrounds. The only downside is that the words aren’t my own. So I set out to put together a page that both features text as a design element and tells a story that is meaningful to me.

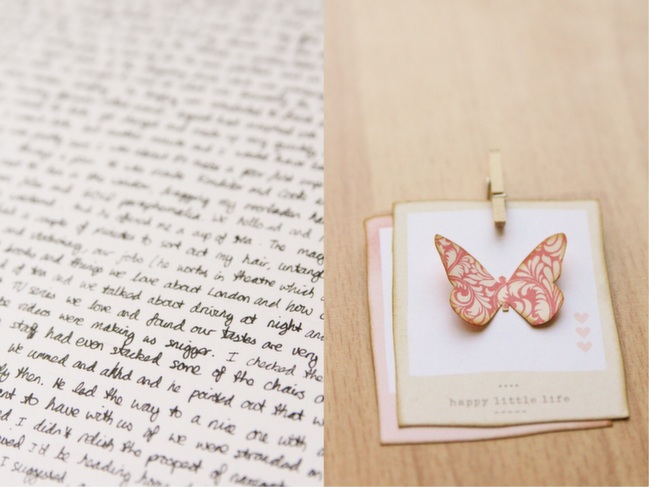
The design concept is simple; to fill a 12×12 sheet of white cardstock with writing. This can seem an intimidating, daunting task, but don’t be put off! First of all, you could always type out your words in a favourite font, or copy passages from a favourite book if you prefer. That way, the words can still be personal to you, but you don’t have to sit down and write an epic novel!

How to Hide a Story in Plain Sight:: A Scrapbook Tutorial by Kirsty Smith @ shimelle.com

However, I did decide to take the hand-written approach as I had a very special memory to record; it seemed appropriate for the page as I didn’t really have any pictures to go with my tale, and making the text the focus of the page really draws attention to the words.
With your story selected, get writing, get typing…whatever you choose, keep going until the page is filled. A border around the edge of the cardstock is a nice way to draw the design together and if you’re anything like me, a few pencil guidelines will help keep handwriting in straight(ish) lines.

How to Hide in Plain Sight:: A Scrapbook Tutorial by Kirsty Smith @ shimelle.com

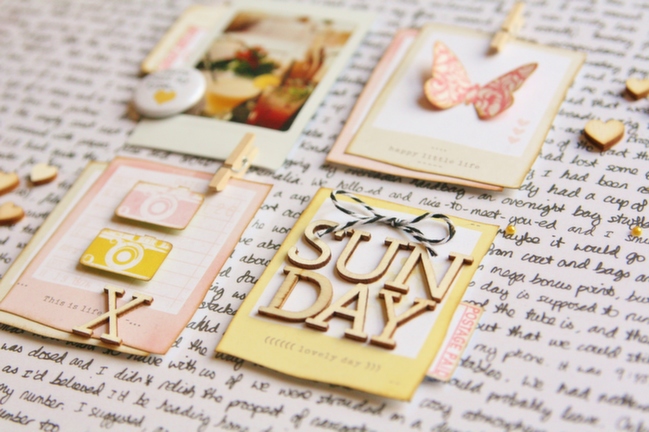
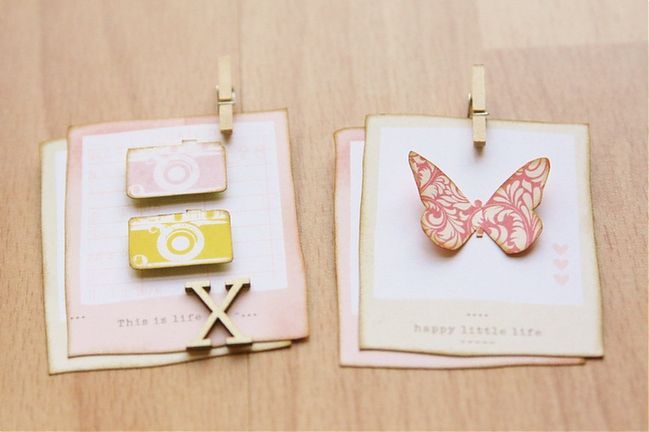
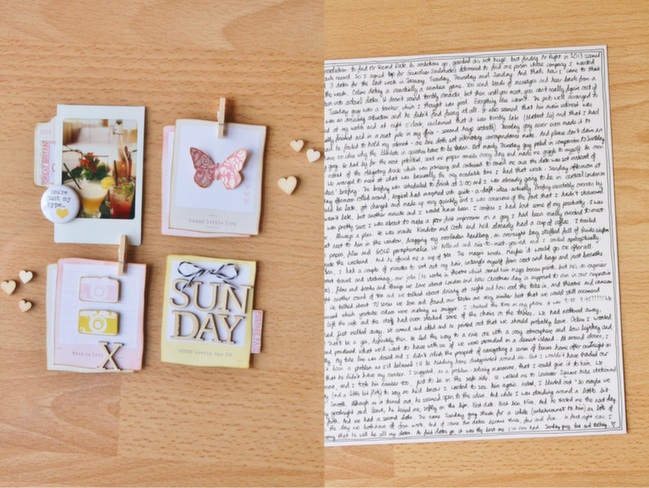
With the background complete, it’s time to think about the rest of the page. Text as a background can be very striking, especially if you’ve gone for black ink on white paper as I did. So I kept the colour palette simple with pastel yellows, pinks and greys. The design is a classic 2×2 grid comprising a title block, a photograph and two embellishment blocks. Repeating the Polaroid-style element makes the design cohesive and the formality of the grid is softened by little details such as miniature wooden clothes pegs and layers created with tabs, twine and die cut shapes.

How to Hide in Plain Sight:: A Scrapbook Tutorial by Kirsty Smith @ shimelle.com

The trick with this design lies in a sheet of 12×12 clear acetate. I adhered each element of the grid design to the acetate and embellished with a few wood veneer hearts. To complete the page, I simply placed the acetate over the top of the handwritten background. The page can then be slipped into a page protector.

How to Hide in Plain Sight:: A Scrapbook Tutorial by Kirsty Smith @ shimelle.com

This layout can play two roles in your album. At first glance, the casual reader sees a pretty design mounted over a page of text. However, someone who looks further will be able to slide away the foreground and read the full story that lies beneath, suddenly revealing something very significant.
I hope you’ll try making your own text backgrounds, whether you use a few sentences in large, loopy letters, or pack a page with close-knit phrases, you can fade a lot of story into the background, but still have the memory recorded forever.


Kirsty is a maths teacher living in North London and she loves to scrapbook and drink tea. If you enjoyed this tutorial, you can see more of Kirsty’s projects on her blog Journal of Curious Things and if you’re so inclined, send her an email to journalofcuriousthings@gmail.com. Who doesn’t love getting mail?

Creative Movie Maker Blog Hop

scrapbook page by shimelle laine @ shimelle.com
Today I’m very happy to be joining in with the Creative Movie Maker Blog Hop, brought to you by Echo Park and Carta Bella paper companies. Echo Park and Carta Bella are sister companies that release paper collections throughout the year, and they sent a few scrapbooking video makers one of their latest collections so we could give it a try, and also so we could all share a video with you today.

For my project, I used the Hello Again collection from Carta Bella, and set myself two challenges: create a page on a white background instead of my usual habit of patterned paper, and think of travelling light when it comes to supplies. I created my page in my usual space, but it’s been about six months since I went away to scrapbook and I’m thinking I need a day scrapping with friends soon, and that requires getting in the mindset of packing light!

scrapbook page by shimelle laine @ shimelle.com
Does adding a patterned border around the edge of the white cardstock count for that first challenge of mine? And as far as the packing goes, I would have needed to pack a sheet of white cardstock, the 12×12 and 6×6 Hello Again paper packs (or have decided at home which 12×12 sheet I would use and just pack that one piece of paper plus the sticker sheet), two bottles of mist, one pack of stamps plus ink pad, block, and ink applicator for edges, one pack of Thickers, two rolls of tape, a sheet of enamel dots, and my usual to-go tool kit of scissors, adhesive roller, pop dots, black pen, and cloth for cleaning up ink. I don’t usually take a paper trimmer to scrap elsewhere. Would that all qualify as travelling lightly? I’m not sure when you consider I used all that for just one page, but if I knew I had a few pages worth of photos that would work well with just those supplies, then I think it certainly makes the jump to being quite useful for scrapping elsewhere! If I’m going to spend the day cropping somewhere, I do tend to carry more than this, but as I don’t take a car I am usually limited to one bag and it’s always surprising just how quickly it’s filled!


Now! The movie! Youtube is giving me minor fits today, but it looks like it should be ready to view shortly, fingers crossed! This is the perfect time to jump through the hop and take a look at the projects and videos posted, and by the time you make it back here, hopefully this notice will be replaced with the live video! I’m happy to report YouTube and I are finally back on speaking terms! Well, mostly. It has still decided to display ads on this video for the music, except I bought a license to play that particular jingle, so this is new! Please click the ad away and I’m working on getting rid of it for good.

I hope you find a few new channels you like, and please do subscribe to the YouTube channels of any of the participants that you enjoy! Take a visit to Jen Gallacher, Celine Navarro, Lilith Eeckels, Janna Werner, Marcy Penner, Wilna Furstenberg, and Laura Craigie. Laura’s post will bring you back to here!

Many thanks to Echo Park and Carta Bella paper for this opportunity, and may YouTube smile on me in the next few minutes!

Five Ideas Using Product Packaging by Adrienne Alvis

Five Ideas Using Product Packaging by Adrienne Alvis @ shimelle.com

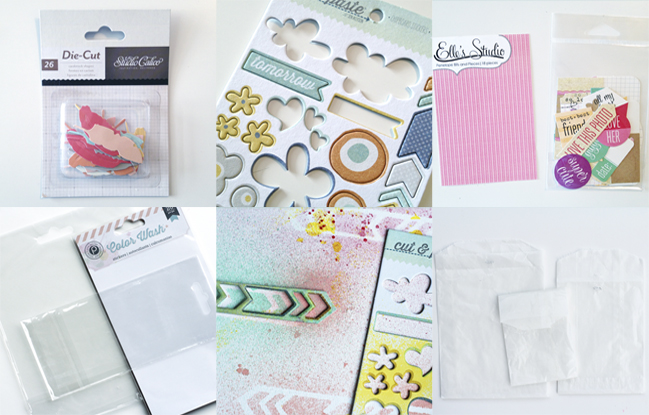
The trash can in my craft room is always the first one in the house to fill up. I try to do a good job of saving leftover scrap pieces of card stock and patterned paper for other uses, but lately I’ve noticed that most of the contents in my trash can is the packaging that comes from the crafting products I use. I’m here today to show you five ways to recycle leftover product packaging on your projects because helping to reduce waste is always a good thing.

Five Ideas Using Product Packaging by Adrienne Alvis @ shimelle.com

Cards
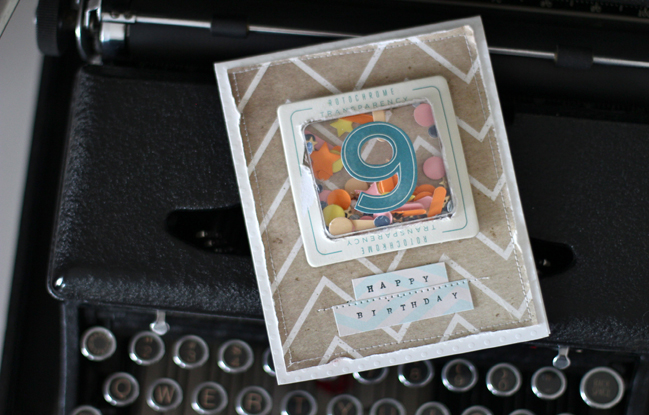
I created a shaker style birthday card using the leftover plastic ‘window’ piece from some packaging that contained various embellishments. I carefully removed the plastic window, placed confetti inside, and adhered the piece to the front of my card. I placed a frame over the plastic window to hide the edges and added a die cut number to the front of the window finish it off.

Five Ideas Using Product Packaging by Adrienne Alvis @ shimelle.com

Journaling and Filler Cards
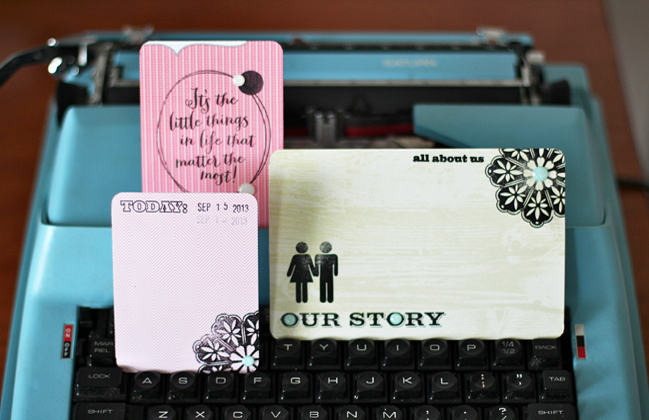
Most companies coordinate their packaging with their collections so I love to utilize the paper that comes inside of the clear plastic bags that usually contain non-bulky items such as tags, acrylic stamps, die cuts, etc. The manufacturer’s information is almost always at the top or bottom, but can be easily cut off to create 3×4 and 4×6 sized journaling and filler cards which are perfect for PL style memory keeping. I cut these cards to size, stamped a few images onto each of them, and used some enamel dots for added embellishment.

Five Ideas Using Product Packaging by Adrienne Alvis @ shimelle.com

Masks
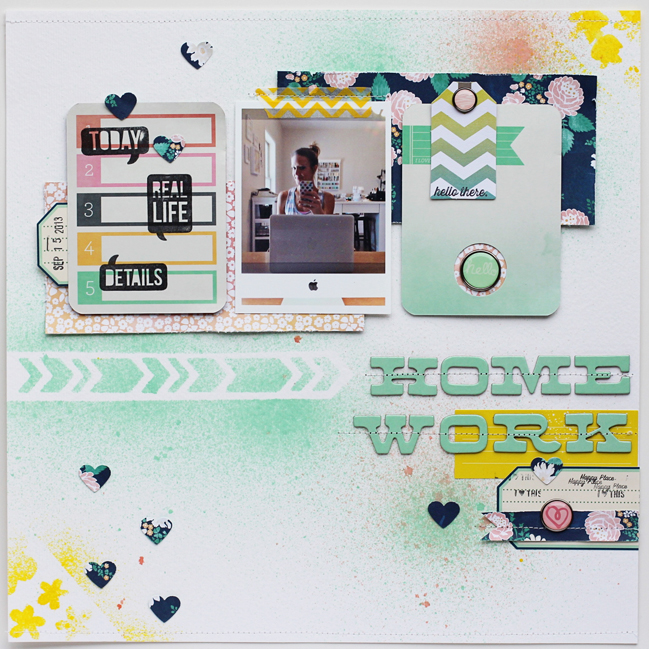
After I pop out chipboard letters or pieces from their packaging, I love to use the ‘negative’ part as a mask. I cut out the portion of the image that I want to use, position it on my layout where I want it, and then spray ink or watercolors over it to create the image like I did in my ‘Home Work’ layout above. The misted chevron arrow mask helped direct attention to my title and gave my layout a trendy mixed media look.

Five Ideas Using Product Packaging by Adrienne Alvis @ shimelle.com

Layers and Embellishments
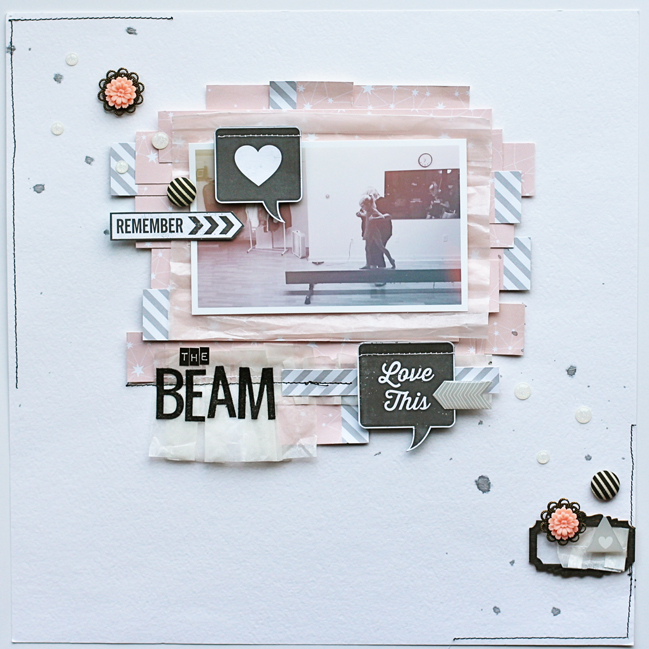
I have quite the stash of empty vellum envelopes and bags that were once used to house sequins, wood veneer pieces, and kit contents. In my layout, ‘The Beam’, I used scissors to cut the side and bottom of a vellum bag apart. Then I scrunched it up a bit to give it some texture before layering it behind my photo. I used another vellum bag that I had cut apart and ran it through my sewing machine to make the ruffle embellishment behind my title. I really like the texture and whimsical effect the vellum gives my layout.

Five Ideas Using Product Packaging by Adrienne Alvis @ shimelle.com

Mini Album
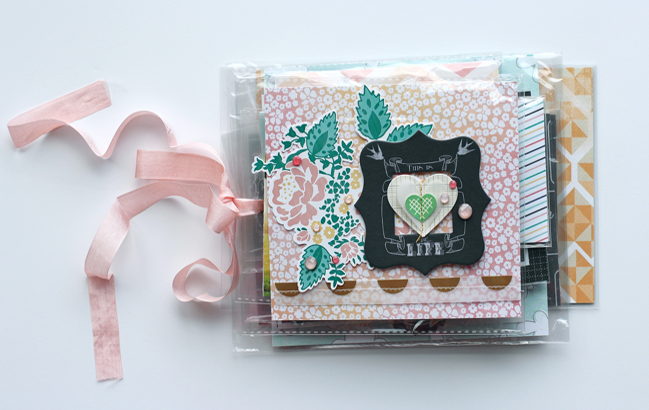
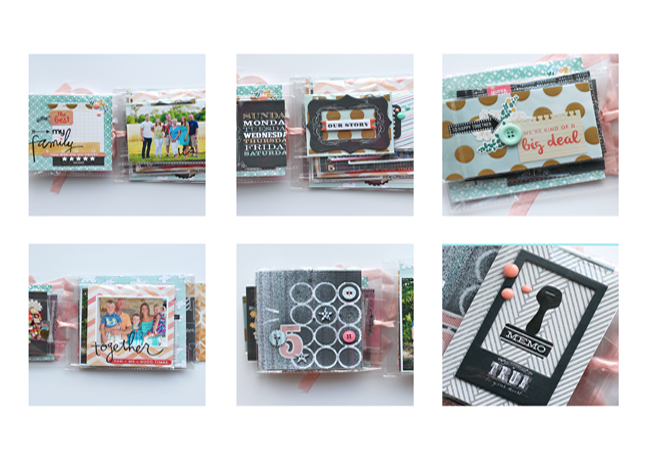
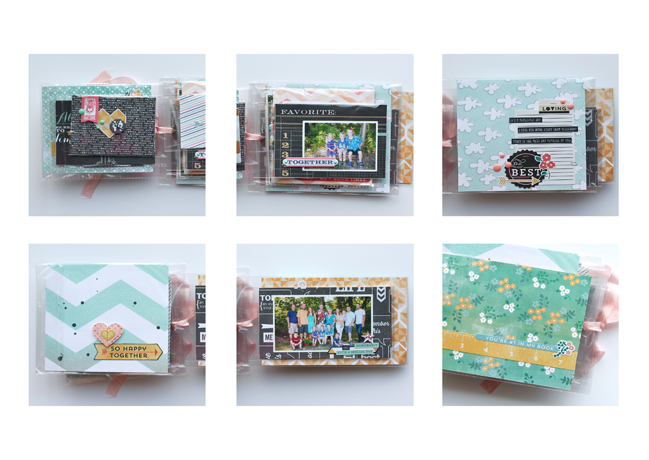
After I’ve used up a product that comes in those self-adhering plastic sleeves, I save them to use as pages for mini albums. I just slip my photos and embellished pages inside of the sleeves and run a piece of ribbon or twine through the existing holes in the packaging to bind all of the sleeves together. And since the sleeves have a sticky strip of adhesive on them, no machine sewing or stitching is required to hold the photos and pages inside.

Five Ideas Using Product Packaging by Adrienne Alvis @ shimelle.com

Five Ideas Using Product Packaging by Adrienne Alvis @ shimelle.com

I hope I’ve inspired you to recycle some of you leftover product packaging on your next project. Having less waste is obviously great for the environment and you might be surprised at what you can create with something you would’ve otherwise thrown in the trash.


Adrienne Alvis is a stay-at-home mother of three from Illinois and has been married to her husband for almost eight years. She started scrapbooking in 2006 after her second son was born and was hooked instantly! She designs for Freckled Fawn, Gossamer Blue, Scrapbook Circle, Chic Tags, and is the creative team coordinator at Come On Get Crafty. You can see more of her work on her blog and find her on Instagram @adriennealvis.

Marbled Fall Leaves Using Distress Stains:: A Scrapbook Tutorial By Kim Watson

Marbled Fall Leaves Using Distress Stains:: A Scrapbook Tutorial by Kim Watson @ shimelle.com

I love discovering new techniques by messing around with different mediums. The one I am going to share today is a blend of x2 of my fave supplies at the moment & once we are done will be perfect for your next fall inspired page.
Let’s get started!

Marbled Fall Leaves Using Distress Stains:: A Scrapbook Tutorial by Kim Watson @ shimelle.com

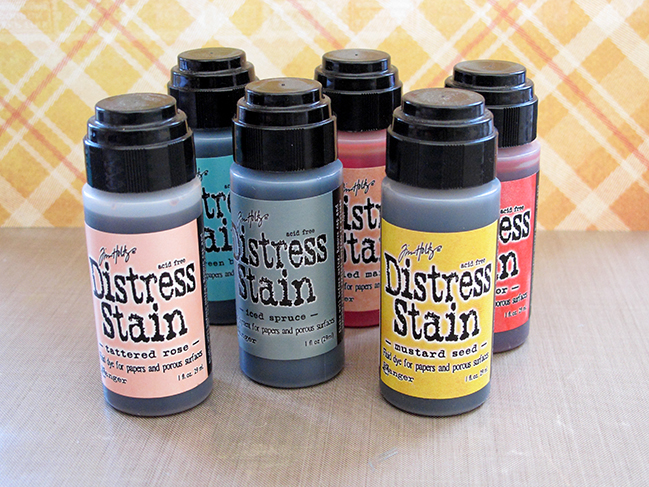
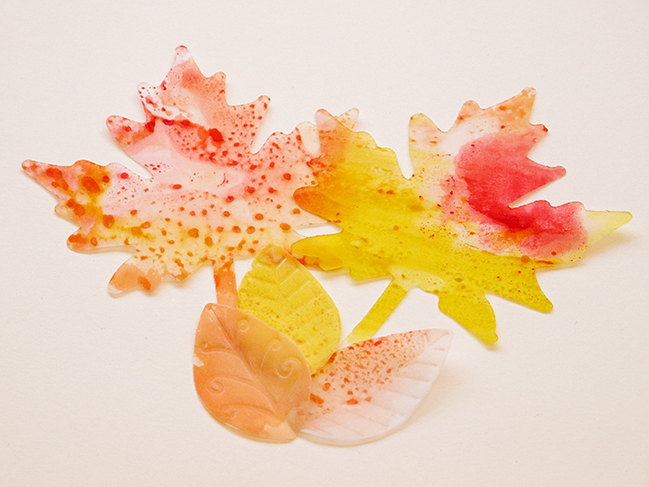
Select a bunch of stain colors that when blended make pleasing new colors. eg: yellow + red = orange.

Marbled Fall Leaves Using Distress Stains:: A Scrapbook Tutorial by Kim Watson @ shimelle.com

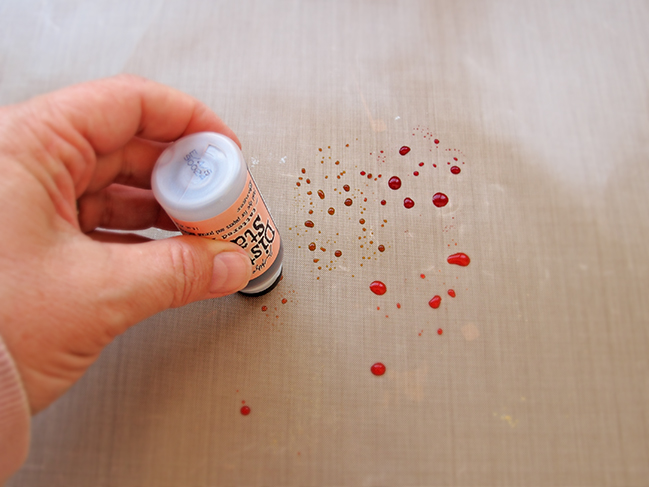
Daube stains colors close together, directly onto your craft sheet.

Marbled Fall Leaves Using Distress Stains:: A Scrapbook Tutorial by Kim Watson @ shimelle.com

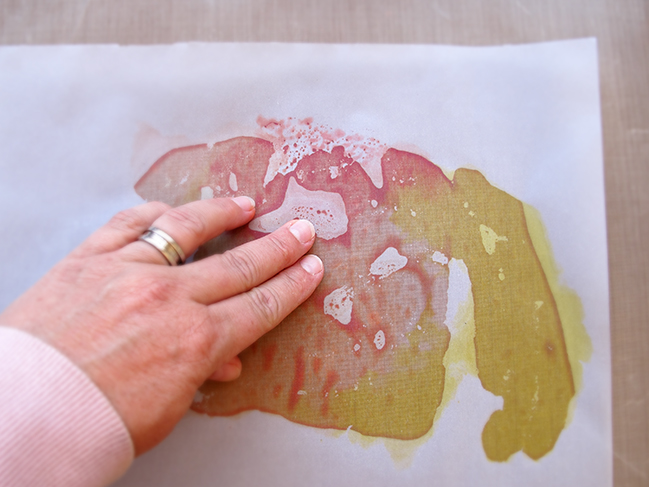
Lay a piece of plain vellum on top of the stain puddles & press down rubbing gently to blend.

Marbled Fall Leaves Using Distress Stains:: A Scrapbook Tutorial by Kim Watson @ shimelle.com

Marbled Fall Leaves Using Distress Stains:: A Scrapbook Tutorial by Kim Watson @ shimelle.com

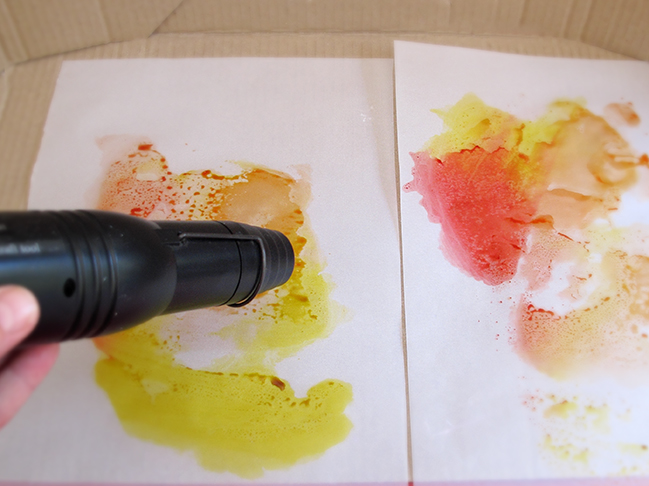
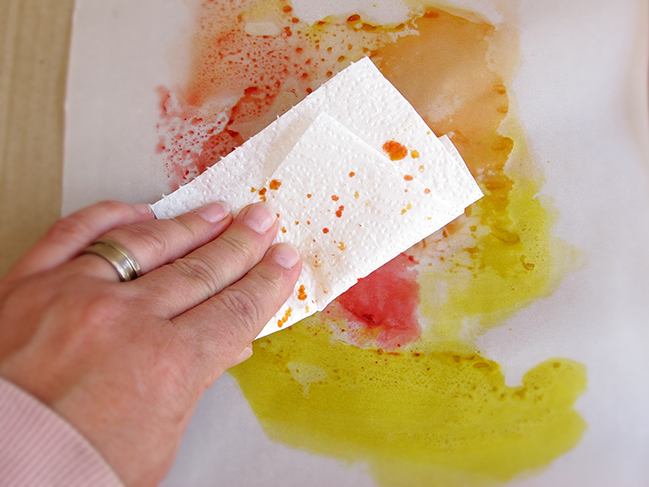
Daube surface of vellum with paper towel to absorb any remaining wet spots. Turn the inked vellum over & dry with a heat gun.

Marbled Fall Leaves Using Distress Stains:: A Scrapbook Tutorial by Kim Watson @ shimelle.com

Marbled Fall Leaves Using Distress Stains:: A Scrapbook Tutorial by Kim Watson @ shimelle.com

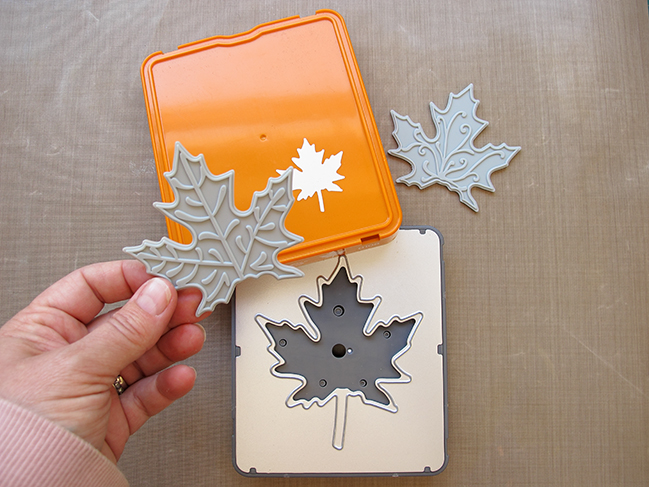
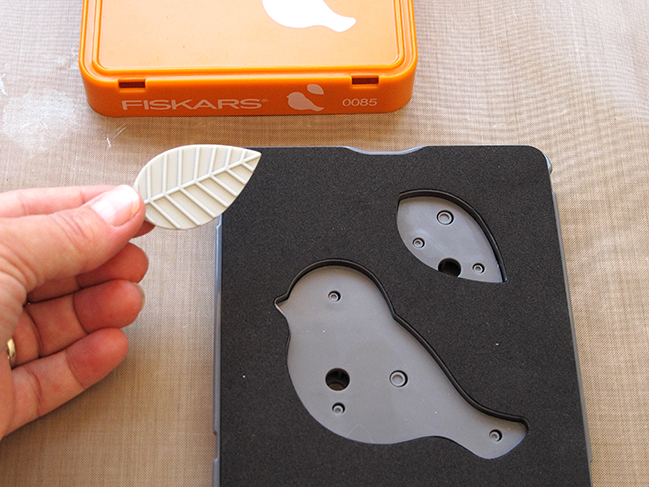
Mixing up your leaf shape dies, will create some great interest on your page.

Marbled Fall Leaves Using Distress Stains:: A Scrapbook Tutorial by Kim Watson @ shimelle.com

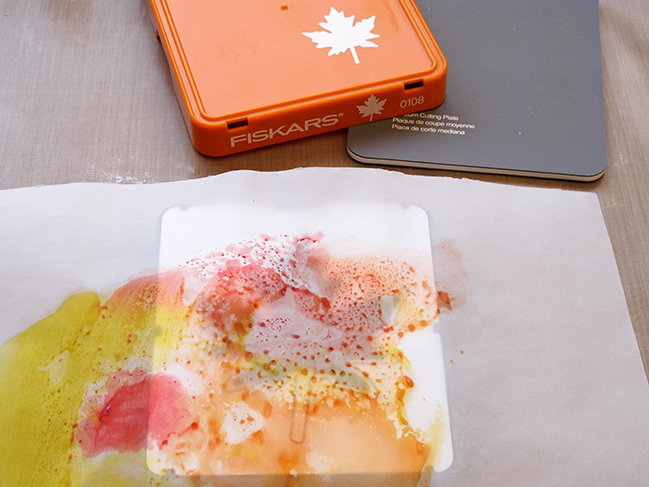
Position the entire piece of your marbled paper over the die to make the most of every scrap of paper.

Marbled Fall Leaves Using Distress Stains:: A Scrapbook Tutorial by Kim watson @ shimelle.com

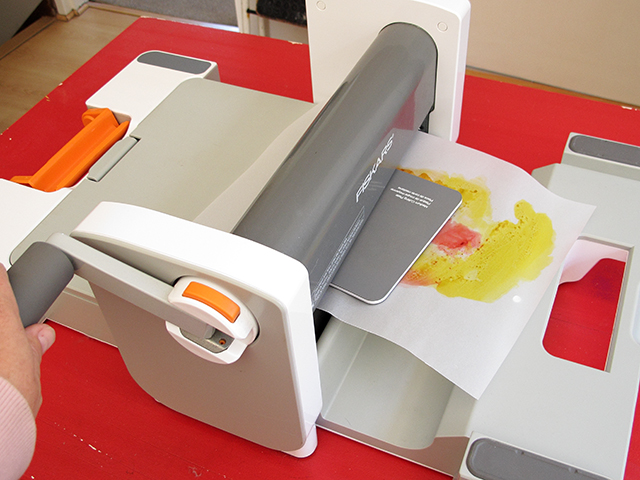
Run through the die cutter/ embossing machine.

Marbled Fall Leaves Using Distress Stains:: A Scrapbook Tutorial by Kim Watson @ shimelle.com

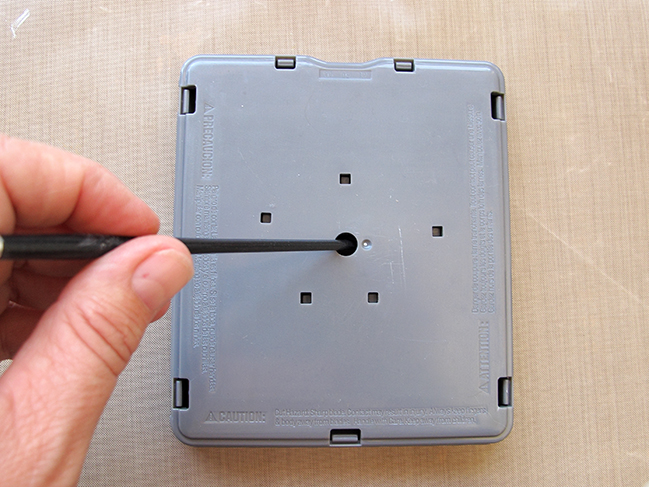
Use the back of a paint brush to pop the shape out, remembering not to puncture the vellum.

Marbled Fall Leaves Using Distress Stains:: A Scrapbook Tutorial by Kim Watson @ shimelle.com

Your beautiful fall leaves are ready to grace your next crafty project.

Marbled Fall Leaves Using Distress Stains:: A Scrapbook Tutorial by Kim Watson @ shimelle.com

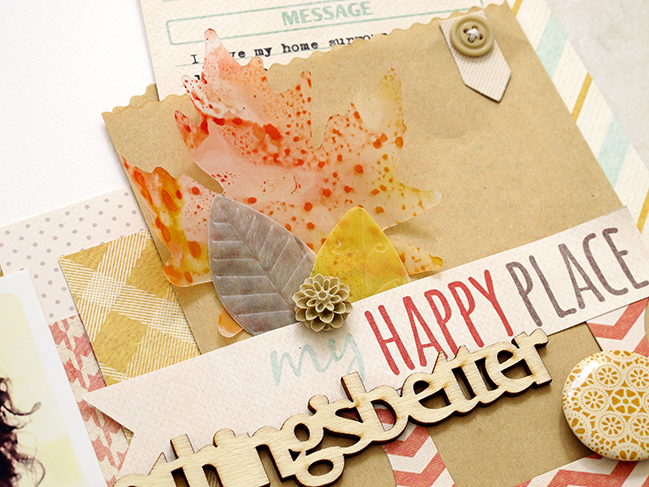
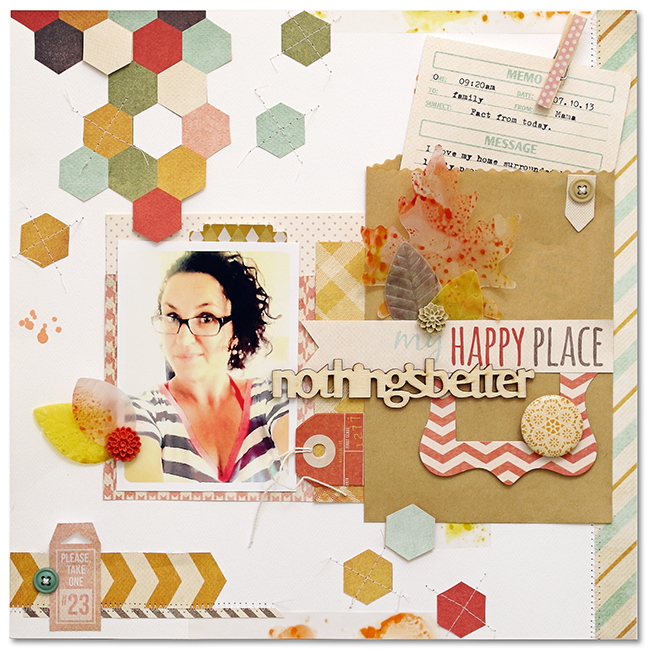
This is my completed page. I love how the subtle texturing of the leave clusters compliment the beautiful fall inspired patterned papers, craft bag and wooden sentiment.

BONUS IDEA:

Blended Chalk Inks To Create a Quick Ombre Effect

Blended Chalk Inks to Create a Quick Ombre Effect by Kim Watson @ shimelle.com

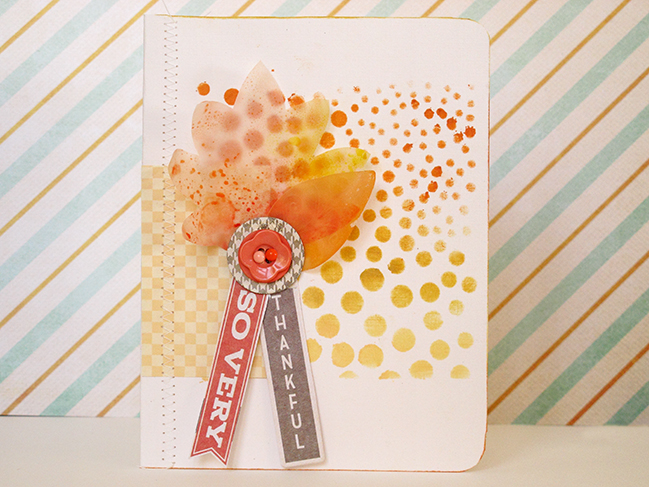
I had extra leaves left over, so thought a fall themed card might be cool to make

Blended Chalk Inks to Create a Quick Ombre Effect @ shimelle.com

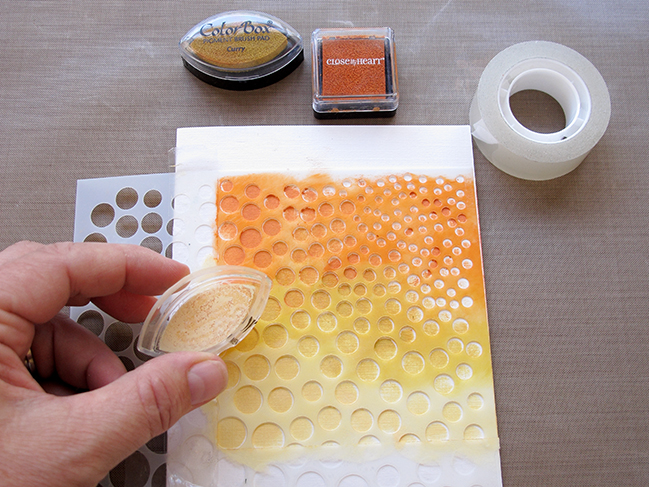
To create my cool ombre background, you’ll need to mask off a section of your stencil using sellotape to fit your base card. Starting with orange ink blend, adding the lighter yellow shades as you work down the stencil.

Blended Chalk Inks to Create a Quick Ombre Effect @ shimelle.com

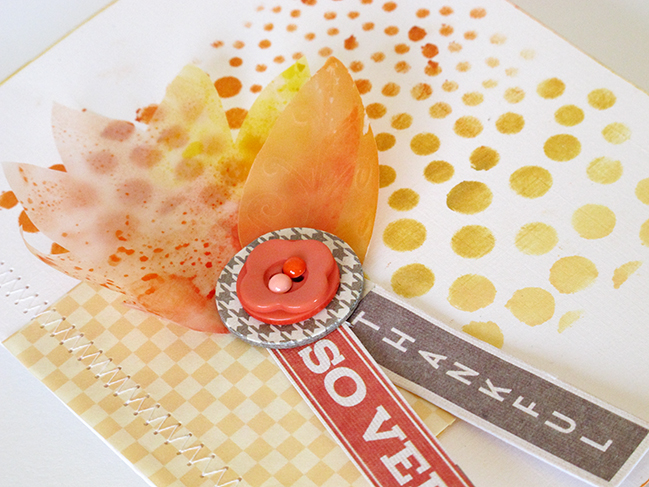
This is the completed card using my left over marbled leaves, clustered to make a focal point on the card.

Thanks for joining me today! I have enjoyed sharing these techniques with you, I hope you found them helpful. If you try them for yourself, link up a comment in comments section of this post & I’ll be sure to pop on over and leave you some crafty love!

Happy day friends!


Kim Watson is a papercrafter, graphic designer & writer from Cape Town, South Africa. She feels blessed to be able to do her hobby as a job, designing for Creating Keepsakes magazine Dream Team member, as well as designing for Fancy pants Designs for the last 4 years. You can find Kim on Pinterest, Facebook, Twitter or her blog and gallery. Check her out!

Five Ideas for 6x6 Paper Pads by Gretchen Mcelveen

Five Ideas for 6x6 Paper Pads by Gretchen Mcelveen @ shimelle.com

Hi there! As a cardmaker in addition to being a scrapbooker, I end up with a lot of half-used 6×6 paper pads. I love the 6×6 pads for my cards, but I can only make so many cards with one pad before I am ready to use something different! Lately I have been trying to figure out how to use the 6×6 pads more in my scrapbooking so they don’t go to waste. No pretty paper should go unused! I have come up with a few ways to scrapbook with 6×6 pads and I am going to share them with you today.

Five Ideas for 6x6 Paper Pads by Gretchen Mcelveen @ shimelle.com

Use Them as Photo Mats for your Instagram Photos
6×6 paper pads make perfect photo mats for your square Instagram photos. I used the entire 6×6 sheet to mat the photo on this layout. However if you want less mat, just crop the 6×6 sheet to 5×5 or even 4 ½ x 4 ½!

Five Ideas for 6x6 Paper Pads by Gretchen Mcelveen @ shimelle.com

Punch Stuff out of Them!
No need to waste a whole 12×12 sheet of paper when you want to punch out a couple of things. Use the 6×6 sheets instead!

Five Ideas for 6x6 Paper Pads by Gretchen Mcelveen @ shimelle.com

Layer Them to Create a Background for a Layout
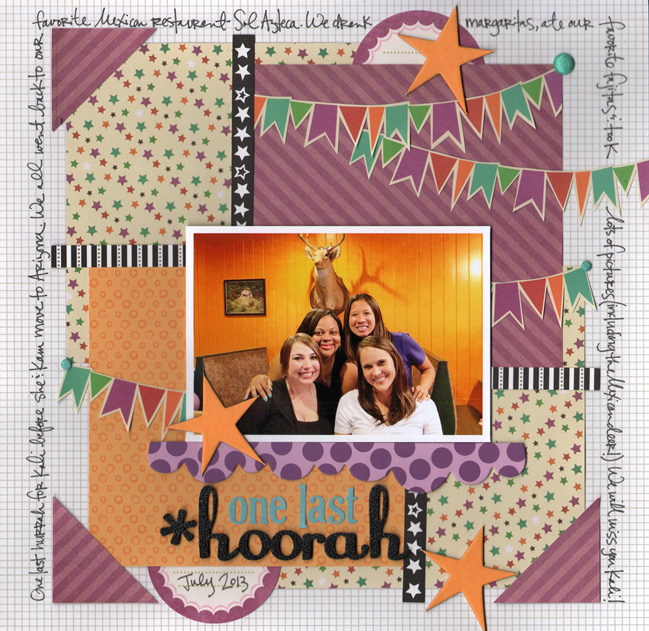
Combine a couple or several different 6×6 sheets to make the background for your scrapbook page. One fun thing about 6×6 pads is that all the papers usually coordinate. That makes it easy to use a few different sheets together on a page! On this page I used 4 6×6 sheets: 2 sheets of the starry paper, 1 purple sheet, and 1 orange sheet.
tip: I used another 6×6 sheet of the purple paper to make the photo corners here. I just cut 3 of the corners off the 6×6 sheet and had 3 easy photo corners to add to the page. Just another way to not have to waste a 12×12 sheet!

Five Ideas for 6x6 Paper Pads by Gretchen Mcelveen @ shimelle.com

Cut Them Up to Use on your Project Life Pages
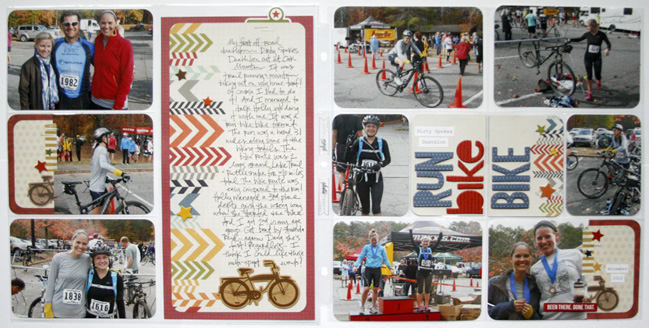
Once again, no need to waste a whole 12×12 sheet of paper when you have a 6×6 pad! Use the 6×6 sheets as photo mats, journaling blocks, and fillers for the pockets in your Project Life pages.
??Confession:? I don’t really do Project Life. BUT I do like to throw a Project Life-style page into my albums every now and then. It really adds some fun contrast between the regular 12×12 pages.

Five Ideas for 6x6 Paper Pads by Gretchen Mcelveen @ shimelle.com

Use them for Mini Albums!
6×6 sheets are great for mini-albums! Even if your mini album is not 6×6, these sheets are a great size to use. No need to be cutting up those 12×12 sheets! And with all the coordinating papers in a 6×6 pad, you may only need 1 pad to complete an entire mini album.
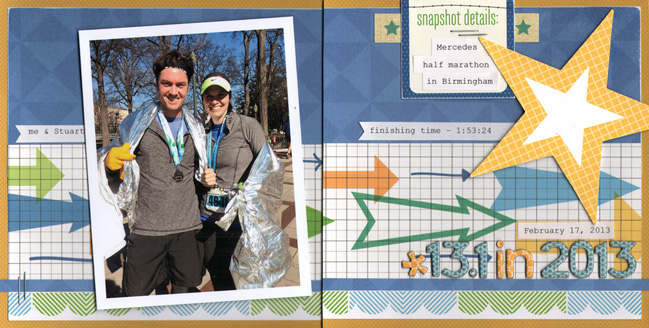
I have made a 6×6 2-ring mini-album to keep track of some races that I have run. It is very easy to use 6×6 sheets as the background for each of the pages in the album.

Thanks for stopping by today! Hopefully this gave you some fun ideas and inspired you to use those 6×6 paper pads in your scrapbooking!


Gretchen is a physical therapist by day and a scrapbooker by night! She started scrapbooking 10 years ago after she got married and had all those wedding pictures to scrap. She and her husband do not have children (yet); but between friends, pets, family members, hobbies, and travelling adventures she still has plenty to scrap! Gretchen was a Creating Keepsakes Dream Team member this year and she currently designs for KI Memories/Hampton Art and Noel Mignon kit club. You can keep up with her and see more of her work on her “blog”:www.gretchenmac.blogspot.com.

Five Ideas How to Use Project Life Cards by Wendy Antenucci

Five Ideas how to use Project life cards by Wendy Antenucci @ shimelle.com

I have shied away from Project Life for years, I tried in 2008 for about a week and that was it. I just wasn’t cut out for documenting my everyday, but the products kept getting prettier and prettier and I really had to have some of them. So, here are some ideas on how to use those gorgeous cards even if you don’t have a life!

Five Ideas how to use project life cards by Wendy Antenucci @ shimelle.com

Journaling on your Scrap Pages
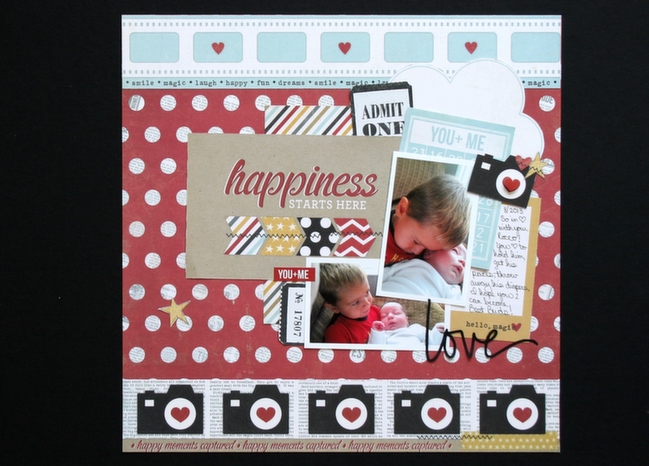
The PL cards that are out there might be made for pocket scrapbooking, but they are wonderful to use to journal on your pages. In this layout, Happiness starts here, I used the Simple Stories cards as both a journaling spot and as my title. I even cut the cloud out of one of the 4 × 6 PL cards.

Five Ideas how to use project life cards by Wendy Antenucci @ shimelle.com

Papers on a Scrap Page
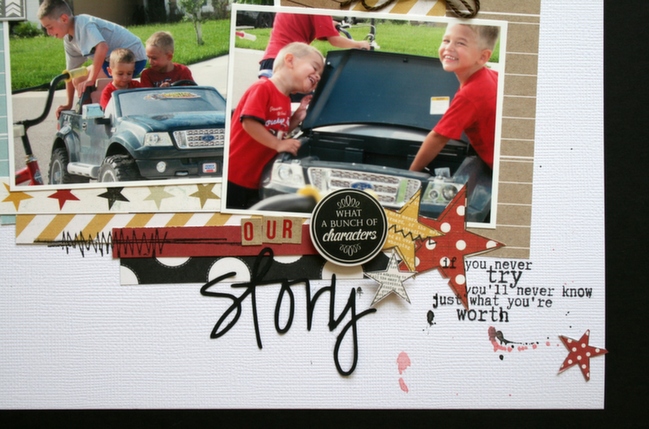
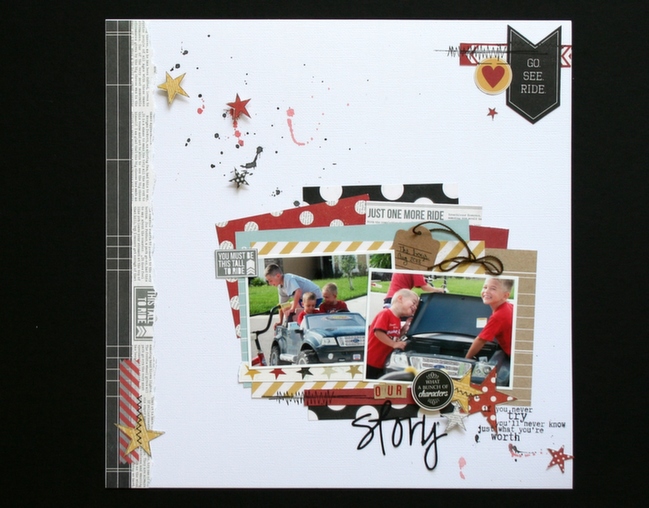
Why would I cut up a perfectly good piece of 12×12 paper when instead I can layer these adorable PL cards and create a quick and easy page that fits my Simple yet layered style? I am hooked! In my layout, Our Story, I layered multiple PL cards from Simple Stories, I fussy cut some stars from the cards, added in a few stickers and used a scrap of 12 × 12 paper to finish out my project.

Five Ideas how to use project life cards by Wendy Antenucci @ shimelle.com

Mini Album
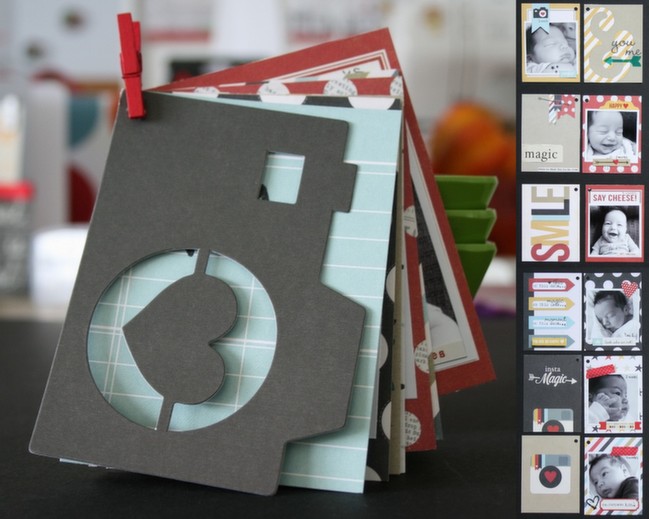
Cute little cards, cute little boy, and together they create a cute little mini album that I can send to his Great Grandparents. In my Rocco mini I used the cards as my base for the album, added a few stickers, and stamps to create a complete album within a short period of time.

Five ideas how to use project life cards by Wendy Antenucci @ shimelle.com

Cards
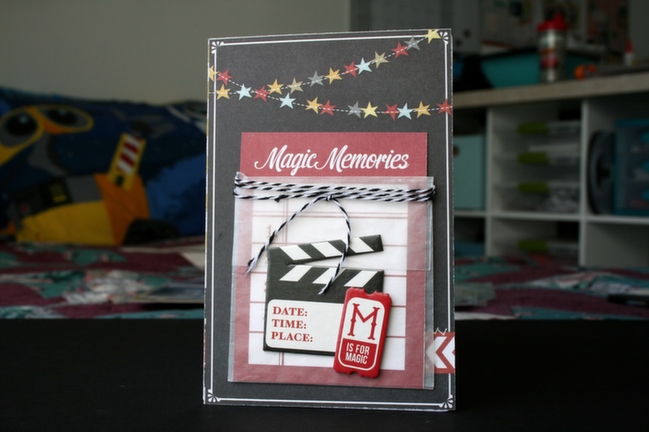
I love using the 4×6 PL cards to make cards because again, I don’t have to use up my 12 × 12 sheets of paper. (I am beginning to think I might be a hoarder!) I used a 4 × 6 PL card as my base, then I added a vellum envelope and a smaller PL card some chipboard and twine to finish up the card. Again a quick an easy card!

Five ideas how to use project life cards by Wendy Antenucci @ shimelle.com

Traditional Project Life
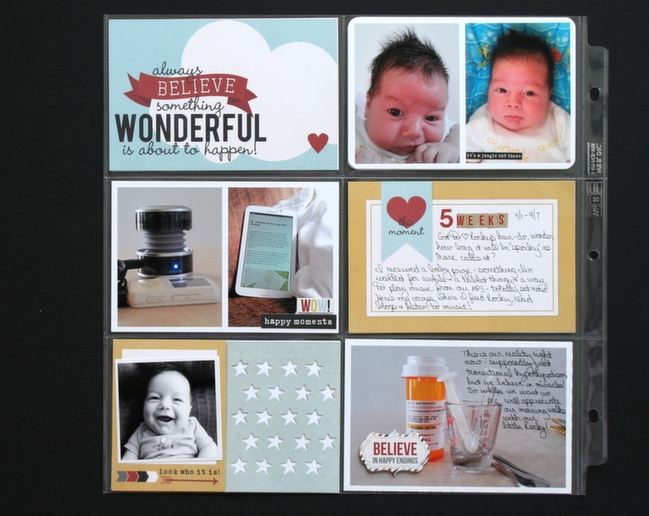
I finally decided that I would break down and buy some of the PL sets, I figured I could use them in a variety of ways and just maybe I would begin to document our everyday life! I started documenting our lives when our little boy was born August 2013 and so far, I am enjoying it. I only use one page and I’m not very specific about the dates so that some weeks might really be 2 weeks in one. Here is my page for week 5 using the same Simple Stories products as in the previous examples.

To me I needed to know that purchasing the Project Life items would be cost efficient and not just a purchase sitting in my closet waiting for my next box of donations to go out. Needless to say, I am hooked! Thanks so much Shimelle for having me, it has been an honor! Stop on by my blog for even more examples of how I have used the Project Life cards, once I got going I couldn’t stop!


Wendy Antenucci is from FL and married to her wonderful hubby of almost 14 years. They have 6 kids, ranging from 11-2 months. she started scrapbooking shortly after her first child was born in 2002. Wendy is a AHM and homeschooler so tends to scrap during her kids rest time. Her style is simple, but loves to layer and look for the perfect way to embellish her pages that connect with the memory she is telling. Wendy designs for Pebbles, Bella Blvd, and is the DT coordinator for Memorable Seasons an online store. She has been published in Creating Keepsakes, Cards, Create, Scrapbook Trends, Scrap365, and various online publications.