



pretty paper. true stories. {and scrapbooking classes with cupcakes.}

lovely to meet you Twitter Facebook Pinterest YouTube

Take a Scrapbooking Class

online scrapbooking classes

Shop Shimelle Products

scrapbook.com simon says stamp shimelle scrapbooking products @ amazon.com shimelle scrapbooking products @ amazon.co.uk

Reading Material

travel

Five Ways to Use Your Home Printer by Tami Brundage
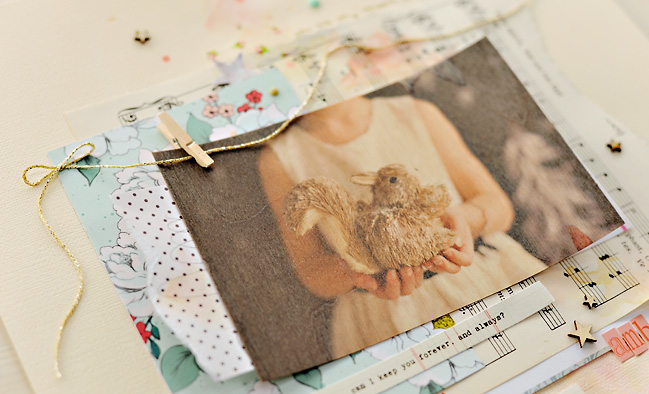
five ways to use your home printer by tami brundage @ shimelle.com

I don’t know what I would ever do without my home printer(s)! I use them for so much more than just straight forward photo printing or even printing my journaling. Not only are home printers pretty convenient for when you are ready to scrap and need a photo, you can also experiment with the surfaces you print on for extra interest on your pages. I have two printers I use; a small HP Photosmart photo printer and a large Epson all-in-one office printer. Besides your basic home printer all you will need is some removable adhesive (washi tape works for this too) and a computer editing program, like Photoshop. Here are five of my favorite “outside the box” ways I use my home printer.
five ways to use your home printer by tami brundage @ shimelle.com

Print on Wood Veneer
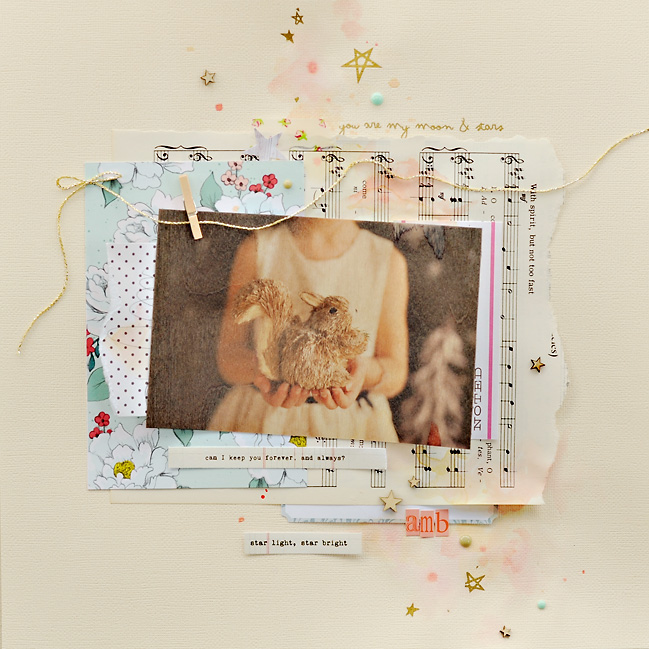
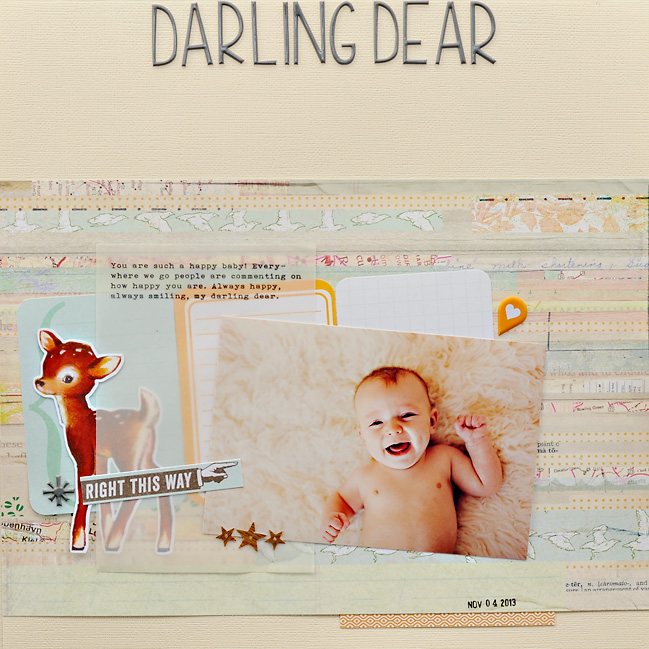
I absolutely love wood veneer! I picked up these thin sheets of wood veneer from a paper goods store a few years ago and have been hoarding them ever since. They are great for printing on and slide right through the printer on their own. Here I printed a whole 4×6 photo on the wood. I chose this image because the tones and subject matter went well with the wood grain. I find that this technique works best with pictures that are less busy or more abstract like close ups or landscapes. You can even print your own wood veneer journal cards using text, digital brushes, and graphics.
five ways to use your home printer by tami brundage @ shimelle.com

Print on Vellum
Vellum is great for layering, and when you print your journaling or photo on it, it is even better! You do have to be a bit cautious about smearing the ink since it doesn’t soak in like regular paper; I just give things printed on vellum longer drying time. If you print a photo on vellum it is best to choose an image that has a lot of light tones, versus one that is dark or very saturated. To print on vellum I usually adhere it to plain white photo paper using a small strip of washi at the top and bottom to hold it in place.
five ways to use your home printer by tami brundage @ shimelle.com

Print on a Glassine Bag
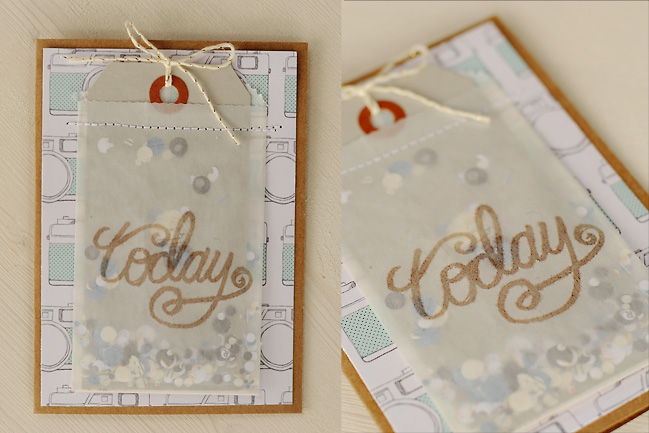
A great way to customize a glassine bag in by printing right on it. You can use a digital brush, like I did here, or use a pattern, graphic, or regular text. Printing on these baggies is just like printing on vellum, and the print will usually be a little imperfect which I don’t mind. These custom bags are a clever way to add some interest to a pocket if you do any pocket style scrapbooking, and are also a great place to hide some private journaling on a tag. I popped some punched confetti in mine, sewed it up and made it into a card for my hubby.
five ways to use your home printer by tami brundage @ shimelle.com

five ways to use your home printer by tami brundage @ shimelle.com

Print on Canvas
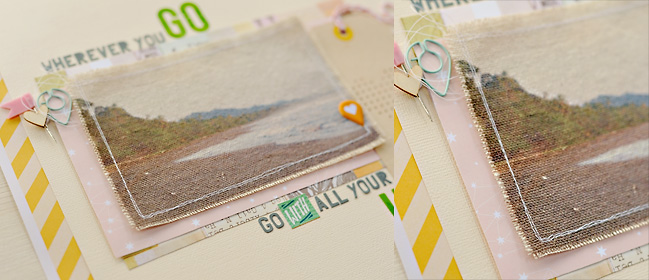
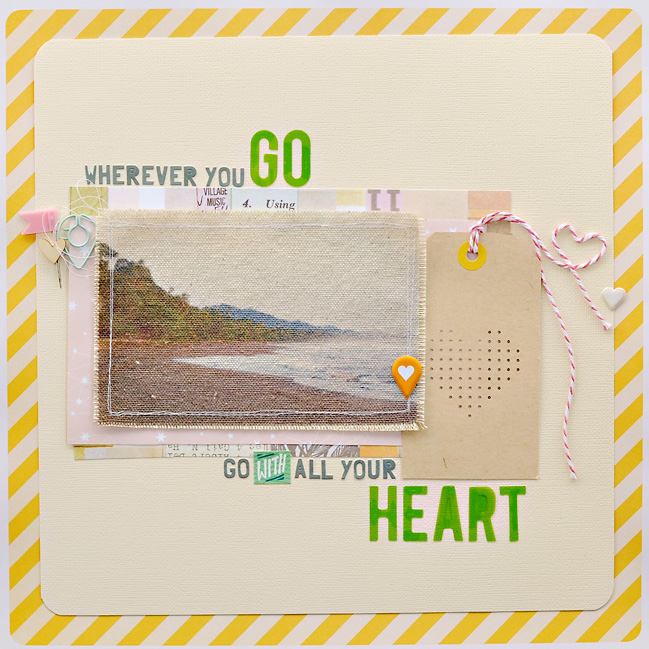
I have been getting canvas prints of my professional photography work for years; one day it dawned on me that I could incorporate this in to scrapbooking as well! I love love love the texture that canvas brings to a photograph especially. I think this look suits portraits, snapshots, landscapes, you name it. It is also really easy and cost effective to do at home: I purchased a 12×12 sheet of flat canvas from my local craft store for around $1 and cut it into (6) 4×6 pieces. I used a free template from Paislee Press to place my picture and then attached the canvas to my paper sheet using removable adhesive. After it printed I sewed around the canvas and frayed the edges for texture.
five ways to use your home printer by tami brundage @ shimelle.com

five ways to use your home printer by tami brundage @ shimelle.com

Print a Stitching Template
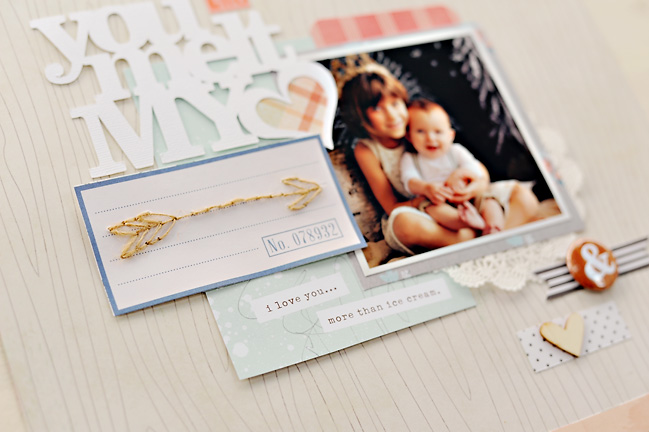
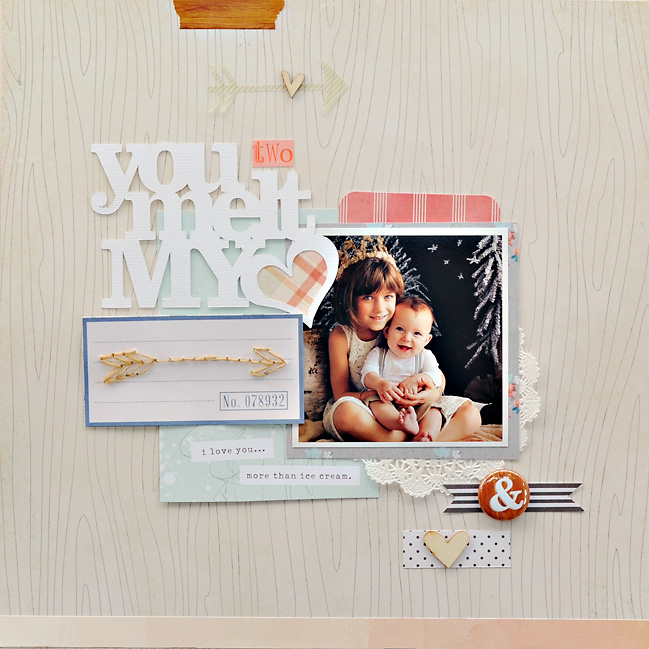
You can do this on just about any surface. For this project I chose to print my stitching guide, an arrow, on a journal card cut from a Dear Lizzy patterned paper. I used a digital brush from Studio Calico. I just resized it to the size I wanted in Photoshop and printed in a light grey so that you wouldn’t notice the lines after it was stitched. I am not so great at stitching freehand, so this technique is perfect for me, not to mention with all the digital brushes, cut files, graphics etc. available the possibilities are endless.

All of these techniques are so versatile, you can use them for printing photos or journaling, for traditional layouts or cards or pocket pages. I myself have used several of these ideas for my December to Remember 2013 project and I love the extra touch it adds to my album. You can see my album and my home printer techniques in action here Studio Calico in my gallery at Studio Calico. I hope you have fun thinking outside the box and experimenting using your own home printer.


Tami Brundage is a dreamer. Besides being a professional photographer, she enjoys finding vintage treasures, cooking healthy local food, organic gardening, the smell of fresh cut grass, road trips, running bare foot, the beach, salted caramel anything, paper crafting, and sing-a-long music. If she had to pick a theme song to her life it would be “Wildflowers” by Tom Petty. She raises a small flock of backyard chickens in the suburbs of Washington state, but would love to live on a farm someday (soon!). In the meantime she enjoys finding ways to simplify her life with her husband and two children, Avery and Sawyer. Tami has been honored to be published in Scrapbook Trends magazine, design for Crate Paper, and be a class contributor for Studio Calico. You can see more of her photography on her blog or on her
facebook page

Gold Foil Technique:: A Scrapbook Tutorial by Julie Campbell

gold foil technique:: a scrapbook tutorial by julie campbell

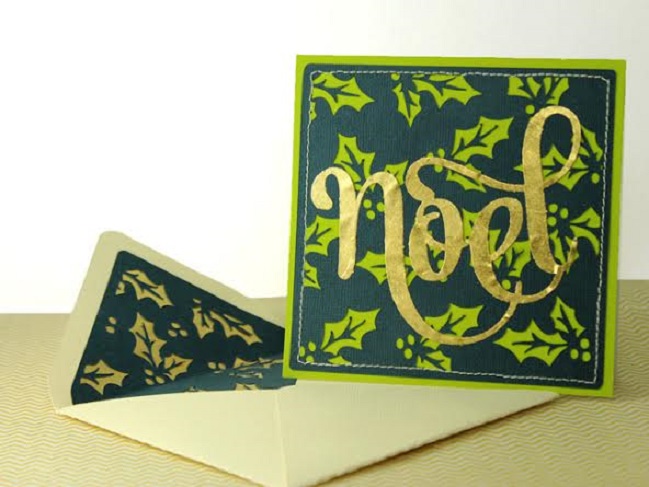
I love the look of gold foiling on holiday cards. It makes any project look more rich & festive. Today I wanted to show you a really simple way to add foiled accents. I’ll be creating a card, but this same technique would look beautiful on a layout & would really dress up those last minute holiday packages.

I hope this inspires you to break out your digital die cutter & try some designs of your own. Of course, if you don’t own a digital machine, this same concept would work perfectly with metal dies or punches.


Julie Campbell is a 30-something mom to two energetic boys. She lives with her husband & children in an old farmhouse in rural Indiana (USA), where she sees almost as many tractors pass by as cars.
Julie works part-time as an operating room nurse at a pediatric hospital, but she’d rather be stitching on paper than people. Being creative energizes her spirit & she loves the instant gratification that card making brings. Julie is a part of Studio Calico’s Creative Team & you can find her gallery here . You can find more about Julie on her blog, Stamped In His Image, or follow her on Instagram, Twitter, Pinterest, & Facebook

Five Ideas to use Watercolors by Jen Kinkade

five ideas to use watercolours by jen kinkade @ shimelle.com

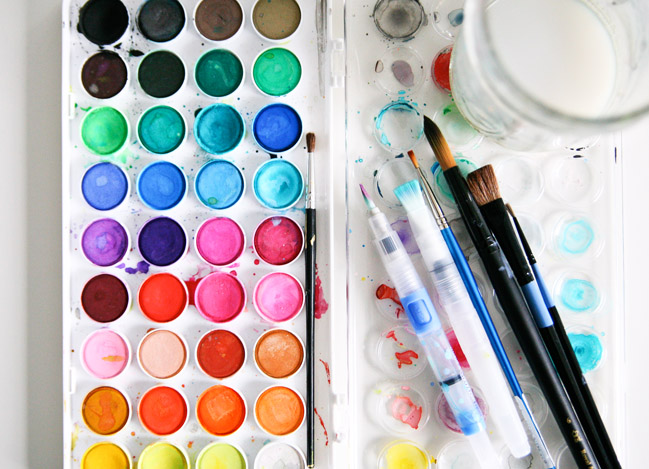
I have fallen madly in love with watercolors and using them on my projects. I will be showing you five ways to use watercolors on your creative projects using a simple watercolor palette. There is something perfectly imperfect about the way the color flows when working on a piece of paper. I find it to be a relaxing exercise of creativity and find myself losing all sense of time as I experiment with putting watercolor to paper. I find inspiration everywhere from images on Pinterest to stretching my creativity as I pore over Wilna Furstenburgs Art Class at Two Peas in a Bucket.

five ideas to use watercolours by jen kinkade @ shimelle.com

Color Plain Die Cuts
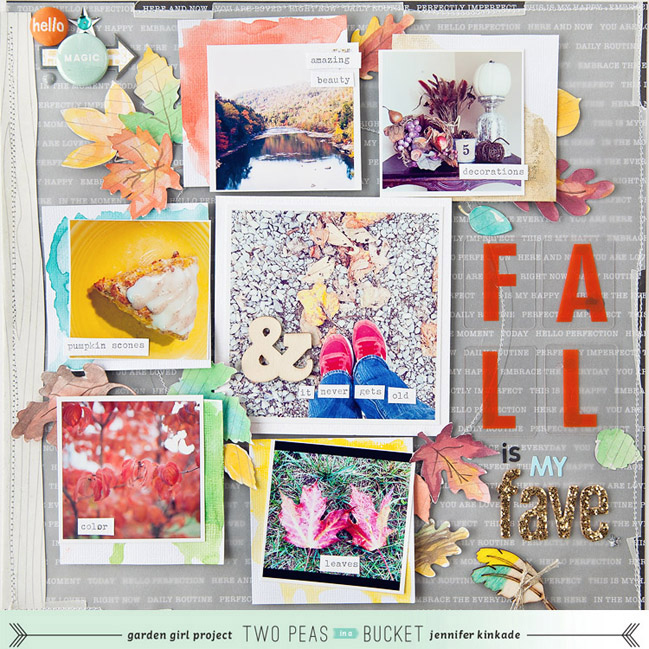
For a Fall inspired layout at Two Peas in a Bucket used watercolors to custom color leaves that I used to frame my project. I used various Fall inspired colors on each leaf, even including some veining of the leaves by using a smaller detail brush. For a complete supply list of items used on this layout, visit my Two Peas gallery.

five ideas to use watercolours by jen kinkade @ shimelle.com

Create Drips
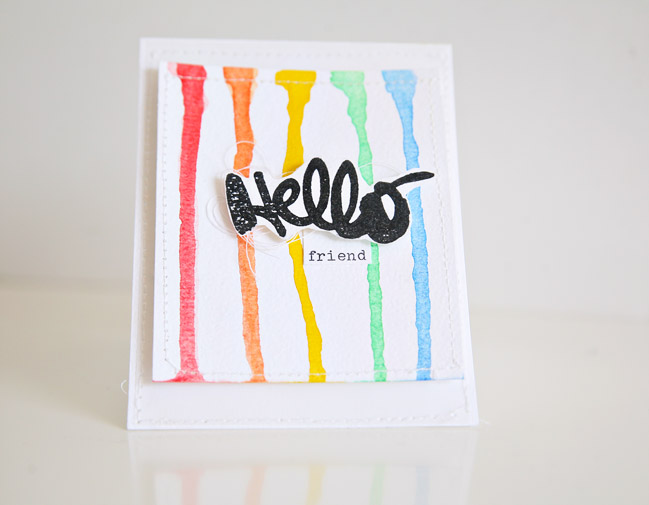
I created this simple ‘Hello’ card by loading my brush with each color and lots of water, then allowing the color to drip down the paper. I was able to create a fun rainbow effect with the colors. You may need to go back and add more color to each drip depending on how vibrant you want your colors to be. I added a stamped hello image, exclusive stamp by Studio Calico, and typed ‘friend’ underneath the image that made this card simple and quick to make.

five ideas to use watercolours by jen kinkade @ shimelle.com

five ideas to use watercolours by jen kinkade @ shimelle.com

Create a Custom Background Paper
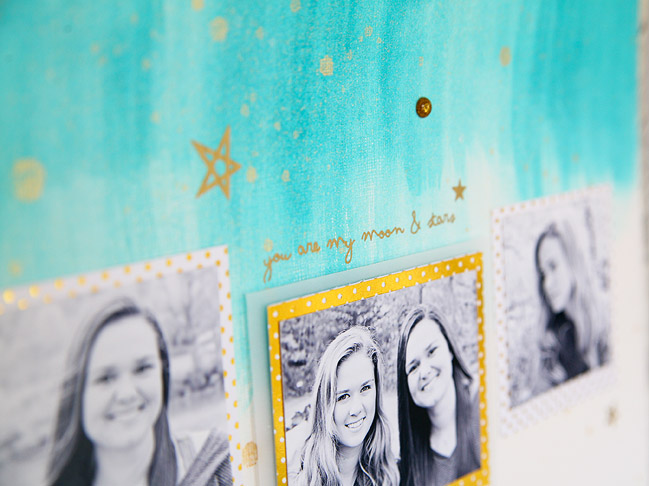
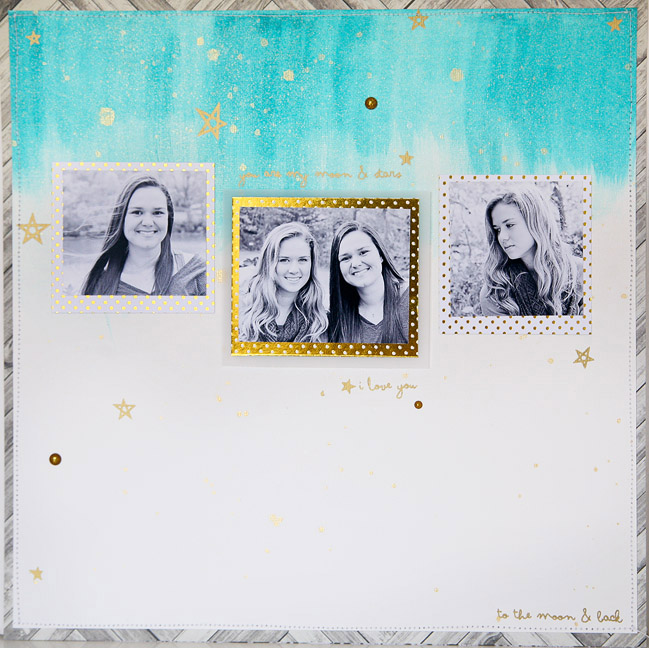
Creating a custom background paper has endless possibilities when it comes to using watercolors. On this layout I was able to achieve a bit of an ombre look by starting with my color at the top of the page and blending it down until I was happy with the overall look. You can choose to use a nice weight cardstock for this or you may want to invest in some watercolor paper or mixed media paper that can be found at your local craft supply store. Watercolor and mixed media papers are designed to withstand the use of water and liquids that will help reduce warping. I finished my layout with simple gold touches using Heidi Swapp Color Shine mist in gold lame and gold rub-ons from Studio Calico. I backed my layout with a woodgrain paper by Crate Paper and Maggie Holmes’ Flea Market collection and machine sewed the pieces together.

five ideas to use watercolours by jen kinkade @ shimelle.com

five ideas to use watercolours by jen kinkade @ shimelle.com

Color Cards/Create a Mosaic Effect
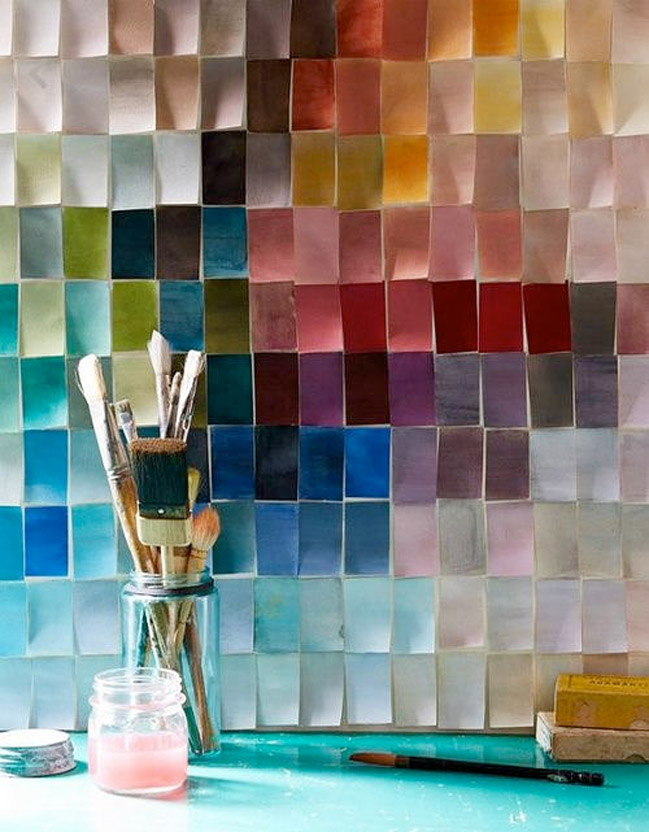
I was inspired by this image that I found on Pinterest for my next layout that I created for Two Peas in a Bucket
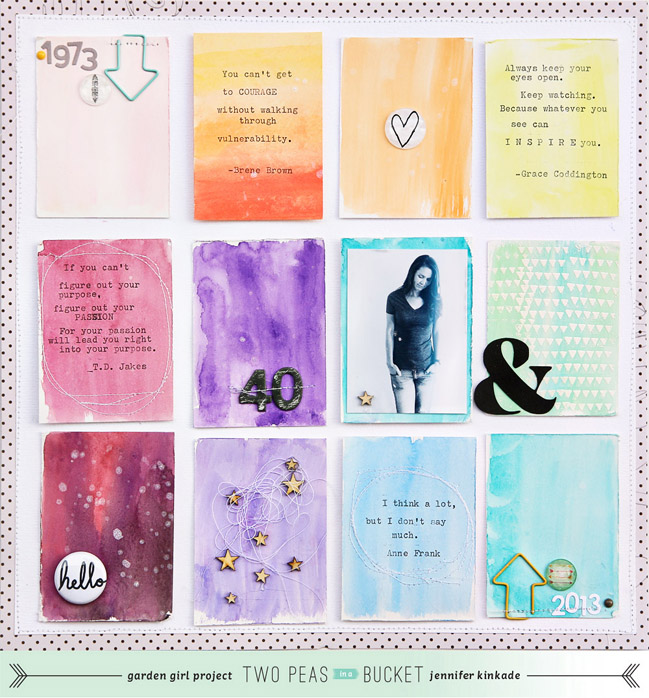
All About Me October theme.
I used this inspiration image as a springboard for my entire layout. I used watercolor artist trading cards that I found at my local craft store to help create the mosaic effect on this layout. I experimented with mixing different colors on my palette, then applied each custom color to my individual card. I finished the layout by adding small, light embellishments to keep the focus on the watercolor technique and feel that I wanted to achieve. For the full supply list on this layout, visit my
Two Peas gallery.

five ideas to use watercolours by jen kinkade @ shimelle.com

five ideas to use watercolours by jen kinkade @ shimelle.com

Custom Color Embellishments and Titles to Frame your Photo(s)
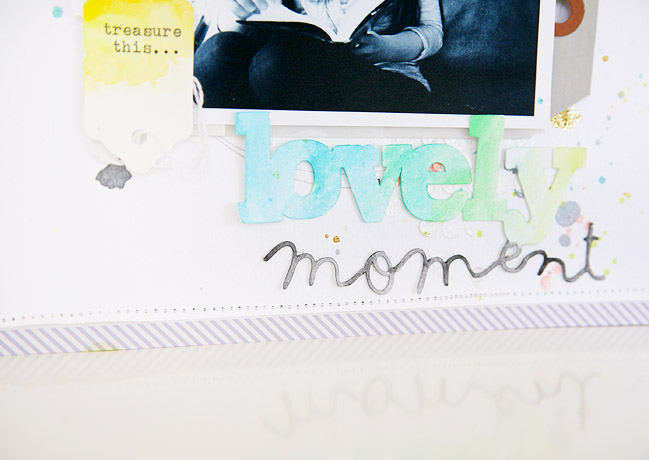
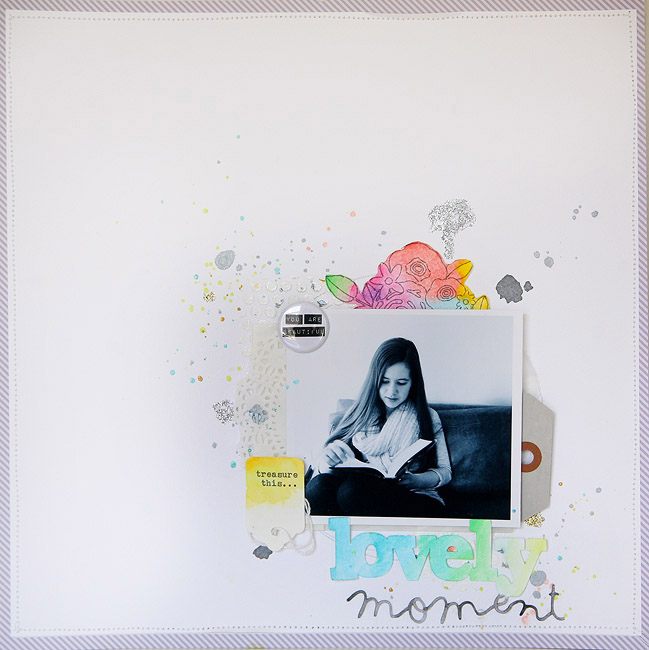
I used my Silhouette Cameo to create the title ‘Lovely Moment’ and cut it out of heavy white cardstock. I used a blue, green, yellow watercolor gradient color palette for the word “lovely” being careful as I worked, blotting with a paper towel as needed. Keeping a paper towel nearby is helpful when working with watercolors because you can easily fix a mistake, or make it less noticeable while it’s wet. The ‘Moment’ portion of the title was colored with grey watercolor.
Next I wanted to custom color an embellishment using Amy Tan’s Cut & Paste line pencil rub-ons. First, I applied the various watercolors to my white cardstock, being mindful of colors that I wanted to use. I allowed those to dry, then applied the rub-on.
Once the rub-on was applied I used my scissors to cut out the design and use it as additional framing for my photo. Lastly, I created a simple yellow ombre office supply tag, blending the color from darker to lighter, as another framing element to my photo.

The possibilities using watercolors are endless! You can even experiment with your handwriting using watercolors or painting your own custom drawn embellishments.
All you need is a simple watercolor palette, a brush of your choice, some water, and your creativity and imagination! Have fun experimenting with watercolors and adding them to your projects. I hope you find it as relaxing and inspiring as I do.


Jen is a wife, mom, maker of pretty stuff, lover of photographs, and keeper of her family’s precious memories. Jen has been scrapping for over 15 years, since the birth of her second daughter, but it hasn’t been until the last couple of years that she has found herself in the world of scrapbooking design. Jen is a Garden Girl at Two Peas in a Bucket and is also a designer for Basic Grey and Oh Deer Me kits for Freckled Fawn
You can visit Jen at her blog, on Pinterest and Instagram and Twitter: @jenkinkade

UK Readers: Grab a special scrapbooking Christmas offer today!

Christmas scrapbooking supplies @ shimelle.com
Today I have a special offer for UK readers looking to treat themselves with a bit of Christmas joy in the form of pretty paper!

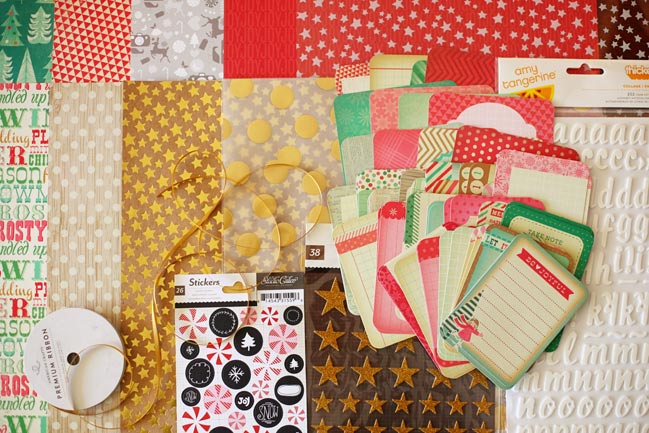
This special Christmas box includes what you see above:
Four 12×12 double-sided patterned papers by Crate Paper
Two 12×12 double-sided patterned papers by Studio Calico
Three 12×12 specialty papers: metallic gold stars on kraft cardstock, metallic gold spots on white vellum, and white stars on a transparency
Full set of sixty winter themed Project Life cards, including 4×6 and 3×4 sizes
White foam Thickers by Amy Tangerine for American Crafts
Gold glittered chipboard star stickers by Studio Calico
Red, white, and chalkboard black stickers by Studio Calico
Roll of American Crafts gold ribbon
PLUS five sheets of 12×12 coordinating cardstock, not shown.

Christmas scrapbooking papers @ shimelle.com
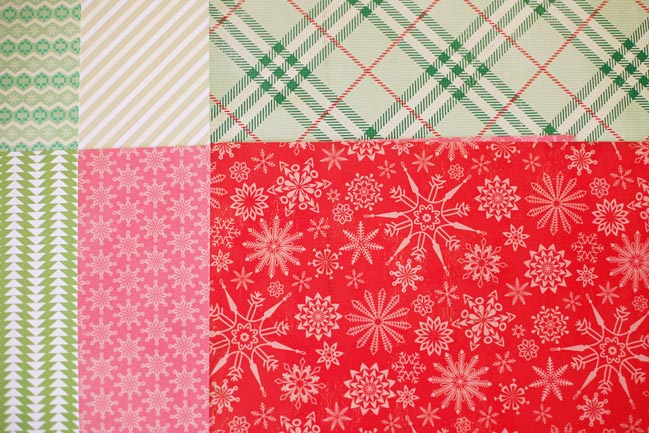
Here’s a look at the b-sides of the six double-sided papers. The overall colour scheme is traditional red, green, and gold, with an energetic shot of pink thrown in for good measure!

I have a very limited number of these kits and they are ready to ship to you today, if you order by 2pm. The kits are £25, which includes first class shipping via Royal Mail. Remember, this is available for UK addresses only.

This kit is a smaller version of the full 2013 Christmas in a Box kit I’m using to (slowly!) put my Christmas journal together this year. I have just three of the full kits left. The full kit has everything in the photo above and also includes many more papers from Echo Park, Simple Stories, Elle’s Studio, and Webster’s Pages, and a few more small embellishments. It does not include the five sheets of cardstock. Rather than put up a separate button just for those, if you would like the full kit, please leave a note in the ‘notes to seller’ section of your payment to say so. The first three people to do so will get the full kit, and I’ll send you a click-to-pay invoice for the remaining amount. The full kit is priced £40, which includes shipping, so you would be invoiced a further £15.

This offer is only while supplies last. If there are additional boxes left after 2pm, I will update this post as I’m happy to still sell them, but won’t be able to ship them nearly so fast.

Thanks so much and happy scrapping!

Get Started with Gelatos:: A Scrapbook Tutorial by Loredana Bucaria

get started with gelatos:: a scrapbook tutorial by loredana bucaria @ shimelle.com

Do you know the fabulous gelatos? I really love them. They are something like crayons but more soft and funny! You can decide to use them with or without water for many different looks.
If you have never used these magic colors don’t worry because it’s very very simple. They will steal you! Try to believe!

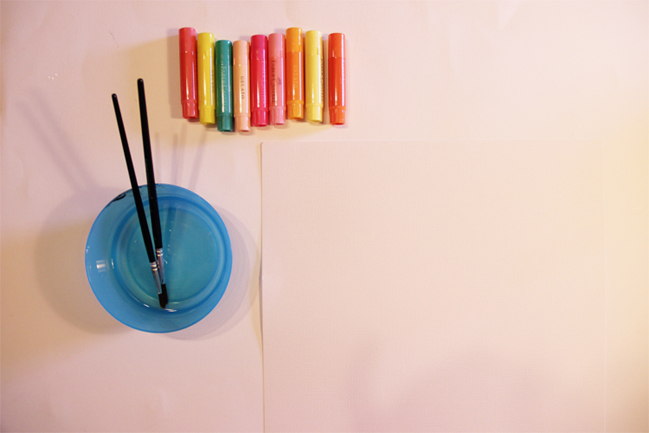
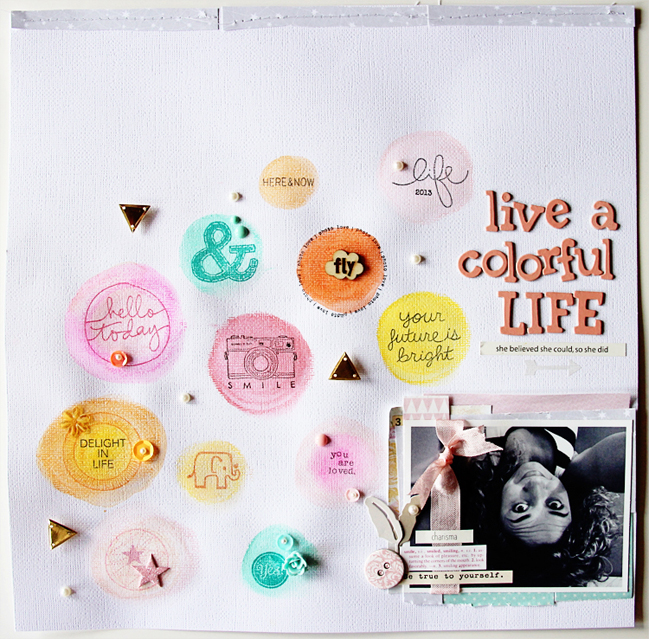
So Take your favorite gelatos colors, a brush and water and simply have fun! I had the idea to create a background for my page in a different way, playing and having fun using these amazing colors! I love to play with my fingers so they are perfect!

get started with gelatos:: a scrapbook tutorial by loredana bucaria @ shimelle.com

get started with gelatos:: a scrapbook tutorial by loredana bucaria @ shimelle.com

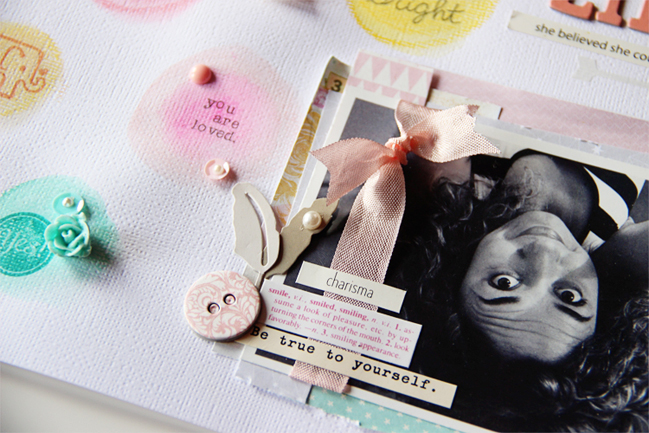
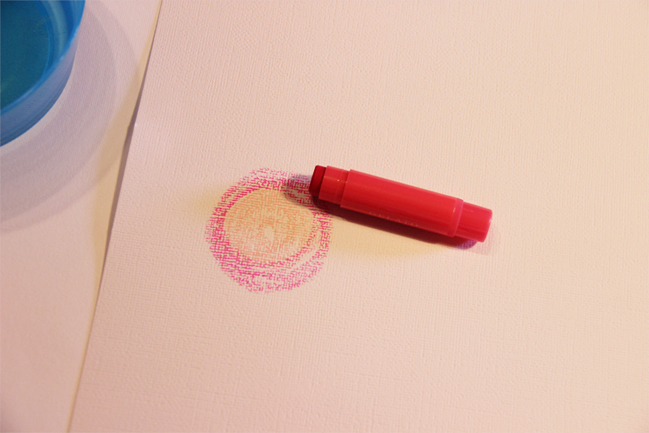
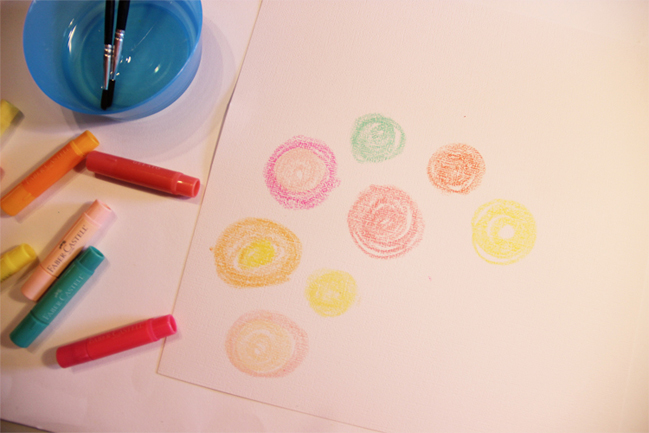
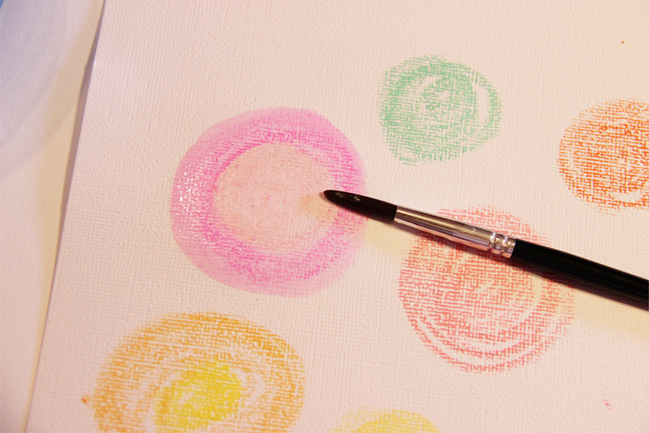
I have used a white cardstock from bazzill as background, start drawing some circles on the paper. You can choose to use one color or mix many different colors together in the same circle.

get started with gelatos:: a scrapbook tutorial by loredana bucaria @ shimelle.com

get started with gelatos:: a scrapbook tutorial by loredana bucaria @ shimelle.com

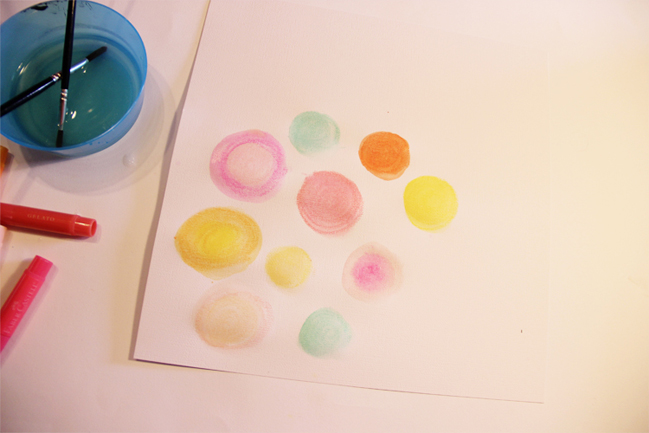
Take a brush and with water paint the circles, you can use your fingers as well.

get started with gelatos:: a scrapbook tutorial by loredana bucaria @ shimelle.com

Let the circles dry, if you prefer you can use the heat gun to dry faster.

get started with gelatos:: a scrapbook tutorial by loredana bucaria @ shimelle.com

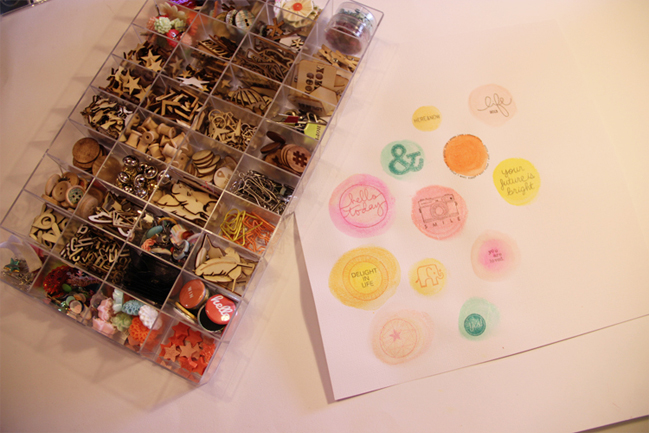
You can embellish every circle with stamps, sequins, enamel dots, pearls, whatever you like and you want to use to create your own background for you page.

get started with gelatos:: a scrapbook tutorial by loredana bucaria @ shimelle.com

This is very easy and very fun! Give it a try!


Lory knew scrapbooking in 2003 thanks a friend and a little journey in a Funfair Park where she was attracted by a scrapbooking book full of colors and of die cuts! Since then she made a long internet research about this hobby and she was really lucky to discover a new wonderful world!he loves scrapbooking because it makes her happy, free, with the scrapbooking she forgets all the ordinary worries, all the bad thoughts and only the page, the photos, the story about the photo exist ! In Italy she organized an international convention of scrapbooking and mixed media for four years. knowing the most famous scrapbookers and enjoying so much everything! It was a dream came true! She is solar, joyful, full of things to do but she loves her everyday life even if something is not like she would. She has got married with the love of her life and now she has a new so cute home that she improves day by day. She loves her life even if she isn’t a Hollywood star! You can follow Lory on her blog, Facebook, Pinterest, Twitter, Instagram and Studio Calico

Five Ways to Add Glitter into your Holiday Crafting by May Flaum

five ways to add glitter into your holiday crafting by may flaum @ shimelle.com

Hello there, May Flaum here, and I adore the holiday season. Everything is merry, bright, and I have loads of excuses to glitter everything up! As I am a huge fan of sparkles in general, this just adds to my love of the season. To celebrate, I’ve got five ways to add glitter into your holiday crafting!

Now if you’re thinking you hate the mess of glitter I have a great surprise for you – four of my five ideas do not require actual loose glitter! That’s right – I’m using all kinds of pre-glittered products to keep your hands clean and your workspace sparkle free. If you find yourself out doing errands and someone points out glitter on your face (ah stray glitter, you do get everywhere!) just smile because this time of year it’s totally normal and even acceptable to be sparkly and glitterific out in public.

five ways to add glitter into your holiday crafting by may flaum @ shimelle.com

Trim with Glitter
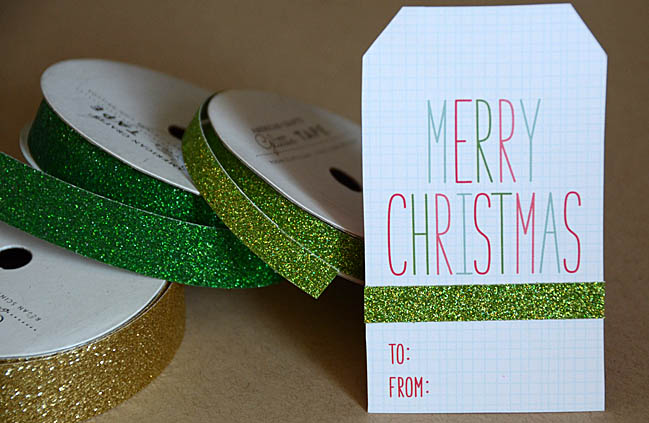
I adore American Crafts glitter ribbons because they give me sparkle and controlled glitter instantly! No mess, no fuss, just add a bit of glitter ribbon to any tag, layout, or other project and it has instant pizazz. Here I’ve added some of the (adhesive backed!) ribbon to a Lawn Fawn tag that is now ready for gifting.

five ways to add glitter into your holiday crafting by may flaum @ shimelle.com

Edge a Card
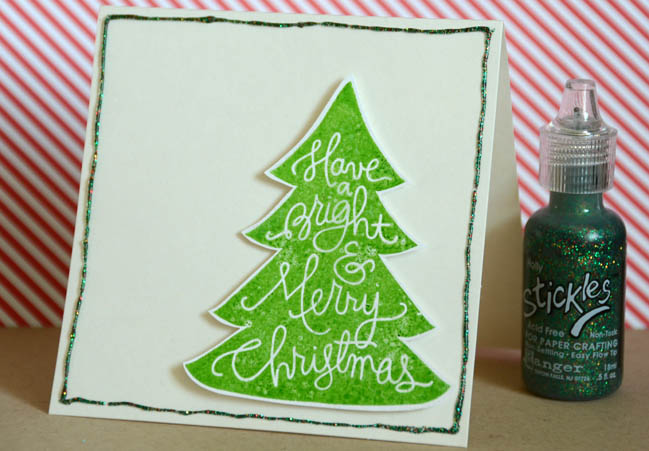
Even if you don’t make cards often, it can be as simple as stamping + cutting out an image, then edging with glitter! Here is pictured a personal favorite – holly stickles! I love that it has flecks of red, and that because it is glitter glue my hands can stay mess free.

five ways to add glitter into your holiday crafting by may flaum @ shimelle.com

Glitter your Gifts
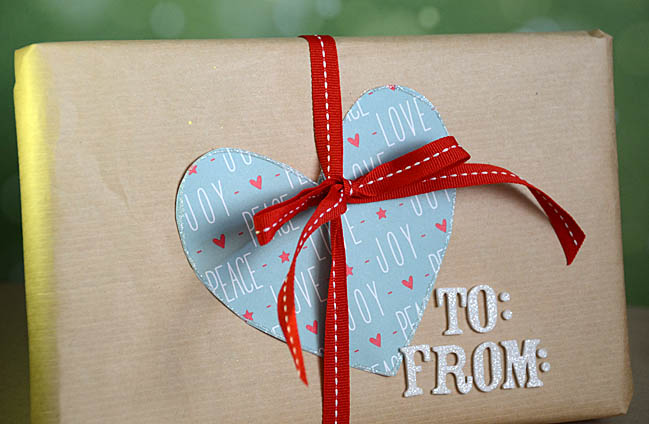
For the love of glitter – this is double the fun. I used glittered alphabets and edged the hand cut heart with white glitter glue so that my brown paper package tied up with simple red ribbon becomes a gift to remember.

five ways to add glitter into your holiday crafting by may flaum @ shimelle.com

Glitz up the Table
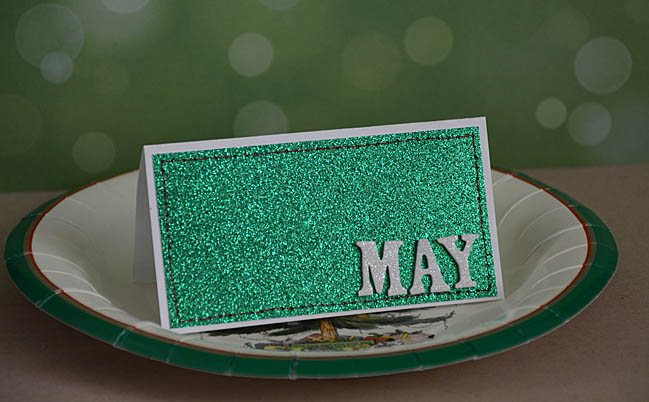
Glitter paper + glittered letters = glam name cards in an instant! What I love about these products is that they will not flake off glitter onto your guests, or your food!

five ways to add glitter into your holiday crafting by may flaum @ shimelle.com

Glam up the Wooden Accents!
I adore the wooden accents that are all the rage now, but sometimes they are a bit plain. Never fear – just grab glitter and you’ve got a fancy accent in no time! My tip to you on this is that using a glossy medium such as glossy accents is a must. The shine of this product will make sure your glitter shines and it also holds down the glitter really well. Need extra hold? Just add an extra coating over the top after you apply your glitter.

I hope you’ve enjoyed my ideas here today, and if you’d like to learn more about my holiday crafting ideas I hope that you’ll join me in my new holiday crafting class! I’ve even got a special just for Shimelle’s fabulous readers – 20% off of a class (or two!) at my new website! Just use this link and the discount will automatically be added at check out.


When it comes to crafting May Flaum has one rule: it’s gotta make her happy. She’s not afraid to get super grungy or work with bright colors, dabble in lace and doilies then make something more splattered and wild. If she’s not in her studio (aka ‘the bat cave’) then she’s probably out running around having fun with her family or cooking up a storm. May has been working in the Scrapbooking industry for a decade and currently blogs her crafty adventures, teaches online classes, and works with amazing companies sharing her projects and ideas. She just launched her own on-line craft class website where she’s hard at work on her next fun idea. If she has one piece of advice to share, it’s always to be true to your creative heart.

Showcasing Patterned Paper:: A Scrapbooking Tutorial by Paige Evans

showcasing patterned paper:: a scrapbooking tutorial by paige evans @ shimelle.com

I love using lots of different patterned papers on my layouts and I find one of the best ways to include dozens of papers is to use a punch and make lots of shapes! American Crafts just came out with a bunch of new, fun, small shapes – perfect for showcasing patterned paper!

Start by gathering your supplies. I chose to work with mainly the Colorwash line by Pink Paislee because the subtle colors perfectly coordinate with the photos I wanted to scrap.

showcasing patterned paper:: a scrapbooking tutorial by paige evans @ shimelle.com

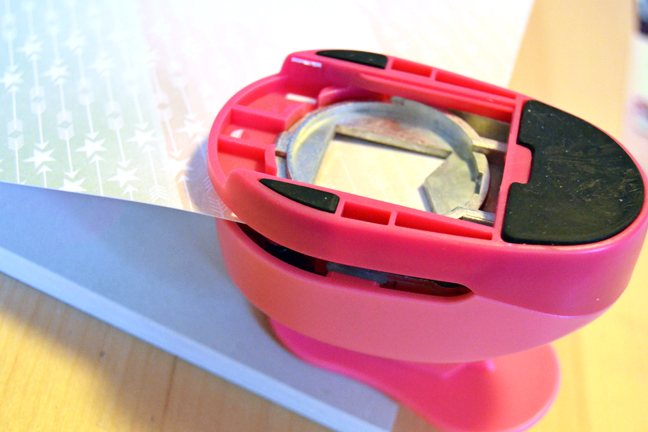
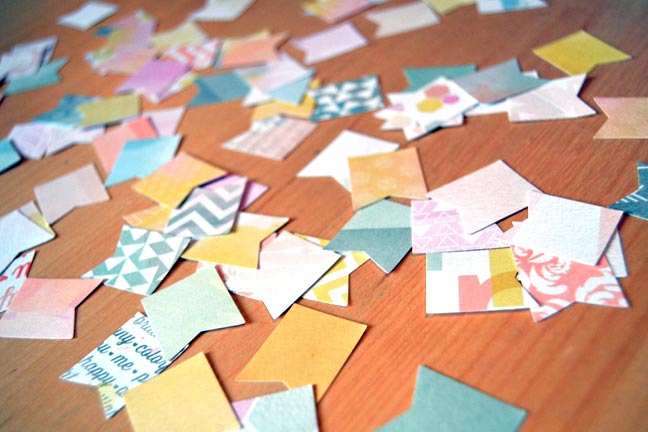
Use a punch or or die cut machine to punch a shape from each of the papers in the 6×6 and 12×12 paper pads of the Colorwash line or whichever line you are using.

showcasing patterned paper:: a scrapbooking tutorial by paige evans @ shimelle.com

Flip over all the punches so you can see the pretty designs. Consider taking a picture of all the pieces.

showcasing patterned paper:: a scrapbooking tutorial by paige evans @ shimelle.com

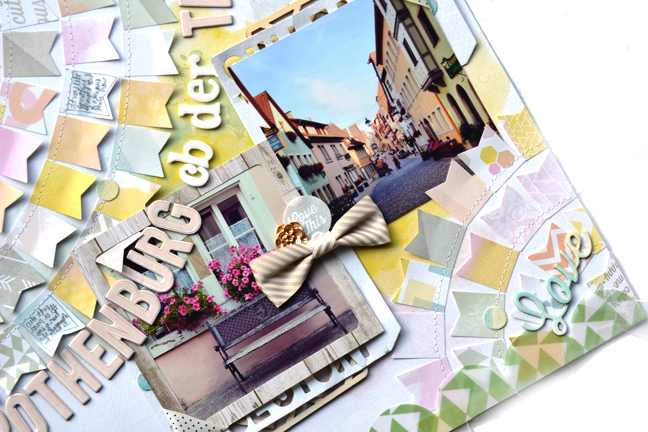
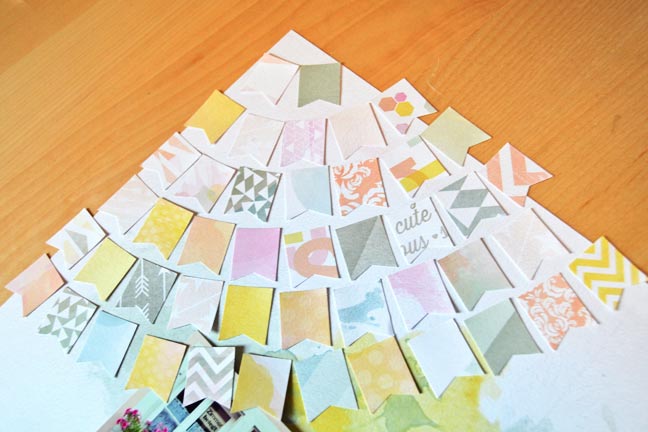
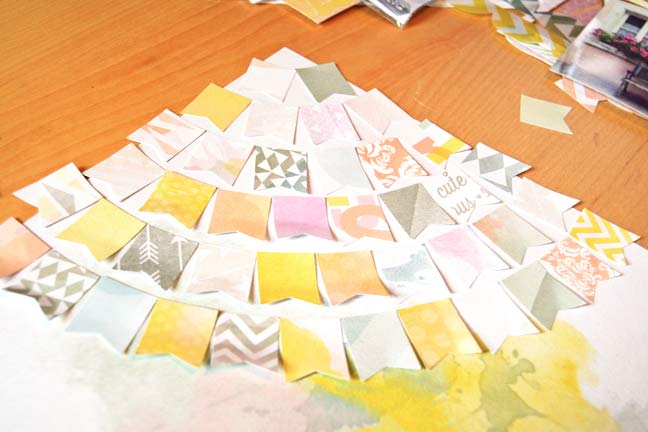
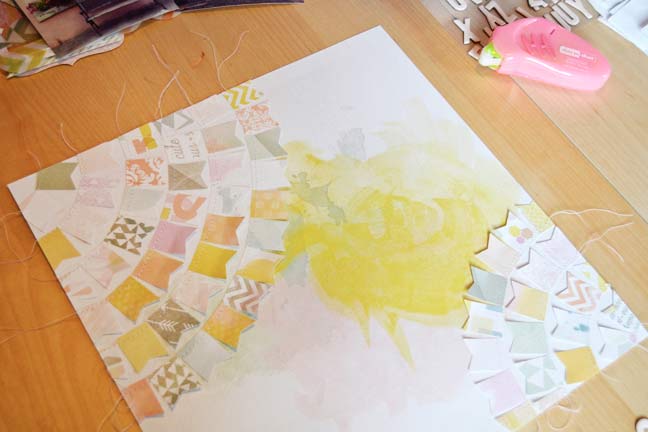
Begin placing the punched pieces where you want them on your layout. Since I used a banner punch I went with a banner theme and placed them in concentric curves around opposite corners of my layout.

showcasing patterned paper :: a scrapbooking tutorial by paige evans @ shimelle.com

Lightly adhere each of the punched shapes onto the background.

showcasing patterned paper:: a scrapbooking tutorial by paige evans @ shimelle.com

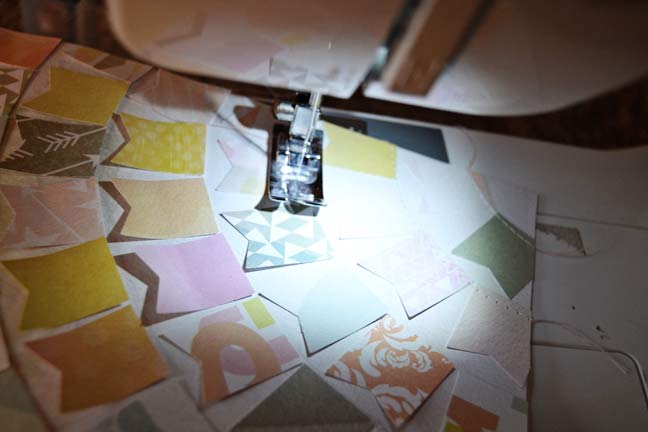
Sew across the top of each line of punches to ensure they’ll stay in place for eternity.

showcasing patterned paper:: a scrapbooking tutorial by paige evans @ shimelle.com

Leave the strings long for interest or trim them off for a cleaner look. I chose to keep them long.

showcasing patterned paper:: a scrapbooking tutorial by paige evans @ shimelle.com

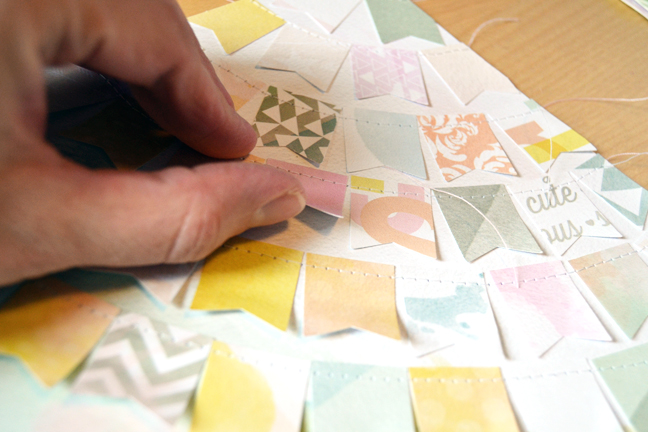
Bend up each punched shaped a bit for added dimension.

showcasing patterned paper:: a scrapbooking tutorial by paige evans @ shimelle.com

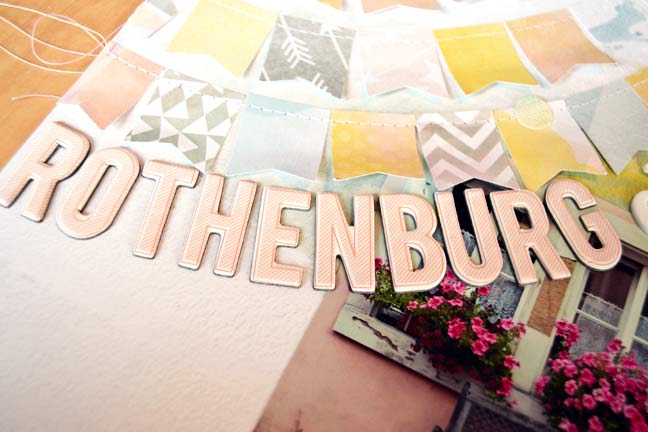
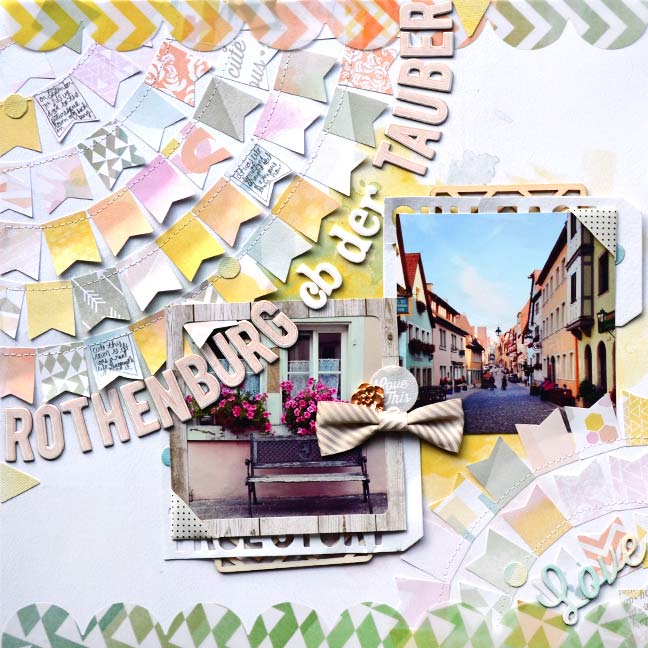
Add a title then adhere photos and embellish until the layout looks complete!

showcasing patterned paper:: a scrapbooking tutorial by paige evans @ shimelle.com

I think the fundamental scrapbooking embellishment is patterned paper so why not try to use as much of it as possible?! With a simple punch you can create dozens of fantastic shapes and designs and create eye-catching projects in a snap.


Paige Evans has been scrapbooking since she was 16 years old and worked at her first job at a local scrapbook store. The first time she put pictures and papers together it was a match made in heaven! She currently works from home for Northridge Publishing – the makers of Scrapbook Trends, CARDS, the Create series, Cricut Magazine, Cricut Idea Book, and Signature Series magazines. She is also the design team manager/blog hostess for American Crafts and is a Garden Girl at twopeasinabucket.com. While not scrapbooking she makes pacifier clips for her etsy shop. Paige is the mother of two adorable children – Fox age 3 and Jane age 1.5. She and her husband Chris have been married for 7.5 years and currently live in Grafenwoehr Germany where Chris is a dentist for the Army.
You can check out more of her and her work on her blog, Instagram, Etsy shop, Pinterest, Twitter and 2Peas Gallery

A Christmas Manifesto and Some Holiday Honesty

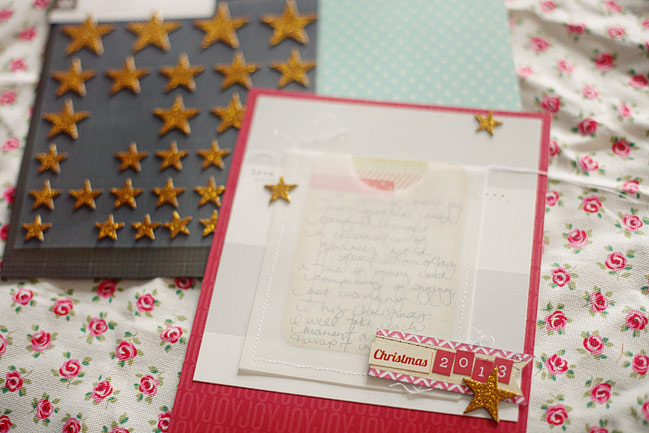
christmas journal scrapbook page by shimelle laine @ shimelle.com
I always start my Christmas journal with a manifesto of sorts. It’s a declaration that tends to lead me in two directions – both in how I go through life through the holiday season and to remind me to finish what I start when it comes to keeping my journal. When I first started writing these, they were more about the book itself. Now they tend to be more about the life side of things, and I’m happy with that natural evolution. Part of my personal process with Journal your Christmas over the years has been to realise the book is secondary for me. In a way I suppose that could be seen as a teensy bit too radical, but I don’t want to make plans and do things just so I have something to scrapbook. I want to do the things I’m inspired to do… and then feel they were worth the time of taking photographs and writing words and gluing bits of paper to other bits of paper in an aesthetically pleasing manner. Live first, scrapbook second.

So yesterday December arrived on the doorstep and since that is the first day of class, it’s always a work day for me even if it falls on a Sunday this year. I don’t mind that. The less fun part of starting the class like spreadsheets and data entry and jumping through hoops of spam filters is always far, far outweighed by all the good parts, like seeing familiar faces pop up who have done this project several times or seeing all sorts of happy photos turn up on online, thanks to the ease of tags like #JYC2013 and #ChristmasJournal and modern day fanciness like Instagram. (We use two different tags – the former for all sorts of Christmas activities and the latter specifically for the pages in our books.) But the truth is that even though I write my manifesto for the year before the first of December, I don’t like making the actual page before December hits. I tried making all my entries early one year and it just didn’t work – it’s far more fun to be in the actual moment than guessing the moment days ahead! All that stuff added together means I very, very rarely actually finish a manifesto page on the first of December.

What you see above is what I’ve done so far. For me, the important thing is there: I’ve written the words I want to live by this year and they are there in ink for me to remember. The rest is all icing. There’s a bit of icing, but not enough to call this done. I guess I am very pro-icing once I know the cake is good cake. My December first reality check looks something like
Missions Accomplished
Class started.
Supplies collected.
Manifesto written in ink.
Tree retrieved from hallway cupboard of mystery.
Missions Nowhere Near Completion
Papers cut to size for album.
Balanced embellishment and title for first entry.
Fabric photo backdrop ironed.
Tree removed from duct-taped cardboard box, assembled, and decorated.

Maybe in some years I would have powered through and done all those things in one day. I think I have. This time I took it all a bit slower – just a bit. But I am okay with all that. Yesterday was only the first. Today is the second. There is still time for everything that is truly important. We’ll see if that includes the ironing or not. With a bit of luck, eh?

With that in mind, my Christmas Manifesto for 2013…
a year of more joy, more gratitude, more careful thought.
a celebration of gladness, not a glorification of busy.
a time of giving, not comparing. of enjoying, not worrying.
This Christmas, I will take each moment as it comes and wrap it in my own holiday spirit.
I will seek out beauty in simple things and choose time with loved ones over most anything else.
All this will lead me to a holiday season of nothing short of true sparkle.

You can find previous Christmas manifestos here and here. Those were probably a bit more poetic, but every year leads to its own natural focus so sometimes poetic just isn’t what wins out for me. But we all create our own manifesto for the year, so perhaps some of the JYC participants will also share their words and pages for 2013?