



pretty paper. true stories. {and scrapbooking classes with cupcakes.}

lovely to meet you Twitter Facebook Pinterest YouTube

Take a Scrapbooking Class

online scrapbooking classes

Shop Shimelle Products

scrapbook.com simon says stamp shimelle scrapbooking products @ amazon.com shimelle scrapbooking products @ amazon.co.uk

Reading Material

travel

Scrapbooking with Mist or Ink
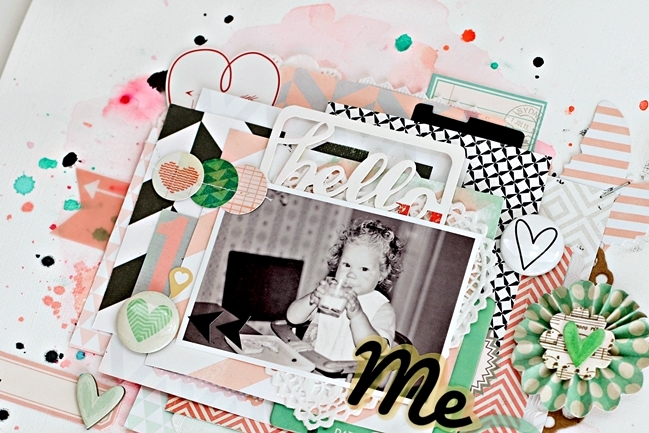
scrapbooking with mist or ink @ shimelle.com
Ready for your next challenge? This time we’re heading to technique land and challenging you to scrapbook with mist or ink on your next page! Four lovely ladies have stepped up to inspire you with their beautifully inked pages.

First to share with us today is Christin Goslett.
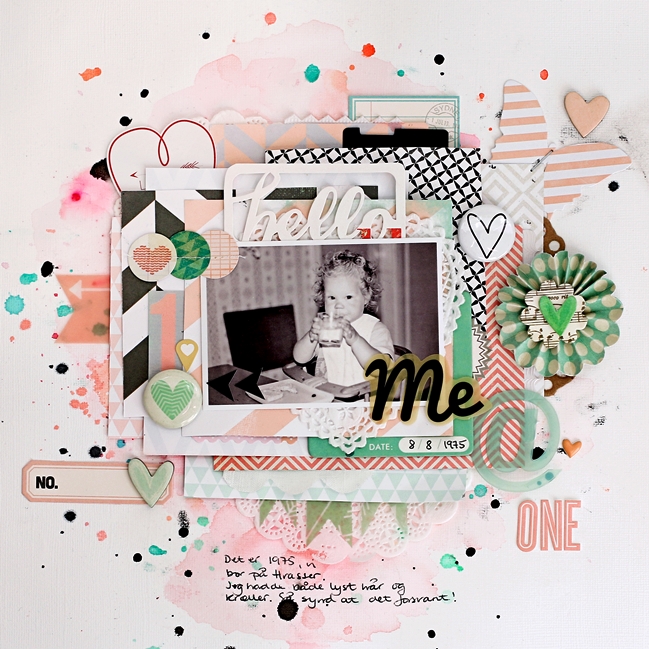
scrapbooking with mist or ink by Christin Goslett @ shimelle.com

I love to use mist when I scrap, but you will hardly ever find a page where I actually use it to spray. The first way I use it is almost as I would use watercolors. I start with adding a layer of clear gesso. The clear gesso give a very different texture than white gesso and it doesn’t give the white cardstock a yellow tint. While mist almost runs off white gesso – the clear gesso sucks the color right in. I used a water brush to add water and spread out the mists to a wash. When it all dried, I added drops of mist. If you add drops of mist before it has dried, you will get an ice crystal effect – the color will spread out like an ice crystal. Then my tons of layers were added, in the same colors as the mist. I actually picked out a lot of the papers and embellishments after I picked out the Mister Huey mists. My biggest secret when it comes to scrapping is to staple the layers. That is what gives me the freedom to add small pieces in between here and there. -Christin
scrapbooking with mist or ink @ shimelle.com

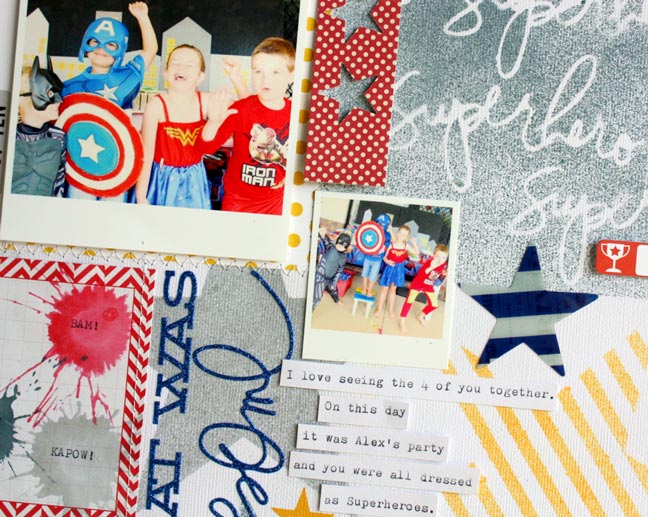
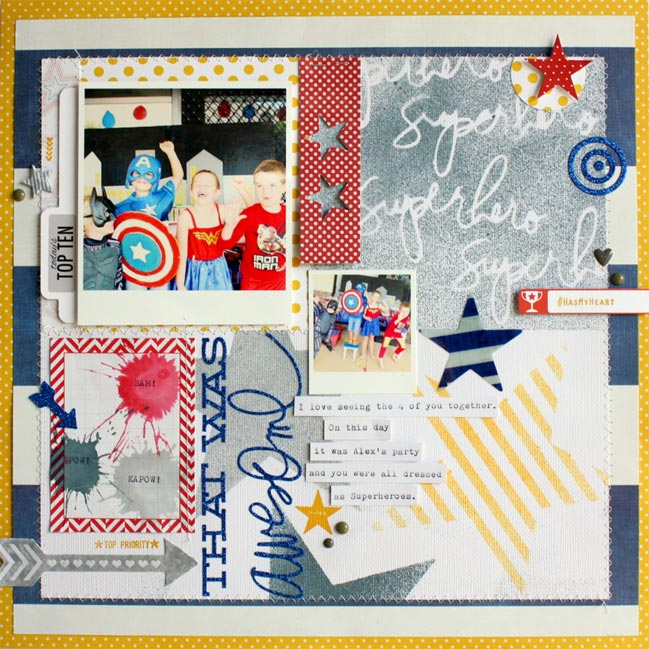
Next up: Kim Jeffress with her fun, superhero inspired layout.
scrapbooking with mist or ink by Kim Jeffreys @ shimelle.com

First use a word cut from your Silhouette Cameo. I cut out the Superhero word several times and then laid it on my white cardstock. I used some scrap paper to mask off the area I wanted to mist and then sprayed over the words with Color Shine mist, then removed the words to reveal the white underneath. You can also use a stencil with your mists. Here I used the same stencil (in my case a star) and misted it in one colour then moved it to another area of my cardstock and misted it with a new colour. This can be repeated as many times as you like. Next I grabbed some empty paint dauber tubes that I bought at my local craft store and poured a few colours of Color Shine mist into them. I then grabbed a journaling card and slammed the tube down onto the card to create a splatter effect with the mist. Once dry I used my typewriter to add the words over the splats. Finally I have misted over some resist shapes also from Heidi Swapp. The shapes are coated with a special resist material so once misted parts of the shape remains white while the other takes on the colour of the mist! -Kim
scrapbooking with mist or ink @ shimelle.com

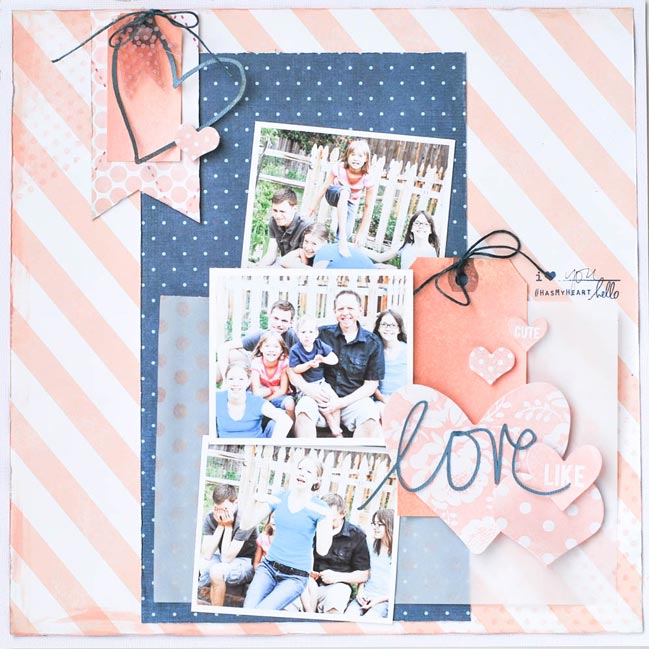
Jamie Pate shows how only using two colours can work perfectly.
scrapbooking with mist or ink by Jamie Pate @ shimelle.com

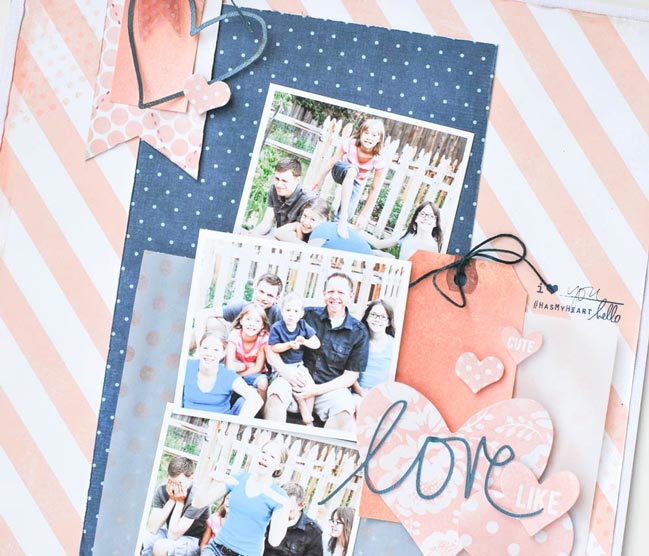
Something found on my studio table almost all the time are mists. I am most partial to the Heidi Swapp Color Shine. The little ball at the bottom really helps mix up the shine that adds such a fabulous sheen to my paper projects. For this layout, I had to share the photos leading up to the photo. It’s not easy trying to take a decent shot of five kids and their dad. Mist can be found all over this page. I often mix it with acrylic paint and swipe along the distress edges. Stencils are used to add interest to pattern paper, as well as vellum. Resist embellishments are easy with mists. Die cutting white card stock and spraying with mist adds great effect. A misted manila tag can be found on here to help it fit the colors of the pages, oh, and don’t forget the string. Yep, a little bit of mist love found here is not hard at all. -Jamie
scrapbooking with mist or ink @ shimelle.com

And a beautiful project by Celine Navarro.
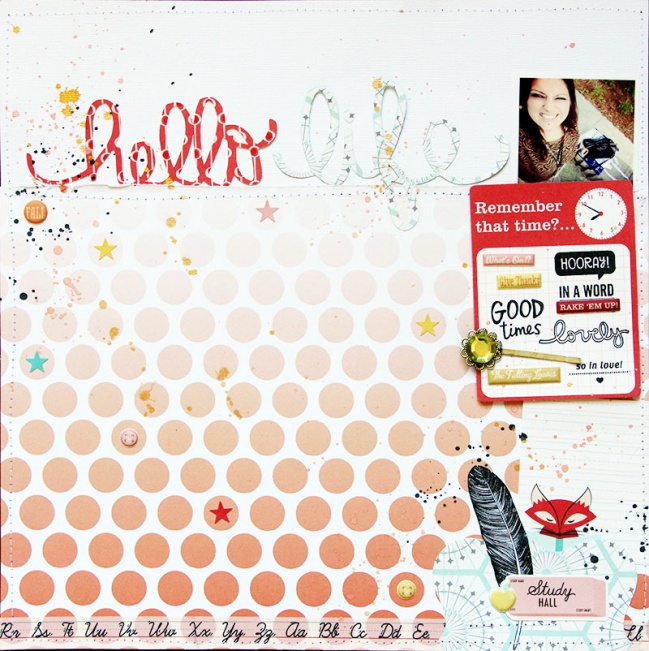
scrapbooking with mist or ink by Celine Navarro @ shimelle.com

For this layout, I use dome Studio Tekturek products, which is a Polish company that I love, some October Afternoon embellishments, and the brand new Brother ScanNCut cutting machine to create my title and some die-cuts I have on this layout. I simply wrote my title, ‘Hello Life’, on a piece of white cardtock with a big black pen (such as a Posca pen), scanned it with the Scan’n’Cut machine, outlined the outside and inside of the words and made the machine cut my title in two different patterned papers! Isn’t that fun?! -Celine
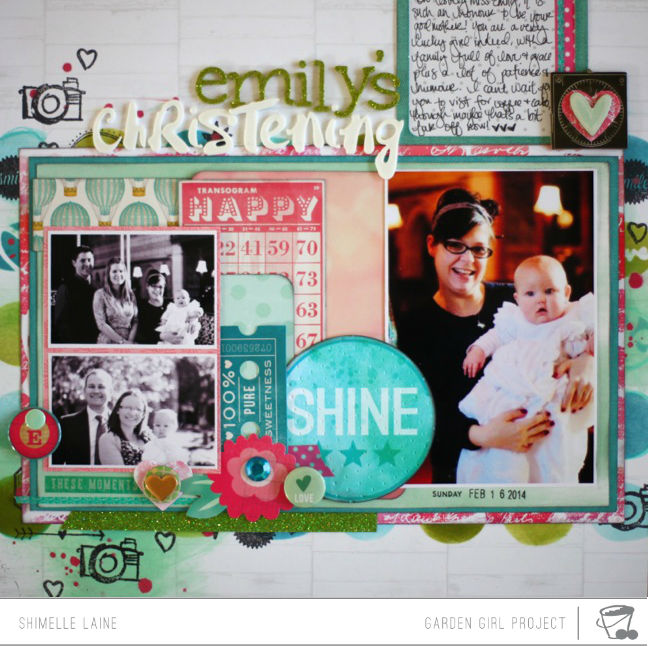
scrapbooking with mist & ink @ shimelle.com

Glitter Girl uses mist and ink at least every few weeks, but there are two adventures that come to mind for this challenge. If you’re brand new to mists and want a rundown of brands and basic tips, then Mists of Magnitude is a resource video to get you started. If you’re ready for something a bit more involved, then this adventure includes masks, stamps and sprays:


Find the supplies and further details here at Two Peas.


Christin Grønnslett lives in Røyken, Norway with two kids and a husband. When the kids are tucked in bed she escapes down to her scrap cave in the basement. Christin currently serves on the Design Teams for My Creative Scrapbook, Papirdesign, Inzpira magazine, Scrap around the world and Paper Issues. You can find her blog here and follow her on Instagram.


Kim Jeffress lives in Brisbane, Australia with her husband and two sons, who are her inspiration for scrapbooking. Kim likes to capture the everyday memories of my family. She designs for Heidi Swapp, Jillibean Soup , Pebbles Inc, Scraptastic kit club and Jot magazine.


Jamie Pate lives on the Front Range in Colorado. She has five kids who fuel many of her creative story telling. Jamie has a love for all things paper and most especially love using it to document her every day and not so everyday life. The community of creatives she is lucky to be apart of blesses her everyday. Jamie is on Instagram as ‘jamiepate’ and she’d would love for you to drop in and say hi on her blog.


Céline Navarro is a Scrapbook & Mixed Media Artist and Instructor, travelling all over Europe and the World to teach unique & colorful classes full of techniques. She is the co-owner of the French quaterly publication {entreARTistes)magazine, the french community and eshop www.entreartistes.fr, and also designs for Studio Calico and Two Peas in a Bucket. Check out her Blog / Pinterest / Twitter / Instagram / Facebook / YouTube.

Sketch to Scrapbook Page:: Grid Collage

Sketch to Scrapbook Page:: Grid Collage by Suz Mannecke @ shimelle.com
Happy Saturday, and welcome to our third scrapbooking challenge of this online cropping weekend: a simple sketch for three or more photos to start the day.

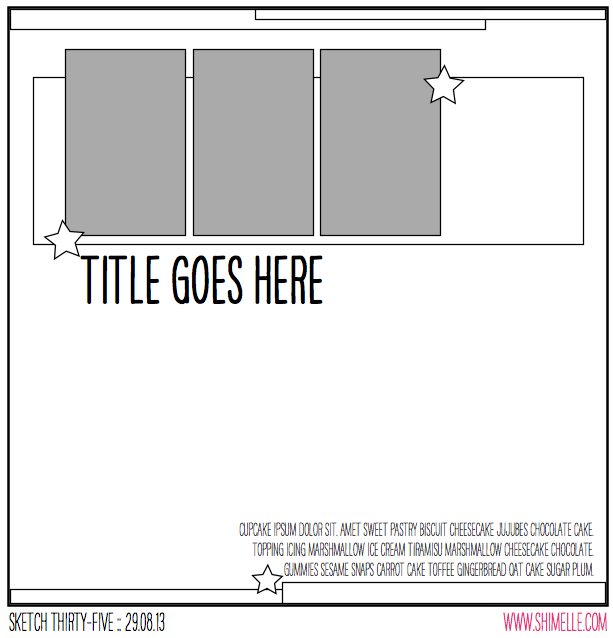
scrapbook page sketch @ shimelle.com
Again, it’s a design that can really feature a sheet of patterned paper! When I was drawing these, I was hitting a wall with papers I loved that ended up mostly covered by other elements, and yet coincidentally Suz made it work with white card stock again! She also demonstrated how it could easily work with twice as many photos as I originally imagined.

Sketch to Scrapbook Page:: Grid Collage by Suz Mannecke @ shimelle.com

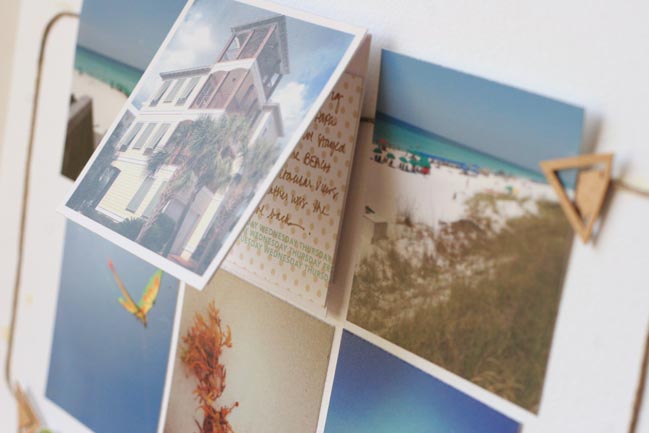
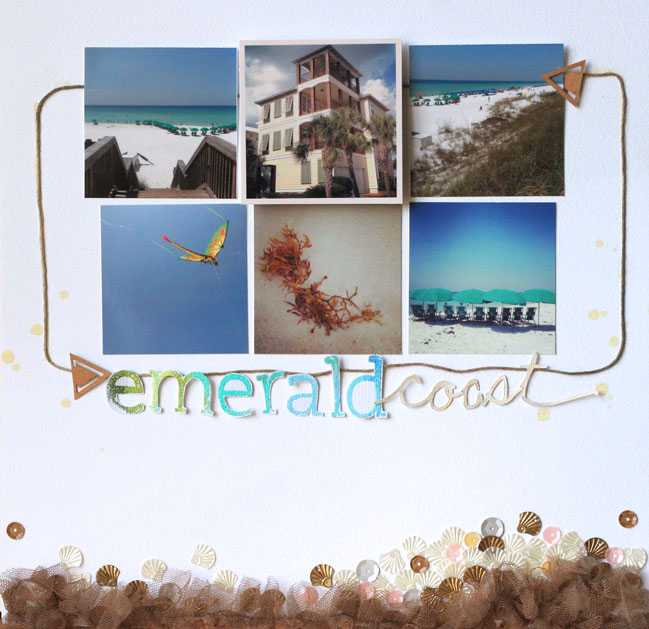
I decided not to rotate the design for my take on this sketch but did opt for a two by three grid collage photo arrangement instead of the row of three photos. I placed the triangle wood veneer clips where the stars were surrounding the photo arrangement. In place of the journaling at the bottom right of sketch, I grouped a large cluster of sequins and trim to mimic the gorgeous Florida Emerald Coast. For the outline around the photos, I initially thought I would machine or hand stitch this area, but instead used hemp cord which I think added to the organic feel of my design. I placed my journaling in a “flip up” located beneath my main photo which I adhered with pop dots for added dimension. As for my title work, I applied a wet embossing ombre technique using several Zing powders and then created a handwritten Silhouette cut ‘coast’ which I colored with metallic watercolors and watercolor pencils. I enjoyed creating with this sketch and hope you do too! -Suz


Suz Mannecke lives with her husband of 18 years and two sons in the Ozark Mountains of southwest Missouri. She is an optometric physician who turned SAHM after the birth of her second son. Suz has been scrapbooking for several years and enjoys documenting the EXTRAordinary in everyday life with photos + words + an eclectic mix of scrapbooking products. She likes trying new techniques and trends while staying true to her own design aesthetic. Her creations have been published in several issues of Scrapbook Trends, Create, and Cards magazines and she currently designs for Elle’s Studio and Come On Get Crafty . More of Suz’s designs can be found on her personal blog, as well as online at Studio Calico, Two Peas, Twitter, and Instagram; User ID “SuzMannecke”.

Scrapbooking your Significant Other

scrapbooking your significant other by kasia tomaszewska @ shimelle.com

Welcome back for our second challenge of this online scrapbooking weekend: scrapbook your significant other! It seemed a good balance after Corrie started us off with a round of scrapbooking ourselves! You can scrapbook whomever you like in any style you love, but we have three special guests who have created scrapbook pages to share with you today.

First up, Kasia Tomaszewska.

scrapbooking your significant other by kasia tomaszewska @ shimelle.com

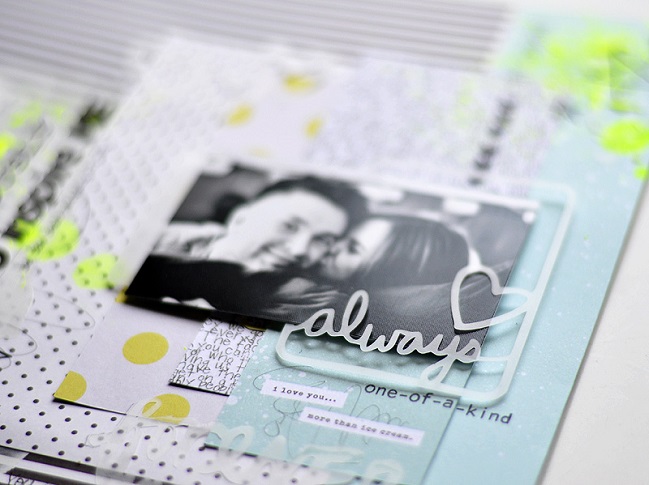
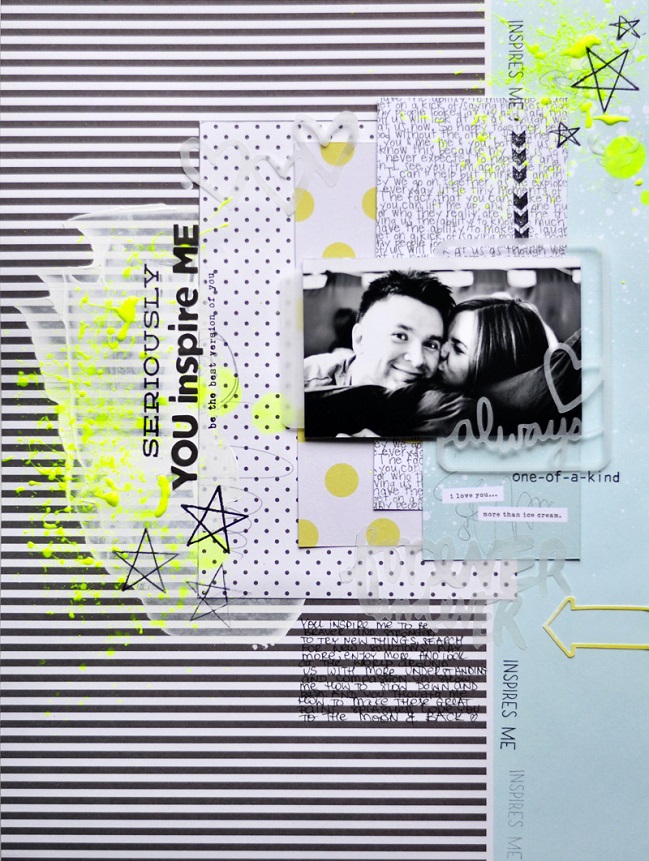
_My boyfriend is such an inspiring person- he is creative, he paints, draws, takes photographs and creates adverts for living. He motivates me to be a better person: to look at things with more distance,to exercise more, to focus on the good things in life. He really inspires me and I decided to focus my today’s layout on this part of our relation. The color combination- neutrals with a bit of neon- is so him! Also if you like the paint splashes on the page, I can tell you he was the one who taught me to play with paint like this! I cut the vellum shapes on my Silhouette with two cut files: Love Words and Love Cards -Kasia

scrapbooking your significant other by jessica lohof @ shimelle.com

Jessica Lohof makes me want to try something new with my title work!

scrapbooking your significant other by jessica lohof @ shimelle.com

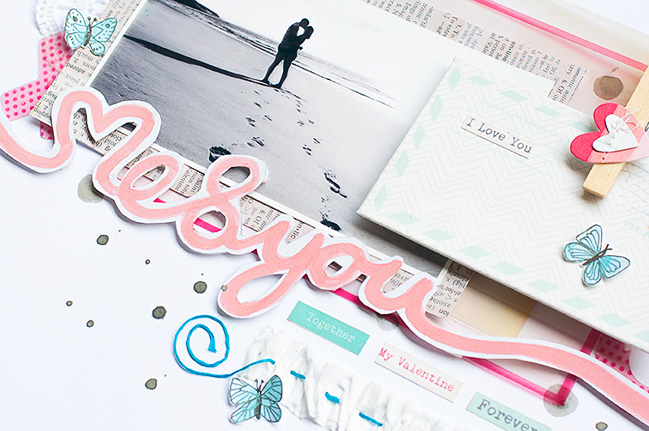
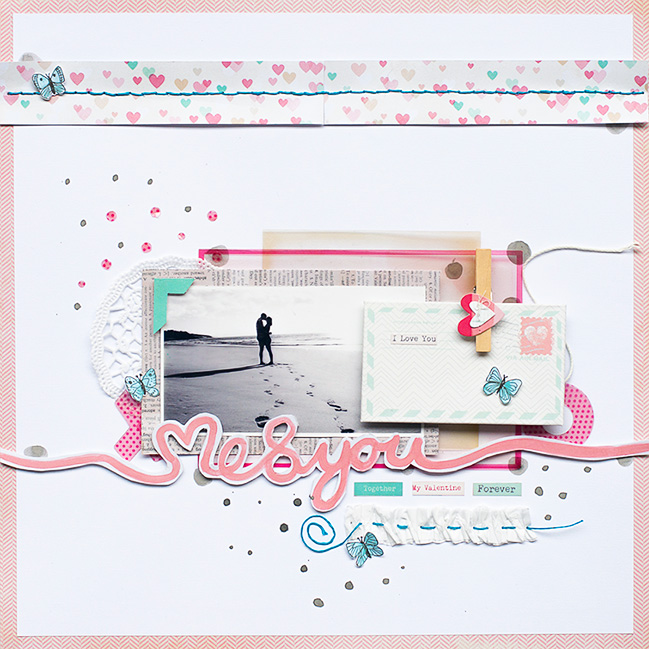
The first thing that came to my mind when I thought about ‘my significant other’ was, of course, my boyfriend. I’ve used a picture of a summer vacation showing both of us, even though the pictures are a bit older now, I love using them again. My starting point for this layout was the ‘me & you’ title. I wrote it with a pencil on cardstock and cut it bold enough to write the title again with watercolors. The rest came together quickly. I used a lot of Crate Paper’s Love Notes collection – because I think pink is never wrong for a love themed page – and added a bit of turquoise. The butterflies are also sketched on cardstock, cut out, and watercolored. -Jessica

scrapbooking your significant other by jill cornell @ shimelle.com

And this page by Jill Cornell is a great design for using some of those 3×4 cards that seem to multiply in our stash when we’re not looking!

scrapbooking your significant other by jill cornell @ shimelle.com

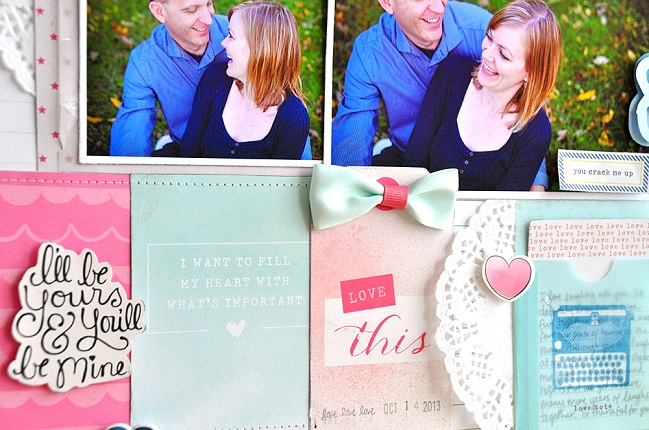
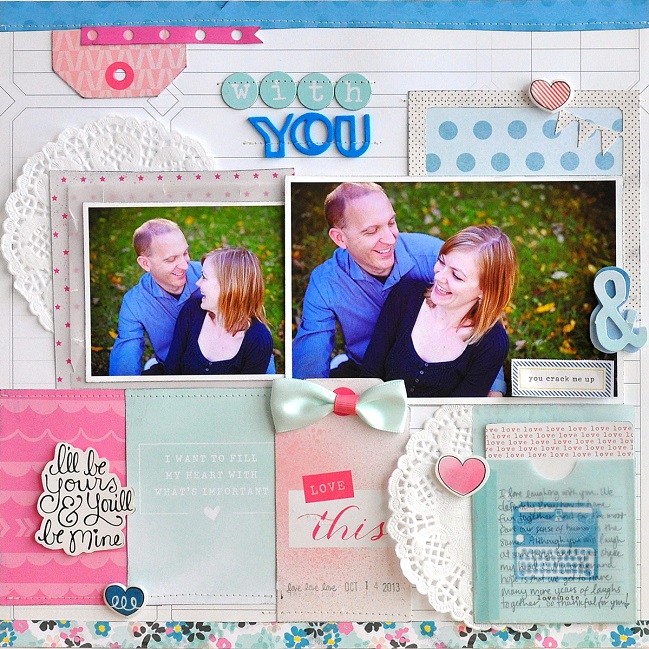
I have been married for ten years and one of the things I love the most about my relationship with my husband is how much we laugh together. We have nearly the same sense of humor and know how to have fun with each other. This fall we had a family photo session and our photographer captured these photos of just the two of us laughing. I created this layout using a mix of Dear Lizzy Daydreamer and Dear Lizzy Polka Dot Party – two gorgeous collections from American Crafts.

scrapbooking your significant other @ shimelle.com

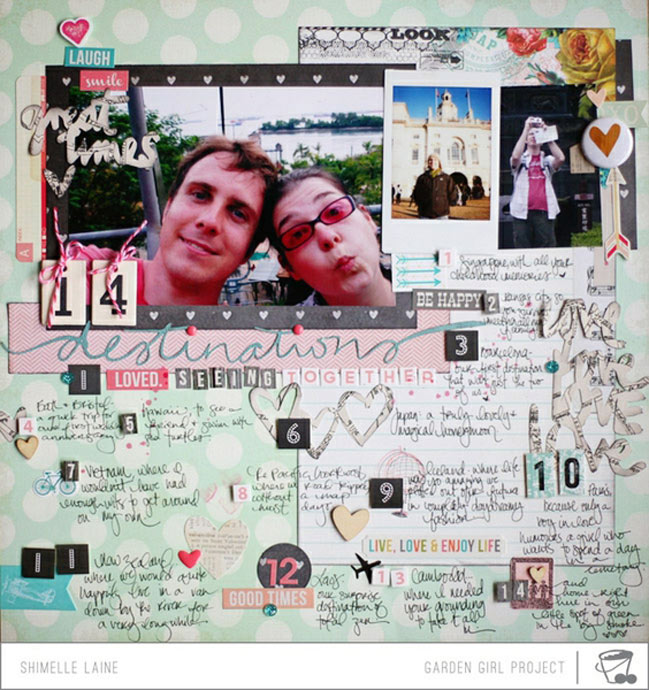
If you’re looking for an angle to get you started on your significant other storytelling, this page from the Glitter Girl archives may come in useful: write a love list. (That link also takes you to the PNG for that ‘destinations’ title if you’d like to cut it with your Silhouette. It’s a free download.)

By the way, that random tic in my hand and arm has gone now, like magic! File it under ‘weird stuff your body does when pregnant’ indeed. But now the little blips in my writing just tell me when I made the page which isn’t a bad thing at all.


Those two challenges will get us started, and challenge three will carry on with the scrapping on Saturday morning. See you then!


Kasia Tomaszewska works in fashion business by day and as a scrapbooker by night. She loves colorful patterned papers, paints and stamps the most and recently she really got into playing with her Silhouette Cameo! Scrapbooking is for her both- a way to document memories and an excuse to be creative! She designs for Citrus Twist Kits, Prima Marketing and Lemon Owl. She lives in Istanbul together with her soon to be husband, apart of scrapbooking she loves running and cooking! See more of her work on her blog.


Jessica Lohof loves all things creative and started to document daily life stories with scrapbooking in 2011. She is a German girl living in a small town in the middle of the country. If she is not making a huge mess on her crafting table, she enjoys improving her skills in taking pictures and spending quality time with friends and family.
Jessica is currently proud to design for Gossamer Blue, Color Hills and Color Conspiracy.
She shares her love for scrapbooking on her blog Talk About Priceless and through Instagram Facebook and Pinterest.


Jill Cornell lives with her husband of 10 years and 4-year-old twin daughters in Windsor Heights, Iowa. She has a degree and career experience in public relations and broadcasting but is now a stay-at-home mom. Jill has been scrapbooking and papercrafting for 10 years and has a soft, shabby chic style that incorporates linear design elements. She loves having girls to scrapbook because it gives her an excuse to use pink and feminine details on her work. Jill is currently designing for American Crafts, Webster’s Pages and Gossamer Blue. Visit Jill at her blog, Blessed Scrapper.

Sketch to Scrapbook Page :: A photo and a banner (Welcome to a weekend of online scrapbooking!)

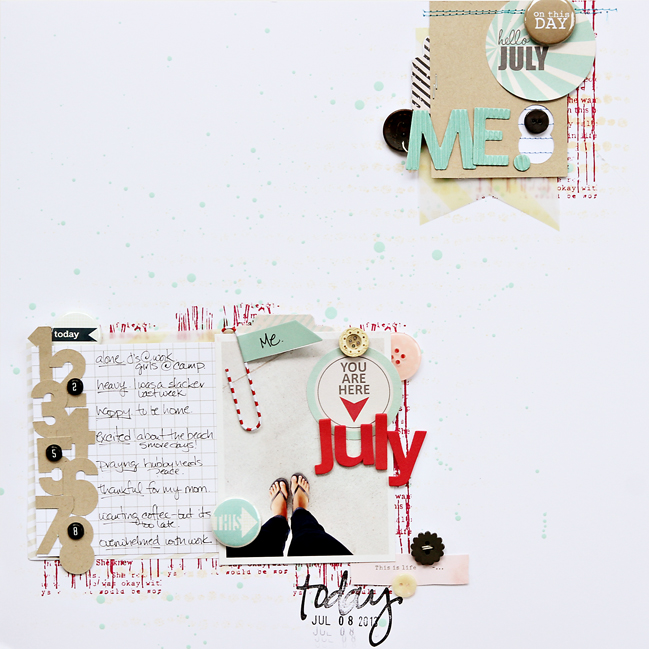
Sketch to Scrapbook Page:: Scrapping Yourself by Corrie Jones @ shimelle.com
Happy Friday scrapping friends! This weekend, I’m delighted to bring you a series of scrapbooking challenges so you can join in our online crop and scrapbook right along with us. You’ll see quite a few sketches as well as some theme and technique challenges, and you can work with any supplies, any photos, and any pace you fancy – no pressure, just inspiration and ideas from a group of lovely guest artists! There are couple challenges tonight then more throughout Saturday and Sunday, so please check back whenever you need a boost. For now, Corrie Jones starts us off with a sketch and layout!

scrapbook page sketch @ shimelle.com
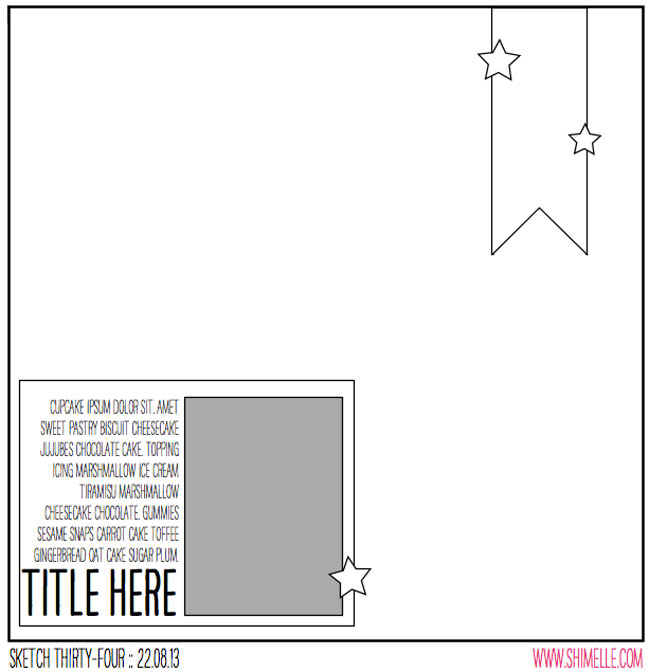
When I plotted out this page sketch, I imagined it as a design that would work well with a sheet of patterned paper you really liked and didn’t want to cover (something I also covered in this week’s Glitter Girl Adventure actually), but Corrie made me realise it can work just as well with something simply and airy too. With one block for photos and writing then some banners in the opposite corner, this is a design that can be made with just one full sheet for the background and everything else made from scraps.

Sketch to Scrapbook Page:: Scrapping Yourself by Corrie Jones @ shimelle.com

I love creating with sketches. I find that I can be incredibly creative with a sketch as a jumping off point. Instead of trying to come up with a design, I can just play with supplies. Sometimes, I will take one or two things that I am inspired by from a sketch and other times, like with this sketch, I will be more true to the overall layout. With this sketch, how was I not supposed to be more true. I just love the design with the white space and two elements. Totally my kind of page. This page is the continuation of my personal pages about me. I rarely scrapbooked about myself and honestly, except for these monthly pages journaling about myself each month on the 8th, I still rarely scrapbook about myself. But I like these. I like that I have a few pages that are more than what my kids are doing or what event we have going on. These pages are a glimpse of inside me that I am sure one day I will really be happy I have.

To share what you create with this sketch, upload it to a page gallery like Two Peas or UKScrappers, or your Instagram account, then link us up here. (If you’d like to start using Instagram for your sharing, you can find info on that here at Inlinkz, but it’s easy and just look for the Instagram logo, really!)


Corrie Jones lives with her dear hubby and three active girls in the ‘burbs of Atlanta, Georgia. She has been scrapbooking for four years, ever since two large plastic tubs jammed full of photos started laughing at her. Four sheets of paper, blue Thickers, some double-sided tape, and a scrapbook magazine later and she hasn’t looked back since! Now scrapbooking is her way to relax, to stretch her creative side of her brain, and a great reason to spend my time with her friends. Other than scrapbooking, Corrie enjoys being at the beach, photography, and reading.

Using that Inspiration:: A Scrapbook Tutorial by Paige Evans

using that inspiration:: a scrapbook tutorial by paige evans @ shimelle.com

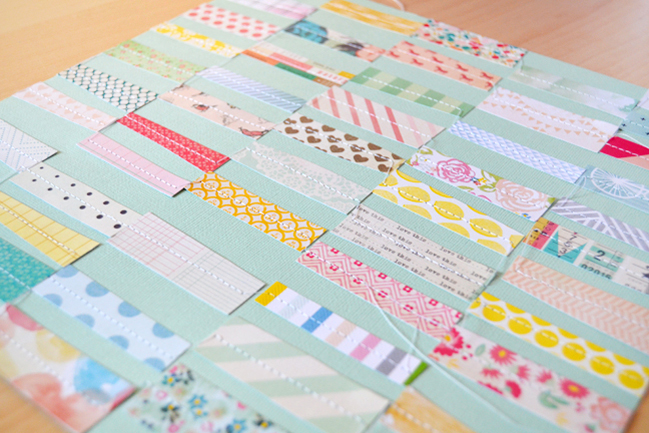
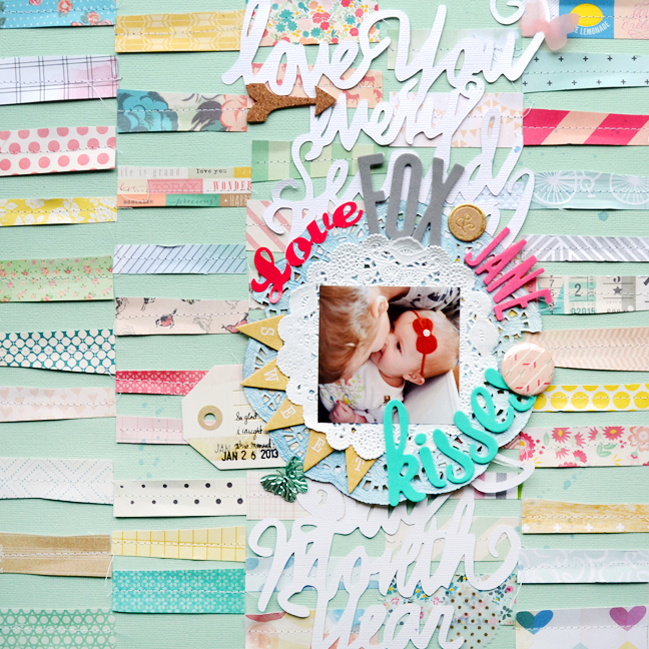
I LOVE using quilts as inspiration for my layout backgrounds! This layout is no exception. It’s also a great way to use up your paper scraps. I have a hard time throwing anything that can possibly be used away so pieced paper backgrounds are perfect.

using that inspiration:: a scrapbook tutorial by paige evans @ shimelle.com

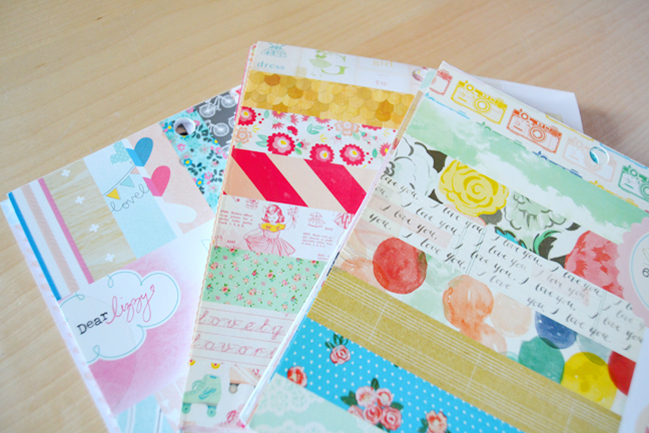
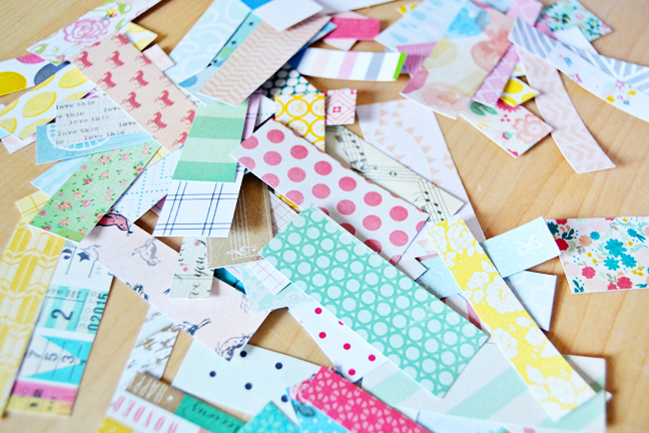
Gather your favorite 6×6 patterned paper pads or paper scraps.

using that inspiration:: a scrapbook tutorial by paige evans @ shimelle.com

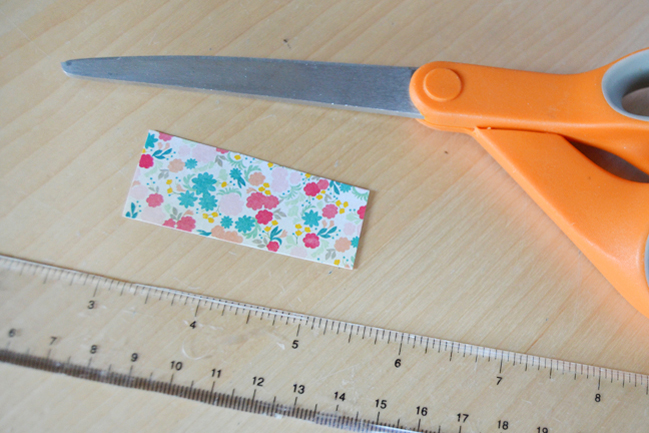
Trim papers 2.4” strips and vary the width.

using that inspiration:: a scrapbook tutorial by paige evans @ shimelle.com

Trim a few dozen paper pieces.

using that inspiration:: a scrapbook tutorial by paige evans @ shimelle.com

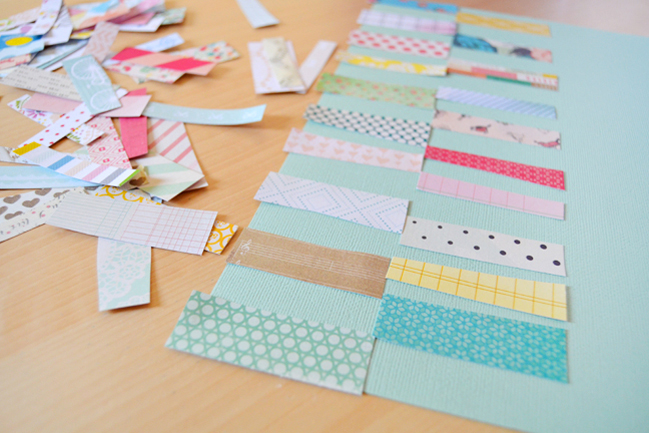
Begin filling up the background of your chosen cardstock with the paper pieces, leaving a gap between each piece.

using that inspiration:: a scrapbook tutorial by paige evans @ shimelle.com

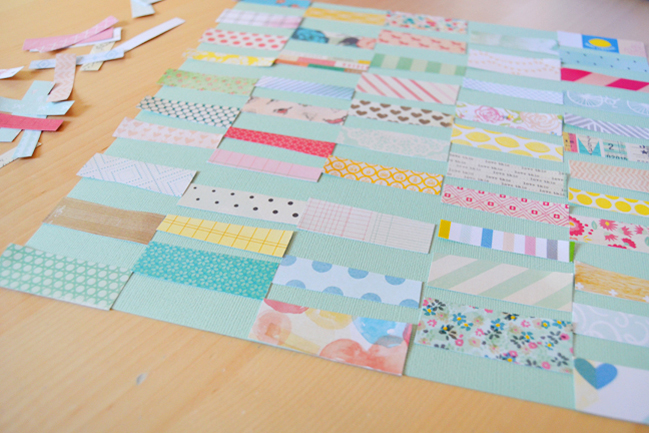
Keep going until the entire background is filled and you like the way it looks!

using that inspiration:: a scrapbook tutorial by paige evans @ shimelle.com

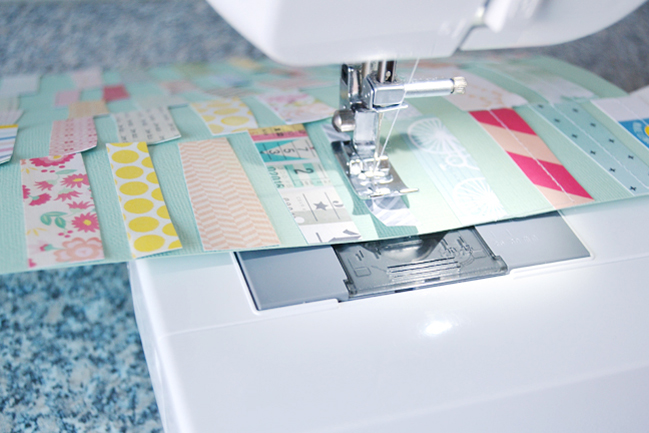
Use a sewing machine to stitch across each paper strip for the quilted finish.

using that inspiration:: a scrapbook tutorial by paige evans @ shimelle.com

Keep the threads long to also help with the quilted look.

using that inspiration:: a scrapbook tutorial by paige evans @ shimelle.com

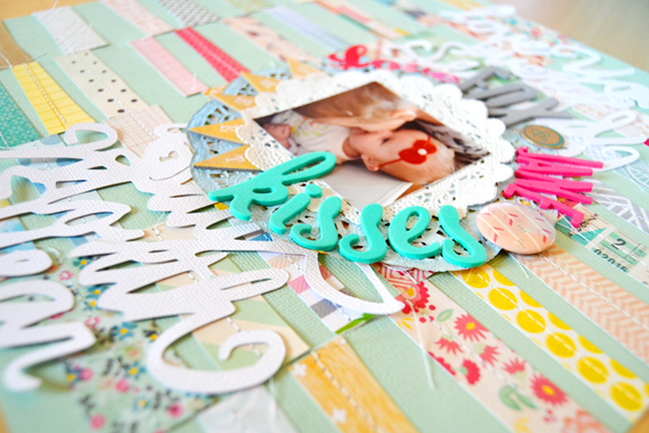
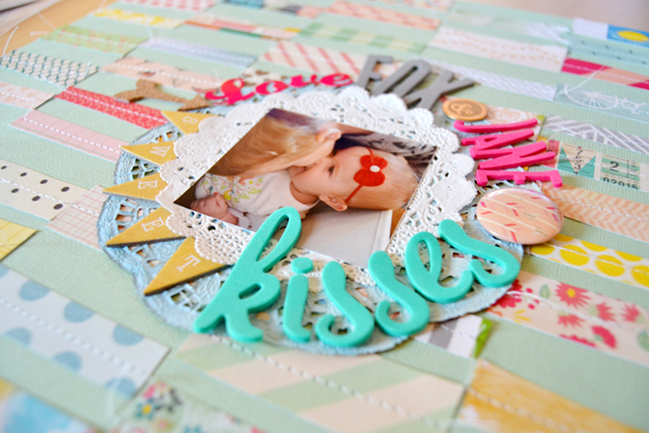
Layer a photo on doilies (the larger one is misted) then create a title around the doilies.

using that inspiration:: a scrapbook tutorial by paige evans @ shimelle.com

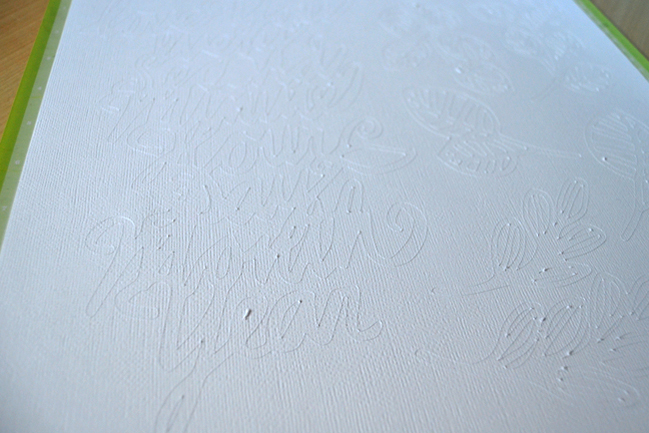
Die cut phrases and leaves from Wilna Furstenberg then adhere it behind the photo. Embellish with a badge, tag with journaling and the date stamped, sequins, and more!

using that inspiration:: a scrapbook tutorial by paige evans @ shimelle.com

Try finding an image of a quilt on Pinterest and recreating it with patterned paper! You’ll create a bright and vibrant layout and use up your paper scraps you’ve been holding onto!


Paige Evans has been scrapbooking since she was 16 years old and worked at her first job at a local scrapbook store. The first time she put pictures and papers together it was a match made in heaven! She is the design team manager/blog hostess for American Crafts, a Garden Girl at twopeasinabucket, and on the creative team for Studio Calico. While not scrapbooking she makes pacifier clips for her etsy shop. Paige is the mother of two adorable children – Fox age 3.5 and Jane almost 2. She and her husband Chris have been married for 7 years and currently live in Grafenwöhr Germany where Chris is a dentist for the Army. You can check out more of her and her work on her blog, Instagram, Etsy shop, Pinterest, Twitter, 2Peas Gallery, and Studio Calico Gallery.

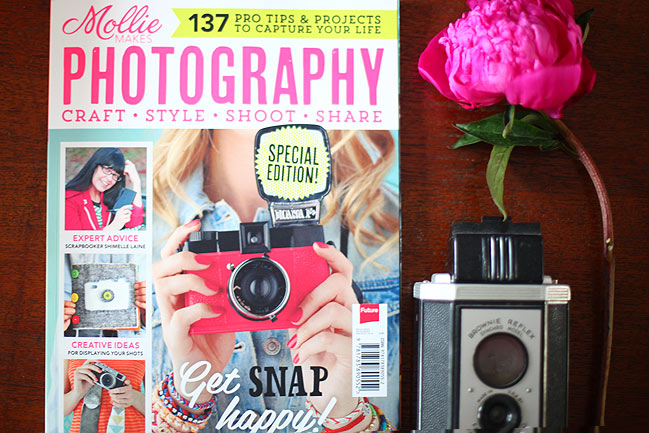
Introducing... Mollie Makes Photography

Mollie Makes Photography @ shimelle.com

Some time last winter, I apparently came down with a special ‘can’t say no’ sickness and took on a few big projects. Because, you know, growing a baby was not a big enough project on its own, apparently. One of those was creating a collection of craft supplies that will be available so soon now, and the other was a book… which is available now! I was thrilled to have the chance to guest edit this special edition title from Mollie Makes all about photography.

Mollie Makes Photography @ shimelle.com

I am not a professional photographer. I am someone who loves to take pictures, loves to look at pictures, loves to learn new things with my camera, and loves to talk to others about photos in general. When we started this project, I said that very thing: but I am not a professional photographer and it turned out to be just right because we didn’t want to create a book about professional photography. If you’re making your living shooting photos, I am not your girl and this is probably your not book. But if taking photos and surrounding yourself with photos is something you enjoy, then you might find this book right up your street.

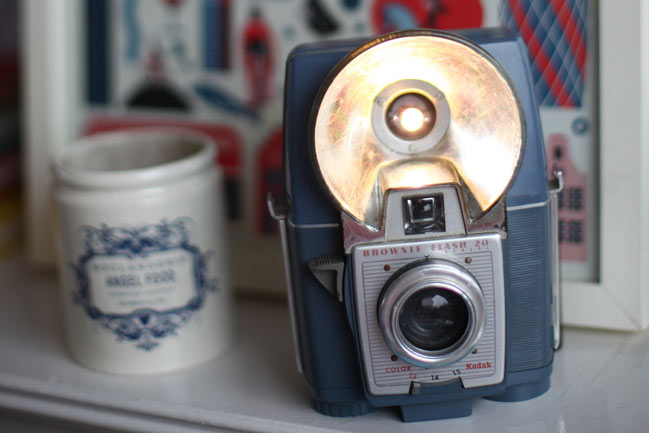
Mollie Makes Photography steers clear of technical jargon and instead encourages you to embrace simple things that can help you create more consistent images with your own style, be that by brightening things up with more light or getting the hang of your desired field of focus. It includes interviews with inspiring creative people working with their photos in some amazing way – Wilna, Kelly, Liz, Claire, Chantelle, Melanie, and Sophie. Both Kirsty and SJ actually built and customised cameras to share. We figured out how to turn an old camera into a lamp (and it was actually pretty easy), gathered tips from the professionals on styling and DIY photo booths, stitched camera straps and photo pillows, and shared some scrapping projects too, with a mini book from Amy and a look at Project Life for lovers of photos and paper craft.

Mollie Makes Photography @ shimelle.com

This special edition is 130 pages in soft cover and can currently be ordered online for £7.49 to UK addresses, £8.49 to Europe, and £9.49 to anywhere else in the world (so it works out to $16.10 in US dollars with shipping to the US). UK readers can also find it via your newsagent, though it would be £7.99 and might be a special order if they don’t already have it on the shelf. Special edition titles are just available while supplies last, so if you are interested, please don’t count on it still being available at Christmas necessarily!

Many thanks to Mollie Makes for inviting me on board this project and to the Mollie team for their beautiful layout and lovely way of making it all come together. I hope it strikes your fancy if imagery is something you would like improve upon over the coming months!

Creating Sunbursts with Ease:: A scrapbooking tutorial by Marcy Penner

creating sunbursts with ease:: a scrapbooking tutorial by marcy penner @ shimelle.com

I think on the ‘Technique’ spectrum I fall more on the tips and tricks side. I like to find new ways to do things and find ways to make things easier. I’ve loved creating starbursts on layouts for a while now. Especially in summer. They just seem to ‘fit’. I wanted to share how I’ve been creating them lately… highlighting a little trick that will make them a whole lot easier and faster.

creating sunbursts with ease:: a scrapbooking tutorial by marcy penner @ shimelle.com

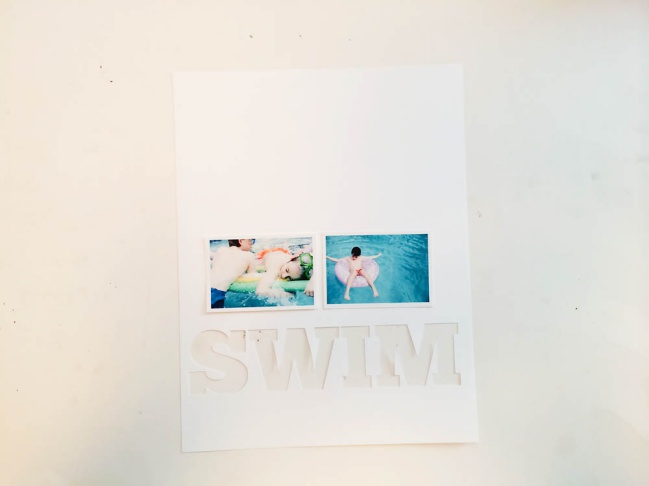
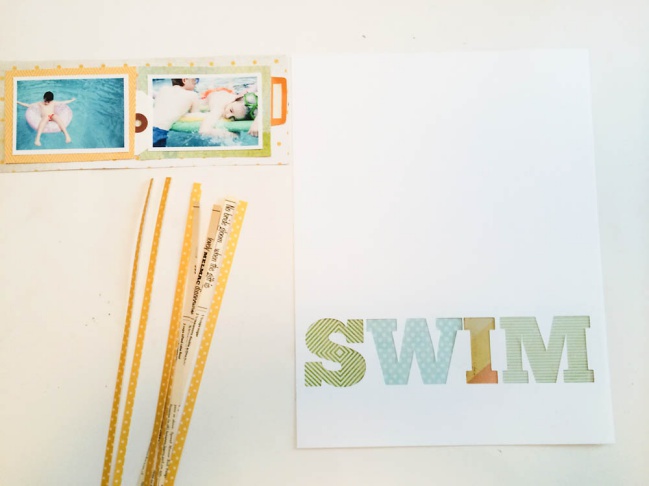
I want to hide the base of my sunburst behind my photos so I decided on two photos running across my page and sitting on top of a large title. I cut this title out with my Cameo.

creating sunbursts with ease:: a scrapbooking tutorial by marcy penner @ shimelle.com

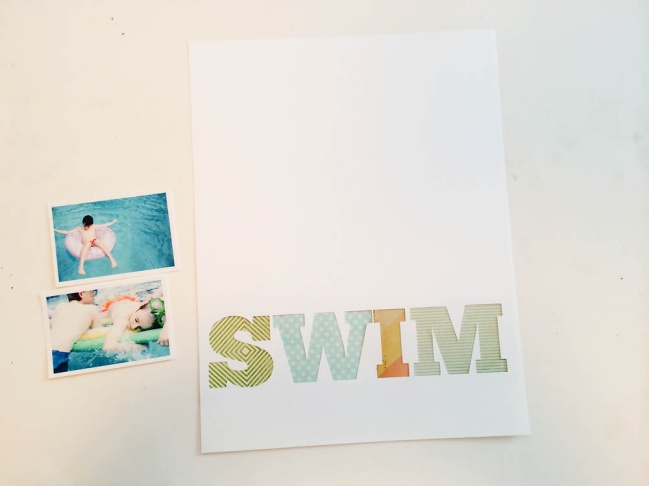
I chose some scraps of papers in summer-y colours and adhered them behind the letters cut out in my background.

creating sunbursts with ease:: a scrapbooking tutorial by marcy penner @ shimelle.com

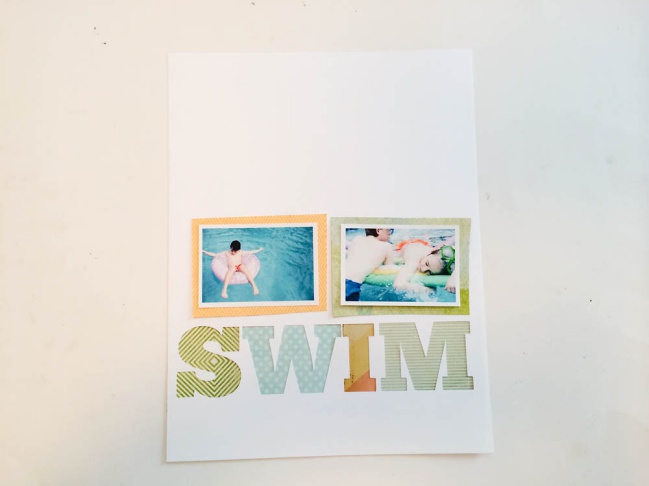
I matted my photos with patterned paper individually and then adhered the both of them to another piece of patterned paper. This way I’m guaranteed to have the centre of my sunburst covered.

creating sunbursts with ease:: a scrapbooking tutorial by marcy penner @ shimelle.com

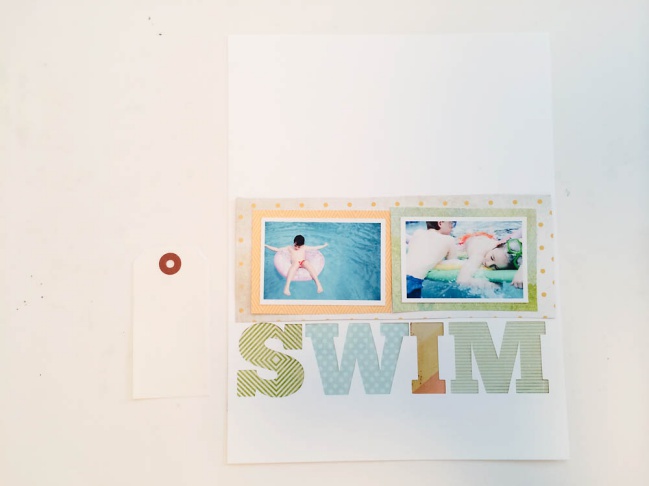
I’ll be sticking the photos and their patterned paper base down later so I’m going to move that aside and layer a few bits under it here and there.

creating sunbursts with ease:: a scrapbooking tutorial by marcy penner @ shimelle.com

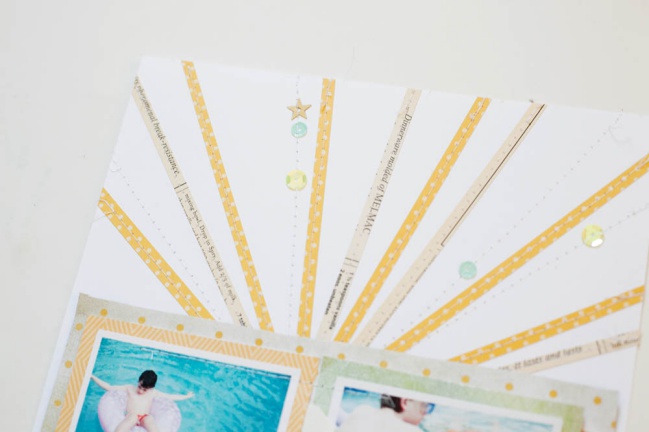
I chose a yellow paper for my sunburst. I was picturing a thin/skinny sunburst but this would work with thicker strips as well.
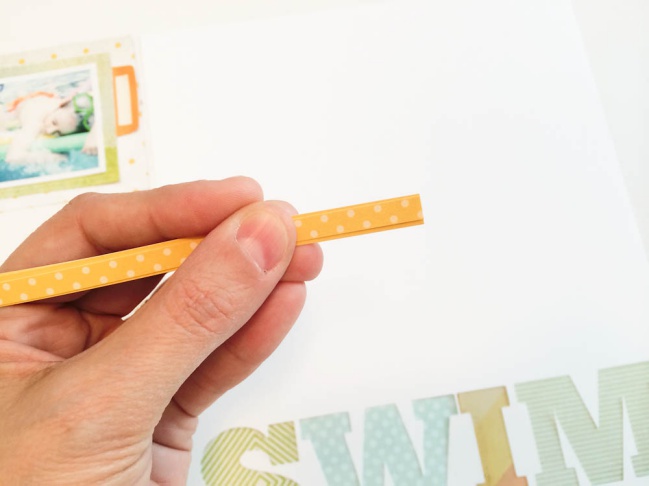
I trimmed random skinny strips of that yellow paper and got them ready.

creating sunbursts with ease:: a scrapbooking tutorial by marcy penner @ shimelle.com

Now, here’s where the trick comes in. I could just mark a spot on my card stock and adhere all the strips down coming off that mark. But I’ve found an easy way to do that… to keep them in that centre point but also allowing them to be moved around and adjusted until I was happy.

I gathered up my skinny strips and piled them all together. I made a pencil mark on my page where I wanted all the strips to originate from.

creating sunbursts with ease:: a scrapbooking tutorial by marcy penner @ shimelle.com

creating sunbursts with ease:: a scrapbooking tutorial by marcy penner @ shimelle.com

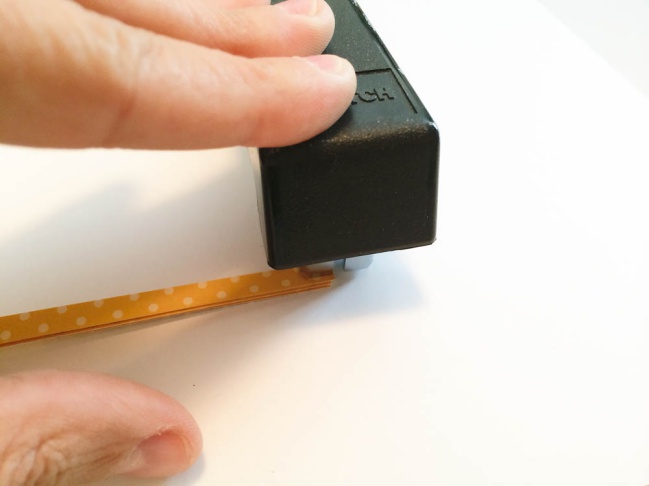
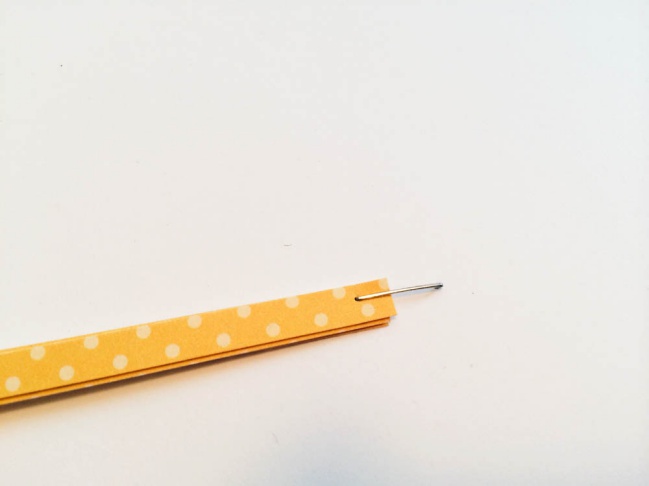
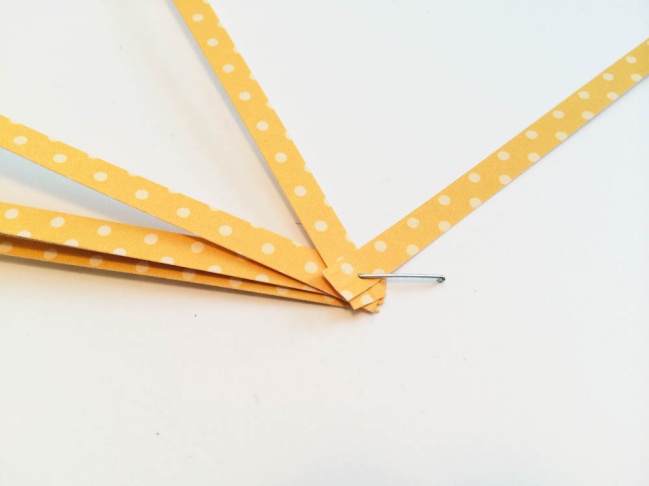
Using a long-reach stapler I stapled them onto the centre of the page…. having only one prong of the
staple going through the pile of strips. You could easily do this with a regular stapler too. You’d just have to open the stapler and staple into the pile making sure you have a mat underneath to bend your prongs back.

creating sunbursts with ease:: a scrapbooking tutorial by marcy penner @ shimelle.com

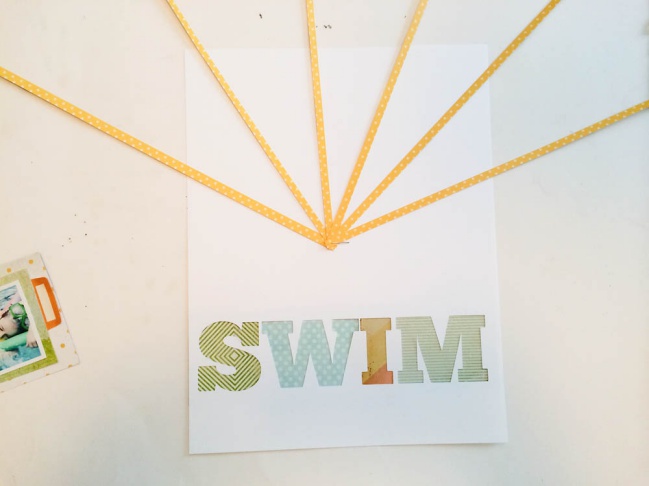
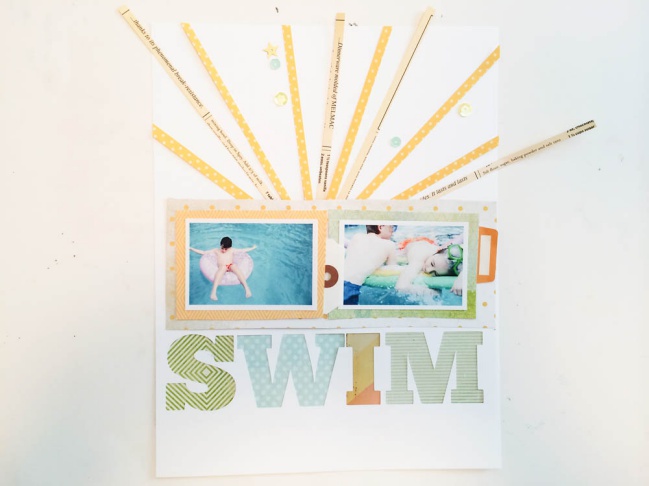
Now I simply fanned my strips out.

creating sunbursts with ease:: a scrapbookig tutorial by marcy penner @ shimelle.com

Having the staple keeping my strips anchored to my page lets me spread them out until I’m happy. They’re not going to move from that centre mark and I’m not going to accidentally brush one aside and have to line them all up again.

creating sunbursts with ease:: a scrapbooking tutorial by marcy penner @ shimelle.com

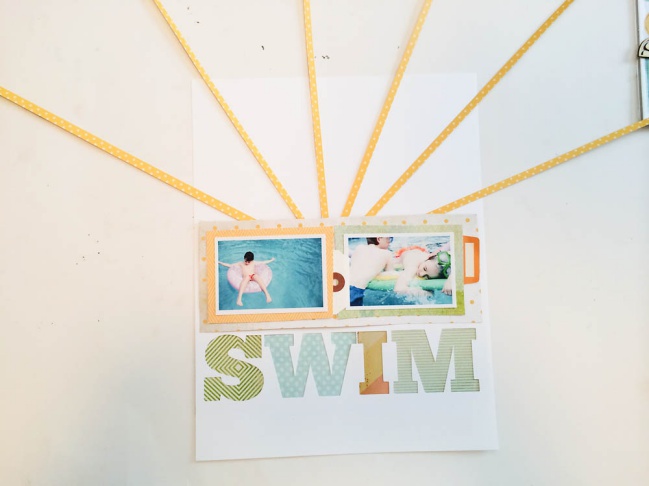
I did a quick check of their placement by putting my photo collage on top and adjust the rays again.

creating sunbursts with ease:: a scrapbooking tutorial by marcy penner @ shimelle.com

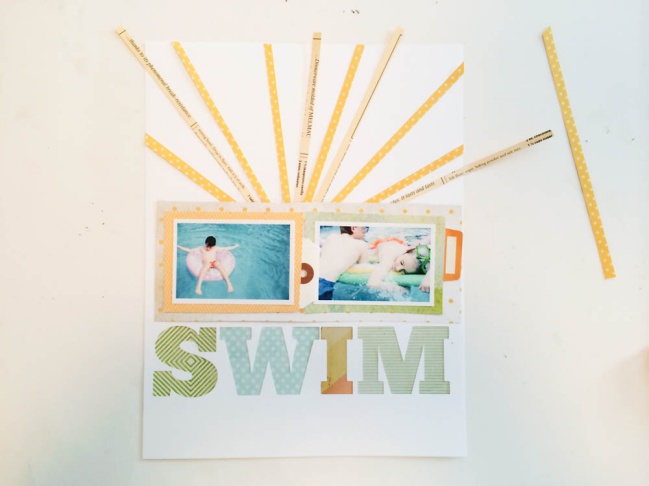
In the end I decided to add some more and and just quickly tucked in some of the extra strips with the B side showing.

creating sunbursts with ease:: a scrapbooking tutorial by shimelle.com

creating sunbursts with ease:: a scrapbooking tutorial by shimelle.com

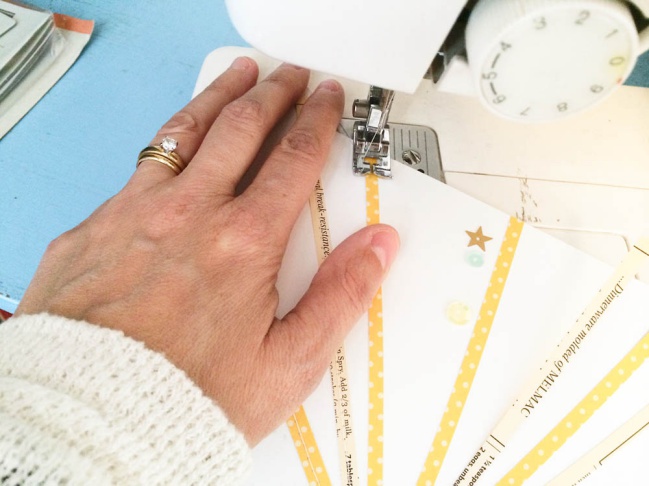
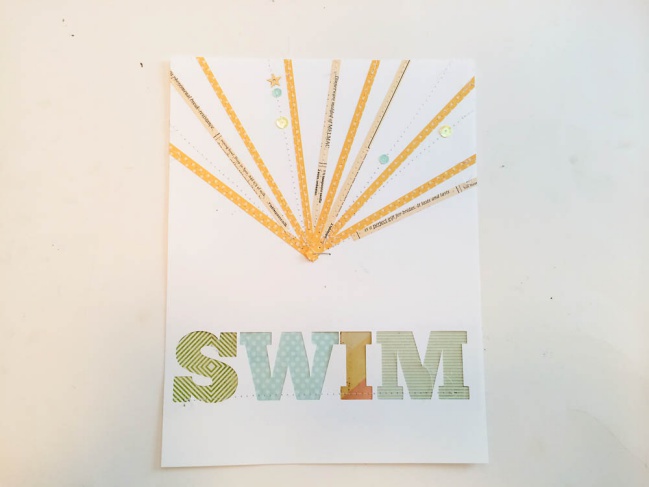
Using just a bit of my roller adhesive I tacked down the strips and got them ready to run through my sewing machine. I added a few sequins in between the rays to sew down as well.

creating sunbursts with ease:: a scrapbooking tutorial by shimelle.com

Now I have all my strips sewn down. By not adhering my photos till the very end I can sew right down to the centre. At this point I removed my staple. The stitches will hold everything in place.

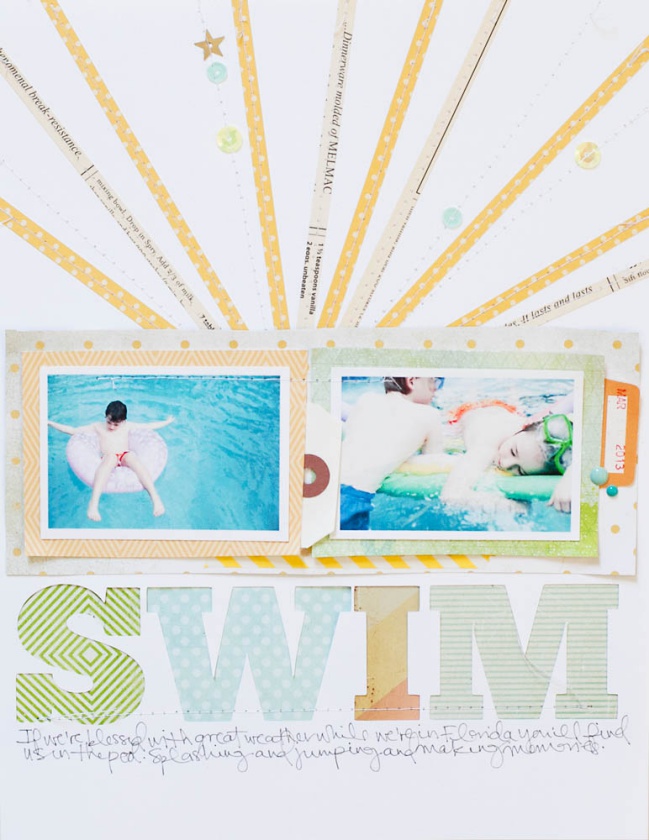
Once my photos are glued down over top I sewed them down a bit and did some journaling under my title and some enamel dots and washi tape.

creating sunbursts with ease:: a scrapbooking tutorial by marcy penner @ shimelle.com

Sunbursts were always challenging for me to put together… mainly because as I added strips and adjusted them things got moved around pushed aside. But using a stapler to anchor them I’m free to adjust to my heart’s content and not always find myself back at square one.

Anything to make things a little easier.


Marcy is a self-proclaimed simple girl. She is married to her high school sweetheart and they have three kids. For the last 12 years they’ve been living on the family farm, homeschooling two of their three kids and renovating a 120 year old farmhouse in Canada. Yes. Still renovating! She’s a major homebody so country life is a great fit for her!
Back in the day she earned her Bachelor of Education degree, but an artistic life has always been calling her name. She’s always busy doing something creative, photography (sometimes shooting others, but enjoying shooting her own family the most), scrapbooking, decorating… you name it! She loves that scrapbooking combines so many of her hobbies into one! It’s the perfect fit.

You can find Marcy at her blog, Hello Forever , and hanging out on Twitter and Instagram. She also design for Studio Calico and is a Garden Girl over at Two Peas in a Bucket.

Best of Both Worlds: My Scrapbooking Product Picks for June 2014

Best of Both Worlds Scrapbooking Kit - June 2014 @ shimelle.com

It’s the first of June. June! Time for me to stare at the calendar in shock that we’re nearly halfway through what still feels like a new year, that Wonder Boy is a month-and-a-half old, and that it’s been a very long time since I slept for more than a couple hours at a time. Of course. But it’s also time for a new month’s scrapbooking product picks, which can now be found here.

Best of Both Worlds Scrapbooking Kit - June 2014 @ shimelle.com

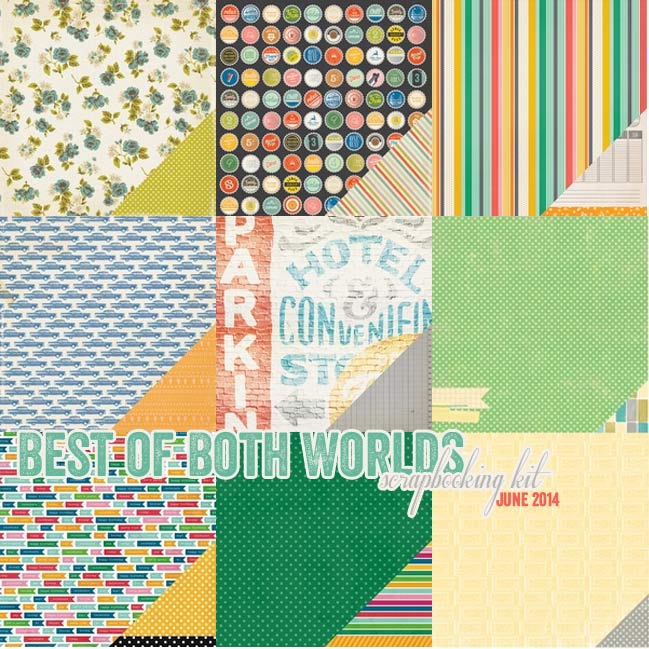
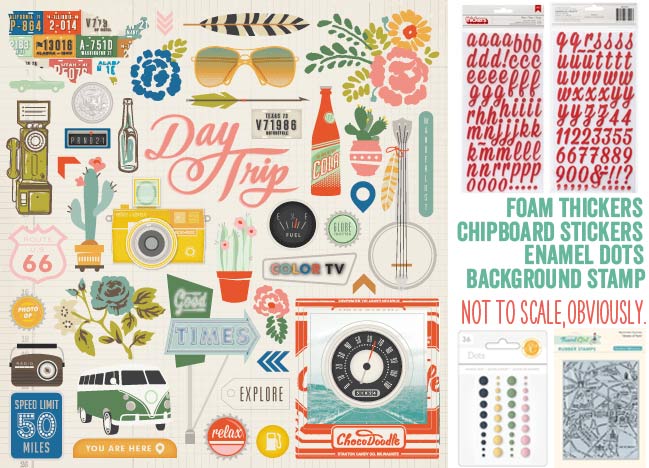
This month’s kit includes plenty of summery brights, with a bit of distressed detail to bring it back from Rainbow Brite territory. Nine double-sided papers give you a mix of bold patterns and smaller, more subtle designs, brought to life a bit with red Thickers letters. This chipboard set is one of my favourite products in a few months, at least. It will stretch to so many layouts! Enamel dots always make a great finishing touch, and the travel motifs made me think it was time to bring in a map background for those of you who love to stamp.

Best of Both Worlds Scrapbooking Kit - June 2014 @ shimelle.com

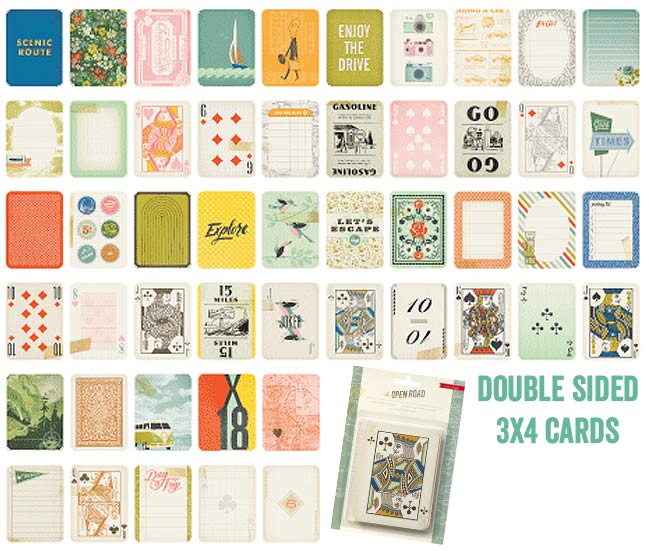
This was my mystery item this month: in the store it looks like a pack of playing cards! But it’s actually a lush set of double-sided 3×4 cards. The Crate Paper design team have been creating gorgeous projects with these, so I’m inspired to see how they will come to life on my projects. Have a look at these posts to see the cards in action: travel notes, two mini books, springtime cards, and a pre-made vacation journal.

Best of Both Worlds Scrapbooking Kit - June 2014 @ shimelle.com
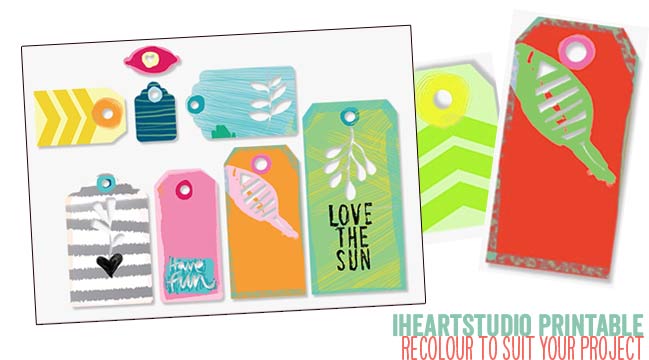
Plus a printable for some creative fun. My plan is to print it once in the original colours then also recolour a few elements so it can match any page made from these supplies. There is also a matching cut file if you are a print-and-cut fan!

As always, the Best of Both Worlds kit gives you the flexibility to customise your selection – add more, make substitutions, or keep to a specific budget. You can start your shopping here and add one of everything or make any changes you like. Thanks as always for your support!